Table of Contents
Advertisement
Advertisement
Table of Contents

Related Manuals for HP lc100w


Summary of Contents for HP lc100w
- Page 1 Mini WiFi Cam User Manual...
-
Page 2: Table Of Contents
Contents About this guide ................3 FCC statement ................3 Prohibition of co-location ............4 FCC specific absorption rate (SAR) statement ......4 WEEE notice .................4 Open Source Software ..............5 CE regulatory notice ..............5 RF Exposure information (SAR) – CE ...........6 Battery warning ................6 Caution ..................6 Important information regarding the waterproofing of the camera………………………………………………………………………………8... - Page 3 2.5.1 Installing onto the clip mount & strap ..22 2.5.2 Installing onto the bike mount ....23 2.5.3 Installing the tripod mount ....... 26 Using the waterproof case ..........27 Initial set up ..............29 Camcorder application installation ......29 Wi-Fi connecting ............
-
Page 4: About This Guide
About this guide The content in this document is for information purposes and is subject to change without prior notice. We have made every effort to ensure that this User Guide is accurate and complete. However, no liability is assumed for any errors or omissions that may have occurred. -
Page 5: Prohibition Of Co-Location
Prohibition of co-location This device and its antenna(s) must not be co-located or operated in conjunction with any other antenna or transmitter. FCC specific absorption rate (SAR) statement The product complies with the FCC portable RF exposure limits set forth for an uncontrolled environment and is safe for the intended operation as described in this manual. -
Page 6: Open Source Software
Open Source Software Use of OSS (Open Source Software) on SP5K basefw A. Standard SP5K basefw does not use any OSS. B. NDK (Network Development Kit) uses some OSS but does not use any GPL software. NDK lib License Version Modified Link address http://savannah.nongnu.org/projects/lwip/... -
Page 7: Rf Exposure Information (Sar) - Ce
RF Exposure information (SAR) – CE This camcorder meets the EU requirements (1999/519/EC) on the limitation of exposure of the general public to electromagnetic fields by way of health protection. The highest CE SAR value for the camcorder is 0.121 W/Kg. Battery warning The battery for this mini WiFi cam is sealed internally. - Page 8 The product employs wireless data communication which may interfere, or be interfered by, a near-by device. Never use this device in the vicinity of a microwave oven or at places where there is radio interference. Radio wave reception may be worsened in specific environments. Please be advised that if another device is also using the same 2.4GHz band as this product, the processing speed of both devices may slow down.
-
Page 9: Important Information Regarding The Waterproofing Of The Camera
posted sign requests you to switch off any device that may interfere the radio frequency. ‧Explosion sites or any location with a posted sign: In order to prevent interfering with an explosion activity, observe all the signage and instructions in the Explosion Area or in a zone with a “Switch Off 2-way Radios”... - Page 10 The product is only waterproof for activities encountered during normal living; DO NOT immerse the product into water. In the event of accidental soaking or ingression of water, switch off the power immediately and bring the product to a nearby authorized service center for repair.
-
Page 11: Important Information Regarding The Capability Of The Waterproof Casing
Take heed to prevent any impact of the product, otherwise the casing or lens may become damaged, or the water resistant capability may reduced. Important information regarding the capability of the waterproof casing The exclusive waterproof casing for the product complies with IEC Class VIII (IPX8) specification, which allows immersing the product at a depth of 3m of fresh water for up to 30 minutes when having installed the product inside the casing. -
Page 12: Introduction
1 Introduction Thank you for purchasing this camcorder. This camcorder is specifically designed for real time video and audio recording during leisure activities. 1.1 System requirements 1.1.1 Connection to a Computer For connection to a PC, be sure your PC meets the following specifications: For Windows: •... -
Page 13: Linking A Mobile Device
1.1.2 Linking a mobile device Linking a mobile device, be sure your mobile device meets the following specifications: For iOS operating system: • Version: Requires iOS 6 or higher • Compatible with iPhone,iPad For Android operating system: • Version: 4 or higher •... -
Page 14: Package Contents
1.3 Package contents The package contains the following items. In case there are any missing or damaged items, contact your dealer immediately. Camcorder Clip mount Strap Micro USB cable CD-ROM Quick start guide Waterproof Bike mount Tripod mount case... -
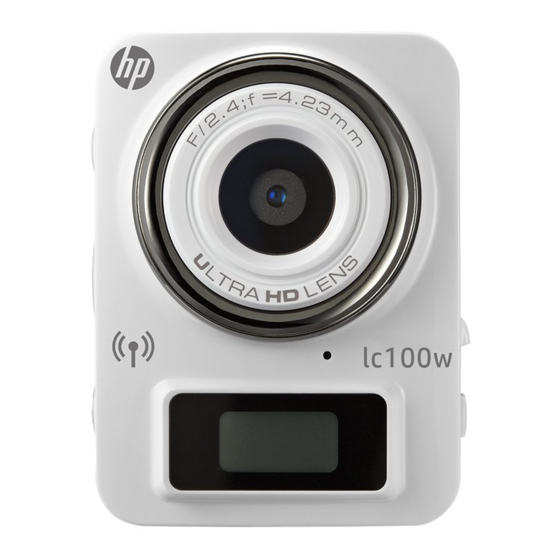
Page 15: Product Overview
1.4 Product overview Front view Side (left and right) views Top and bottom views Rear view Item Item Bracket socket Waterproof cover of the USB / Memory card slot Mode indicator light Mode button Power indicator light Timelapse / Capture / Recording Power button indicator light Record Button... -
Page 16: Button Operation
1.5 Button operation You can operate the camera without connecting to a mobile device via Wi-Fi/App. See the table below for descriptions of each button. Item Function Mode button Changing Modes (Timelapse / Capture / Recording Mode) • • • • In Timelapse mode, press the Record button to start recording a video. -
Page 17: Getting Started
2 Getting started 2.1 Inserting the memory card Open the waterproof cover of the USB / Memory card slot. Insert the memory card with the gold contacts facing the front of the camcorder. Push the memory card until it clicks into place. Make sure the waterproof cover of the USB / Memory card slot is sealed tightly, to achieve water resistant. -
Page 18: Charging The Camcorder
Charging the camcorder 2.2.1 Charging from a computer Open the waterproof cover of the USB / Memory card slot. Connect the micro USB cable into the port on the camcorder. Connect the other end of the micro USB cable to an available USB port on your computer. -
Page 19: Definition Of Indicator Lights
2.3 Definition of indicator lights Item Status Sound effect indicator Changing Flash red One beep modes Mode Self-timer Flash red None indicator light Timelapse Flash red None mode One beep (Time Timelapse Flash red interval) Timelapse / Capture / Recording Capture Flash red One beep... - Page 20 Power on None Power off None indication Power Power will soon Flash Red None be out indicator light Charging None Fully charged None indication...
-
Page 21: Information In Lcm Screen
2.4 Information in LCM screen Item Icon Description Full battery power 2/3 battery power 1/3 battery power Battery status Out of battery power Charging Wi-Fi on Wi-Fi status Wi-Fi off Timelapse mode Capture mode Status Recording mode Memory card error (damaged, locked or no card inside) - Page 22 Memory card full Connect with mobile device Enter USB mode when connected to a computer Power will run out soon...
-
Page 23: Installing With A Mount
2.5 Installing with a mount 2.5.1 Installing onto the clip mount & strap Push the fixture latch gently into the support receptacle on the camcorder, until the latch clicks into position. Tie the hanger string into the hole on the top of the fixing. Make sure the hanger string is firmly fixed to the camcorder. -
Page 24: Installing Onto The Bike Mount
2.5.2 Installing onto the bike mount Loosen the knob of the bike mount latch and push the latch into the support receptacle, until it clicks into position. Tighten the knob; make sure that the camcorder is firmly fixed. - Page 25 Install the rubber part of the bike mount around the handlebar then pass through the bolt until the mount is firmly fixed. Loosen the knob and adjust the camcorder vertically and/or horizontally. Tighten the knob, make sure the device is firmly fixed.
- Page 26 To remove the bike mount, first loosen the latch knob and withdraw the camcorder from the bolt, followed by pushing up the latch on the bike mount, to loosen the rubber part.
-
Page 27: Installing The Tripod Mount
2.5.3 Installing the tripod mount Push the tripod gently into the bolt on the camcorder, until clicks into position. Make sure that the tripod adapter is firmly fixed to the camcorder. -
Page 28: Using The Waterproof Case
2.6 Using the waterproof case Place the camcorder into the front shell of the Waterproof Case in accordance with the position of the lens. Lift up the buckle ring on top of the casing and confirm that the camcorder is firmly installed in the front casing;... - Page 29 Push the buckle on top of Waterproof Case backwards to engage the latch-hook on the back cover. Then push the buckle ring on top of the Waterproof Case down and forward so it is in the fixed position. Make sure that there is no gap in the Waterproof Case, and that the buckle ring has tightly fixed the Waterproof Case.
-
Page 30: Initial Set Up
Initial set up Install a micro SD card (class 10 or higher rating, max up to 32GB) into the camcorder. 3.1 Camcorder application installation The camera allows you to connect to the mobile devices via the App. When using for the first time, install the [ Pixi Cam ] App for your mobile device. -
Page 31: Wi-Fi Connecting
3.2 Wi-Fi connecting Press the Power button to switch on the camcorder. Press the Wi-Fi button to activate the wireless network. Using the Wi-Fi function of the mobile device, search for the camcorder ID from the list. Each camcorder has a unique ID no.: hplc100wXXXXXXX (The last 2 digits of the ID will be as same as the last 2 digits that displayed on the LCM screen.). -
Page 32: Using The Pixi Cam Application
Using the Pixi Cam application 4.1 Recording videos You can use this feature to record your life story, travel diary, or sports clips. Touch the button to switch to Recording mode. Touch the button to set video duration. (3 min. / 5 min. / 10 min. - Page 33 Icon Item Description Wi-Fi status Indicates the Wi-Fi signal status. Indicates the estimated remaining Battery status battery power. The camcorder will record the video according to the duration and store them as individual files. Video duration Touch to select the required video duration.
-
Page 34: Shooting Photos
Note: If download the AVI format videos to the iOS system mobile device, the camcorder can't recognize the AVI files format rather than lost. To browse files please use a computer or other media players. See Using the File Format On: MOV / Off: AVI (5.1.1). 4.2 Shooting photos You can use this function to capture photo, such as landscape and portraits. - Page 35 Icon Item Description Wi-Fi status Indicates the Wi-Fi signal status. Indicates the remaining battery Battery status power. Touch to select the capture mode. Capture mode Available options: Normal / 5 sec. / 10 sec. / Burst 3 Photos / Burst 5 Photos Touch to select the Beauty mode.
- Page 36 Icon Item Description Playback Touch to enter Playback mode. Shooting Touch to start shooting photos. 2014/01/01 Indicates the current recording date and Date and time time. 12:00:00 Menu Touch to enter the menu. Photo resolution Indicates the current photo resolution. Indicates the current Shooting mode.
-
Page 37: Timelapse Videos
4.3 Timelapse videos When filming something in which photographs are taken over a long period of time and are shown quickly in a series so that a slow action appears to happen quickly. You can use this function to record videos such as the evolution of a construction project, weather changes, tree growth, or flower blossom, etc. - Page 38 • • • • When you touch , the camcoeder will automatically disable Wi-Fi and exit the Pixi Cam App for power saving. • • • • Deactivate power saving mode: the equipment is continuously in standby. Touch to start shooting timelapse photos, the file will be saved automatically on the camcorder.
-
Page 39: The Timelapse Screen
4.3.1 The Timelapse screen Icon Item Description Wi-Fi status Indicates the Wi-Fi signal status. Indicates the remaining battery Battery status power. Touch to select a suitable capture Interval. Timelapse Available options: 5 sec. / 10 sec. / 30 sec. / 1 min. / 5 min. / 10 min. - Page 40 Icon Item Description Touch to select the required frame rate. Frame rate Available options: 3 fps / 5 fps / 10 fps Touch to select the power saving mode. Power saving mode Available options: On / Off Indicates the zoom status. Touch Zoom indicator to adjust the digital zoom.
-
Page 41: Playback Pictures And Videos
4.4 Playback pictures and videos You can use this function to view pictures and videos. Touch to enter Playback mode. You can touch Edit to enter Edit mode. Touch to select the required pictures or videos, and touch to Delete or Download the selected files on your mobile device. -
Page 42: Viewing Pictures
4.4.1 Viewing pictures Touch the photo to view it in full screen. Icon Item Description Delete Touch to delete the current picture. 2014/01/01 Date and time Indicates the recorded date and time. 12:00:00 Touch to download the current picture to Download your mobile device. -
Page 43: Playing Videos
4.4.2 Playing videos Touch the video to play it in full screen. Icon Item Description 00:00:01 Current duration Indicates the video current duration. Delete Touch to delete the current video. Stop Touch to pause the video playback. 2014/01/01 Date and time Indicates the recorded date and time. - Page 44 Icon Item Description Download Touch to download the current video. Note: 1. Video recorded using Timelapse is a string of pictures, therefore there is no audio when played back. 2. The Pixi Cam App is only applicable for previewing a video without audio playback. To view the integral video content, download the file to your mobile device or PC for playback.
-
Page 45: Settings Menu
Settings menu 5.1 Using the settings You can customize the video recording and other general settings via the on-screen display (OSD) menus. If recording is in progress, please touch to stop recording. Touch to enter the OSD menu. -
Page 46: Menu Items
5.1.1 Menu items Refer to the below table for details of menu items and available menu options. Menu option Description Available option 4K (3840x2160) / Set Photo Set the desired photo 5M (2576x1932) / Resolution resolution. 2M (1920x1080) Set Video Set the desired video FHD (1080P/30fps) / HD30 Resolution... - Page 47 Menu option Description Available option Format the memory card inserted in the equipment. Recorder Format No / Yes All the files in the card will be erased. Indicates the current App Version application version. Display the model number Product Name hplc100w of the camcorder.
-
Page 48: Connecting To Other Devices
Connecting to other devices 6.1 Connecting to the computer You can connect the camcorder to a desktop computer or notebook to transfer or view files. Open the waterproof cover of the USB / Memory card slot. Connect the micro USB cable into the port on the camcorder. Connect the other end of the micro USB cable to an available USB port on your computer. -
Page 49: Installing The Software
7 Installing the software 1. Place the attached CD ROM into the CD player. 2. If the CD does not execute automatically, please use Windows File Manager to execute the Install_CD.exe file in the CD. The following screen will be shown up. 3. -
Page 50: Editing Software
8 Editing software MAGIX Video easy SE is the perfect beginner program for the whole family. Thanks to the intuitive program interface with extra large buttons, a wide range of help functions and practical wizards, you can transform your recordings into amazing videos, even if you don't have any previous experience. -
Page 51: Specifications
Specifications Item Description Image Sensor 8MP, 1/3.2’’ CMOS F2.4 F/NO Lens Fixed focus lens Focus Range 1 m ~ infinity Resolution: 4K (3840×2160); 5M (2576x1932); 2M (1920x1080) Timelapse Format: JPG; AVI / MOV Resolution: 4K (3840×2160); 5M (2576x1932); 2M (1920x1080) Still Image Format: JPG Resolution: FHD (1080P/30fps);... - Page 52 Item Description Supports microSD/SDHC class 10 speed or greater up to Storage Media 32GB. Battery Built-in 700mAh Li-polymer rechargeable Operating 0° ~ 50° C (14° ~ 122° F) Temperature Operating Humidity 0 ~ 95% RH Storage -20° ~ 70° C (-4° ~ 140° F) Temperature Dimensions 38.5 x 50.3 x 20.4 mm...
Need help?
Do you have a question about the lc100w and is the answer not in the manual?
Questions and answers