Table of Contents
Advertisement
Quick Links
Advertisement
Table of Contents

Related Manuals for HP ac150


Summary of Contents for HP ac150
- Page 1 Action Camcorder User Manual...
-
Page 2: About This Manual
Preface About this Manual This manual is designed to demonstrate the features of your HP Action Camcorder AC150. All information presented is as accurate as possible but is subject to change without notice. HP shall not be liable for technical or editorial errors or omissions contained herein. -
Page 3: Safety And Handling Precautions
Safety and Handling Precautions WARNING: Follow these instructions to prevent damage to the camcorder: DO NOT USE UNPROTECTED/OUTSIDE THE WATERPROOF CASE IN RAIN OR WATER. PREVENT CONTACT WITH ANY KIND OF LIQUIDS USE RECOMMENDED ACCESSORIES ONLY DO NOT DISASSEMBLE OR ATTEMPT REPAIRS ON YOUR OWN. DISASSEMBLING THE CAMCORDER ... -
Page 4: Terms And Definitions
Terms and Definitions Term Definition Auto White Balance-the camcorder attempts to determine the color temperature of the light and automatically adjust for that color temperature variability. The process of encoding information using fewer bits cf. video, image or Compression sound file compression. A compressed file format for digital cameras in which the images are compressed using the baseline JPEG standard, described in ISO 12234-2, Exif/JPEG... -
Page 5: Package Contents
PACKAGE CONTENTS HP Action Camcorder ac150 Warranty Flyer Waterproof Case Quick Release Short Connector Long Connector Battery Mount 2 x Universal Handlebar Mount Helmet Mount 2 x Adhesive Pads USB Cable Mounts... -
Page 6: Insert And Charge The Battery
Protect the unit from extreme temperatures. Stop recording at temperatures less than minus 10 and higher than 50 . HP assumes no liability for accidents, damages or failures which result from improper use of the camcorder. Insert and Charge the Battery Push and slide the battery lock compartments away from the lens to remove the cover. -
Page 7: Insert The Microsd Memory Card
Insert the MicroSD Memory Card 1. Power off the camcorder to insert the memory card. 2. Insert the MicroSD/SDHC card into the memory card slot. 3. Push the memory card into the memory slot until it clicks into position. If the card does not click into place, repeat to ensure proper positioning. -
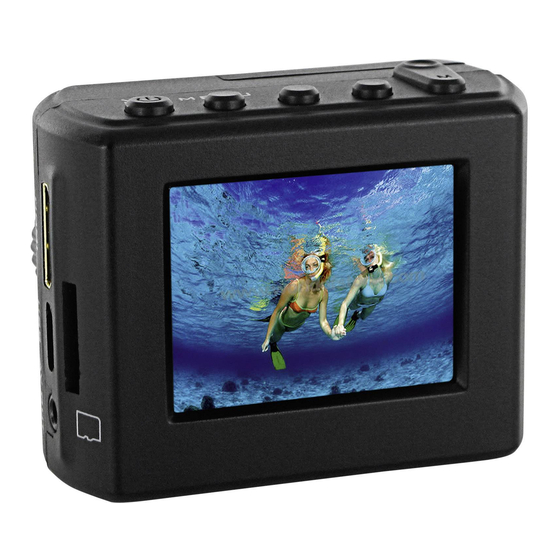
Page 8: Camcorder Overview
Camcorder Overview Note: The LCD screen may have a single or few dark or light dots in the image. This is not a defect and does not have an impact to the recorded video or photo! Note: The buttons of the camcorder have more than one function. Functions are noted on the drawings. On/Off Button... - Page 9 Power the Camcorder On and Off Note: Never remove the microSD memory card or battery during recording. Doing so may cause the permanent loss of ALL video and photos from the memory card. LCD Screen Overview Power On Press the power button. The camcorder enters the video recording live view mode. Power Off Press and hold the power button until the camcorder shuts down.
-
Page 10: Basic Operations
Basic Operations 1. Inserted the microSD memory card before the initial power up of the HP Action Camcorder ac150. 2. Set the date and time. Use the button to increase and the button to reduce the value of the category. Once you have the correct value displayed, press the button to select the value and move to the next category. - Page 11 Delete Recorded Video and Photos MENU In playback mode, press the button to display the delete option: Note: the Delete icon is highlighted with a yellow border indicating the selection. Press the button to display the delete submenu as show below. Use the button to navigate to the desired selection.
- Page 12 WARNING: to select. is selected, all of the video or photo files are permanently deleted and CANNOT be recovered. Protect Recorded Video and Photos This feature prevents the accidental deletion of video and photos from the memory card. In playback MENU mode, press the button.
-
Page 13: Menu Settings
If you chose to Protect All, a screen displaying a prompt to select Video File or Image File appears. Use the button to navigate to the desired option and press the button to select. Use the button to navigate to the desired YES or NO selection. Press the button to select. - Page 14 The yellow highlighted icon on the bottom of the screen indicates the active menu. Pressing the button cycles to the next menu option. Press the MENU button again to exit. Video/“Movie” Record Menu Options This menu changes settings relevant to the video recording options. Option Description Change the video recording resolution.
- Page 15 Provide control when adapting the camcorder to environmental conditions. The camcorder changes recoding parameters such as white balance, exposure, and ISO sensitivity to match the selected scene mode. Auto – The simplest and usually safest way record video. Settings are automatically adjusted by the camcorder.
- Page 16 Photo/“Still” Capture Option In this menu, you can change settings relevant to the taking photos. Below is a description for each of the options: Option Description Change the digital photo resolution. 14M – Captures photos in 4352 x 3264 pixel resolution using Digital Image Interpolation.
- Page 17 -2, -1.7, -1.3, -1, -.7, -.3, 0, .3, .7, 1, 1.3, 1.7, 2 0 is the neutral setting for this option and is the default value. Camcorder changes capture parameters to compensate for different light color “temperatures”. Auto – Camcorder automatically detect the light color temperature and change its parameters to produce optimal photo appearance.
- Page 18 This option allows for the deletion of one or more video/photo files from the memory card. Delete one - This option allows a single video or photo to be deleted from the Delete microSD memory card per action. Delete All – This option allows all video or photo files to be deleted from the microSD memory card per action.
- Page 19 Options are: On – Select this to enable audible system beeps when setting the menu options. Beep This is the default setting for this option. Off – Disables the audible system beeps. Note: The beep is only heard through an HDMI or AV connection. Set the automatic power off time when the camcorder is not active.
- Page 20 the button again to shut it off. Off – Disables the front facing LED. This is the default setting for this option. Note: To conserve battery power, only use this feature when necessary. Reset Setup This option sets the camcorder to the original factory default settings. This option displays the current firmware level of the camcorder.
-
Page 21: Technical Specification
Technical Specification Operating Voltage: 5V (USB) / 3,7V (Li-ion Battery, 600mAh) Consumption: 430 - 500mAh (depending on camcorder settings) Size: 53 x 41 x 34mm Weight: 58g Battery: 3,7V 600mAh Li-ioin Format: HPIM *.AVI Sensor: 5MPixel CMOS Lens: 142° Wide-angle Zoom: Up to 4x digital (only for taking photos) PC camera support: yes Screen: 1,5 “...
Need help?
Do you have a question about the ac150 and is the answer not in the manual?
Questions and answers