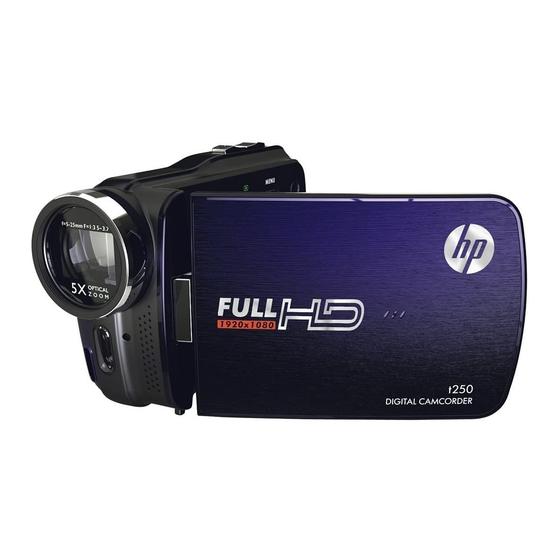
HP t250 User Manual
Digital camcorder
Hide thumbs
Also See for t250:
- Quick start manual (19 pages) ,
- Specifications (2 pages) ,
- Quick manual (2 pages)
Table of Contents
Advertisement
Quick Links
Advertisement
Table of Contents

Related Manuals for HP t250


Summary of Contents for HP t250
-
Page 1: User Manual
Digital Camcorder User Manual... -
Page 2: Table Of Contents
Contents Disclaimer...............6 About This Manual............6 Safety Warning and Notice .........9 1 Overall Introduction......13 System Requirements........13 Features..............13 Accessories ............14 External View.............15 Adjusting LCD Display........16 2 Getting Started........17 ... - Page 3 Photo (DSC) Mode..........30 4 Using the Camcorder ......32 Shooting a Movie Clip ........32 Voice Recording Mode........34 Video Clip / Voice Clip Playback....35 Shooting / Playback Photos ......38 Taking a picture ........38 ...
- Page 4 Menu options of DSC Mode ......56 6.3.1 Still Image Resolution......56 White Balance ..........57 6.3.2 6.3.3 Effect............58 Metering ............59 6.3.4 6.3.5 Backlight............60 6.3.6 Night Mode..........61 6.3.7 Self-timer...........62 ...
- Page 5 6.5.11 LCD brightness.........81 6.5.12 Instant Review..........82 Memory .............83 6.5.13 6.5.14 Volume............84 Start-up LOGO .........85 6.5.15 Face Detection .........86 6.5.16 7 PC and TV Connection......87 Connecting to the Computer ......87 ...
-
Page 6: Disclaimer
This manual is designed to assist you in using your new camcorder. All information presented is as accurate as possible but is subject to change without notice. For the latest reversion, please visit www.hp.com/support. Copyright This manual contains proprietary information protected by copyright. -
Page 7: Declaration Of Conformity
Federal Communications Commission (FCC) Compliance This equipment has been tested and found to comply with the limits for a Class B digital device, pursuant to Part 15 of the FCC Rules. These limits are designed to provide reasonable protection against harmful interference in a residential installation. -
Page 8: Trademark Recognition
Trademark Recognition Windows 2000/XP/Vista/Windows 7 are registered trademarks of Microsoft Corporation in the United States and/or other countries. Macintosh and Mac OS are registered trademarks of Apple Inc. In addition, all other companies or product names are trademarks or registered trademarks of their respective companies. -
Page 9: Safety Warning And Notice
Safety Warning and Notice Before operating the camcorder, please make sure that you read and fully understand the content in this section. Please do NOT ignore and violate all safety warning notices indicated in this section. Any violation may damage and void the camcorder warranty and in rare events result in injury. - Page 10 exposed terminals. The material may complete an electrical circuit and become quite hot. Exercise care in handling any batteries, particularly when placing it inside your pocket, purse, or other container with metal objects. In such an event, this could result in property damage, injury or burns. Do not dispose of batteries in fire as they may explode.
- Page 11 If your camcorder becomes wet, wipe it with a dry cloth as soon as possible. Salt or seawater may cause severe camcorder damage. Do not drop, knock, or shake the camcorder. Inappropriate behavior when using the camcorder may damage the internal electronic circuit board or deform the lens shape.
- Page 12 Operating environment Do not use or store your camcorder in the environments listed below: Direct sunlight Dusty or damp places Next to an air conditioner, electric heater or other heat sources In a closed car that is in direct sunlight Unstable locations Do not use your camcorder outdoors when it is raining or snowing.
-
Page 13: Overall Introduction
1 Overall Introduction Please read this chapter carefully to understand the features and functions of this Digital Video Camera. The description of this chapter also includes the description of system requirements, package contents, and hardware components. 1.1 System Requirements This Digital Video Camera requires a computer or notebook with the following specifications: •... -
Page 14: Accessories
1.3 Accessories This package should contain the following items. In case there is any missing or damaged item, please contact your reseller immediately. -
Page 15: External View
1.4 External View Lens Menu Button LED Light Power Self-timer Indicator Light Button Status Display Mode Button Recording Button Tripod socket Battery / Memory Card USB/HD/TV Output Compartment Zoom Button Microphone Speaker Hand Strap Playback Button... -
Page 16: Adjusting Lcd Display
1.5 Adjusting LCD Display Before taking picture or recording movie clips, please adjust the LCD display for optimal viewing. This camcorder will allow the LCD display to be completely rotated for playback viewing if desired. -
Page 17: Getting Started
2 Getting Started 2.1 Inserting SD Card(s) Open the battery cover. Insert the SD card gently into the slot. Make sure the copper contact faces upwards. SD card 1: : SD / SDHC card; SD card 2: : Micro SD card Note: To avoid damage to the camcorder and memory cards, DO NOT insert while powered up. -
Page 18: Loading The Battery
2.2 Loading the Battery ONLY use the provided battery or manufacturer recommended battery with this camcorder. Note: Insert the battery correctly according to this description. Failure to due this could result in damage to this Digital Video Camcorder and result in fire. Open the battery cover. - Page 19 Close the battery cover. Battery Status Indicator: Battery full Battery half full Battery empty Charging battery (A new battery should be charged at least 4 hours.) The device power is supplied by DC input. (No...
- Page 20 battery inside.)
-
Page 21: Charging The Battery
2.3 Charging the Battery You can use the AC adaptor to charge the lithium battery, whether the camcorder is on or off Insert the lithium battery into the camcorder and connect the camera to the cable of the AC adaptor. You can also charge the battery by a PC (via USB port) when the system is off. -
Page 22: Using The Touch Screen Gestures
2.4 Using the touch screen gestures 2.4.1 Single touch The single touch function acts as a hotkey menu to adjust basic settings directly on the display. Mode change (Video, Photo and Voice Recording) Resolution change (Full HD, HD, WVGA, WEB or 16M, 8M, 5M,... -
Page 23: Slide
2.4.2 Slide Slide right or left to view the previous file or the next file in Playback Mode. 2.4.3 Rotate Under Playback Mode, you can rotate the image by 90°/step as shown below. -
Page 24: Buttons & Functions
2.5 Buttons & Functions Description Button Function Power Press the button to turn Button ON/OFF the power. Menu Press the button to display the Button main OSD menu. - Press [MODE] to access different the 3 mode of Video, Photo and Voice recording. LIGHT - Press [LIGHT] to turn Button... -
Page 25: About Led Indicators
Press the Playback button to Playback enter Playback mode and Button playback the last file. 2.6 About LED Indicators Below table describes the meaning of the camera LED indicators: Indicator Color Definition Power Green Turning power on. (Rear LED) Recording Red blinking Recording (Front LED) -
Page 26: Initial Settings Before Use
2.7 Initial settings before use 2.7.1 Setting Date and Time Turn on the camcorder to set up the date and time for the initial use. Set the date and time by pressing the Zoom Buttons ( ) and / or touching the screen to select. Press Mode Buttons ( ) or touch the indicator to highlight each column. -
Page 27: Lcd Display Information
3 LCD Display Information 3.1 Video (DV) Mode The following illustration shows the LCD display layout and icon description in the DV Mode ( DV(Movie Clip) Mode icon Motion Detection icon Night Mode icon Exposure compensation icon Color effect icon... - Page 28 Metering Mode icon White balance icon Battery status icon 00:00:00 Remaining recording time icon Resolution Button Backlight icon Histogram icon Playback Button Digital Zoom Button Menu Button Memory Status icon : SD card 1 icon; : Micro SD card 2 icon : Internal memory icon (displayed when there is no SD card)
-
Page 29: Voice Recording Mode
3.2 Voice Recording Mode The following illustration shows the LCD display layout and icon description in the Voice Recording Mode ( ). Voice Recording Mode icon Battery status icon 00:00:00 Recording time left icon Playback Button Menu Button Memory Status icon : SD card 1 icon;... -
Page 30: Photo (Dsc) Mode
3.3 Photo (DSC) Mode The following illustration shows the LCD display layout and icon description in the DSC Mode ( DSC Mode icon Night Mode icon EV compensation icon Effect icon Metering Mode icon White balance icon... - Page 31 Battery icon 0001 Number of pictures left icon Resolution Button Backlight icon Histogram icon Playback Button Digital zoom Button Menu Button Memory Status icon : SD card 1 icon; : Micro SD card 2 icon : Internal memory icon (displayed when there is no SD card) Burst icon Self-timer icon...
-
Page 32: Using The Camcorder
4 Using the Camcorder 4.1 Shooting a Movie Clip 1. Power on the camcorder by opening the LCD panel or pressing the power button. Press the Mode Button ( ) or touch the “DV Mode icon” on the LCD screen to switch to DV mode. 2. - Page 33 The LCD screen ratio will be different depending on the setting of video resolution. Please refer to the table shown below: Video Resolution Preview 16:9 ratio FHD ( 1920 x 1080p ) HD (1280 x 720p) WVGA (848 x 480p) 4:3 ratio WEB (320 x 240)
-
Page 34: Voice Recording Mode
4.2 Voice Recording Mode 1. Power on the camcorder. Press the Mode Button ( ) or touch the screen to select the “Voice Recording Mode icon” to switch to Voice Recording Mode. 2. Press the Recording Button ( ) to start voice recording. Press the Recording Button again ( ) to stop voice recording. -
Page 35: Video Clip / Voice Clip Playback
4.3 Video Clip / Voice Clip Playback Note: Video, Photos and Audios may not play back on the camcorder if: 1. The folder/file name has been changed on your computer. 2. If the file has been edited / processed on a computer or captured with another camcorder / camera. - Page 36 2. Touch the desired mode icon (DV, DSC, or Audio). Recorded files will appear as thumbnails as illustrated below. Touch the file thumbnail or press the Zoom Button ( ) to select the file, and press Recording Button ( 3. To pause the Playback of file, press the Recording Button ( or touch the screen icon ( 4.
- Page 37 5. You can also playback the video clips at different speeds by touching the screen icons ( ). To playback in slower speeds, touch the ( ) icon to select ON/OFF then touch the ( ) icons to vary the speed. Review the table below for details.
-
Page 38: Shooting / Playback Photos
4.4 Shooting / Playback Photos 4.4.1 Taking a picture 1. Turn on the camcorder. Press the Mode Button ( ) or touch the screen to select the “DSC Mode icon” to switch to DSC Mode. 2. Press the Recording Button ( ) to capture photos. -
Page 39: Photo Playback
4.4.2 Photo Playback 1. In DSC Mode, press Playback Button ( ) or touch the screen to select the Playback Button icon to display the images on the LCD screen. Playback Playback Mode Icon 2. Touch the file thumbnail or press the Zoom Button ( ) to select the file, and press Recording Button (... - Page 40 3. Pressing the Zoom Button ( ) or touching the screen to select the Zoom icons ( ) will zoom in or zoom out the picture. Press the Mode Button ( ) or touch the screen to select the 4-way icons to move the image. 4.
-
Page 41: Lcd Display Information
5 LCD Display Information 5.1 DV Playback Mode Please refer to the following table regarding the description of each icon and symbol. Slow Motion Playback Button File Protect icon Battery status icon Playback Mode icon 00:00:00 Length of each Movie clip icon Resolution icon Return Button Fast forward Playback Button... - Page 42 Playback/Pause Button Fast rewind Playback Button Menu Button Sound volume Button 100-0001 Folder and file number Note: Maximum capacity of each recorded file is 4GB. Once the recording reaches 4 GB, the camcorder will automatically stop recording. Press the record button to begin recording again.
-
Page 43: Voice Recording Playback Mode
5.2 Voice Recording Playback Mode Please refer to the following table regarding the description of each icon and symbol. File Protect icon Battery status icon Playback Mode icon 00:00:00 Length of each voice recording icon Return Button Fast forward Playback Button Playback/Pause Button Fast rewind Playback Button Menu Button... -
Page 44: Dsc Playback Mode
5.3 DSC Playback Mode Please refer to the following illustration to familiarize yourself with icons and symbols of DSC Playback Mode. DPOF (Digital Print Order Format) icon File Protect icon Battery status icon Image Playback Mode icon 0001 Number of pictures left icon Resolution icon Return Button Menu Button... -
Page 45: Menu Mode
6 Menu Mode Touching the icon or pressing the Menu button will launch the Main menu screen. 6.1 Menu options for DV Mode Set your camcorder to DV Mode and press the MENU Button ( to show the DV options menu. 6.1.1 Video Recording Resolution Power on the camcorder and make sure it is in the DV Mode. -
Page 46: White Balance
6.1.2 White Balance Power on the camcorder and make sure it is in the DV Mode. Touch the icon or press the Menu Button ( ) then touch the White Balance option to display the submenu. Touch the desired White Balance option (Auto, Daylight, Cloudy, Fluorescent or Tungsten) to select as illustrated below. -
Page 47: Effect
6.1.3 Effect Power on the camcorder and make sure it is in the DV Mode. Touch the icon or press the Menu Button ( ) then touch the Effect option to display the submenu. Touch the desired Effect option (Normal, B/W (Black/White) or Sepia) to select as illustrated below. -
Page 48: Metering
6.1.4 Metering Power on the camcorder and make sure it is in the DV Mode. Touch the icon or press the Menu Button ( ) then touch the Metering option to display the submenu. Touch the desired Metering option (Spot, Center, Touch AE) to select as illustrated below. -
Page 49: Backlight
6.1.5 Backlight 1. Power on the camcorder and make sure it is in the DV Mode. 2. Touch the icon or press the Menu Button ( ) then touch the Backlight option to display the submenu. 3. Touch the desired Backlight option to enable or disable the function as illustrated below. -
Page 50: Night Mode
6.1.6 Night Mode 1. Power on the camcorder and make sure it is in the DV Mode. 2. Touch the icon or press the Menu Button ( ) then touch the Night Mode option to display the submenu. 3. Touch the desired Night Mode option to enable or disable the function as illustrated below. -
Page 51: Motion Detection
6.1.7 Motion Detection When the Motion Detection is enabled, the camcorder will automatically begin recording when a few seconds of movement is detected. The camcorder will stop recording a few seconds after no further motion is detected. When this feature is enabled, the camcorder will NOT automatically shut down due to the power saving mode. -
Page 52: Ev Compensation
6.1.8 EV Compensation You can adjust the value of the exposure compensation which is ranged from -2.0EV to +2.0EV (at 0.5EV increment). The higher the EV value, the brighter the image will be. Power on the camcorder and make sure it is in the DV Mode. Touch the icon or press the Menu Button ( ) then... -
Page 53: Menu Options Of Dv/Voice Playback
6.2 Menu options of DV/Voice Playback In DV/Voice Recording Mode, touch the icon or press the Playback button to enter Playback Mode. 6.2.1 Delete Power on the camcorder and make sure it is in the DV/Voice Playback Mode. Touch the screen to select the file to be deleted and touch the icon or press the Menu Button ( ) to enter Menu mode. - Page 54 Delete One Delete the current file Delete all files stored in the Digital Video Delete All Camera Note: The file cannot be recovered once it is deleted. Please make sure you have backed up the file (if desired) before Deleting. Protected files cannot be deleted.
-
Page 55: Protect
6.2.2 Protect Power on the camcorder and make sure it is in the DV/Voice Playback Mode. Touch the screen to select the file to be protected and touch icon or press the Menu Button ( ) to enter Menu mode. If the file is already protected, the lock icon will be displayed in the upper part of the screen as illustrated below. -
Page 56: Menu Options Of Dsc Mode
6.3 Menu options of DSC Mode Touching the icon or pressing the Menu button will launch the DSC Main menu screen. 6.3.1 Still Image Resolution Power on the camcorder and make sure it is in the DSC Mode. Touch the icon or press the Menu Button ( ) then touch the Resolution option to display the submenu. -
Page 57: White Balance
6.3.2 White Balance Power on the camcorder and make sure it is in the DSC Mode. Touch the icon or press the Menu Button ( ) then touch the White Balance option to display the submenu. Touch the desired White Balance option (Auto, Daylight, Cloudy, Fluorescent or Tungsten) to select (as illustrated below). -
Page 58: Effect
6.3.3 Effect This digital video camera can record normal color image, black and white image, or image with sepia effect. Power on the camcorder and make sure it is in the DSC Mode. Touch the icon or press the Menu Button ( ) then touch the Effect option to display the submenu. -
Page 59: Metering
6.3.4 Metering Power on the camcorder and make sure it is in the DSC Mode. Touch the icon or press the Menu Button ( ) then touch the Metering option to display the submenu. Touch the desired Metering option (Spot, Center, Touch AE) to select as illustrated below. -
Page 60: Backlight
6.3.5 Backlight Power on the camcorder and make sure it is in the DSC Mode. Touch the icon or press the Menu Button ( ) then touch the Backlight option to display the submenu. Touch the desired Backlight option to enable or disable the function as illustrated below. -
Page 61: Night Mode
6.3.6 Night Mode Power on the camcorder and make sure it is in the DSC Mode. Touch the icon or press the Menu Button ( ) then touch the Night Mode option to display the submenu. Touch the desired Night Mode option to enable or disable the function as illustrated below. -
Page 62: Self-Timer
6.3.7 Self-timer Power on the camcorder and make sure it is in the DSC Mode. Touch the icon or press the Menu Button ( ) then touch the Self-timer option to display the submenu. Touch the desired Self-timer option (Off, 2S, or 10S) to select as illustrated below. -
Page 63: Burst
6.3.8 Burst This feature will continuously and automatically shoot three pictures in approximately 1 second by pressing the Recording Button ( 1. Power on the camcorder and make sure it is in the DSC Mode. 2. Touch the icon or press the Menu Button ( ) then touch the Burst Mode option to display the submenu. -
Page 64: Ev Compensation
6.3.9 EV compensation You can adjust the value of the exposure compensation which is ranged from -2.0EV to +2.0EV (at 0.5EV increment). The higher the EV value, the brighter the image will be. 1. Power on the camcorder and make sure it is in the DSC Mode. 2. -
Page 65: Menus Of Dsc Playback
6.4 Menus of DSC Playback In DSC Recording Mode, touch the icon or press the Playback button to enter Playback Mode. 6.4.1 Delete 1. Power on the camcorder and make sure it is in the DSC Playback Mode. 2. Touch the screen to select the file to be deleted and touch the icon or press the Menu Button ( ) to enter Menu mode. - Page 66 Delete One Delete the current file Delete all files stored in the Digital Video Delete All Camera Note: Photos cannot be recovered once deleted. Please make sure you have backed up the Photo(s) (if desired) before deleting. Protected photos cannot be deleted. Before deleting, you must unlock it. Touch the icon to return to Playback mode.
-
Page 67: Protect
6.4.2 Protect 1. Power on the camcorder and make sure it is in the DSC Playback Mode. 2. Touch the screen to select the file to be protected and touch the icon or press the Menu Button ( ) to enter Menu mode. -
Page 68: Autoplay
6.4.3 Autoplay This camcorder includes a slideshow feature for playing back each photo at a fixed interval. 1. Power on the camcorder and make sure it is in the DSC Playback Mode. 2. Touch the screen to select the file to begin the slideshow and touch the icon or press the Menu Button ( ) to... -
Page 69: Rotate
6.4.4 Rotate 1. Power on the camcorder and make sure it is in the DSC Playback Mode. 2. Touch the screen to select the file to rotate and touch the icon or press the Menu Button ( ) to enter Menu mode. -
Page 70: Dpof
6.4.5 DPOF DPOF (Digital Print Order Format) function allows you to determine which captured photos on the memory card are to be printed. 1. Power on the camcorder and make sure it is in the DSC Playback Mode. 2. Touch the screen to select the file to be printed and touch the icon or press the Menu Button ( ) to enter Menu mode. - Page 71 4. Touch the desired option to select. Once selected, the previous Menu screen will be displayed. 5. Touch the icon again to return to Playback mode. Note: 1. A memory card is required for the DPOF function. 2. If you insert the memory card into a DPOF compatible printer, these selected photos will begin to print after prompted.
-
Page 72: Settings Menu
6.5 Settings Menu The Settings Menu can be used to select specific camcorder settings such as date/time. The Settings menu can be accessed in recording or playback mode. 6.5.1 Information This feature is used to display information on the LCD screen to help you capture the best video and photos. -
Page 73: Beep
6.5.3 Beep 1. Power on the camcorder. 2. Touch the icon or press the Menu Button ( ) then touch the Settings icon Touch the Beep option to display the submenu. 3. Touch the desired option to enable or disable the camcorder sound effects. -
Page 74: Default
6.5.4 Default Use this to reset all settings to the original factory default settings. 1. Power on the camcorder. 2. Touch the icon or press the Menu Button ( ) then touch the Settings icon Touch the Default option to display the submenu. -
Page 75: Tv Standard
6.5.5 TV standard Use the TV standard to set for your area. See table below. 1. Power on the camcorder. 2. Touch the icon or press the Menu Button ( ) then touch the Settings icon . Touch the TV Standard option to display the submenu. -
Page 76: Auto Power Off
6.5.6 Auto Power Off This setting can be used to automatically power off the camcorder after not using it for a selected period of time. 1. Power on the camcorder. 2. Touch the icon or press the Menu Button ( ) then touch the Settings icon Touch the Auto Power Off... -
Page 77: Frequency
6.5.7 Frequency Use the Frequency setting to set the frequency system for your area. See table below. 1. Power on the camcorder. 2. Touch the icon or press the Menu Button ( ) then touch the Settings icon . Touch the Frequency option to display the submenu. -
Page 78: Language
6.5.8 Language 1. Power on the camcorder. 2. Touch the icon or press the Menu Button ( ) then touch the Settings icon . Touch the Language option to display the submenu. 3. Touch the desired User Interface language (English, German, French, Italian, Japanese, Spanish, Portuguese, Traditional Chinese, Simplified Chinese, Turkish, Russian, Thai, Arabian or Korean) to select. -
Page 79: Format
6.5.9 Format This will format the memory card or the built-in memory. Be warned that all Video, Photo, and Audio content on the card or internal memory will be deleted and CANNOT be restored once completed. 1. Power on the camcorder. 2. -
Page 80: File Number(Default: Series)
6.5.10 File Number(Default: Series) This setting allows you to name the files. If “Series” is selected, the file name will follow the latest stored file consecutively. If “Reset” is selected, the next file name will start from 0001 even after formatting, deleting or inserting a new memory card. -
Page 81: Lcd Brightness
6.5.11 LCD brightness This setting can be used to adjust the brightness of the screen. 1. Power on the camcorder. 2. Touch the icon or press the Menu Button ( ) then touch the Settings icon Touch the LCD Brightness option to display the submenu. -
Page 82: Instant Review
6.5.12 Instant Review This setting can be used to determine the number of seconds that a photo will displayed on the LCD after capture. 1. Power on the camcorder. 2. Touch the icon or press the Menu Button ( ) then touch the Settings icon . -
Page 83: Memory
6.5.13 Memory Use this setting to select data storage location. If a single memory card is inserted, it will be automatically selected by default. This setting should only be used when 2 memory cards are inserted. 1. Power on the camcorder. 2. -
Page 84: Volume
6.5.14 Volume Use this setting to adjust the camcorder effects volume. 1. Power on the camcorder. 2. Touch the icon or press the Menu Button ( ) then touch the Settings icon Touch the Volume option to display the submenu. 3. -
Page 85: Start-Up Logo
3. Touch the desired option (Default or User Setting) to select as illustrated below. If Default is selected, then the camcorder will display the HP startup screen. 4. If the User Setting option is selected, cycle through the photos stored on the camcorders memory (card or internal) and touch the desired photo you want when the camcorder powers up. -
Page 86: Face Detection
6.5.16 Face Detection The Face Detection setting will detect and focus on faces in a scene automatically during a photo mode. 1. Power on the camcorder. 2. Touch the icon or press the Menu Button ( ) then touch the Settings icon . -
Page 87: Pc And Tv Connection
7 PC and TV Connection 7.1 Connecting to the Computer As shown in the illustration, use the USB cable provided to connect the camcorder to a PC for file transmission. 7.2 Connecting to a Standard TV As shown in the illustration, use the video cable to connect the camcorder to a standard TV. -
Page 88: Connecting To A Hd Tv
7.3 Connecting to a HD TV As shown in the illustration, use the HDMI cable provided to connect the camcorder to a HD TV or HDMI enabled PC monitor for high resolution picture display. Note:Some TVs may not recognize this image format (1080p, 30fps). Please confirm the resolution of the connected TV. -
Page 89: Installing The Software
8 Installing the Software 1. Place the CD ROM attached into the CD player. 2. If the CD is not executed automatically, please use the root menu of the computer to locate the Install_CD.exe file in the CD root menu. The following screen will be displayed. -
Page 90: Editing Software
9 Editing Software ArcSoft Total Media Extreme(TME) ™ manages your media for you, and gives you tons of fun and exciting ways to create and share projects featuring your photo, video, and music files. Edit, enhance and add creative effects to your photos. You can Create your own movies or photo slide shows complete with soundtrack. -
Page 91: Appendix
10 Appendix Specifications Image sensor 1/3.2 inch. 5 mega pixels CMOS sensor Effective pixels 5 Megapixel (2592X1944) Support SD / Micro SD card and SDHC card up to Storage media 32GB ISO Equipment Auto Color effect Normal / BW / Sepia f = 5-25 mm;... - Page 92 Static image playback: 8x digital zoom (depending on the size of the image) Sound: ADPCM Audio Video: MOV TFT screen 3.0” Touch Panel screen Range:Below 1.0m LED Flashlight DV: On / Off DSC: On / Off White balance Auto / Daylight / Cloudy / Fluorescent / Tungsten Exposure -2.0 EV~+2.0 EV (0.5EV / step) Self-Timer...
-
Page 93: Troubleshooting
Troubleshooting Problem Possible Cause Solution 1. Battery is not 1. Please insert inserted correctly. battery correctly. Cannot power on the Camcorder. 2. Battery is 2. Recharge the exhausted. Battery. 1. Power saving 1. Please turn on the mode already power again. Camera shutdown activated. - Page 94 1. Unlock the memory 1. Memory card is card. Protected. 2. Reformat the 2. Memory card memory card. Unable to use the contains non-DCF Please make sure external memory images taken by to backup the file card. other cameras. before reformatting memory card.
Need help?
Do you have a question about the t250 and is the answer not in the manual?
Questions and answers