
Related Manuals for Keystone KSTAW08A


Summary of Contents for Keystone KSTAW08A
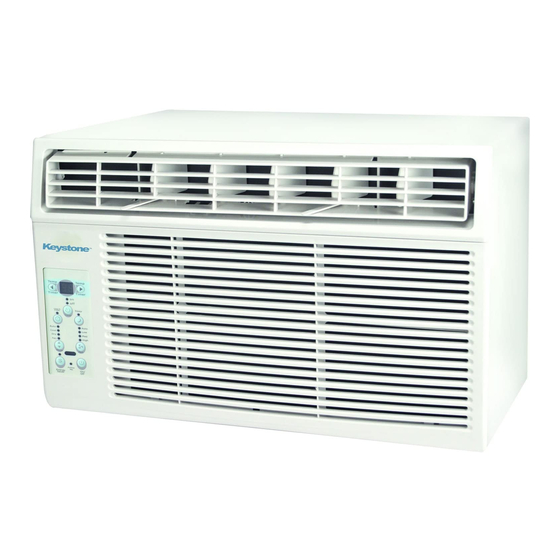
- Page 1 WINDOW/WALL TYPE ROOM AIR CONDITIONER Model: KSTAW08A KSTAW10A KSTAW12A Before using your air conditioner, please read this manual carefully and keep it for future reference.
- Page 3 Producto...
- Page 4 1 866 646 4332 1 866 646 4332...
-
Page 5: Table Of Contents
CONTENTS 1. SAFETY PRECAUTIONS..............2 2. IMPORTANT SAFETY INSTRUCTIONS ..........4 3. NORMAL SOUNDS ................5 ..4. AIR CONDITIONER FEATURES ..........5 ..5. INSTALLATION INSTRUCTIONS............10 6. CARE AND CLEANING ..............14 7. -
Page 6: Safety Precautions
Safety Precautions To prevent injury to the user or other people and property damage, the following instructions must be followed. Incorrect operation due to ignoring of instructions may cause harm or damage. The seriousness is classified by the following indications. WARNING This symbol indicates the possibility of death or serious injury. - Page 7 ! CAUTION Do not clean the air Ventilate the room well when When the air filter is to be removed, do not touch the conditioner with water. used together with a stove, metal parts of the unit. etc. It may cause an injury. Water may enter the unit and An oxygen shortage may occur.
-
Page 8: Important Safety Instructions
IMPORTANT SAFETY INSTRUCTIONS For your safety WARNING NOTE The power supply cord with Do not store or use gasoline or other flammable vapors and liquids this air conditioner contains a current in the vicinity of this or any other appliance. detection device designed to reduce Avoid fire hazard or electric shock. -
Page 9: Normal Sounds
NORMAL SOUNDS High Pitched Chatter High efficiency compressors may have a high pitched chatter Vibration during the cooling cycle. Unit may vibrate and make noise because of poor wall or window construction or incorrect installation. Sound of Rushing Air At the front of the unit, you may hear the sound of rushing air being moved by the fan Pinging or Switching... - Page 10 AIR CONDITIONER FEATURES(CONTINUED) NOTE: The following instructions represent the Unit Controls, the same instructions can be used for the Remote Control. TO TURN UNIT ON: Auto Auto Cool High Mode DO THIS: Press the On/Off button. Follow Energy On/Off Saver TO CHANGE TEMPERATURE SETTING: NOTE:...
- Page 11 AIR CONDITIONER FEATURES(CONTINUED) TO SELECT THE NOTE: OPERATING MODE: To choose operating mode, press the Mode button. Each time you press the button, a mode is selected in a sequence that goes from Auto, Cool, Dry to Fan. The indicator light besides will be illuminated and remained on once the mode is selected.
- Page 12 AIR CONDITIONER FEATURES(CONTINUED) TIMER: AUTO START/ STOP FEATURE: NOTE: First press the Timer button, the indicator light besides word On illuminates. It indicates the Auto Start program is initiated. Temp Temp Press or hold the Left arrow or Right arrow to change the Auto time by 0.5 hour increments, up to 10 hours, Timer Timer...
- Page 13 AIR CONDITIONER FEATURES(CONTINUED) NOTE: FOLLOW ME FEATURE: This feature can be activated from the remote control ONLY. The remote control serves as a remote thermostat allowing for the precise temperature control at its location. Auto Auto To activate the Follow Me feature, point the remote Cool Light flashing control towards the unit and press the Follow Me...
-
Page 14: Installation Instructions
Air Directional Louvers The louvers will allow you to direct the air flow Up or Down and Left or Right throughout the room as needed. Pivot horizontal louvers until the desired Up/Down direction is obtained. Move the Levers from side to side until the desired Levers Left/Right direction is obtained. -
Page 15: How To Install
Fig.B C: Align the hole in the top rail with those in the Fig.C top of the unit as shown in Fig.B D: Secure the top rail to the unit with the 3/8 Screws as shown in Fig.C. NOTE: For safety reasons, all four(4) screws MUST be securely fastened. - Page 16 Fig.4 C. Once the panel has been installed on the side of the cabinet, make sure it sits securely inside the frame channel by making slight adjustments. Slide the top and bottom ends of the frame into the top and bottom ends of the frame into the top and bottom rails of the cabinet.
- Page 17 Drive 3 / 4 (19mm) locking screws through frame Fig.9 holes into window sash (Fig.9/10). To secure lower sash in place, attach right angle sash lock with 3 / 4 (19mm) screw as shown(Fig.11). Fig.10 Fig.11 Fig.12 Cut foam seal and insert in the space between the upper and lower sashes (Fig.12).
-
Page 18: Care And Cleaning
CARE CAUTION . Trapped out. washing. Note: C(104 F) to... -
Page 19: Troubleshooting Tips
TROUBLESHOOTING TIPS Before calling for service, review this list. It may save you time and expenditure. This list includes common occurrences that are not the result of defective workmanship or materials in this appliance. Problem Solution Wall plug disconnected. Push plug firmly into wall outlet. Air conditioner does not start House fuse blown or circuit breaker tripped. - Page 20 Problem Solution Unit removing large quantity of moisture from humid room. This is normal during Water dripping excessively humid days. OUTSIDE when unit is cooling. Remote control not located within range. Place remote control within 20 feet & 180 , Remote Sensing radius of the front of the unit.
-
Page 21: Warranty Information
Third 1-866-646-4332... - Page 22 Manual del Usuario Unidad de aire acondicionado de ventana Modelo: KSTAW08A KSTAW10A KSTAW12A Antes de usar su aire acondicionado, lea con cuidado este manual y guárdelo para su consulta posterior.
- Page 23 ÍNDICE ÍNDICE 1.PRECAUCIONES DE SEGURIDAD............2 2.INSTRUCCIONES IMPORTANTES SOBRE SEGURIDAD......4 3.SONIDOS NORMALES................5 4.CARACTERISTICAS DEL ACONDIONADOR DE AIRE......5 5.INSTRUCCIONES DE INSTALACIÓN……………………..………...…...11 6.CUIDADO Y LIMPIEZA………..............15 7.SOLUCIÓN DE PROBLEMAS…...............16 8.INFORMACIÓN DE LA GARANTÍA............17 Leer Este Manual Aquí usted puede contrar muchas indicaciones útiles sobre como usar y mantener su aire acondicionado de manera adecuada.
-
Page 24: Precauciones De Seguridad
PRECAUCIONES DE SEGURIDAD Para evitar daños materiales y lesiones al usuario u otras personas, se deben seguir las siguientes instrucciones. La operación incorrecta debido a la omisión de estas instrucciones puede ocasionar lesiones o daños. La gravedad se indica de la siguiente manera. - Page 25 Ventile la habitación antes de encender el No desensamble ni modifique la unidad aire acondicionado si hay una fuga de gas debida a otro aparato. • Puede producirse una Se puede producir una falla y una descarga explosión, un incendio y eléctrica.
-
Page 26: Instrucciones Importantes Sobre Seguridad
INSTRUCCIONES IMPORTANTES SOBRE SEGURIDAD Para su seguridad ADVERTENCIA ● NO almacene o use gasolina ni otros vapores o líquidos inflamables junto a este o cualquier otro aparato. ● Evite los riesgos de incendio o descarga eléctrica. No use un cable de extensión o un adaptador para el enchufe. -
Page 27: Sonidos Normales
INSTRUCCIONES DE FUNCIONAMIENTO CON CONTROL ELÉCTRICO Antes de comenzar, conozca en profundidad el panel de control, como se muestra a continuación, y todas sus funciones. En las páginas 6 a 8 puede encontrar una descripción detallada de cada botón y sus funciones. - Page 28 CARÁCTERÍSTICAS DEL ACONDIONADOR DE AIRE (CONTINUACIÓN) NOTA: las siguientes instrucciones corresponden al manejo del panel de control. También pueden servir para el control remoto: PARA ENCENDER LA UNIDAD: A u t o A u t o L o w Co o l Dr y Hi g h Mo d e...
- Page 29 PARA SELECCIONAR EL MODO DE FUNCIONAMIENTO: NOTA: Presione el botón “Mode” [modo] para seleccionar el modo de funcionamiento A u t o A u t o deseado: “Auto” [automático], “Cool” [frío], “Dry” L o w Co o l Dr y [seco] y “Fan”...
- Page 30 PARA USAR LA FUNCIÓN DEL TEMPORIZADOR (INICIO/APAGADO AUTOMÁTICO): NOTA: La función “TIMER” [TEMPORIZADOR] iniciará y apagará automáticamente el acondicionador de aire Tem p Tem p en intervalos establecidos. Ti m er Ti m er TEMPORIZADOR ENCENDIDO: Of f Presione el botón “TIMER” [TEMPORIZADOR]. Ch ec k Sl eep La luz de “TIMER ON”...
- Page 31 PARA USAR LA FUNCIÓN DE DORMIR: NOTA: En modo “SLEEP“ [DORMIR], el acondicionador de aire realizará lo siguiente: Al presionar el botón “SLEEP“ [DORMIR], el Tem p Tem p acondicionador de aire aumentará de forma automática la configuración de temperatura Ti m er Ti m er seleccionada en 2 ºF (1-2 º) luego de 30...
- Page 32 Follow Me A u t o A u t o L o w Follow Me Co o l Dr y Hi g h Follow Me Mo d e Follow Me Follow Me Fo l l o w En er g y On /Of f Sav er ALGO MÁS QUE DEBE SABER...
-
Page 33: Instrucciones De Instalación
INSTRUCCIONES DE INSTALACIÓN Su aparato de aire acondicionado está diseñado para instalarse en ventanas deslizable vertical con ancho de aberturas de 23 a 36 pulgadas (584mm a 914 mm) (Ver Fig. 1). El sujetador inferior para el marco debe separarse lo suficiente para permitir una apertura vertical de 15-1/2 pulgadas (394 mm). - Page 34 CÓMO INSTALAR NOTA: El riel superior y los paneles corredizos laterales están diseñados para lograr la inclinación adecuada de la parte posterior (5/16”). Esto es necesario para el drenado correcto del agua condensada. Si por alguna razón no está usando los paneles laterales, debe conservar esta inclinación hacia la parte posterior.
- Page 35 2 Sujete con firmeza el aparato de aire acondicionado, coloque con cuidado la unidad en la abertura de la ventana hasta que la parte inferior de la unidad se apoye en el alféizar de la ventana (Fig. 5). Cierre con cuidado la ventana por detrás del riel superior de la unidad.
- Page 36 5 Coloque los tornillos de fijación de 1/2” (13 mm) en el sujetador del marco a través de los orificios del marco (Figs. 9/10). 6 Para asegurar el sujetador inferior en su sitio, colóquelo en ángulo recto con un tornillo de ¾” (19 mm) como se muestra (Fig. 11). 7 Corte la espuma selladora e insértela en el espacio entre los fijadores superior e inferior (Fig.
-
Page 38: Cuidado Y Limpieza
SOLUCIÓN DE PROBLEMAS SOLUCIÓN DE PROBLEMAS Antes de llamar para solicitar servicio, revise esta lista. Puede ahorrarle tiempo y gastos. Esta lista incluye los casos más comunes que no son resultado de mano de obra o materiales defectuosos en este aparato. Problema Solución El aparato de aire... -
Page 39: Información De La Garantía
Garantía de Air acondicionado Su producto está protegido por esta garantía: Reparaciones bajo garantía deben ser obtenidos de Centro de Servicios al Consumidor de Midea o con un administrador de Midea. MIDEA , A TRAVES DE SU PERIODO DE EL CONSUMIDOR VA A SER CENTRO DE SERVICIO GARANTIA RESPONSABLE PARA... - Page 40 1-866-646-4332.
- Page 41 1-866-646-4332.
Need help?
Do you have a question about the KSTAW08A and is the answer not in the manual?
Questions and answers