
Related Manuals for Keystone KSTAW12UA


Summary of Contents for Keystone KSTAW12UA
- Page 1 WINDOW-TYPE ROOM AIR CONDITIONER User’s Manual IMPORTANT NOTE: Before using your air conditioner, please read • this manual carefully and keep it for future reference.
-
Page 2: Table Of Contents
Table of Contents Important Safety Instructions ...........03 Installation Instructions..............13 Normal Sounds................18 Air Conditioner Features............19 Care and Cleaning...............24 Troubleshooting Tips..............25... -
Page 3: Important Safety Instructions
Important Safety Instructions READ THIS MANUAL Inside you will find many helpful hints on how to use and maintain your air conditioner properly. Just a little preventive care on your part can save you a great deal of time and money over the life of your air conditioner. - Page 4 CAUTION When the air filter is to be removed, do not touch the metal parts of the unit. It may cause an injury. Do not put a pet or house plant where it will be exposed to direct air flow. This could injure the pet or plant.
- Page 5 NOTE: The power supply cord with this air conditioner contains a current detection device designed to reduce the risk of fire. Please refer to the section Operation of Current Device for details.In the event that the power supply cord is damaged, it cannot be repaired-it must be replaced with acord from the Product Manufacturer.
- Page 6 Operation of Current Device (Applicable to the unit adopts current detection device only ) The power supply cord contains a current device that senses damage to the power cord. To test your power supply cord do the following: 1.Plug in the Air Conditioner. 2.The power supply cord will have TWO buttons on the plug head.
- Page 7 -Servicing shall only be performed as recommended by the equipment manufacturer. Maintenance and repair requiring the assistance of other skilled personnel shall be carried out under the supervision of the person competent in the use of flammable refrigerants. -DO NOT modify the length of the power cord or use an extension cord to power the unit. DO NOT share a single outlet with other electrical appliances.
- Page 8 WARNINGS (for using R290/R32 refrigerant only) 1.Transport of equipment containing flammable refrigerants See transport regulations 2.Marking of equipment using signs See local regulations 3.Disposal of equipment using flammable refrigerants See national regulations. 4.Storage of equipment/appliances The storage of equipment should be in accordance with the manufacturer's instructions. 5.Storage of packed (unsold) equipment Storage package protection should be constructed such that mechanical damage to the equipment inside the package will not cause a leak of the refrigerant charge.
- Page 9 WARNINGS (for using R290/R32 refrigerant only) 7)ventilated area Ensure that the area is in the open or that it is adequately ventilated before breaking into the system or conducting any hot work. A degree of ventilation shall continue during the period that the work is carried out.
- Page 10 WARNINGS (for using R290/R32 refrigerant only) Ensure that seals or sealing materials have not degraded such that they no longer serve the purpose of preventing the ingress of flammable atmospheres. Replacement parts shall be in accordance with the manufacturer's specifications. NOTE: The use of silicon sealant may inhibit the effectiveness of some types of leak detection equipment.
- Page 11 WARNINGS (for using R290/R32 refrigerant only) Open the circuit by cutting or brazing. The refrigerant charge shall be recovered into the correct recovery cylinders. The system shall be flushed with OFN to render the unit safe. This process may need to be repeated several times.
- Page 12 WARNINGS (for using R290/R32 refrigerant only) j)When the cylinders have been filled correctly and the process completed, make sure that the cylinders and the equipment are removed from site promptly and all isolation valves on the equipment are closed off. k)Recovered refrigerant shall not be charged into another refrigeration system unless it has been cleaned and checked.
-
Page 13: Installation Instructions
Installation Instructions The unit you purchased may be look like the following: NOTE: Model A Model B Model D Model C NOTE: All the illustrations in this manual are for explanation purpose only. The air conditioner you have may be slightly different. The actual shape shall prevail. ... - Page 14 CAUTION BEFORE YOU BEGIN Do not, under any circumstances, cut or remove the third (ground) prong from the Read these instructions completely and power cord. carefully. Do not change the plug on the power cord MPORTANT-Save these instructions for of the air conditioner. local inspector’s use.
- Page 15 PREPARE THE WINDOW ASSEMBLE THE SUPPORT BRACKET Lower sash must open sufficiently to allow a clear Connect the retaining plate and support rail vertical opening of 13 inches (330mm). Side via snaps. And fix the horizontal support plate louvers and the rear of the AC must have clear air to the main support connection plate with space to allow enough airflow through the See Fig1.
- Page 16 INSTALL AC INSTALL THE SUPPORT BRACKET Place the AC unit on support braket: Align the window to the grooved part of the Adjust the braket until the sliding leg to firmly See Fig.5 unit. secure against exterior surface. Place in window: Rest bracket on the bottom sill.
- Page 17 CAUTION WALL-MOUNTED INSTRUCTIONS All side louvers of the cabinet must remain Note: Remove the air conditioner and hardwares exposed to the outside of the structure. from the carton and place on a flat surface. After installing, make sure the air conditioner Save Carton and these Installation Instructions Note: is tilted 3~4...
-
Page 18: Normal Sounds
Normal Sounds High Pitched Chatter High efficiency compressors may have a high pitched chatter during the cooling cycle. Pinging or Switching Droplets of water hitting Sound of Rushing Air condenser during normal operation may cause At the front of the unit, you "pinging or swishing"... -
Page 19: Air Conditioner Features
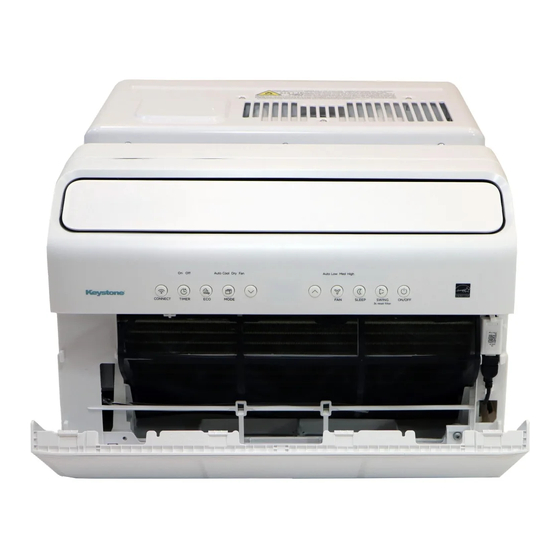
Air Conditioner Features Air Directional Louvers WARNING To reduce the risk of fire, electric shock, or injury to persons, read the IMPORTANT Lever SAFETY INSTRUCTIONS before operating this appliance. Lever CAUTION Please always wait 3 minutes when turning unit off then on again, and when changing from cool to fan and back to cool. - Page 20 ELECTRONIC CONTROL OPERATING INSTRUCTIONS NOTE: Different models have different control buttons and indicator lights. Not all the control buttons and indicator lights describing below are available for the unit you purchased. Please check the control panel of the unit you purchased. The unit can be controlled by the unit control alone or with the remote.
- Page 21 ECO button Press ECO button to initiate this function. This function is available on COOL, DRY, AUTO (only AUTO- COOLING and AUTO-FAN) modes.The fan will continue to run for 3 minutes after the compressor shuts off.The fan then cycles on for 2 minutes at 10 minute intervals until the room temperature is above the set temperature, at which time the compressor turns back on and Cooling Starts.
- Page 22 FAN button Press Fan button to select the Fan Speed in four steps-Auto, Low, Med or High. Each time the button is pressed, the fan speed mode is shifted.For some models, the fan speed can not be adjusted. SLEEP button Press Sleep button to initiate the sleep mode.
- Page 23 DISPLAYS Display DIS P L AYS : DISPLAYS: Shows the set temperature in " ℃" or " ℉" and the Auto-timer settings.While on Fan only mode, it shows the room temperature. If the room temperature is too high or low, it will display " HI" or " LO". Error codes: The unit may stop operation or continue to run safely.
-
Page 24: Care And Cleaning
Care and Cleaning Cabinet Cleaning CAUTION Clean your air conditioner occasionally to Be sure to unplug the air conditioner to prevent keep it looking new. Be sure to unplug the shock or fire hazard. The cabinet and front may unit before cleaning to prevent shock or be dusted with an oil-free cloth or washed with fire hazards. -
Page 25: Troubleshooting Tips
TROUBLESHOOTING TIPS Before calling for service, review this list. It may save your time and expense. This list includes common occurrences that are not the result of defective workman-ship or materials in this appliance. Problem Solution Air conditioner Wall plug disconnected. Push plug firmly into wall outlet. does not start House fuse blown or circuit breaker tripped. - Page 26 Problem Solution Water dripping Improper installation. Tilt air conditioner slightly to the outside to allow water drainage. INSIDE when unit Refer to installation instructions - check with installer. is cooling. Water dripping Unit removing large quantity of moisture from humid room. This is normal during OUTSIDE when excessively humid days.
- Page 28 The design and specifications are subject to change without prior notice for product improvement. Consult with the sales agency or manufacturer for details. Any updates to the manual will be uploaded to the service website, please check for the latest version. CW008UI-QB 16120300000760 2 0210112...
- Page 29 备注: 1. 基准说明书为单英文版本,不含型号及商标,也无制造商信息,请业务根据所 销售国家或者区域的法规要求,使用对应的官方语言版本,增加型号及其它 法规要求信息,重新申请订单编码说明书。内容。 此面及后面的页面无需印刷 技术 要求: 1.80克/平方双胶纸 2.尺寸:A4 3.颜色:黑白 4.注意:排版时注意页码数字都是靠外面的,以便翻阅 5.装订。...
Need help?
Do you have a question about the KSTAW12UA and is the answer not in the manual?
Questions and answers