Table of Contents

Related Manuals for Keystone KSTAW081WA


Summary of Contents for Keystone KSTAW081WA
- Page 1 WINDOW TYPE ROOM AIR CONDITIONER Owner’s Manual KSTAW081WA KSTAW101WA KSTAW121WA KSTAW141WA KSTAW182WA KSTAW242WA IMPORTANT NOTE: Before using your air conditioner, please read this manual carefully and keep it for future reference.
-
Page 2: Table Of Contents
CONTENTS Safety precautions Installation instructions What is in the Box Before you get start Installation overview. Operation instructions Get to know your AC. Get to know the features. Cleaning & maintenance Troubleshooting... -
Page 3: Safety Precautions
Safety Precautions Must read the warning message Inside you will find many helpful hints on how to use and maintain your air conditioner properly. Just a little preventive care on your part can save you a great deal of time and money over the life of your air conditioner. - Page 4 WARNING • Plug in power plug properly. Otherwise, it may cause electric shock or fire due to excess heat generation. Do not operate or stop the unit by inserting or pulling out the power plug.It may cause electric shock or fire due to heat generation. Do not damage or use an unspecified power cord.It may cause electric shock or fire.
- Page 5 CAUTION • Hold the plug by the head of the power plug when taking it out. It may cause electric shock and damage. Turn off the main power switch when not using the unit for a long time. It may cause failure of product or fire. •...
- Page 6 Operation of Current Device The power supply cord contains a current device that senses damage to the power cord. To test your power supply cord do the following: • Plug in the Air Conditioner. • The power supply cord will have TWO buttons on the plug head. Press the TEST button, you will notice a click as the RESET button pops out.
-
Page 7: Installation Instructions
Electrical Information The complete electical rating of your new room air conditioner is stated on the serial plate. Refer to the rating when checking the electrical requirements. • Be sure the air conditioner is properly grounded. To minimize shock and fire hazards, proper grounding is important. -
Page 8: What Is In The Box
What is in the Box Package contents 5/8in Screws and Top Rail 3/8in Screws Safety Lock(3 Types) LEFT RIGHT Frame Assembly(Left) Window Type Room Frame Assembly(Right) Air Conditioner unit Foam insert(E-Star model only) Window Sash Seal Window Sash Seal Foam (with glue) Foam (non glue) Prepare the following tools NOTE... -
Page 9: Before You Get Start
Before you get started Preparations before installation n u a The installation must be carried out Installing your AC should take about in strict accordance with the instructions 60 minutes. in this manual. We’re here if you need us, please contact We recommend doing this with a helper. -
Page 10: Installation Overview
Installation view Installation Completion Display LEFT RIGHT Safety Lock and 5/8in Screws Frame Assembly (Right) Top Rail and 3/8in Screws Air Conditioner unit Frame Assembly (Left) Window Sash Seal Foam Safety Lock and 5/8in Screw Remote controller NOTE Illustrations in this manual are for explanatory purposes. The actual shape of your indoor unit may be slightly different. - Page 11 Step Install your AC unit LEFT RIGHT What you need...
- Page 12 Install you AC Install the top rail on the AC Install the Top Rail on the AC with 4 Screws (3/8in) , For safety reasons, all 4 screws MUST be securely fastened. *The top rail must be assembled on the unit for <10000Btu/h models only. R I G H Pull the panels out around...
- Page 13 Install you AC LEFT RIGHT Fasten the panels to the AC Stretch the wind screen outward and insert the upper and lower frame strips of the Panels into the AC card slot. LEFT RIGHT The AC unit is done A. the upper and lower frame strips of the Panels into the AC card slot.
- Page 14 Step Insulate your window What you need...
- Page 15 Insulate your window Cut the seal foam to the width of your window, and stick it of the underside You should cut the foam to be the width of your window from the left to the right side. Make sure you’re cutting the foam with the adhesive, and stick it of the underside.
- Page 16 Step Lift the AC into the window LEFT RIGHT What you need...
- Page 17 Lift the AC into the window Make sure you do this step with a helper. Very carefully, lift the assembled AC into the window frame. Make sure someone is holding the back of LEFT RIGHT the unit securely. *It’s helpful to rest the unit on the inside window sill until you’re ready to reposition it correctly.
- Page 18 Lift the AC into the window SASH Board Storm window thickness 1-1/2"min frame or other as required, (38 mm) obstruction. for proper pitch to rear, CAUTION: If storm window blocks AC, along entire Please install according to the figure above. sill.
- Page 19 Step Secure the AC LEFT RIGHT 5. CHECK FILTER FEATURE: What you need...
- Page 20 Secure the AC DRIVE LOCKING SCREWS Follow the above instructions and drive the screws. 1/8 " (3mm) pilot holes before driving screws. Drive 1/ 2" (12.7mm) locking screws through frame holes into window sash Drive 1/ 2" (12.7 mm) (Only wooden locking screws through windows:) LEFT...
- Page 21 The final details Cut the non-adhesive insulation foam to fit the width of your window Make sure you are cutting the foam with the LEFT RIGHT non-adhesive sides. Measure and cut the foam to be the width of your window from the left to right side.
- Page 22 One more thing Additional Notes If AC is Blocked by Storm Window Add wood as shown in Caution illustration on page 16, or remove storm window before air conditioner is installed. If Storm Window Frame must remain, be sure the drain holes or slots are not caulked or painted shut.
-
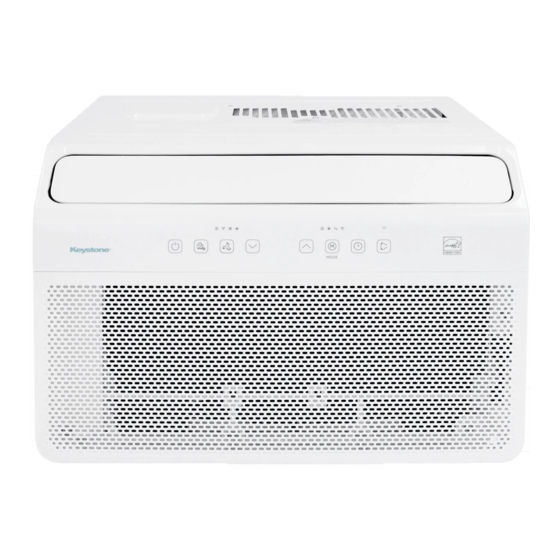
Page 23: Get To Know Your Ac
Get to know your AC AC unit overview NOTE The actual functions of your machine may differ to the example shown here.. Levers Air Direction Display Status display (Electronic control panel only) Power key Front Intake Grille (The filter is behind this) Strainer disassemble... - Page 24 Adjust your air conditioning direction Air conditioning louvers CAUTION Do not stick your fingers in the air outlet, it may cause an injury. Four-way adjustment (up or down, left or right) - For 06K/08K/10K/12K/14K Lever The louvers will allow you to direct the air flow Up or Down (on some models) and Left or Right throughout the room as needed.
-
Page 25: Get To Know The Features
Get to know the features Air conditioner features WARNING • To reduce the risk of fire, electric shock, or injury to persons, read the IMPORTANT SAFETY INSTRUCTIONS before operating this appliance. • Please always wait 3 minutes when turning unit off then on again, and when changing from cool to fan and back to cool. - Page 26 Electronic control operating instructions 1. TO TURN UNIT ON OR OFF: Press POWER button to turn unit on or off. Wireless button Press and hold on the POWER button for 3 seconds to initiate the Wireless connection mode. 2. FLASHCOOL FUNCTION: Press this button to initiate the FlashCool function.
- Page 27 • During this function, the display will show the actual room temperature, not the set temperature as in the cooling mode. • In Fan only mode ,the temperature is not adjusted. To operate on Dry mode: • In this mode, the air conditioner will generally operate in the form of a dehumidifier. Since the conditioned space is a closed or sealed area, some degree of cooling will continue.
- Page 28 Error codes: The unit may stop operation or continue to run safely. If the error codes appear, wait for about 10 minutes. The problem may resolve itself. If not, disconnect the power, then connect it again. Turn the unit on. If the problem persists, disconnect the power and contact your nearest customer service center.
-
Page 29: Cleaning & Maintenance
Cleaning & maintenance How to clean & change your filter Check the air filter once a month to see if cleaning is necessary The air filter should be checked at least once a month to see if cleaning is necessary. Trappedparticles in the filter can build up and cause an accumulation of frost on the cooling coils. -
Page 30: Troubleshooting
TROUBLESHOOTING Problem Solving Before calling for service, review this list. It may save your time and expense. This list includes common occurrences that are not the result of defective workman-ship or materials in this appliance. Problem Solution Wall plug disconnected. Push plug firmly into wall outlet. House fuse blown or circuit breaker tripped. - Page 31 Problem Solving Problem Solution Dirty air filter- air restricted. Clean air filter. Air conditioner turns on and off Outside temperature extremely hot. Set FAN speed to a Higher setting to bring rapidly air past cooling coils more frequently. Air movement sound. This is normal . If too loud, set to a slower FAN setting. Window vibration- poor installation.
- Page 32 CWS003IU-TYBPN8(WA) 16120300001239 20230923...
Need help?
Do you have a question about the KSTAW081WA and is the answer not in the manual?
Questions and answers