Table of Contents
Advertisement
Quick Links
Advertisement
Table of Contents

Related Manuals for Abus TVVR45030


Summary of Contents for Abus TVVR45030
-
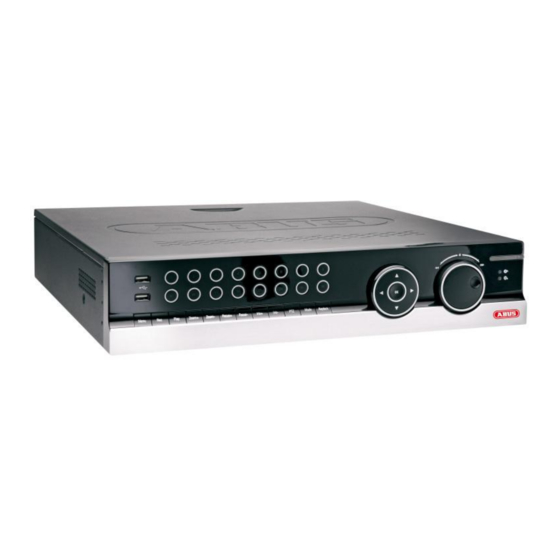
Page 1: User Manual
ABUS 32-channel Network video recorder NVR TVVR45030 User manual Version 1.0... - Page 2 See System operation on page 83. Pay attention to the information in the separate quick guide, plus the notes on the CD and in the accompanying documentation on “Web server control” and “Clients Software”. These can be found on the Internet under www.abus.com.
- Page 3 See System operation on page 83. Pay attention to the information in the separate quick guide, plus the notes on the CD and in the accompanying documentation on “Web server control” and “Clients Front Software”. These can be found on the Internet under www.abus.com. Rearside...
- Page 4 System operation System operation General information Name The device can be controlled as follows: Function Using the operating elements on the front of the Camera selection keys (1, 2, 3...): device Displays the camera status: White: Camera is connected Using the remote control ...
- Page 5 BNC connector for video output for connecting a monitor as an alternative to VGA-/HDMI output (no. 18 / no. 19) AUDIO OUT: (TVVR45030) cinch audio output (synchronised with video output) LINE IN: Cinch audio input (TVVR45030) (is not recorded, only transmitted via net-...
- Page 6 Remote control (TVAC40930)
- Page 7 Notes on the operating instructions ◄II: Pause / reverse playback Operating elements on the remote control : Stops playback PTZ: Note Switches on PTZ control Pay attention to the remote control diagram on Enter II: page 67. Confirms the selection ...
- Page 8 Contents Geräteübersicht ................................3 Systembedienung ................................4 Allgemeines ..................................4 Bedienelemente am Gerät ............................... 4 Anschlüsse an der Rückseite ............................5 Bedienelemente der Fernbedienung ..........................7 Bedienung mit der Maus ..............................7 Kurzanleitung ................................. 26 Bevor Sie beginnen ................................ 26 Festplatte installieren ..............................
- Page 9 Bewegung ..................................54 Reaktion ..................................54 Einrichten ..................................56 Zeitplan ..................................56 Kodierung ..................................57 Erweiterte Einstellung (nur TVVR45030) ........................57 Urlaub .................................... 58 Festplatten ..................................59 Festplatte einbauen ............................... 59 Parameter der Festplattenverwaltung ........................... 59 Festplatteneinstellungen der Kameras .......................... 60 Festplatten Einstellung ..............................
-
Page 10: Table Of Contents
Contents Ereignis (Ereignistyp ‚Bewegung‘) ..........................69 Panikaufzeichnung ................................ 70 Rekord.................................... 70 Fortlaufende Sofortbilder ............................... 70 Alarm ....................................70 Herunterfahren ................................71 Anzeige ..................................71 Einstellungen: Aufzeichnung ............................71 Einstellungen: PTZ ................................ 71 Einstellungen: Netzwerk ..............................71 Einstellungen: Alarm ..............................71 Einstellungen: RS232 .............................. - Page 11 Contents Introduction .................................. 109 General information ..............................109 Unpacking the device ..............................109 Scope of delivery ................................. 109 On-screen keyboard ..............................110 Starting the device ............................... 110 Switching off, locking and rebooting the device ......................110 Status displays ................................111 General information ..............................
- Page 12 Contents Schedule ..................................135 Encoding ..................................136 Confirm the settings by clicking Apply and leave the menu with Back............... 137 Advanced settings (TVVR45030) ..........................137 Holidays ..................................137 HDDs .................................... 138 Installing the HDD ............................... 138 HDD Management parameters ........................... 138 HDD settings of the cameras ............................
- Page 13 Contents Aansluitingen aan de achterzijde ..........................162 Bedieningselementen op de afstandsbediening ......................164 Bediening met de muis ..............................164 Korte handleiding ................................ 183 Voordat u begint ................................183 Installeren van de harde schijf ............................. 183 Aansluiten ..................................183 Apparaat configureren ..............................183 Belangrijke veiligheidsinstructies ..........................
- Page 14 Tijdschema .................................. 213 Codeer ..................................214 Bevestig de instellingen door te klikken op Toepassen en verlaat het menu met Back..........215 Geavanceerde instelling (alleen TVVR45030) ......................215 Vakantie ..................................215 Harde schijven ................................216 Harde schijf inbouwen ..............................216 Parameters van het harde-schijfbeheer ........................
-
Page 15: Glossar
Contents Opeenvolgende directe beelden ..........................227 Alarm .................................... 227 Oplossen van storingen .............................. 228 Recorder reinigen en onderhouden ........................... 228 Opmerking ................................... 228 Technische gegevens ..............................229 HDD opslagcapaciteit ..............................230 Overzicht van verbinding combinaties ........................230 Afvoeren ..................................231 Verwijzing naar de EG-richtlijn voor oude elektrische- en elektronische apparatuur .......... - Page 16 Camèra ..................................285 OSD ..................................... 285 Image ................................... 285 PTZ ....................................286 Mouvement .................................. 286 Alarme ..................................287 Moyen ..................................287 Configuration d´Enregistrement..........................288 Configuration ................................288 Planning ..................................288 Codage ..................................289 Autres paramètres (TVVR45030 uniquement) ......................290 Vacances ..................................290...
- Page 17 Contents Disque management ..............................291 Disque ..................................291 Monjours du disque dur ............................... 291 Paramètres d’administration du disque dur ......................... 291 Configurations disques durs des caméras ........................292 Vérification de l’état du disque dur ..........................293 Configuration des alertes de disque dur ........................293 S.M.A.R.T..................................
- Page 18 Contents Korrekt anvendelse ..............................320 Generelt ..................................320 Strømforsyning ................................320 Overbelastning/overspænding ............................. 321 Kabler ................................... 321 Opstillingssted/driftsomgivelser ........................... 321 Fjernbetjening ................................321 Vedligeholdelse og pleje .............................. 322 Tilbehør ..................................322 Idriftsættelse ................................322 Børn ..................................... 322 Indledning ..................................323 Generelle informationer ...............................
- Page 19 Contents Menubeskrivelse................................337 Konfigurering ................................339 Overblik ..................................339 Generelt ..................................339 Begreber ..................................340 Netværksopbygning ..............................341 Netværkskonfiguration ..............................341 RS-232 ..................................346 Live-visning .................................. 346 Advarsel ..................................347 Bruger ..................................347 Kamera ..................................349 Kamera..................................349 OSD ..................................... 349 Billede ..................................
- Page 20 Contents Alarm .................................... 366 Nedlukning..................................366 Rengøring og pleje af apparatet ..........................367 Henvisning ................................... 367 Udbedring af fejl ................................367 Tekniske data ................................368 HDD-lagerkapacitet ..............................369 Bortskaffelse ................................370 Henvisning til EF-direktivet vedr. gamle elektro- og elektronikapparater ..............370 Henvisning vedr.
- Page 21 Contents Ogólne..................................392 Dioda LED stanu DVR ..............................392 Klawisze wyboru kamery dioda stanu LED ........................392 Wskaźniki na monitorze ............................... 392 Asystent konfiguracji ..............................393 Konfigurowanie systemu .............................. 393 Konfigurowanie administratora ............................ 393 Czas i data systemowa ..............................393 Ustawienia sieci ................................
- Page 22 Contents Zarzadzanie HDD ................................419 Twarde dyski ................................419 Montaż twardego dysku .............................. 419 Parametry zarządzania twardymi dyskami ........................419 Ustawienia twardych dysków kamer ..........................420 Ustawienia twardych dysków ............................420 Sprawdzanie stanu twardego dysku ........................... 421 Konfigurowanie alarmów twardego dysku ........................421 S.M.A.R.T..................................
- Page 23 Contents Перед первым использованием ..........................451 Установка жесткого диска ............................451 Подключение ................................451 Конфигурация прибора .............................. 451 Важные указания по технике безопасности ......................452 Описание символов ..............................452 Применение по назначению ............................452 Общие положения ..............................452 Электропитание................................452 Перегрузка/Перенапряжение...
- Page 24 Движение ..................................482 Действие ..................................482 Настройка ................................... 484 Расписание ................................. 484 Кодирование ................................485 Дополнительные установки (только TVVR45030)....................485 Меню «Отпуск» ................................486 Жесткие диски ................................487 Установка жесткого диска ............................487 Параметры управления жестким диском ........................ 487 Настройка жестких дисков для камер ........................488 Жесткий...
- Page 25 Contents Настройки: Сигнализация ............................500 Настройки: RS232 ..............................500 Устранение неисправностей ............................ 501 Очистка устройства и уход ............................501 Указание ..................................501 Технические характеристики ........................... 502 Утилизация .................................. 504 Ссылка на директиву ЕС по утилизации старого электрического и электронного оборудования..... 504 Указания...
-
Page 26: Quick Guide
Pay attention to the required earthing of the de- vice to avoid static discharge. Note Install one or more HDDs (see the separate quick Check the ABUS homepage (www.abus.com) if guide). for this device any firmware updates are avail- able and install these Firstly, establish the connection to the motherboard using the red data cable (small connector). -
Page 27: Important Safety Information
Important safety information Important safety information Explanation of symbols General information The following symbols are used in this manual and on the Before using the device for the first time, read the follow- device: ing instructions carefully and pay attention to all warn- ings, even if you are already familiar with electronic de- Symbol Signal word Meaning vices. -
Page 28: Overloading / Overvoltage
Important safety information To avoid the possibility of fires, the plug should always be Installation location / operating environ- disconnected from the network socket if the device is not ment used for long periods. Disconnect the device from the mains power supply before impending electrical storms, Position the device on a firm, level surface and do not or use an uninterruptible power supply. -
Page 29: Care And Maintenance
Important safety information Care and maintenance Putting into operation Maintenance is necessary if the device has been dam- Observe all safety and operating instructions before aged. This includes damage to the plug, mains cable and putting the device into operation for the first time. housing, penetration of the interior by liquids or foreign ... - Page 30 changes to the product and operating instructions Terminal connectors at any time and without prior warning. ABUS Se- curity-Center GmbH is not liable or responsible for direct or indirect damages resulting from the equipment, performance and use of this product.
-
Page 31: On-Screen Keyboard
On-screen keyboard Switching off, locking and rebooting the device The on-screen keyboard appears after clicking on a text entry field with the mouse: Click on “ShutDown” in the main menu. The overview appears. The following screen keyboard appears during mere nu- merical entry: To switch off the device, select ShutDown and con- firm by pressing Yes. -
Page 32: Camera Selection Keys – Status Led
Status displays Status displays General information The following status displays indicate the current operat- ing state: LEDs on the front of the device Acoustic signal tones Icons (display elements) on the monitor Note Pay attention to the information in the separate quick guide. - Page 33 Setup wizard Setup wizard Setting up the system Setting up the administrator The setup wizard guides you through the necessary ba- Warning sic system settings. The DVR is then set up for recording Note down the admin password. and surveillance. The following password is preset Note “1 2 3 4 5”...
-
Page 34: Network Settings
Setup wizard 3. Because this device has two network connections, Network Settings there are setting possibilities for the parallel and the separate use of the connections: A LAN connection is selected for the Net Fault- data transfer (select “NIC”). The other tolerance connection is in a type of standby mode. - Page 35 Setup wizard HDD Management Camera recording To set up a new hard disc, activate the “Check box” At “Camera” select a camera with which you would with a left click and then click on Init. like to record. Activate the check box “Start recording”. Warning Select the type of recording.
-
Page 36: Status Symbols
Live view Live view Status symbols Overview The following symbols are displayed depending on The live view starts automatically after the device is the operating status of the device: switched on. Symbol Meaning You can also go back to the live view by pressing the Menu key repeatedly. -
Page 37: Selection Bar In The Camera Image
Live view Note Stop Auto-switch: Specify the delay in the image sequence in the display settings. Note Activation of “AUX monitor” without a connected spot monitor: Mouse pointer function is deactivated. Selection bar in the camera image Click on the camera image in single or multi view. A se- lection bar appears: Nr. -
Page 38: Setting The Camera Output
“Liveview”: screen. Setting the camera output You can display a maximum of 16 cameras (TVVR45030) in the live cast at the same time. Click on the TAB “View”. The following settings are available in the TAB “General”: Video Output In-... -
Page 39: Using The Control Panel
Playback Playback General information Using the control panel Playback can be made in three different ways: The control panel (4) is used for controlling the running Through the video search in the main menu playback. The symbols have the following meaning: ... -
Page 40: Right Click When Playback Is Running
Playback In order to change the description of your marking, Exits playback click on the process symbol. To remove, click on the Note delete symbol. You can zoom in on the screen image. Right click when playback is running ... -
Page 41: Main Menu
Main menu Main menu Menu overview The following overview shows the main menus used to set and control the device. Furthermore you can find important information regarding the devide on the right side of the menu. Click on the menu to open it. ... -
Page 42: Menu Description
Main menu Menu description Menu description page Configuration Used for managing all device settings (General, Camera, Record, Network, Alarm, PTZ, RS232, Display, Exception, User). Camera Menu for setting camera parameters (OSD configuration, image mode, PTZ configuration, motion recognition etc.) Record Menu to set recording parameters (time plan, camera resolution, camera stream etc.). - Page 43 Settings - Configuration Settings - Configuration User Adding and changing users, assigning authorisation rights Note Pay attention to the instructions in the correspond- ing sections. General Note The “Configuration” menu is used to manage all device settings. Warning Ensure that the date and time are set correctly. IMPORTANT: Subsequent changes to the settings can lead to data loss!
-
Page 44: Terms And Definitions
Settings - Configuration TAB “DST set- Terms and definitions Setting tings” An overview of relevant terms when using the device in a With an activated check box, the de- Auto DST Ad- network can be found below. vice converts automatically to summer justment Parameter Setting... -
Page 45: Network Layout
Settings - Configuration Network-configuration Port A port is an interface used for communi- cation by different programs. Certain ports are fixed (23: Telnet, 21: FTP), whilst others can be freely selected. Ports are important for different applica- tions (e.g. external access to the device over a browser). - Page 46 Address of the Domain Name Server DNS Server (usually the IP address of the gateway) Alternate DNS IP address of the alternative DNS To use the ABUS DDNS function, you must first set server up an account under www.abus-server.com. Please Default Route LAN 1 or LAN 2 note the FAQs on the website when doing this.
- Page 47 Settings - Configuration Sender´s Corresponding e-mail address for Adresse the e-mail account Sender´s Re- Select three possible recipients for ceiver the e-mail Receiver Enter the name of the recipient here Receiver´s Enter the e-mail address of the Adresse recipient here Enable Attached Tick the box when camera images Picture...
- Page 48 SNMP is used for monitoring the device status. Trap Adresse Enter the IP address of the For this you need SNMP software not available SNMP manager from ABUS. Trap Port Enter the trap port (Default: 162) Confirm the settings by clicking Apply and leave the menu with Back.
- Page 49 Settings - Configuration Handling Alarm TAB Trigger channel Alarm status Tick a checkbox to select which camera channel is trig- Here you see a list with all the alarm inputs and outputs gered in the case of an alarm. and their current status. TAB Arming schedule Alarm input ...
- Page 50 Sends an alarm signal to a PC with Assign any name to the alarm output in “Alarm lance Center ABUS CMS software. The software Name”. must be enabled and the recorder In “Dwell Time”, select how long the alarm is trig- set to surveillance mode on the PC.
- Page 51 Settings - Configuration RS-232 Currently no functioning. Live view See page 115. Warning Parameter Setting User Name Unique identification Password Access code for the device (device management) Note: Change all passwords on a regu- lar basis, using a combination of letters and numbers.
- Page 52 Settings - Configuration Note The user can make the settings locally (i.e. on the device) or change the parameters. The user can access the device via the network connection. The “Camera Permission” tab is used to set ac- cess rights for individual cameras (network or lo- cal).
- Page 53 Custom Settings for custom addition Click the + sign to add a camera to the system. Click “Refresh” to search the network for ABUS network cameras. Click “Add all” to add all existing network cameras. Click “Custom” to add Onvif cameras..
- Page 54 Settings - Configuration TVIP2xxxx network cameras. Select the checkbox for motion detection. The motion detection in the network camera must also be activated. For further details, refer to the network camera manual. Saving and retrieving presets 1. Use the arrow buttons to move the network cam- Note era to the required image section and save the In order to record using the motion recognition, you...
- Page 55 Here you set the times when the reactions in the TAB Sends an alarm signal to a Notify Surveillance Cen- Reaction are triggered. PC with the ABUS CMS software. For this, the soft- ware must be running and the recorder must be in sur- veillance mode.
-
Page 56: Setting Up
Settings - Configuration Record Setting up Open the main menu and click on record: Schedule The schedule is used to specify the recording times and triggers (recording type) for the cameras. Click on the “Schedule” tab: Note Because there is no difference between the set- tings for the TABs record and instant image, these are only listed once. - Page 57 Settings - Configuration At Copy you can take on this setting for other days or the whole week. 6. Finalize your settings in the record screen with Apply and then OK. Encoding TAB Record The following setting options are available in this sub- menu: Confirm the settings by clicking on Apply and exit the menu with OK.
-
Page 58: Advanced Settings (Tvvr)
5 seconds according to event or time plan Confirm the settings by clicking Apply and leave the menu with Back. Advanced settings (TVVR45030) Manual name entry of the vaca- Holiday Name tion or holiday Activate or deactivate the set va-... -
Page 59: Hdd Management Parameters
HDDs hard disc administration Note The device manages up to eight 3.5" SATA hard disk drives (only TVVR45030). For additional data security, an e-SATA hard disc can be optionally connected. Each of the installed HDDs must be initialised be- fore the device can be used for recording. The de- vice only detects the HDD and its assignment af- ter initialisation has been made. -
Page 60: Hdd Settings Of The Cameras
Settings - Configuration HDD settings of the cameras Hard disc setting Click on the sub-menu “Advanced”. Note Mode: Quote To be able to define these settings, you must have allocated cameras to a hard disc group (see HDD settings of cameras). Specify the maximum recording size per camera on the hard disc. -
Page 61: Checking The Hdd Status
Settings - Configuration Warning: If you want to use redundancy you have to acti- vate the redundant storage in the recording menu (see also p. 136) At least one HDD must have the R/W status (Read/Write). Otherwise, no recordings are possi- ble. -
Page 62: Continous Recording
Settings - Configuration Playback Press Configuration in the main menu and then Play- place according to recording type, rather according back to search for video recordings after an event or a to identification or a keyword of the markings’ marking, or to view your saved images. name Continous Recording Event... - Page 63 Settings - Configuration Select one or more network cameras by activating the checkbox. Click on Search. Select one or more images from the list which appears. Click on Details to obtain more information about the im- ages.
-
Page 64: Log Search
Maintenance Maintenance Note Note This menu is used for device maintenance, and The information menu shows the technical data should only be operated by experienced users. for the device and information on the various set- tings of the cameras, recording etc. This can be useful for support queries, for exam- ple. - Page 65 Maintenance Power On Import / Export Abnormal Shutdown Start / Stop Audio Local Operation, e.g.: Shutdown / Reboot / Login / Logout / Configure Parame- ters / Upgrade / Start Re- cording Remote Operation, e.g.: Export Record File / Alarm Arming / ...
- Page 66 Maintenance Default Network Note Note Information regarding the network traffic and net- In this process, the device is reset to the factory de- work interfaces are shown here. fault settings. TAB network load Warning All settings made since the start of operation are deleted (cameras, recording settings, PTZ, alarms etc.)! Avoid data loss by backing up the settings in...
- Page 67 Maintenance Click Network to change your network settings (see In “Destination Address”, you can check the connection p. 124). to another device, such as a computer (‘pinging’). Enter the network address of the device to be checked (e.g. TAB Network Stat. 192.168.0.25) and press Test.
- Page 68 Video Export Video Export Duration Select the connected medium used for data storage from the drop-down menu. Note If the medium is not displayed, click on Refresh. The export function is used to store important re- If the medium is still not displayed, disconnect it from cordings on connected external media, such as: the device and reconnect the medium again.
-
Page 69: Event (Event Type 'Motion)
Video Export For both types of event, the following window appears af- Event (event type ‘Alarm input’) ter activating the Search button: Define the time span of the recording being searched for Select the files to be exported by activating or deactivat- by means of the selection fields at “Start time”... -
Page 70: Manual Management
Manual Management Manual Management Press the REC button or go to panic recording in the Alarm main menu in order to start a manual image / video re- cording or to switch to an alarm output. Record In order to switch on one of the alarm outputs, select the alarm output with a left click and click on Trigger for one, or Trigger All, to switch on all outputs. - Page 71 Troubleshooting Troubleshooting Before calling the Service department, read the following information to determine the possible cause of a malfunction. Malfunction Cause Solution No power Mains cable not connected Connect the mains cable securely to the socket Power switch set to OFF Turn the power switch to ON No current in the power socket Use another device on the socket, where...
-
Page 72: Technical Data
Technical data Technical data Subject is to alterations and errors. The dimensions are approximate values. ABUS digital recorder TVVR45030 Video compression H.264, MPEG-4 Hybrid-compatible Camera inputs Camera outputs none Monitor: 1 x BNC (1.0 V p-p, 75 Ω), 1 x VGA, 1 x HDMI... - Page 73 On the included CD you can find a program in order to calculate the required amount of memory. In addition you find this software for download on our homepage together with the ABUS CMS software. Overview monitor output combination...
- Page 74 Disposal Disposal Information on the EU directive on waste Change low batteries in good time. electrical and electronic equipment Always change all the batteries at the same time and use batteries of the same type. To protect the environment, do not dispose of the device with domestic waste at the end of its service life.
-
Page 75: Overview Of Specialist Terms
An address in the computer network based on the Inter- Name used for the identification of websites on the Inter- net protocol. Allows different devices to identify them- net (e.g. www.abus-sc.de). selves in a network so that they are accessed specifi- cally. - Page 76 MPEG PPPoE Moving Picture Experts Group – International standard PPP over Ethernet (point-to-point protocol) for the compression of moving images. On some DVDs, Network transmission method used for establishing a the digital audio signals are compressed and recorded in connection over dial-up lines. Used in ADSL connections, this format.
-
Page 77: Internal Hdd
Internal HDD Internal HDD The internal hard disk drive (HDD) is very sensitive. Operate the device according to the following instructions in order to avoid drive errors. Important recordings should be backed up on external media to avoid unexpected data loss. Note ... - Page 78 ABUS Network video recorder NVR TVVR45030 Manufacturer: ABUS Security-Center GmbH & Co. KG Linker Kreuthweg 5 86444 Affing (Germany)
Need help?
Do you have a question about the TVVR45030 and is the answer not in the manual?
Questions and answers