Abus TVVR30004 User Manual
Hide thumbs
Also See for TVVR30004:
- Quick manual (162 pages) ,
- User manual (569 pages) ,
- Quick manual (16 pages)
Table of Contents
Advertisement
Quick Links
Advertisement
Table of Contents

Related Manuals for Abus TVVR30004


Summary of Contents for Abus TVVR30004
- Page 1 ABUS 4-channel digital recorder TVVR30004 User guide Version 1.0...
- Page 2 English This user guide contains important information on starting operation and using the device. Make sure that this user guide is handed over when the product is given to other persons. Keep this user guide to consult later. A list of contents with the corresponding page number can be found in the index.
-
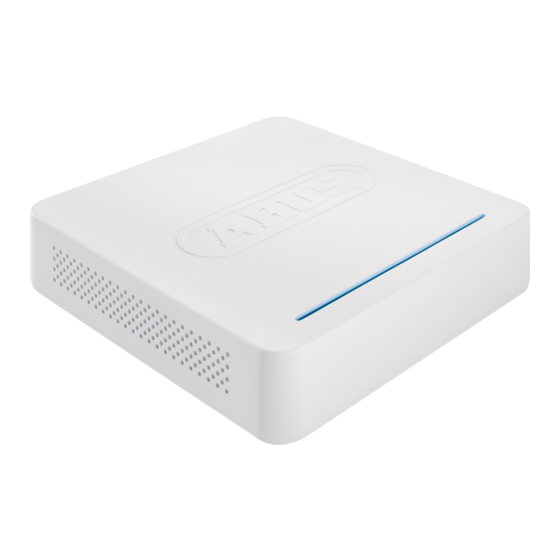
Page 3: Device Overview
Device overview Device overview Rearside LED illumination... -
Page 4: System Operation
System operation System operation General information The device can be controlled as follows: Using the USB mouse Connections on the rear of the device Note Pay attention to the overview on page 60. Name Function VIDEO IN: BNC video inputs VIDEO OUT: BNC video output ... -
Page 5: Mouse Operation
System operation Mouse operation Note Further descriptions in these operating instruc- tions are made with the mouse. The device is suitable for use with a USB mouse. Connect the mouse to the USB port. Button Function Left Single-click: Selection in the menu, activation of an input field or a TAB, display of the Quick Set menu Double-click:... -
Page 6: Table Of Contents
Contents Device overview ................................60 System operation ................................61 General information ............................... 61 Connections on the rear of the device ........................... 61 Mouse operation ................................62 Quick guide..................................66 Before you start ................................66 Installing the HDD ................................66 Establishing the connections ............................66 Configuring the device .............................. - Page 7 Contents Playback screen ................................78 Using the control panel ..............................78 Right click when playback is running ..........................79 Main menu ..................................80 Menu overview ................................80 Menu description ................................80 Menu description ................................81 Configuration.................................. 82 Overview ..................................82 General ..................................
- Page 8 Contents Troubleshooting ................................108 Device cleaning and care ............................108 Note ....................................108 Technical data ................................109 Disposal ..................................110 Information on the EU directive on waste electrical and electronic equipment ............110 Information on handling batteries ..........................110 Important information on disposing of batteries ......................110 Information on the European RoHS directive ......................
-
Page 9: Quick Guide
Pay attention to the required earthing of the de- vice to avoid static discharge. Note Install one or more HDDs (see the separate quick Check the ABUS homepage (www.abus.com) if for this device any firmware updates are avail- guide). able and install these First make a connection to the motherboard with the blue data cable (small connector). -
Page 10: Important Safety Information
Important safety information Important safety information Explanation of symbols General information The following symbols are used in this manual and on the Before using the device for the first time, read the follow- device: ing instructions carefully and pay attention to all warn- ings, even if you are already familiar with electronic de- Symbol Signal word Meaning vices. -
Page 11: Overloading / Overvoltage
Important safety information To avoid the possibility of fires, the plug should always be Installation location / operating environ- disconnected from the network socket if the device is not ment used for long periods. Disconnect the device from the mains power supply before impending electrical storms, Position the device on a firm, level surface and do not or use an uninterruptible power supply. -
Page 12: Care And Maintenance
Important safety information Care and maintenance Putting into operation Maintenance is necessary if the device has been dam- Observe all safety and operating instructions before aged. This includes damage to the plug, mains cable and putting the device into operation for the first time. housing, penetration of the interior by liquids or foreign ... -
Page 13: Introduction
ABUS Se- curity-Center GmbH is not liable or responsible for direct or indirect damages resulting from the equipment, performance and use of this product. -
Page 14: On-Screen Keyboard
Introduction On-screen keyboard Switching off, locking and rebooting the The on-screen keyboard appears after clicking on a text device entry field with the mouse: Click on “ShutDown” in the main menu. The overview appears. The following screen keyboard appears during mere nu- merical entry: To switch off the device, select ShutDown and con- firm by pressing Yes. -
Page 15: Status Displays
Status displays Status displays General information The following status displays indicate the current operat- ing state: LEDs on the front of the device Acoustic signal tones Icons (display elements) on the monitor Note Pay attention to the information in the separate quick guide. -
Page 16: Setup Wizard
Setup wizard Setup wizard Setting up the system Setting up the administrator The setup wizard guides you through the necessary Warning basic system settings. The DVR is then set up for record- Note down the admin password. ing and surveillance. The following password is preset Note “1 2 3 4 5”... -
Page 17: Network Settings
Setup wizard Network Settings HDD Management To set up a new hard disc, activate the “Check box” Note with a left click and then click on Init. To check whether DHCP can be selected (or if Warning you have to set the IP address and other settings manually), consult your network administrator. -
Page 18: Live View
Live view Live view Status symbols Overview The live view starts automatically after the device is The following symbols are displayed depending on switched on. the operating status of the device: Symbol Meaning You can also go back to the live view by pressing the Menu key repeatedly. -
Page 19: Selection Bar In The Camera Image
Live view Note Stop Auto-switch: Specify the delay in the image sequence in the display settings. Note Activation of “AUX monitor” without a connected spot monitor: Mouse pointer function is deactivated. Selection bar in the camera image Click on the camera image in single or multi view. A sel- ection bar appears: (1) (2) No. -
Page 20: Settings
Live view Setting the camera output Settings You can display a maximum of 4 cameras simultaneously Note in the live view. The live view can be set as follows. Click on the TAB “View”. Open the main menu, then click on “Configuration”. Then click on “Liveview”: Select the display mode. -
Page 21: Playback
Playback Playback General information Using the control panel Playback can be made in three different ways: The control panel (4) is used for controlling the running Through the video search in the main menu playback. The symbols have the following meaning: ... -
Page 22: Right Click When Playback Is Running
Playback Note You can zoom in on the screen image. Right-click in the running playback. Please choose ’Digital Zoom‘. The zoom mode is active. Shift the zoom area by means of the window in the miniature screen. ... -
Page 23: Main Menu
Main menu Main menu Menu overview The following overview shows the main menus used to set and control the device. Furthermore you can find important information regarding the devide on the right side of the menu. Click on the menu to open it. ... -
Page 24: Menu Description
Main menu Menu description Menu description page Configuration Used for managing all device settings (General, Network, Live View, Excep- tion, User). Camera Menu for setting camera parameters (OSD configuration, image mode, mo- tion recognition, Private Zone, Tamper Monitoring, Video Loss). Record Menu to set recording parameters (time plan, camera resolution, camera stream etc.). -
Page 25: Configuration
Configuration Configuration General Note “General” tab Setting The “Configuration” menu is used to manage all device settings. Language Language on the OSD CVBS Output PAL / NTSC Warning Standard Ensure that the date and time are set correctly. Resolution Resolution on the monitor IMPORTANT: Time Zone GMT (Greenwich Mean Time) -
Page 26: Terms And Definitions
Configuration Terms and definitions Note An overview of relevant terms when using the device in a Activate remote access network can be found below. Activate this function to enable optimum technical Parameter Setting support. IP address An IP address is the unique address of a TAB “DST set- Setting network device within a network. -
Page 27: Network Layout
Configuration Network-configuration Port A port is an interface used for communi- cation by different programs. Certain ports are fixed (23: Telnet, 21: FTP), whilst others can be freely selected. Ports are important for different applica- tions (e.g. external access to the device over a browser). - Page 28 Note In certain modes some of these settings cannot be To use the ABUS DDNS function, you must first set selected. up an account under www.abus-server.com. Please note the FAQs on the website when doing this. Tick the “Enable DDNS” box, enter ‘ABUS DDNS’ as the “DDNS Type”, then enter www.abus-server.com...
- Page 29 Configuration Enable SSL Tick the box to activate the e-mail encryption Sender Name of the sender Sender´s Corresponding e-mail address for Adresse the e-mail account Sender´s Recei- Select three possible recipients for the e-mail Receiver Enter the name of the recipient here Receiver´s Ad- Enter the e-mail address of the resse...
- Page 30 Configuration UPnP Note Server port 8000 and HTTP port 80 are the stand- ard ports for remote clients and remote Internet browser access. Parameter Setting Enable UPnP Tick box to activate visibility in an IP network. Mapping Type Select here whether port mapping is to be conducted automatically or manually.
-
Page 31: Warning
Configuration You can add new users, delete existing users and Warning change the settings in the “User Management” menu. To add a new user, select Add. You can trigger a warning for the following error types: Parameter Setting User Name Unique identification ... - Page 32 Configuration Permission Control the access rights of the user by clicking the “Permission” symbol. Only the access data of users add- ed manually can be changed: Note The user can make the settings locally (i.e. on the device) or change the parameters. The user can access the device via the network connection.
-
Page 33: Camera
Camera Camera Motion Select the camera channel under “Camera”. Select the checkbox for the motion detection. Camera Camera to be set Allocation of camera name Camera Name Activate / deactivate display of Display Name Note camera name in the live view In order to record using the motion recognition, you Activate / deactivate display of Display Date... -
Page 34: Private Zone
Camera Armin Schedule Confirm the settings by clicking Apply and leave the menu with OK Select the TAB Arming Schedule. Here you set the times when the reactions in the TAB Reaction are triggered. Private Zone Select the camera channel under “Camera”. Select the checkbox for activating the private zone. -
Page 35: Tamper Monitoring
Camera Tamper monitoring Select the camera channel under “Camera”. Select the checkbox for activating tamper monitoring. Parameter Notification Full Screen Monitoring The camera is displayed as a full-screen picture in live cast Audible Warning The device emits a repeat- ing tone Armin Schedule Send E-Mail An e-mail is sent to a specif-... -
Page 36: Video Signal Loss
Camera Video signal loss Handling Click on the TAB Handling. Select the camera channel under “Camera”. Here you can configure the behavior of the recorder dur- Set the checkmark for the alarm in the event of a “Video ing a detected event (for example: motion got detected) Loss”. -
Page 37: Setting Up
Record Record Setting up Open the main menu and click on record: Schedule The schedule is used to specify the recording times and triggers (recording type) for the cameras. Click on the “Schedule” tab: Note Because there is no difference between the set- tings for the TABs record and instant image, these are only listed once. -
Page 38: Record
Encoding Encoding Record Confirm the settings by clicking Apply and exit the menu The schedule is used to specify the recording times and with OK. triggers (recording type) for the cameras. TAB Substream The following setting options are available in this sub- menu: The following parameters can be set: Camera... -
Page 39: Advanced Settings
Encoding Advanced settings Manual name entry of the vaca- Holiday Name tion or holiday Activate or deactivate the set va- Enable cation According to date / week / month Mode Selection of start date / start time Start Date Selection of end date / end time End Date Confirm your settings with Apply and OK. -
Page 40: Hdds
HDDs HDD Management parameters Note The device can manage one 2.5" SATA hard disk drive. Each of the installed HDDs must be initialised be- fore the device can be used for recording. The de- vice only detects the HDD and its assignment af- ter initialisation has been made. -
Page 41: Hdd Settings Of The Cameras
This information helps to recognise hard disc errors. For HDD settings of the cameras this reason, do not deactivate this feature if possible. Click on the “Advanced” submenu Mode: Storage Selection of the hard disk drive to be processed. Self-test status Shows the status of the current self- test Self-test type... -
Page 42: Recording
Panic recording Panic recording Recording Press the REC button or navigate to Panic Recording in the main menu to start manual picture/video recording. Click on the “Recording” submenu. Analog Select the settings for all cam- eras Click “Off” or “On” to change the settings. -
Page 43: Continous Recording
Playback Playback Press Configuration in the main menu and then Play- fore not listed separately. back to search for video recordings after an event or a In the sub-menu ‘Tag’, searching does not take marking, or to view your saved images. place according to recording type, rather according to identification or a keyword of the markings’... -
Page 44: Video Export
Video Export Video Export Duration Select the connected medium used for data storage from the drop-down menu. If the medium is not displayed, click on Refresh. If the medium is still not displayed, disconnect it from Note the device and reconnect the medium again. See al- The export function is used to store important re- so the manufacturer’s specifications. -
Page 45: Event (Event Type 'Motion')
Video Export Event (event type ‘Motion’) Define the time span of the recording being searched for by means of the selection fields at “Start time” and “End time”. Select the camera by activating or deactivating the check box and click Search. For both types of event, the following window appears af- ter activating the Search button: Select the files to be exported by activating or deactivat-... -
Page 46: Maintenance
Maintenance Maintenance Note Note This menu is used for device maintenance, and The information menu shows the technical data should only be operated by experienced users. for the device and information on the various set- tings of the cameras, recording etc. This can be useful for support queries, for exam- ple. -
Page 47: Import / Export
Maintenance Operation Click on Export to back up the log file on a USB me- dium. Power On Abnormal Shutdown Import / Export Start/Stop Audio Local Operation, e.g.: Shutdown/Reboot/Login/ Logout/Configure Parame- ters/Upgrade/Start Record- Remote Operation, e.g.: Export Record File/Alarm Arming/ ... -
Page 48: Default
Maintenance Select the USB port (click on Refresh, if necessary). Network Select the upgrade file and click on Upgrade. Wait until the device reboots. Check the firmware status in the “Maintenance” menu under “System Info”. Note Upgrades via FTP are made in the same way as detailed above. - Page 49 Maintenance 1. For “Device Name”, select a storage medium to save TAB Network Detection the settings to. 2. Click Export. After the progress display finishes and initializa- tion is successful, an information window ap- pears. Close it with OK. Click Status to display the status of the LAN connec- In “Destination Address”, you can check the connection tions (connected/not connected).
-
Page 50: Shutdown
Shutdown Shutdown Note Select “Lock” to lock the operating menu. Select “ShutDown” to switch off the device. Select “Reboot” to reboot the system (switch off and back on). Display Note See description on page 75. Settings: Recording Note See description on page 94. -
Page 51: Troubleshooting
Troubleshooting Troubleshooting Before calling the Service department, read the following information to determine the possible cause of a malfunction. Malfunction Cause Solution No power Mains cable not connected Connect the mains cable securely to the socket Power switch set to OFF Turn the power switch to ON No current in the power socket Use another device on the socket, where... -
Page 52: Technical Data
Technical data Technical data Subject is to alterations and errors. The dimensions are approximate values. ABUS digital recorder TVVR30004 Video compression H.264 Camera inputs Monitor: 1 x BNC (1.0 V p-p, 75 Ω), 1 x VGA Monitor outputs Operating mode... -
Page 53: Disposal
Disposal Disposal Information on the EU directive on waste Change low batteries in good time. electrical and electronic equipment Always change all the batteries at the same time and use batteries of the same type. To protect the environment, do not dispose of the device with domestic waste at the end of its service life. -
Page 54: Glossary
Domain this format. Name used for the identification of websites on the Inter- net (e.g. www.abus-sc.de). Network Time Protocol Dual Stream Method for synchronising the time across networks. Dual stream is a video transmission method. A high-... - Page 55 Glossary ZOLL (inches) Typical unit of screen size. One inch is equivalent to 2.54 Phase Alternating Line – European colour TV system. centimetres. The most common sizes of 16:9 displays Uses 576 visible image lines. Together with the lines are 26 inch (66 cm), 32 inch (81 cm), 37 inch (94 cm), 42 used for signal management, a full-screen image is com- inch (106 cm), 50 inch (127 cm) and 65 inch (165 cm).
-
Page 56: Internal Hdd
Internal HDD Internal HDD The internal hard disk drive (HDD) is very sensitive. Operate the device according to the following instructions in order to avoid drive errors. Important recordings should be backed up on external media to avoid unexpected data loss. Note ... - Page 57 ABUS 4-channel digital recorder TVVR30004 Manufacturer: ABUS Security-Center GmbH & Co. KG Linker Kreuthweg 5 86444 Affing (Germany)
Need help?
Do you have a question about the TVVR30004 and is the answer not in the manual?
Questions and answers