KitchenAid Artisan 5KES100 User Instructions
Espresso machine
Hide thumbs
Also See for Artisan 5KES100:
- Manual (213 pages) ,
- Manual to expert results (214 pages) ,
- Manual to expert results (214 pages)

Related Manuals for KitchenAid Artisan 5KES100


Summary of Contents for KitchenAid Artisan 5KES100
- Page 1 ArtisAn EsprEsso MAchinE ™ GUiDE to EXpErt rEsULts Model 5KEs100 Espresso Machine...
-
Page 2: Table Of Contents
Troubleshooting Espresso as it Brews ..........15 Cleaning the Housing and Accessories .........10 A Glossary of Espresso Drinks ................15 Cleaning the Shower Screen ..............11 Household KitchenAid™ Espresso Machine Warranty .....16 Priming After Long Periods of Non-Use .........11 Service Centers ......................16 Descaling ......................11 Customer Service......................16... -
Page 3: Important Safeguards
iMportAnt sAfEGUArDs When using electrical appliances, basic safety precautions should always be followed, including the following: 1. Read all instructions. 2. Do not touch hot surfaces. Use handles or knobs. 3. To protect against fire, electric shock and personal injury do not immerse cord, plugs, or appliance in water or other liquids. -
Page 4: Model 5Kes100
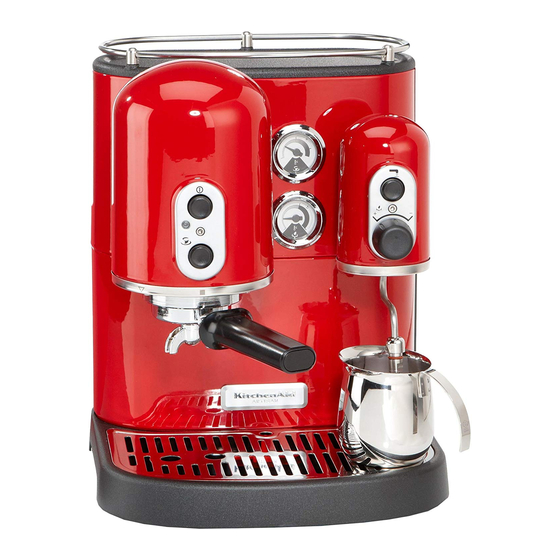
Model 5KEs100 Cup Rail Espresso ( ) Boiler Temperature Gauge O/I Power Switch Hot Water ( Button Power-On (I) Indicator Steam ( ) Dial Espresso ( ) Button Brew Head Filter holder Frothing Arm & Nozzle Water Tank (in back) Frothing ( ) Boiler Temperature Gauge... - Page 5 Espresso Machine features Brew head filter holder Commercial-size brew head is chrome-plated brass for Commercial-size filter holder features chrome-plated brass exceptional durability and brew temperature stability. construction and an easy-to-grip flared handle. Attaches to the Brewing boiler is bolted directly to group head, so brew brew head with a firm twist to the right.
-
Page 6: Preparing The Espresso Machine For Use
preparing the Espresso Machine for Use Attach the cup rail fill and rinse the Boilers Align the three rail posts with the holes on top of the espresso The boilers need to be filled and rinsed before the espresso machine. Then press the rail posts firmly into machine is used for the first time. -
Page 7: Brewing Espresso
preparing the Espresso Machine for Use 7. Press the “ ” Button – it is not necessary to wait for the 9. Slowly open the “ ” Dial by turning it counter-clockwise, boiler to heat. This activates the water pump and fills the then press and hold the “... - Page 8 Brewing Espresso When the espresso boiler temperature gauge needle climbs 12. After removing the filter holder, place a cup under the brew into the “ ” zone, the espresso machine is ready to brew. head and press the “ ” Button for a second or two. This 7.
-
Page 9: Frothing And Steaming Milk
frothing and steaming Milk Frothing and steaming milk requires a bit of practice, but you’ll 6. Slowly open the “ ” Dial by turning it counter-clockwise. be surprised how quickly your skills will develop. The Artisan™ The farther the “ ”... -
Page 10: Dispensing Hot Water
Dispensing hot Water Hot water can also be dispensed from the frothing arm. This provides a convenient way to make Americanos, tea, or hot chocolate. Filling a demitasse with hot water is also a great way to warm it before brewing espresso. notE: It is recommended not to exceed 60 seconds when producing steam or getting hot water. -
Page 11: Cleaning The Shower Screen
– coffee may be too firmly tamped If the problem cannot be fixed with the steps above, see the KitchenAid™ Espresso Machine Warranty on page 16.* * Do not return the Espresso machine to the retailer – they do not provide service. -
Page 12: What Is Espresso
What is Espresso? Espresso began as an attempt in the 1800s to quickly brew tested and refined to produce the standards we have today: coffee on demand, by the cup. The goal was to serve the one cup (30 ml) of true espresso comes from exposing 7 grams freshest, most flavorful coffee possible and avoid the burned, of finely ground and packed coffee to 90–96º... -
Page 13: Espresso Brewing Technique
Espresso Brewing technique Brewing temperature Dosing Water temperature and temperature consistency have a direct Dosing is the process of measuring ground coffee into the impact on the flavor of espresso. Great espresso comes from filter basket. A single cup (30 ml) of espresso requires brewing at an optimum temperature, ideally between 90º–96º... -
Page 14: Tamping
The best solution is to invest in completely around twice. the KitchenAid™ Artisan™ Burr Grinder. If this isn’t possible, 5. Inspect your tamp. The coffee disc should be smooth and experiment with the tamping pressure. Tamp with less force for level with no gaps between the side of the filter basket and a faster pour, and more force for a slower one. -
Page 15: Troubleshooting Espresso As It Brews
Espresso Brewing technique troubleshooting Espresso as it Brews …is thin and fast-flowing: • review your tamping technique – the tamp may not be As it pours, if your espresso… firm enough to provide an even resistance to the brew water …has more of a cinnamon color, •... -
Page 16: Household Kitchenaid™ Espresso Machine Warranty
One Year Full Warranty from date installation/ operation not in of purchase. accordance with local electrical codes. KitchEnAiD DoEs not AssUME AnY rEsponsiBiLitY for inDirEct DAMAGEs. service centers All service should be handled locally by an authorized in the U.K.: in Australia: KitchenAid Service Center.
Need help?
Do you have a question about the Artisan 5KES100 and is the answer not in the manual?
Questions and answers