CyClone SC300 Installation And Operation Instructions Manual
Self-cleaning range hoods
Hide thumbs
Also See for SC300:
- Installation and operation instructions manual (15 pages) ,
- Use and care manual (2 pages) ,
- Use and care manual (2 pages)
Table of Contents
Advertisement
Self-Cleaning Range Hoods
Wall Mount and Island Range Hoods
Models:
SC(B)500, SC(B)501, SC(B)502, SC(B)503, SC510,
SC(B)513, SC(B)514, SI(B)323, SI(B)520, SI(B)521,
SI(B)522, SI(B)523, SI530, SI531
SC322, SCB722, SC712, SC(B)715, SCB717,
SCB718, SC720, SC(B)722
Installation and Operation Instructions
Please read all instructions before installing and operating.
All wiring and installation must be in accordance with CEC, NEC and local electrical codes.
READ AND SAVE THESE INSTRUCTIONS
Advertisement
Table of Contents

Related Manuals for CyClone SC300


Summary of Contents for CyClone SC300
-
Page 1: Installation And Operation Instructions
Self-Cleaning Range Hoods Wall Mount and Island Range Hoods Models: SC(B)500, SC(B)501, SC(B)502, SC(B)503, SC510, SC(B)513, SC(B)514, SI(B)323, SI(B)520, SI(B)521, SI(B)522, SI(B)523, SI530, SI531 SC322, SCB722, SC712, SC(B)715, SCB717, SCB718, SC720, SC(B)722 Installation and Operation Instructions Please read all instructions before installing and operating. All wiring and installation must be in accordance with CEC, NEC and local electrical codes. - Page 2 Cyclone Canopy Installation - English...
-
Page 3: Important Safety Instructions
• The hood motor has a thermal overload that will automatically shut off the motor if it becomes overheated. The motor will restart. If the motor continually shuts off and restarts, contact the Cyclone service department. Ensure that the hood is mounted at the recommended mounting height. • This product may have sharp edges. Be careful to avoid cuts and abrasions during installation and cleaning. -
Page 4: Table Of Contents
Wall Mount Installation - Parts Supplied Wall Mount Hood Installation Island Installation - Tools and Materials Required Island Installation - Parts Supplied Island Hood Installation Canopy Hoods Specifications Troubleshooting Control Panel Maintenance Cyclone Range Hoods Limited Warranty Cyclone Canopy Installation - English... -
Page 5: Damage Inspection
Soffit or crawl space • 6” round ductwork must be used to maintain maximum air flow efficiency with motors of 300 CFM or greater. If Side wall cap with the use of any size ducting is less than 6”, the warranty is gravity damper automatically voided. • The venting duct must go horizontally or vertically up to the outside wall or the roof. If it is turned downward anywhere in the venting system, the warranty is automatically voided. Fasten all connections with sheet metal screws and tape all joints with certified silver tape or duct. Do not cut a joist or stud unless absolutely necessary. If a joist or stud must be cut then a supporting frame must be constructed. Before making cutouts make sure there is proper clearance within Side wall cap with the ceiling or wall for the exhaust vent. gravity damper Additional parts not provided. Cyclone Canopy Installation - English... -
Page 6: Mounting Heights And Clearance
Install the Electrical Power Supply This appliance must be grounded. Position the outlet or junction box within the space covered by the This appliance is equipped with a cord having a grounding wire or duct cover. Place the outlet or junction box at a maximum distance with a plug having grounding wire. The grounding wire must be of 24” from where the cord exits from the hood. The center of the grounded properly in the junction box or the plug must be plugged outlet or junction box should be positioned at 2 ¾” away from the into an outlet that is properly installed and grounded. center of the future hood location. Make sure this does not interfere with the mounting area or with the duct cover. 1. Connect the power line ground wire to the green ground wire supplied with the hood. 2. Connect the black power wire to the black wire supplied with the hood. 3. Connect the white neutral wire to the white wire supplied with the hood. Black: Power M in : 3 ” White: Neutral Green: Ground Cyclone Canopy Installation - English... -
Page 7: Wall Mount Installation - Tools And Materials Required
4 × Drywall Anchors 2 × Washers 6 × Damper Screws (Long and Medium, 2 each) (Large and Small, 2 each) 2 × Top Chimney Screws SC500, SC711, SC715 ONLY: 2 × Bottom Chimney Screws Cyclone Canopy Installation - English... -
Page 8: Wall Mount Hood Installation
10. Install 6” round duct over the adapter, connect it with the venting duct coming from the wall or ceiling. Use metal foil duct tape to seal the joint. 11. Install electrical connection. Turn on the hood and check for leaks around duct tape. 12. Place telescopic duct covers onto hood and extend inner top duct cover upwards and secure to duct cover bracket. 13. Reinstall filters to the hood. Remove protective plastic film Figure 3. covering the duct covers and hood. Ceiling Screw Locations Mounting Bracket Flush with Ceiling Cyclone Canopy Installation - English... -
Page 9: Island Installation - Tools And Materials Required
1 × Plastic Damper Cover 2 or 4 × G4 Type Lights (12V, 20W) HARDWARE PACKAGE 4 × Mounting Screws 4 × Washers 6 × Damper Screws 20 × Mounting Bracket Screws SI520 ONLY 2 × Bottom Chimney Screws Cyclone Canopy Installation - English... -
Page 10: Island Hood Installation
Range Hood Bottom 4 ⅜” Figure 5. 6” Round Ceiling Joists Ductwork Determine the required distance between the ceiling and the top of the blower box (D) based upon ceiling height (C), desired height of hood above cooktop (A) and unit height (B): D=C-A-B Cross Framing The height D is the installation height of the mounting bracket (Figure 3) . If the installation height D is less than 22”, the mounting bracket and duct covers may need to be cut. The duct covers needs a Upper Mounting Bracket clean cut and must to be cut from bottom end sides for both inside and outside pieces. For optimal clearance, the minimum mounting should be 30” above the cooking surface. Cyclone Canopy Installation - English... - Page 11 Note: For some models, the “L” shape support frame may be used (Figure 8). The installation procedures are same except that the hood is mounted on one side. If need be, use an adjustable string wire from other side to keep the hood level. Cyclone Canopy Installation - English...
-
Page 12: Canopy Hoods Specifications
6” ROUND TOP 6” ROUND TOP 6” ROUND TOP 6” ROUND TOP 120V 120V 120V 120V 120V AC INPUT 60Hz 60Hz 60Hz 60Hz 60Hz 170W 280W 280W 280W 280W POWER CONSUMPTION 2.5A 2.5A 2.5A 2.5A 2.5A MOUNTING HEIGHT 28”-36” 28”-36” 28”-36” 28”-36” 28”-36” Cyclone Canopy Installation - English... - Page 13 Max 45 ¼” 10 ¼” 1 ¾” 17 ¾” 30”/36” 9 ¼” 8” Min. 27 ¾” Max. 45 ¼” 29 ½” or 35 ½” 17 ¾” FRONT SIDE 6 ¼” Φ 6” 7 ⅛” 3 1/4” BACK Cyclone Canopy Installation - English...
- Page 14 27 ¾” Max 45 ¼” 11” 1 ¾” 17 ¾” 23 ½” 9 ¼” 8” Min. 27 ¾” Max. 45 ¼” 23 ½” 17 ¾” FRONT SIDE 6 ¼” Φ 6” 7 ⅛” 3 1/4” BACK Cyclone Canopy Installation - English...
- Page 15 10 ½” Min. 23 ½” Min. 23 ½” Max. 44 ½” Max. 44 ½” 23 ¼” 17” 19 ¾” 29 ½” or 35 ½” FRONT SIDE 7 ¾” Φ 6” 9 ½” 5 ¼” BACK Cyclone Canopy Installation - English...
- Page 16 2” 19 ¾” 30”/36” 10 ½” 11 ¾” Min. 23 ½” Max. 44 ½” 23 ¼” 17” 29 ½” or 35 ½” 19 ¾” FRONT SIDE 7 ¾” Φ 6” 9 ½” 5 ¼” BACK Cyclone Canopy Installation - English...
- Page 17 2” 19 ¾” 30”/36” 11 ¾” 10 ½” Min. 23 ½” Max. 44 ½” 23 ¼” 17” 29 ½” or 35 ½” 19 ¾” FRONT SIDE 7 ¾” Φ 6” 9 ½” 5 ¼” BACK Cyclone Canopy Installation - English...
- Page 18 1 ¾” 19 ¾” 30”/36” 10 ½” 11 ¾” Min. 23 ½” Max. 44 ½” 19 ¾” 29 ½” or 35 ½” FRONT SIDE 7 ¾” Φ 6” 9 ½” 5 ¼” 6 ¼” BACK Cyclone Canopy Installation - English...
- Page 19 19 ½” 30”/36” 11 ¾” 10 ½” Min. 24 ½” Max. 45 ½” 24 ¼” 16 ½” 29 ½” or 35 ½” 19 ½” FRONT SIDE 7 ¾” Φ 6” 9 ½” 5 ¼” BACK Cyclone Canopy Installation - English...
- Page 20 Max 44 ½” 2 ¾” 19 ½” 30”/36” 10 ½” 11 ¾” Min. 23 ½” Max. 44 ½” 19 ½” 29 ½” or 35 ½” FRONT SIDE 7 ¾” Φ 6” 9 ½” 5 ¼” BACK Cyclone Canopy Installation - English...
- Page 21 23 ½” Max 44 ½” 2 ¾” 19 ½” 24” 10 ½” 11 ¾” Min. 23 ½” Max. 44 ½” 19 ½” 23 ½” FRONT SIDE 7 ¾” Φ 6” 9 ½” 5 ¼” BACK Cyclone Canopy Installation - English...
- Page 22 12” 10 ¾” 23 ½” 26” Max: 49” 2 ¾” 23 ½” 30” 10 ¾” 12” Min. 26” Max. 49” 29 ½” 23 ½” FRONT SIDE Φ 6” 8 ¾” 3 ¾” FRONT WITHOUT FLUE Cyclone Canopy Installation - English...
- Page 23 10 ¾” 23 ½” 30” Max: 53” 6 ½” 1 ¾” 23 ½” 36” 12” 10 ¾” Min. 30” Max. 53” 35 ½” 23 ½” FRONT SIDE Φ 6” 8 ¾” 3 ¾” FRONT WITHOUT FLUE Cyclone Canopy Installation - English...
- Page 24 2 ½” 23 ½” 18” 36” 12” 10 ¾” Min. 26” Min. 26” Max. 49” Max. 49” 23 ¼” 18” 23 ½” 35 ½” FRONT SIDE Φ 6” 8 ¾” 3 ¾” FRONT WITHOUT FLUE Cyclone Canopy Installation - English...
- Page 25 23 ½” 25” Max: 48” 1 ¾” 23 ½” 18” 36” 10 ¾” 12” Min. 25” Max. 48” 23 ¼” 18” 35 ½” 23 ½” FRONT SIDE Φ 6” 8 ¾” 3 ¾” FRONT WITHOUT FLUE Cyclone Canopy Installation - English...
- Page 26 12” 10 ¾” 23 ½” 26” Max: 49” 2 ¾” 23 ½” 36” 10 ¾” 12” Min. 26” Max. 49” 35 ½” 23 ½” FRONT SIDE Φ 6” 8 ¾” 3 ¾” FRONT WITHOUT FLUE Cyclone Canopy Installation - English...
- Page 27 10 ¾” 23 ½” 25” Max: 48” 1 ¾” 23 ½” 36” 11 ¾” 10 ½” Min. 25” Max. 48” 21” 23 ½” 35 ½” FRONT SIDE Φ 6” 8 ¾” 3 ¾” FRONT WITHOUT FLUE Cyclone Canopy Installation - English...
- Page 28 Max 49” 1 ½” 1 ½” 23 ½” 36” 10 ½” 11 ¾” Min. 26” Max. 49” 18” 24 ¼” 35 ½” 23 ½” FRONT SIDE Φ 6” 8 ¾” 3 ¾” FRONT WITHOUT FLUE Cyclone Canopy Installation - English...
- Page 29 Max: 44 ½” 1.75” 19 ¾” 24”/30” 10 ½” 11 ¾” Min. 23 ½” Max. 44 ½” 19 ¾” 23 ½” or 29 ½” FRONT SIDE 7 ¾” Φ 6” 9 ½” 5 ¼” BACK Cyclone Canopy Installation - English...
- Page 30 Max: 47 ½” 12” 2 ½” 17 ¾” 30”/36” 9 ¼” 8” Min. 30” Max. 47 ½” 29 ½” or 35 ½” 17 ¾” FRONT SIDE 6 ¼” Φ 6” 7 ⅛” 3 ¼” BACK Cyclone Canopy Installation - English...
- Page 31 Max: 44 ½” 2” 19 ¾” 36” 12” 10 ½” Min. 23 ½” Max. 44 ½” 16 ½” 15 ¼” 35 ½” 19 ¾” FRONT SIDE 7 ¾” Φ 6” 9 ½” 5 ¼” BACK Cyclone Canopy Installation - English...
- Page 32 26 ½” Max: 40” 12 ½” 1 ½” 21” 30”/36” 10 ½” 8” Min. 26 ½” Max. 40” 29 ½” or 35 ½” 21” SIDE FRONT 7 ¼” Φ 6” 9 ½” 3 ¼” BACK Cyclone Canopy Installation - English...
- Page 33 Distance from front panel to wall: 16” 10 1/2” 11 3/4” Min. 28” Max. 46 1/2” 25 3/4” or 30 3/4” 16” 29 1/2” or 35 1/2” FRONT SIDE 7 3/4” 9 9/16” Φ 6” 5 1/4” BACK Cyclone Canopy Installation - English...
- Page 34 Max: 46 ½” 16” 36” Distance from front panel to wall: 16” 11 ¾” 10 ½” Min. 28” Max. 46 ½” 16” 35 ½” SIDE FRONT 7 ¾” 9 ½” Φ 6” 5 ¼” BACK Cyclone Canopy Installation - English...
- Page 35 Max: 44 ½” 1 3/4” 19 ¾” 30”/36” 10 ½” 11 ¾” Min. 23 ½” Max. 44 ½” 19 ¾” 29 ½” or 35 ½” FRONT SIDE 7 ¾” Φ 6” 9 ½” 5 ¼” BACK Cyclone Canopy Installation - English...
- Page 36 Max: 44 ½” 1.75” 19 ¾” 30”/36” 10 ½” 11 ¾” Min. 23 ½” Max. 44 ½” 29 ½” or 35 ½” 19 ¾” FRONT SIDE 7 ¾” Φ 6” 9 ½” 5 ¼” BACK Cyclone Canopy Installation - English...
- Page 37 21 ½” 23 ¼” Max: 44 ½” 1.75” 19 ¾” 24” 10 ½” 11 ¾” Min. 23 ½” Max. 44 ½” 19 ¾” 23 ½” FRONT SIDE 7 ¾” Φ 6” 9 ½” 5 ¼” BACK Cyclone Canopy Installation - English...
-
Page 38: Troubleshooting
3. Call for assistance. 4. Defective light transformer. 4. Change transformer. Servicing may be required. The hood is not venting 1. The hood might be hanging too high from the 1. Adjust the distance between the cook top and out properly. cook top. the bottom of the hood within 28” - 36” above the range. 2. Blockage in the duct opening or ductwork. 2. Remove all the blocking from the duct work or duct opening. 3. Using the wrong size of ducting. 3. Use at least 6” duct work. Cyclone Canopy Installation - English... -
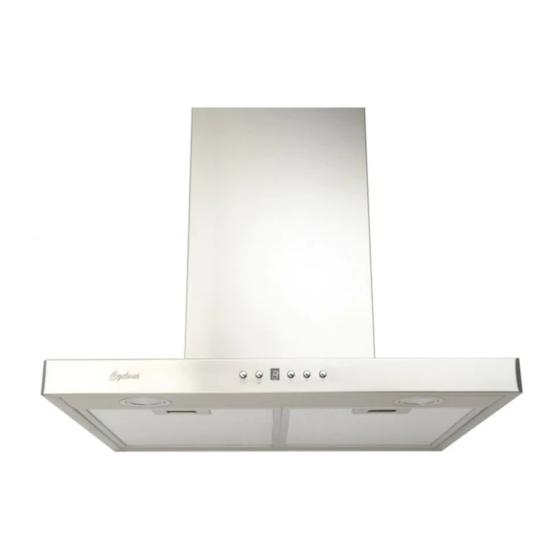
Page 39: Control Panel
30 to 60 days depending on cooking habits. the slots and insert back into place. Filters may be placed in the dishwasher on low heat or soaked in warm, soapy water. Spray degreasing detergent and leave to soak if heavily soiled. Cyclone Canopy Installation - English... -
Page 40: Cyclone Range Hoods Limited Warranty
CYCLONE RANGE HOODS LIMITED WARRANTY Cyclone Range Hoods Inc. (hereunder called Company”) provides a warranty that its products are free from defects in workmanship and materials for a period of two (2) years from the date of purchase. warranty includes in-home service (where applicable) for the year and workshop service for the second year.
Need help?
Do you have a question about the SC300 and is the answer not in the manual?
Questions and answers