Table of Contents
Advertisement
Quick Links
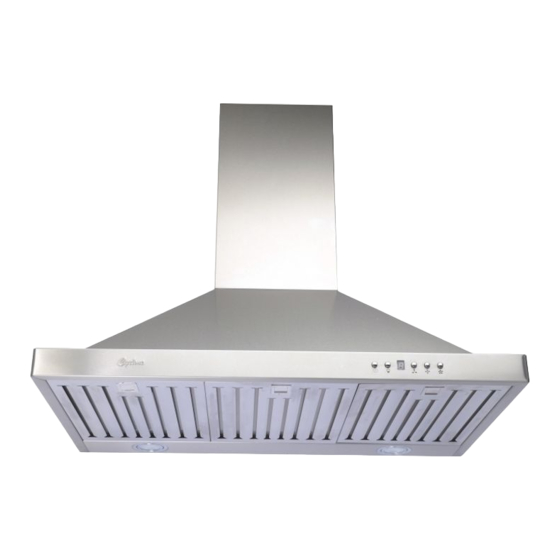
Self-Cleaning Range Hoods
Wall Mount and Island Range Hoods
Models:
SC(B)300, SC(B)500, HC400, AW00, SC(B)301,
SC(B)501, HC401, AW01, SC(B)502, ALW02,
SC(B)503, SC510, ALW10, SC(B)513, HC413,
SC(B)514, HC414, ALW14, AW14, AB14, SCB516,
SCB316, SC(B)519, SC(B)319, SI(B)323, SI(B)520,
SI(B)521, SI(B)522, SI(B)523, SI530, SI531, SI532
SCB711, SC712, SC(B)715, ALW15, SCB717,
SCB718, SC720, SC(B)322, SC(B)722, ALW22
Installation and Operation Instructions
Please read all instructions before installing and operating.
All wiring and installation must be in accordance with CEC, NEC and local electrical codes.
READ AND SAVE THESE INSTRUCTIONS
Advertisement
Table of Contents

Related Manuals for CyClone SCB300


Summary of Contents for CyClone SCB300
- Page 1 Self-Cleaning Range Hoods Wall Mount and Island Range Hoods Models: SC(B)300, SC(B)500, HC400, AW00, SC(B)301, SC(B)501, HC401, AW01, SC(B)502, ALW02, SC(B)503, SC510, ALW10, SC(B)513, HC413, SC(B)514, HC414, ALW14, AW14, AB14, SCB516, SCB316, SC(B)519, SC(B)319, SI(B)323, SI(B)520, SI(B)521, SI(B)522, SI(B)523, SI530, SI531, SI532 SCB711, SC712, SC(B)715, ALW15, SCB717, SCB718, SC720, SC(B)322, SC(B)722, ALW22 Installation and Operation Instructions...
- Page 2 Cyclone Canopy Installation - English...
-
Page 3: Important Safety Instructions
Not for outdoor use. automatically shut off the motor if it becomes overheated. The motor will restart. If the motor continually shuts off and restarts, contact the Cyclone service department. Ensure that the hood is mounted at the recommended mounting height. -
Page 4: Table Of Contents
Wall Mount Installation - Parts Supplied Wall Mount Hood Installation Island Installation - Tools and Materials Required Island Installation - Parts Supplied Island Hood Installation Canopy Hoods Specifications Troubleshooting Control Panel Maintenance Cyclone Range Hoods Limited Warranty Cyclone Canopy Installation - English... -
Page 5: Damage Inspection
Side wall cap with gravity damper For the most efficient and quiet operation: We recommend to install the duct elbow at least 18” from the top of the damper. Additional parts not provided. Cyclone Canopy Installation - English... -
Page 6: Mounting Heights And Clearance
Connect the black power wire to the black wire supplied with the hood. Connect the white neutral wire to the white wire supplied with the hood. Black: Power M a x . 3 6 ” White: Neutral Green: Ground Cyclone Canopy Installation - English... -
Page 7: Wall Mount Installation - Tools And Materials Required
4 × Drywall Anchors 2 × Washers 6 × Adapter Screws (Long and Medium, 2 each) (Large and Small, 2 each) 2 × Top Chimney Screws FOR PYRAMID SHAPE HOODS ONLY: 2 × Bottom Chimney Screws Cyclone Canopy Installation - English... -
Page 8: Wall Mount Hood Installation
13. Reinstall filters to the hood. Remove protective plastic film Figure 3. covering the duct covers and hood. Ceiling Screw Locations Mounting Bracket Flush with Ceiling Cyclone Canopy Installation - English... -
Page 9: Island Installation - Tools And Materials Required
2 or 4 × LED Lights (1.5W per bulb) *Bulb & socket may change. HARDWARE PACKAGE 4 × Mounting Screws 4 × Washers 6 × Adapter Screws 20 × Mounting Bracket Screws SI520 ONLY 2 × Bottom Chimney Screws Cyclone Canopy Installation - English... -
Page 10: Island Hood Installation
The duct cover needs a Upper Mounting Bracket clean cut and must to be cut from bottom end sides for both inside and outside pieces. For optimal clearance, the minimum mounting should be 30” above the cooking surface. Cyclone Canopy Installation - English... - Page 11 Note: For some models, the “L” shape support frame may be used (Figure 8). The installation procedures are same except that the hood is mounted on one side. If need be, use an adjustable string wire from other side to keep the hood level. Cyclone Canopy Installation - English...
-
Page 12: Canopy Hoods Specifications
120V 120V 120V 120V 120V 120V AC INPUT 60Hz 60Hz 60Hz 60Hz 60Hz 60Hz POWER 180W 200W 200W 200W 200W 200W CONSUMPTION MOUNTING 28”-36” 28”-36” 28”-36” 28”-36” 28”-36” 28”-36” HEIGHT *Bulb & socket may change. Cyclone Canopy Installation - English... -
Page 13: Troubleshooting
TROUBLESHOOTING For additional service inquiries, contact Cyclone servicing department at 1-888-293-5662 or Service@CycloneRangeHoods.com ISSUE CAUSE SOLUTION Unit doesn’t work The power source is not turned ON. Ensure power is ON for the circuit breaker and after installation. unit. The power line and the cable locking connector Check the power connection with the unit is are not connected properly. -
Page 14: Control Panel
30 to 60 days depending on cooking habits. Filters may be placed in the dishwasher on low heat or soaked in warm, soapy water. Spray degreasing detergent and leave to soak if heavily soiled. Cyclone Canopy Installation - English... -
Page 15: Cyclone Range Hoods Limited Warranty
CYCLONE RANGE HOODS LIMITED WARRANTY Cyclone Range Hoods Inc. (hereunder called “The Company”) provides a warranty that its products are free from defects in workmanship and materials for a period of two (2) years from the date of purchase. This warranty includes in-home service (where applicable) for the first year and workshop service for the second year.
Need help?
Do you have a question about the SCB300 and is the answer not in the manual?
Questions and answers