Table of Contents
Advertisement
Contents
2
4
5
6
7
8
9
10
12
16
17
18
61
68
• Form No. 0529403C
0215
Owner's Manual
Read this manual for complete instructions
Français (page 21) / Español (página 41)
Questions?
Call Wagner Technical Service at:
1-800-328-8251
Register your product online at:
www.wagnerspraytech.com
Français
Español
English
Advertisement
Table of Contents

Related Manuals for WAGNER FLEXiO 990


Summary of Contents for WAGNER FLEXiO 990
-
Page 1: Table Of Contents
Français (page 21) / Español (página 41) Contents Important Safety Information Controls and Functions Overview Setup Questions? Preparing to Spray Power and Material Controls Call Wagner Technical Service at: Spray Pattern Adjustment 1-800-328-8251 Proper Spraying Technique Cleanup Register your product online at: Maintenance www.wagnerspraytech.com Troubleshooting... -
Page 2: Important Safety Information
Make sure that the product is connected to an outlet having the same configuration as the plug. No adapter should be used with this product. Grounded Outlet Grounding Pin Cover for grounded outlet box English © Wagner Spray Tech - All Rights Reserved... - Page 3 100ºF (38ºC). Thank you for your purchase! Thank you for purchasing the Wagner FLEXiO sprayer with best-in-class features that are designed for spraying residential paint, un-thinned, indoors or out. Only the FLEXiO sprayers have the power of the X-Boost® turbine and versatility of the iSpray nozzle that will help you finish projects fast and professionally.
-
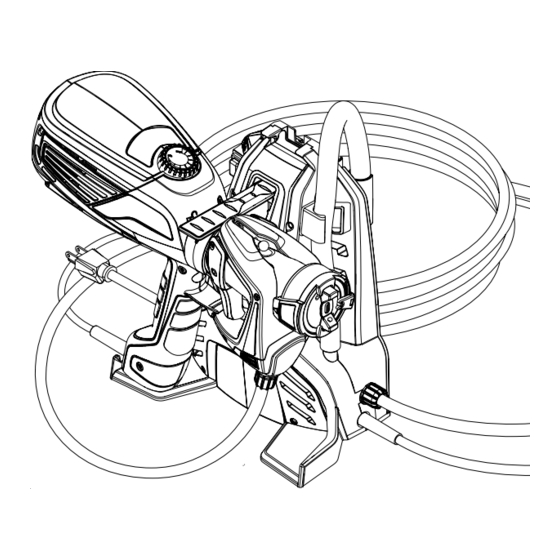
Page 4: Controls And Functions
X-Boost Turbine: The X-Boost Turbine supplies the air that forces the material out of the spray nozzle. When plugged in, power to the turbine is provided by pulling the trigger. English © Wagner Spray Tech - All Rights Reserved... -
Page 5: Overview
18-21 for setup and use instructions. note: These two spray nozzles have different spray pattern / width controls. Make sure to familiarize yourself with the controls on each spray nozzle. See the “Controls” section, page 8-9. English © Wagner Spray Tech. - All Rights Reserved... -
Page 6: Setup
5. Attach the belt clip to yourself (it is recommended that it be secured to waistband of your pants). 6. If necessary, hook the spray gun into the belt clip with the attachment (f). English © Wagner Spray Tech. - All Rights Reserved... -
Page 7: Preparing To Spray
The fluid pump will cycle ON and OFF while spraying to regulate pressure. This is normal. English © Wagner Spray Tech - All Rights Reserved... -
Page 8: Power Dial
Oil enamels 9-10 Heavy Latex paints plus primers, Latex paints 9-10 7-max Heavy* 7-max* Oil or latex primers 9-10 7-max Heavy* 7-max* * Thinning may be necessary to speed up spraying. English © Wagner Spray Tech - All Rights Reserved... -
Page 9: Spray Pattern Adjustment
*note: The air cap can be set diagonally on the Control Finish nozzle only. To achieve a round pattern with the iSpray nozzle, see the “Adjust Spray Width” section. English © Wagner Spray Tech - All Rights Reserved... -
Page 10: Proper Spraying Technique
• Position the spray gun perpendicular to and six (6) to eight (8) inches from the spray surface, depending upon the spray pattern size desired. With reduced material flow and air power, you English © Wagner Spray Tech - All Rights Reserved... - Page 11 • Spray gun movement - moving the gun too quickly will cause the spray pattern to be too thin and excess overspray. Moving the gun too slowly will cause the spray pattern to be too coarse or thick. English © Wagner Spray Tech - All Rights Reserved...
-
Page 12: Cleanup
5. Turn the ON/OFF switch to ON. Allow the pump to run until all paint is purged from the spray hose. Turn the pump OFF. Leave the trigger stop in place for the next steps. English © Wagner Spray Tech - All Rights Reserved... -
Page 13: Before You Begin
This allows gravity to fully drain the hose of all liquids. c. Shut the pump OFF. 6. Make sure to push the trigger stop back into the trigger to release the trigger. CLEANiNG SOLuTiON English © Wagner Spray Tech - All Rights Reserved... - Page 14 Make sure the red seal (e) is in place prior to reinstallation. 6. Place the cover onto the spray nozzle and replace the paint hose. English © Wagner Spray Tech. - All Rights Reserved...
- Page 15 Make sure the cup side of the seal (the side with the groove) is facing out towards the front of the nozzle. Improper installation will cause leakage and damage to the turbine. Groove English © Wagner Spray Tech. - All Rights Reserved...
-
Page 16: Cleaning Filters
Turning the nozzle upside down will prevent the valve seal from falling out of the valve cover during reinstallation. 4. Place the air tube on the valve cover and on the nipple at the nozzle. English © Wagner Spray Tech - All Rights Reserved... -
Page 17: Troubleshooting
Have you tried the recommendations above and are still having problems? In the United States, to speak to a customer service representative, call our Technical Service at 1-800-328-8251. See www.wagnerspraytech.com in the “Contact Us” section for Technical Service hours. English © Wagner Spray Tech. - All Rights Reserved... -
Page 18: Control Finish Nozzle Setup
For detailed instructions regarding the spray controls and proper spraying technique, refer to pages 8-11 in this manual. For Cleanup, refer to pages 19-20 in this manual. English © Wagner Spray Tech. - All Rights Reserved... -
Page 19: Flushing The Unit
IMPORTanT: If you cleaned the sprayer using mineral spirits, repeat steps 1-4 using warm, soapy water. Move on to “Cleanup - Cleaning the nozzle”, next page. PULL English © Wagner Spray Tech. - All Rights Reserved... - Page 20 (the side with the groove) is facing out towards the front of the nozzle. Improper installation will cause leakage. note: Once cleanup steps are complete, see “Maintenance” section in the main unit instruction manual. Groove English © Wagner Spray Tech. - All Rights Reserved...
-
Page 21: Parts List
Tubo de succión 2350680 Filter body Corps du filtre Cuerpo del filtro 2350681 Filter Filtre Filtre 2350211 Belt clip Agrafe Sujetador 0514209 Cleaning brush Brosse de nettoyage Cepillo de limpieza Français Español English English © Wagner Spray Tech. - All Rights Reserved... -
Page 22: Direct Feed Ispray Nozzle Parts List
2346152 Paint hose assembly Ensemble de tuyau de Ensamblaje del manguera pulvérisation de rociadora 2352619 Velcro straps (not Bandes Velcro (non illustré) Correas de velcro (no se shown) muestran) Français English Español © Wagner Spray Tech - All Rights Reserved... -
Page 23: Control Finish Nozzle Parts
Container seal Joint d’étanchéité de Sello de recipiente réservoir 0417357 Suction tube Tube d’aspiration Tubo de succión 0413909 Material container (800 ml) Réservoir de liquide (800 ml) Recipiente (800 ml) Français Español English © Wagner Spray Tech - All Rights Reserved... - Page 24 Detail Finish Nozzle™ Ensemble de buse de Detail Ensamblaje del boquilla de assembly Finish™ Detail Finish™ 2331571 X-Boost® turbine filters Filtres de turbine de X-Boost® Filtros de turbine de X-Boost® Français English Español © Wagner Spray Tech - All Rights Reserved...
-
Page 25: Manufacturing Code Location
Cet appareil n’a aucune pièce électrique utilisable. ne tentez pas d’effectuer vous-même l’entretien. Rangez à l’intérieur en veillant à ce que le cordon d’alimentation autour de la pompe et fixé avec des sangles. Français Español English © Wagner Spray Tech - All Rights Reserved... - Page 26 (une liste des centres de service après-vente accompagne cet article). Le centre de service après-vente agrée de Wagner vous renverra l’article en port payé, après l’avoir réparé ou remplacé (ce choix étant à la discrétion de Wagner).
- Page 27 CUALQUIER GARANTÍA IMPLÍCITA RFERENTE AL POTENCIAL COMERCIAL O ADAPTABILIDAD pARA UN USO PARTICULAR SE LIMITA A UN AÑO A PARTIR DE LA FECHA DE COMPRA. WAGNER EN NINGÚN CASO SERÁ RESPONSABLE DE CUALQUIER DAÑO DIRECTO O INDIRECTO DE CUALQUIER TIPO, YA SEA POR VIOLACIÓN DE ESTA GARANTÍA O CUALQUIER OTRA RAZÓN.
-
Page 28: Warranty
ANY IMPLIED WARRANTY OF MERCHANTABILITY OR FITNESS FOR A PARTICULAR PURPOSE IS LIMITED TO one year FOLLOWING DATE OF PURCHASE. WAGNER SHALL NOT IN ANY EVENT BE LIABLE FOR ANY INCIDENTAL OR CONSEQUENTIAL DAMAGES OF ANY KIND, WHETHER FOR BREACH OF THIS WARRANTY OR ANY OTHER REASON.
Need help?
Do you have a question about the FLEXiO 990 and is the answer not in the manual?
Questions and answers