
Related Manuals for Pioneer Eclipse StripVac


Summary of Contents for Pioneer Eclipse StripVac
-
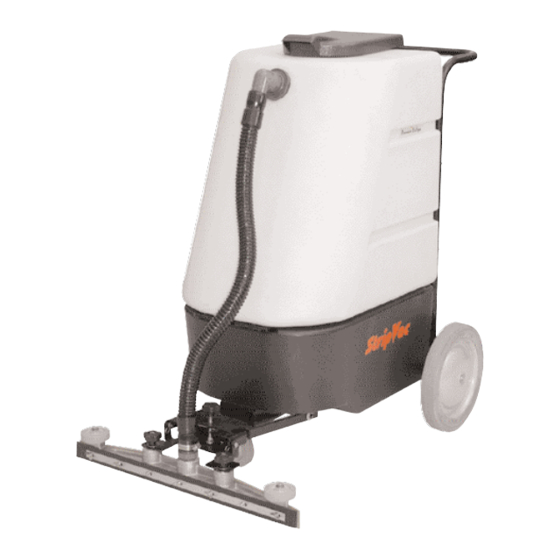
Page 1: Operators Manual
Operators Manual Stripping Solution Recovery Vacuum READ OPERATORS MANUAL BEFORE OPERATING... - Page 2 Record this Important Information Date of Purchase Purchased From Address City State Phone Contact Serial Number Emergency Contacts Medical Emergency Police Fire...
-
Page 3: Table Of Contents
T a b l e o f C o n t e n t s Safe Operating Procedures ............2 Machine Specifications . -
Page 4: Safe Operating Procedures
S a f e O p e r a t i n g P r o c e d u r e s Safe Operating Procedures: • Use care when transporting machine with a full tank. • Do not raise filled tank to check batteries. •... -
Page 5: Operating Instructions
3. Turn off the vacuum motor. Draining 1. Place the StripVac in an appropriate area for draining. 2. Remove the dump hose from the spring hose clip at the rear of the machine. 3. Unplug hose plug from dump hose and lower to drain. -
Page 6: Maintenance Instructions
M a i n t e n a n c e I n s t r u c t i o n s Removing / Attaching Squeegee Blades Front Squeegee Blade: 1. With the vacuum motor off, remove the front blade by loosening the front seven wing nuts and removing the front squeegee retainer strap. -
Page 7: Cleaning
Cleaning IMPORTANT! Clean the StripVac after each use. 1. Place the StripVac in an appropriate area for draining. 2. Remove the dump hose from the spring hose clip at the rear of the machine. 3. Unplug hose plug from dump hose and lower to drain. -
Page 8: Battery Maintenance
B a t t e r y M a i n t e n a n c e Connecting the Batteries and Vacuum Motor 1. Place batteries, B1 and B2, into the chassis as shown. 2. Connect the charger plug positive lead, L1, on the positive post of B1. -
Page 9: Battery Charging
Battery Charging Observe the following for your safety when working with the battery charger: • Make sure the power is OFF. • Be sure to use the specified battery charger. • Connect the battery charger’s power plug only to a 115V/60 Hz 3-wire grounded power supply (220V/50 Hz European). -
Page 10: Refilling The Battery With Distilled Water
Refilling the Battery with Distilled Water NOTE: If the battery terminals are dirty, wipe clean with a dry cloth, and apply some mineral grease. 1. Switch the power OFF. 2. Drain the recovery tank completely. 3. Lift the tank unit. 4. -
Page 11: Battery Replacement
Battery Replacement CAUTION: Use only batteries supplied by Pioneer Eclipse. 1. Switch OFF the power switch. 2. Drain recovery tank. 3. Park the machine in a safe, flat area. 4. Raise the tank unit. 5. Unplug the batteries from the machine. Take hold of both connectors to remove. Do not pull on the cable. - Page 12 This page intentionally blank.
-
Page 13: Wiring Diagram
M a c h i n e D r a w i n g s & P a r t s L i s t s Wiring Diagram REF. PART # DESCRIPTION QTY. STRIPVAC WIRING DIAGRAM - MP118500 SS1012 BATTERY, 12V MP120000 CONNECTOR, S4120 W/6 GA CONTACTS... -
Page 14: Squeegee Assembly
StripVac Squeegee Assembly... - Page 15 StripVac Squeegee Assembly Parts List REF. PART # DESCRIPTION QTY. STRIPVAC 26” SQUEEGEE ASM. - MP121200 MODELS SV2026, SV2026E, SV3026E RV005100 KNOB, HANDLE NB030900 BOLT, SOCKET, 3/8-16 X 1-1/2”, MP107200 KNOB, HANDLE, ASSEMBLY. MP038700 WHEEL, 3”, PERFORMA, FLAT TREAD NB025000 BOLT, HEX, 5/16-18 X 1-1/2”, SS 2...
-
Page 16: Lift Assembly
StripVac Lift Assembly 63559... - Page 17 StripVac Lift Assembly Parts List 34” SQUEEGEE LIFT BEFORE SERIAL # 63558 STRIPVAC LIFT ASSEMBLY W/26” SQUEEGEE - MP121300 REF. PART # DESCRIPTION QTY. MP115800 BRACKET, BREAK-AWAY MP100400 PEDAL, FOOT, WELDMENT MP100700 ARM, LIFT, WELDMENT MP115900 BRACKET, ADJUSTMENT, SQUEEGEE NB025500 PIN, CLEVIS, 3/8”...
-
Page 18: Frame Assembly
StripVac Frame Assembly... - Page 19 StripVac Frame Assembly Parts List REF. PART # DESCRIPTION QTY. REF. PART # DESCRIPTION QTY. STRIPVAC FRAME ASSEMBLY - SV000500 MP101900 HINGE, RH MP098000 CHASSIS, HYDROSTAR/ NB029400 BOLT, PAN HD, 5/16”-18 X 5/8” STRIPVAC MP103500 WELDMENT, BUSHINGS, LIFT MP115200 MOTOR, VACUUM, 3-STAGE, 24 V1 NB031300 BOLT, HEX, 3/8 -16 X 5/8”...
-
Page 20: Tank Assembly
StripVac Tank Assembly 052308... - Page 21 StripVac Tank Assembly Parts List REF. PART # DESCRIPTION QTY. STRIPVAC TANK ASSEMBLY - SV001800 TANK, RECOVERY, STRIPVAC, W/TRAY, ASM. SV001700 TANK, RECOVERY, STRIPVAC, TRIMMED PS023201 BRACKET, DIFFUSION, TANK, REC. MP322400 DOME, TANK, STRIPVAC, ASM. 1 NB026600 BOLTS, HEX, 5/16-18 X 1, SS NB031500 WASHER, 5/16”, BONDED...
-
Page 22: Float Assembly
StripVac Float Assembly... - Page 23 StripVac Float Assembly Parts List REF. PART # DESCRIPTION QTY. STRIPVAC FLOAT VALVE ASSEMBLY - MP121400 MP117300 BRACKET, PIVOT, VALVE MP117600 PLATE, VALVE, FLOAT, WELDMENT MP119900 FLOAT, BALL MP118100 GASKET, VALVE, FLOAT NB026000 BOLT, HEX, 1/4-20 X 1, SS NB025700 WASHER, LOCK, 1/4”, SS...
-
Page 24: Final Assembly
StripVac Final Assembly... - Page 25 StripVac Final Assembly Parts List REF. PART # DESCRIPTION QTY. STRIPVAC FINAL ASSEMBLY - SV3026 NB018000 WASHER, FLAT, 1/2”, NYLON MP118600 HOSE, VACUUM (STD MODEL) MP142300 HOSE, VACUUM, LOW-PROFILE 1 MP118700 HOSE, SUCTION (STD MODEL) 1 MP142400 HOSE, SUCTION, LOW-PROFILE 1 MP183600 HOSE, DUMP, 36”...
-
Page 26: Warranty
THE OBLIGATION OF PIONEER ECLIPSE CORPORATION 1) The obligation of Pioneer Eclipse under this warranty is limited to repairing or replacing, at its option, any part which is proven to be defective in material or workmanship under normal use for the applicable period stated above. - Page 28 P.O. Box 909 Sparta, NC 28675 1-800-367-3550; 1-336-372-8080 Fax: 1-336-372-2895 EC Machinery Directive 98/37/EC; Harmonized Standards EN292-1: 1991, EN294: 1992, EN953: 1997, EN60529: 1991, EN292-2: 1991, EN836: 1997, EN1050: 1997. LT036100-R, 05232008...
Need help?
Do you have a question about the StripVac and is the answer not in the manual?
Questions and answers