Table of Contents
Advertisement
Advertisement
Table of Contents

Related Manuals for Rockwell RS2314 ShopSeries


Summary of Contents for Rockwell RS2314 ShopSeries
- Page 1 18V CORDLESS DRILL RS2314...
- Page 3 RS2314...
- Page 4 RS2314...
-
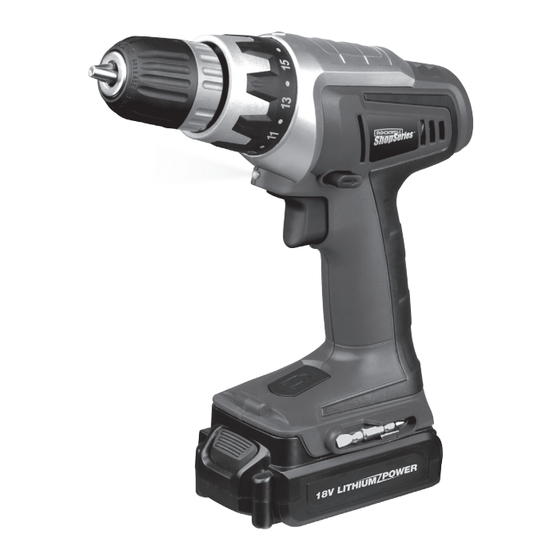
Page 5: Component List
18V CORDLESS DRILL COMPONENT LIST KEYLESS CHUCK TORQUE ADJUSTMENT RING FORWARD/REVERSE ROTATION CONTROL BATTERY PACK DOUBLE-ENDED BIT BATTERY PACK RELEASE BUTTON MAGNETIC TRAY ON/OFF SWITCH SIGHT LIGHT Not all the accessories illustrated or described are included in standard delivery. ACCESSORIES 1. - Page 6 18V CORDLESS DRILL increase the risk of electric shock. 4. POWER TOOL USE AND CARE d) Do not abuse the cord. Never use the cord for a) Do not force the power tool. Use the correct carrying, pulling or unplugging the power tool. power tool for your application.
-
Page 7: Safety Warnings For Battery Pack
18V CORDLESS DRILL that can make a connection from one terminal 6. Do not charge a leaking battery. to another. Shorting the battery terminals together 7. Do not use chargers for works other than those for which they are designed. may cause burns or a fire. - Page 8 18V CORDLESS DRILL SYMBOLS screws or other small metal objects, that can make a connection from one terminal to another. Shorting the battery terminals together may cause To reduce the risk of injury, user must read burns or a fire. instruction manual c) Do not expose battery pack to heat or fire.
-
Page 9: Technical Data
18V CORDLESS DRILL TECHNICAL DATA C-tick marking Battery voltage Charger voltage 100-240V~ 50-60Hz No load speed 0-550/min RCM approval mark Clutch position 16+1 Max. torque 18N.m Chuck capacity 10mm Max. drilling capacity Positive terminal Wood 18mm Steel Battery capacity 1.3Ah Li-Ion Charging time 3-5 hours Negative terminal... - Page 10 18V CORDLESS DRILL 2. HOW TO CHARGE YOUR BATTERY (See Fig. A1, A2) place the forward /reverse rotation control in the center position by pushing it on either side of the drill. Connect the battery charger to the power supply, and Fig D: the forward /reverse rotation control is in the then plug the DC socket of charger in to charger base center position.
-
Page 11: Maintenance
18V CORDLESS DRILL bit at the point to be drilled. Depress the switch trigger 2. THE DRILL STOPS BEFORE THE SCREW IS COMPLETELY to start the tool. Move the drill bit into the workpiece, TIGHTENED. WHY? applying only enough pressure to keep the bit cutting. Verify the torque position of the variable clutch, you Do not force or apply side pressure to elongate a hole. - Page 12 MADE IN PRC...
Need help?
Do you have a question about the RS2314 ShopSeries and is the answer not in the manual?
Questions and answers