Table of Contents
Advertisement
Quick Links
Advertisement
Table of Contents

Related Manuals for SoundMax SM-CMD2039


Summary of Contents for SoundMax SM-CMD2039
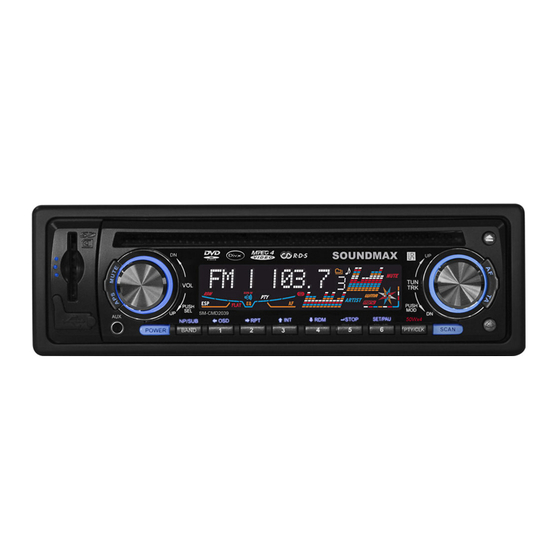
- Page 1 SM-CMD2039 DVD/MP3/CD RECEIVER DVD/MP3/CD- Instruction manual...
-
Page 2: Table Of Contents
Dear customer! Thank you for purchasing our product. For safety, it is strongly recommended to read this manual carefully before connecting, operating and/or adjusting the product and keep the manual for reference in the future. Table of contents Table of contents....................... 2 Important safeguards ...................... -
Page 3: Important Safeguards
Important safeguards Read carefully through this manual to familiarize yourself with this high-quality sound system. The beginning of operation is the moment of the unit installation. Before use the device in winter it is recommended to heat up the passenger compartment during 20 seconds or to the operation temperature. -
Page 4: Accessories
Accessories Receiver 1 pc Front panel 1 pc Remote controller 1 pc Front panel protective case 1 pc ISO cable 1 pc Installation parts: Release keys 2 pcs Screw 1 pc Screw 1 pc Flat washer 2 pcs Spring washer 2 pcs Metal strap 1 pc... -
Page 5: Installation/Connections
Installation/Connections Choose the mounting location where the unit will not interfere with the normal driving function of the driver. Before finally installing the unit, connect the wiring and make sure that the unit works properly. Consult with your nearest dealer if installation requires the drilling of holes or other modifications of the vehicle. - Page 6 1. Install the sleeve into the dashboard; ensure it is installed with the correct side and there are no obstacles (wires, dashboard elements, etc) for the unit installation. 2. After installing the sleeve into the dashboard, bend tabs fitting to the size of the dashboard to fix the sleeve in place.
- Page 7 1. Select a position in which the screw holes of the brackets (3) are aligned with the screw holes in the unit body, and screw in two screws (2) in each side. 2. Screw. 3. Factory radio mounting brackets. 4. Vehicle dashboard. 5.
- Page 8 Connection diagram Speaker wiring notes Follow the above wiring diagram to install the head unit with new or existing speakers. This unit is designed for use with four (4) speakers with impedance between 4 Ohms to 8 Ohms. An impedance load of less than 4 Ohms could damage the unit. Never bridge or combine the speaker wire outputs.
- Page 9 Using the ISO Connector 1. If your car is equipped with the ISO connector, then connect the ISO connectors as illustrated. 2. For connections without the ISO connectors, check the wiring in the vehicle carefully before connecting, incorrect connection may cause serious damage to this unit. Cut the connector, connect the colored leads of the power cord to the car battery as shown in the color code table below for speaker and power cable connections.
-
Page 10: Controls Description
Control description Front panel OPEN button 13. POWER button TA button 14. AUX in jack SCAN button 15. APS button PTY/CLK button 16. USB slot Preset station [1-6] buttons 17. SD/MMC memory card slot 1/LEFT/OSD button 18. MUTE button 2/RIGHT/RPT button 19. - Page 11 Back of the front panel Press OPEN button to open the panel. Panel status indicator RESET button Disc slot Note: Pressing the RESET hole will erase the clock setting and stored stations. Panel status indicator lights up when you slide the panel down; flashes when you remove the panel.
- Page 12 Remote controller (RC) MODE button POWER button BND/SYS button Cursor buttons ENTER button STOP/REVERSE button AMS/RPT button ST/PROG button LOC/RDM button 10. VOL+/- button 11. PBC/MENU button 12. OSD button 13. Number buttons 14. PLAY/PAUSE button 15. MUTE button 16. TITLE button 17.
- Page 13 Changing the battery Press the catch and at the same time pull out the battery tray. 2. Insert the 1 x lithium battery, type CR 2025 3V battery with the stamped (+) mark facing upward. Insert the battery tray into the remote control. Warning: Store the battery where children cannot reach.
-
Page 14: Lcd Layout
LCD layout 1. Subwoofer indicator (not active) 2. PTY function indicator (not active) 3. TA function indicator (not active) 4. TP function indicator (not active) 5. AF function indicator (not active) 6. Equalizer indicator 7. Digit display (radio frequency, track number, etc.) 8. -
Page 15: General Operations
General operations Reset the unit Operating the unit for the first time or after replacing the car battery, you must reset the unit. Press OPEN button and remove the panel, then press the RESET button to restore the unit to the original factory settings. - Page 16 TREBLE: -7, -6,.., 0, +1, +2,..+6, +7 BALANCE: 7L, 6L,.., L=R, 1R,..,7R FADER: 7R, 6R,.., R=F, 1F,.., 7F LOUD: ON/OFF LOC: LOC ON, LOC OFF (DX). ST: STEREO, MONO EQ: CLASS, POP, ROCK, FLAT, OFF Note: In each mode, the waiting time is about 5 seconds, and the waiting time is over, it returns to the last display mode of radio or disc playback mode.
-
Page 17: Radio Operations
Radio operations Note: RDS (Radio Data System) service availability varies with areas. Please understand if RDS service is not available in you area, the following service is not available, either. Band select Press BAND/NP/SUB button on the front panel or BND/SYS button on RC repeatedly to select your desired radio band in RADIO mode: FM1, FM2, FM3, AM1 (MW1), AM2 (MW2). - Page 18 Auto memory store: press and hold APS button on the panel or AMS/RPT button on the RC to enter auto store mode. The radio will automatically store 6 strongest available stations to the 6 preset memories of the current band. To stop auto store, press this button again. Stereo/Mono mode Press ST/PROG button on the RC to select ST ON (stereo) or ST OFF (mono).
- Page 19 PTY (Program Type) Press PTY/CLK button on the panel to activate the PTY function. The previous PTY type is shown. Press PTY/CLK once again to enter the MUSIC type or press twice to enter the SPEECH type, then use number buttons 1-6 to select the desired program type (see the following table).
- Page 20 When same PI station does not catch in 1 cyclic search, the radio retunes to next station with TP information. TA ALARM During searching the radio does not retune but the double beep sound (alarm) is output. RETUNE mode To determine the initial time of automatic TA (Traffic Announcement) search. There are 2 modes: RETUNE L and RETUNE L.
-
Page 21: Disc Operations
Discs operations Disc glossary PBC (PlayBack Control) PBC is a menu recorded on the disc with SVCD or VCD2.0 format. For the discs contained PBC, it can playback interactive software with the menu displayed on TV. And if the disc contains still images, it can playback high definition of still image. - Page 22 ISO 9660 or ISO 9660 +Joliet format - Max. 30 characters Max. Track number is 448 Max. nested directory is 8 levels The max. album number is 99 The max. length of each track is 99 minutes 59 seconds Supported sampling frequency for MP3 disc: 8 KHz – 48 KHz (44.1 KHz preferably) Supported bit-rates of MP3 disc are: 32 - 320 kbps (128 kbps preferably).
- Page 23 Inserting the SD/MMC card/USB device Insert the MMC/SD card or USB device into MMC/SD compartment or USB slot correspondingly. The operation mode of the unit will be changed to MMC/SD or USB mode automatically. The first card/USB device track playback will start. Note: When an MMC/SD card and a USB device are both inserted into their compartment or slot, the playing mode will be changed into the mode of the later one.
- Page 24 Slow playback (for DVD/VCD) During DVD/VCD playback press SLOW button on the RC for slow playback. With each consecutive pressing of SLOW button, the playback speed decreases: X1/2 => X1/3 => X1/4 => X1/5 => X1/6 => X1/7 => Normal. During slow forward, press PLAY/PAUSE button to resume normal playback.
- Page 25 Changing angle (for DVD only) If DVD disc supports multi-angle playback, press ANGLE button on RC to play images in different camera angles. If discs doesn't support multi-angle playback, this function will not work. Selecting the subtitle (for DVD only) Press SUB-T button on RC repeatedly to select the subtitle language.
-
Page 26: Mp3 Overview
MP3 overview MP3 is short for MPEG Audio Layer 3 and refers to an audio compression technology standard. This product allows playback of MP3 files on CD-ROM, CD-R or CD-RW discs. The unit can read MP3 files written in the format compliant with ISO 9660. However it does not support the MP3 data written by the method of packet write. - Page 27 You should not write non-MP3 files or unneeded folders along with MP3 files on the disc otherwise it takes a long time until the unit starts to play MP3 files. With some CD-R or CD-RW media, data may not be properly written depending on their manufacturing quality.
-
Page 28: System Setup
System setup Press SETUP button on the RC or 6/SET/PAU button on the panel to display setup menu. Press UP/DOWN cursor buttons and ENTER button to select the desired setup page: System, Disc, and press LEFT cursor button to go to the selected page. In the selected page select an option using UP/DOWN cursor buttons, then press ENTER button to go to setting list. - Page 29 Original setting: 8. Note: The rating can be selected only under the password unlocked status, and the limits can be worked only under the password locked status.
-
Page 30: Handling Discs
Handling discs Dirty, scratched or warped discs may cause skip ping or noise. Handle the disc only by the edges. To keep clean do not touch its surface. Discs should be stored in their cases after use to avoid scratches. Do not expose discs to direct sunlight, high humidity, high temperature or dust. -
Page 31: Troubleshooting Guide
Troubleshooting guide Below is a table describing simple measures that can help you eliminate most problems likely to emerge when this unit is in use. If below measures do not help, turn to a service center or to the nearest dealer. Symptom Cause Solution... -
Page 32: Specification
Specification General Power supply: 12V DC Current consumption/Fuse: 8A/10A & 1A Maximum power output: 50Wx4 channels Dimensions (W x H x D) 178 x 51 x 178 mm Working temperature range: -20º - +60º Electronic Shock Protection 45 sec. for CD, 120 sec for MP3 FM Stereo Radio Frequency range: 87.5 - 108.0 MHz... - Page 33 ................... 34 ....................35 ................... 36 ....................42 ....................46 ..................... 47 ......................49 ..................49 WMA..................60 ......................62 ....................63 ............64 ..................66...
- Page 36 30°, « » « » « » ( « » ( DIN, « » (...
- Page 37 – – –...
- Page 38 « » ( OPEN...
- Page 41 ISO, (+)--- (-)--- (+)--- 12 (+)/ (-)--- (+)--- ((-)--- ACC+/ (+)--- (-)--- “+”...
- Page 42 OPEN POWER SCAN PTY/CLK 16. USB SD/MMC /OSD MUTE /RPT VOL/ /INT /RDM 5/STOP UP/DOWN/ 6/SET/PAU EJECT BAND/NP/SUB...
- Page 43 OPEN, RESET...
- Page 44 MODE POWER BND/SYS ENTER STOP/REVERSE AMS/RPT ST/PROG LOC/RDM VOL+/- PBC/MENU PLAY/PAUSE MUTE TITLE SUB-T SETUP ANGLE SLOW ZOOM SEEK-/PREVIOUS/SEEK+/NEXT AUDIO GOTO...
- Page 45 (CR 2025 3V),...
- Page 46 PTY ( TA ( TP ( AF ( ROCK CLASS FLAT EON (...
- Page 47 RESET ( OPEN, RESET, OPEN) POWER, VOL+/- MUTE, MODE, : AUX => RADIO ( ) => DISK ) => USB => CARD ( USB, CARD, DISK BAND/NP/SUB,...
- Page 48 SEL, : VOL ( ) => BAS ( ) => TRE ) => BAL ( ) => FAD ( ) => LOUD ( ) => LOC ( => ST ( ) => EQ ( VOL+/- VOLUME: 00, 02,.., 38, 39 BASS: -7, -6,.., 0, +1, +2,..+6, +7 TREBLE: -7, -6,.., 0, +1, +2,..+6, +7 BALANCE: 7L, 6L,.., L=R, 1R,..,7R...
- Page 49 RDS ( BAND/NP/SUB BND/SYS : FM1, FM2, FM3, AM1 (MW1), AM2 (MW2). SEEK-/PREVIOUS SEEK+/NEXT UP/DOWN SEEK-/PREVIOUS SEEK+/NEXT UP/DOWN UP/DOWN SEEK- /PREVIOUS SEEK+/NEXT 1~6,...
- Page 50 AMS/RPT AMS/RPT 1-6. AMS/RPT 1~6. AMS/RPT ST/PROG ST ON/OFF. VOL+/- ST ON ( OFF ( SEL, LOC ( VOL+/- (LO ON) (LO OFF). LOC/RDM AF (...
- Page 51 TA ( PTY ( RDS, PTY/CLK, PTY. PTY/CLK Pop, Rock News, Affairs, Info Easy, Sport, Educate, Light Drama Classics Culture, Science, Varied Jazz, Weather, Country Finance, Children...
- Page 52 Nation, Social, Religion, Oldies Phone IN Folk Travel, Leisure, Document SEL, : MASK DPI/ALL => TA SEEK/ALARM => RETUNE L/S. VOL, TA SEEK/ALARM TA SEEK: (Traffic Program – (RETUNE), PI ( ALARM: RETUNE L/S: TA SEEK. RETUNE S: TA SEEK – 30 RETUNE L: TA SEEK –...
- Page 53 PBC ( – PBC, – : CD/DVD/CDDA/CD-R/- RW/DVD±R/±RW. DVD-video/SVCD/VCD/HDCD/MP3/MP4/WMA/Picture-CD/JPEG/ DivX/MPEG4. : MP3 (*.mp3) WMA (*.wma) : MP4 (*.avi, DIVX3.11/4.0/5.0/6.0 and XVID)
- Page 54 MPEG 2(*.vob) MPEG 1(*.dat) : JPEG (*.jpg) ISO 9660 ISO 9660 + Joliet - – 448. – 99. - 99 44,1 : 32 - 320 : *.ACC, *.DLF, *.M3U, *.PLS, MP3 PRO, DRM. USB/ SD/ MMC SD/ MMC, 2 1 (SD/MMC). FAT 12/ FAT 16/ FAT 32 FAT 12/ 16 ( , 500...
- Page 55 EJECT SD/MMC USB. MODE, USB. SD/MMC CARD. MODE, CARD. PLAY/PAUSE PLAY/PAUSE SET/PAU MP3/WMA/CDDA 5/STOP STOP/REVERSE 5/STOP STOP/REVERSE...
- Page 56 SEEK-/PREVIOUS UP/DOWN SEKE+/NEXT UP/DOWN SEEK-/PREVIOUS SEEK+/NEXT UP/DOWN DVD, VCD SLOW : 1/2, 1/3, 1/4, 1/5, 1/6, 1/7, PLAY/PAUSE AMS/RPT /RDM LOC/RDM /INT,...
- Page 57 ZOOM : X2, X3, X4, 1/2, 1/3, 1/4, DVD, VCD AUDIO AUDIO – ANGLE SUB-T TITLE ENTER PLAY/PAUSE; PBC ( PBC,...
- Page 58 /MENU – ENTER, STOP STOP/REVERSE /MENU, GOTO GOTO, GOTO. ENTER VCD: GOTO, 00 , : 1 => 8 => 2 => 0 => 0 => 0. ENTER DVD: GOTO, 234, : 2 => 3 => 4. ENTER, 00 , : 1 => 8 => 2 => 0 => 0 => 0. ENTER ST/PROG,...
- Page 59 ENTER ST/PROG, DVD/VCD) BAND/NP/SUB : NTSC => PAL => PAL60 =>...
- Page 60 MPEG 3 CD-ROM, CD-R CD-RW. ISO 9660. “.mp3”. “.mp3”, “ MP3” “ ”, PC “ ” “ ” 256. VBR, . VBR: WMA (Windows Media Audio) – Microsoft Corporation. , 64...
- Page 61 CD-R/CD-RW, 44,1 ISO 9660, CD-R MP3 CD-R CD-RW CD-R CD-RW CD-R 1. ID3TAG.
- Page 62 SETUP 6/SET/PAU ENTER ENTER ENTER. SETUP. NTSC/PAL: (NTSC, PAL, PAL60, ENTER – 0000.
- Page 64 “ ”. POWER...
- Page 65 RESET. (ERROR 1 – 11) (ERROR 1 – 11)
- Page 66 <10 /10 -20º - +60º CD/120 c MP3 87.5 - 108.0 / 10.7 522-1620 DVD/DVD±R/DVD±RW/CD/CD-R/CD-RW/USB/SD/MMC DVD/DVCD/SVCD/VCD/CDDA/MP3/WMA/Picture-CD/Photo- CD/JPEG/MPEG 4 (DivX) NTSC/PAL / 24 0 - +/-30 , 75 RMS (+/-3 – 20 (A-vtd)/ RCA- (2 B)
Need help?
Do you have a question about the SM-CMD2039 and is the answer not in the manual?
Questions and answers