
Related Manuals for SoundMax SM-CMD5003G


Summary of Contents for SoundMax SM-CMD5003G
- Page 1 SM - CMD 5 0 0 3 G 2 D I N " DVD - 7 ” TFT- " " " " 2 D I N M ult im e dia D VD r e ce ive r w it h m ot or ize d 7 ” TFT displa y a nd TV t u ne r I nst ruction m anual...
-
Page 2: Table Of Contents
D e a r cu stom er ! Thank you for purchasing our product . For safet y, it is st rongly recom m ended t o read t his m anual carefully before connect ing, operat ing and/ or adj ust ing the product and keep the m anual for reference in t he fut ure. Ta ble of con t e n t s TABLE OF CONTENTS .............................. -
Page 3: I Mportant Safeguards
I m por t a n t sa fegu a r ds ‚ Read carefully t hrough the m anual t o fam iliarize yourself wit h t his unit . ‚ Keep t his m anual handy as a reference for operat ing procedures and precaut ions. Do not allow persons who have not read t hrough t his m anual t o use this unit . -
Page 4: Accessori Es
Acce ssor ie s 1. Receiver 1 pc 2. Front panel 1 pc 3. Protect ive bag 1 pc 4. Rem ote cont roller 1 pc 5. I SO connect or 1 pc 6. Audio- video connect or 1 pc 7. -
Page 5: I Nstallati On/ Connecti Ons
I n st a lla t ion / Con n e ct ion s ‚ Choose t he m ount ing locat ion where t he unit will not int erfere wit h the norm al driving funct ion of t he driver. - Page 6 ‚ Place t he t rim ring ( 5) over t he unit and the inst allat ion is com plet ed. (Som e vehicles m ay not need a t rim ring) . ‚ The device is dist inguished by a high degree of output . During operat ion, t his result s in a st rong heat generat ion.
- Page 7 Conn e ct ion diagr am...
- Page 8 Using t he I SO Conne ct or I f your car is equipped wit h t he I SO connect or, t hen connect the I SO connect ors as illust rat ed. For connect ions wit hout t he I SO connect ors, check t he wiring in the vehicle carefully before connect ing, incorrect connect ion m ay cause serious dam age t o t his unit .
- Page 9 Pa rk in g w ir e con n e ct ion I f Parking cable is connect ed t o hand brake swit ch, the video display of t he TFT m onit or will be cont rolled by driving st atus, syst em set up and input video sources.
-
Page 10: Panel Controls
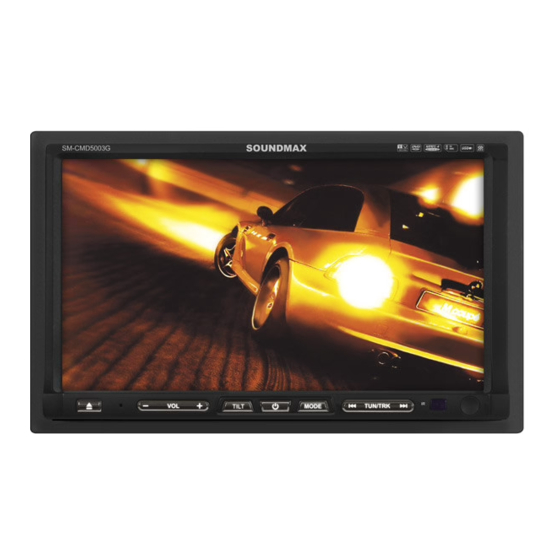
Pa n e l con t r ols Fr ont pane l 1. EJECT but t on 2. Reset but ton ( hole) 3. VOL- but t on 4. Display 5. VOL+ but t on 6. TI LT butt on 7. - Page 11 I nner p a ne l 1. Mem ory card slot 2. Panel stat us indicat or 3. Disc slot Panel st at us indicat or light s up w hen you slide the panel down, flashes when you rem ove t he panel.
- Page 12 Re m ot e cont rolle r 1. MODE but t on 2. POWER butt on 3. UP cursor but t on 4. BND/ RDM but t on 5. ENTER but t on 6. LEFT cursor butt on 7. DOWN cursor but t on 8.
- Page 13 Cha nging t he ba t t ery 1. Press the cat ch and at t he sam e t im e pull out the bat tery t ray ( pic. 1) . 2. I nsert the 1 lit hium bat t ery, t ype CR2025 ( 3V) battery wit h t he stam ped ( + ) m ark facing upwar d.
-
Page 14: General Operati Ons
Ge n e r a l ope r a t ions Tou ch scre e n Due t o t he touch screen, you can fulfill m ost funct ions not only by pressing but t ons but also by t ouching t he opt ions you need. - Page 15 Page 2 ‚ Bass: Adj ust t he low- frequency level. ‚ Treble: Adjust the high- frequency level. ‚ Balance: Adj ust the balance bet ween left and right channels. ‚ Fader: Adj ust t he balance bet ween front and left channels. Page 3 ‚...
- Page 16 N a v ig a t ion ( opt ion) ‚ To enable navigat ion m ode, touch NAVI but t on in t he m ain m enu. ‚ I nsert Navigat ion m em ory card int o t he Mem ory card slot of the unit before enabling navigat ion m ode. To access t he slot , open t he front panel.
-
Page 17: System Setup
Sy st em se t u p When you select SETTI NG m ode, t he m enu will be displayed, in which you can touch any it em t o select corresponding sett ing page: Aft er select ing a m enu page you can navigat e in t he m enu by pressing cursor butt ons on t he RC and confirm your select ion by pressing ENTER but ton on the RC. - Page 18 ‚ DX: Select LOCAL ( only local st at ion recept ion) or DX ( local and distant st at ion recept ion) . The funct ion is available only in FM bands. ‚ TA: Seek/ Alarm . I n TA SEEK m ode, t he unit will seek for t raffic announcem ent program when TA is pressed;...
-
Page 19: Uti Li Ti Es
Ut ilit ie s I n t he m ain m enu t ouch UTI L it em t o go t o ut ilit y m enu consist ing of Calculat or and Calendar it em s. Touch an it em t o go t o correspondent funct ion. -
Page 20: Radi O Operati Ons
Ra dio ope r a t ion s User in t er fa ce of Radio m ode When t he unit is swit ched t o Radio m ode, the below touchable user interface will be displayed on t he display: 1. - Page 21 M a n u al/ au t om a t ic t un ing ‚ Manual t uning: press TUN/ TRK ;/ < but t ons on t he panel or SEEK- / ; and SEEK+ / < on t he RC and hold for 2 seconds t o ent er the m anual tuning m ode.
- Page 22 TA ( Tr a ffic a lar m ) fu n ct ion Touch TA but t on on the screen or press and hold AF/ TA but ton on the RC t o swit ch on t he TA funct ion. When TA is on, t he TA displays on TFT, or else, if t her e is no TP inform at ion, t he m ode will search TP st at ion aut om at ically.
-
Page 23: Tv Operati Ons
TV ope r a t ion s Connect a TV ant enna t o t he TV antenna j ack of t he unit . Select TV m ode; press on t he center of t he t ouch screen, and following int erface will be displayed: 1. -
Page 24: Av- I N Mode
AV- I N m ode Connect an external audio/ video signal source t o t his unit . Select AV- I N m ode in t he m ain m enu or by pressing repeat edly MODE but t on. Following int er face w ill be displayed: 1. -
Page 25: Di Sc/ Usb/ Sd/ Mmc Operati Ons
D isc/ USB/ SD / M M C ope r a t ion s USB/ SD / MMC n ot es USB form at support s 1.1. Capacit y: up t o 8 Gb. For correct and sat isfact ory operat ion, licensed SD/ MMC m em ory cards of fam ous br ands should be used wit h t his unit . - Page 26 8. Touch t o go t o m ain m enu. 9. PLAY/ PAUSE but ton. Touch t o st art , pause or resum e playback. 10. STOP but t on. Touch t o stop playback 11. 9 but t on. Touch repeat edly t o change rewind speed. 12.
- Page 27 M P3 / D ivX/ JPEG disc tou ch in t er fa ce When a file disc, USB or a m em ory card is played, t ouch t he center of t he screen; t he screen will show following int erface: 1.
- Page 28 3. Touch t o reset your adj ust m ent t o default values. 4. Touch t o quit color set t ing. You can also press cursor butt ons on t he RC t o select and adj ust param et ers. D VD se t up Press SETUP but ton on the RC t o go t o DVD set up m enu.
- Page 29 Pla y / pa use The unit w ill aut om at ically play fr om the first sound t rack recorded on a disc/ SD/ MMC/ USB device. To ensure good syst em perform ance, wait unt il t he unit finishes reading the disc/ device inform at ion before proceeding. Press PLAY/ PAUSE but t on on t he RC t o pause playback, press it again to resum e playback.
- Page 30 I nt r o pla yba ck Press I NT but t on on t he RC to act ivat e int roduct ion funct ion. Several init ial seconds of each t rack will be played. Press t he but ton again t o cancel int ro playback. GOTO Press and hold AUDI O/ GOTO but t on t o show the playback param et ers for the current chapt er/ t rack/ t im e ( t r ack/ t it le/ chapt er num ber or t im e).
- Page 31 Se le ct ing a udio langu age ( for D VD on ly) During DVD playback, press AUDI O/ GOTO but t on on t he RC repeat edly t o select t he audio language to list en. This funct ion will not work if a disc does not support m ult i- language audio.
-
Page 32: Handli Ng Compact Di Scs
H a n dlin g com pa ct discs ‚ Do not insert anyt hing ot her t han a CD int o t he CD loading slot. ‚ Do not use cracked, chipped, warped, or ot herwise dam aged discs as t hey m ay cause skipping or noise dam age t he player . -
Page 33: Troubleshooti Ng Gui De
Tr ou ble sh oot in g gu ide Below is a t able describing sim ple m easures t hat can help you elim inate m ost problem s likely t o em erge when t his unit is in use. I f below m easures do not help, t urn t o a service center or t o the nearest dealer. Sy m pt om Ca use Solu t ion... - Page 34 Tem perat ure inside the car is t oo Cool off unt il t he am bient tem perat ure ret urns t o high. norm al. But t ons do not The built - in m icrocom put er is not Reset t he unit with t he help of RESET but t on.
-
Page 35: Speci Fi Cati On
Sp e cificat ion Ge n e r al Power supply: 12 V DC Maxim um power output : 4 x 50 W Dim ensions/ Net weight 165 x 100 x 178 m m / 3.30 kg Mount ing angle 0 t o + / - 30 Working t em perat ure range - 20... - Page 36 " " " " " " " " " " " " " " " 1 " " " " " " " ................................36 " ..........................37 " ............................39 ..........................40 " ............................46 " ..............................50 " ............................
- Page 37 " ‚ " " " " " " ‚ " " " " " " " " " " " " " " " " " " " " " " " " " ‚ " " " " " "...
- Page 38 ‚ " " " " " " " " " " " " " " " " " ‚ " " " " " " " " " " " " " " " " " " " " " "...
- Page 39 " " " " " " " 5. I SO- " " " " " " " " " 15 6 " " " " " " " " " "...
- Page 40 ‚ " " " " " " " " " " " " , " " " " " ‚ " " " " " " " " " " " " " " " " " " " " ‚...
- Page 41 ‚ " " ( 5) " " " " " " ‚ " " " " " " " " " " " " " ‚ " " " " " " " " " " " " " " " "...
- Page 42 " " " " " " " " " " " " " " " " " " " " " " " " " " " " " " " " " " " " " " " " "...
- Page 43 "...
- Page 44 " I SO " " " " " " I SO, " " " " " " " " " I SO " " " " " " " " " " " " " " " " " " ( + ) - - - "...
- Page 45 " " " " " " " " " " " " " " " " " " " " " " " " " " " " “ATTENTI ON!! You cannot use t his funct ion while driving” ( “ "...
- Page 46 " " EJECT ) reset VOL- VOL+ TI LT POWER MODE TUN/ TRK ; TUN/ TRK < " " " " " " " :" " " " " "...
- Page 47 " " " " " " " " " " " " " " " "...
- Page 48 " " MODE POWER " " BND/ RDM ENTER " " " " EJECT P.SCN/ RPT SEEK- / ; AF/ TA STOP/ PBC " " PLAY/ PAUSE MUTE MENU SUB- T " " SETUP ANGLE I NT VOL+ VOL- A-B/ ZOOM AUDI O/ GOTO DUAL SEEK+ / <...
- Page 49 " " " " " " " " " " " (CR 2025 3V) , " " " " " " ‚ " " " " " ‚ " " " " " " " " " " " " "...
- Page 50 " " " " " " " " " " " " " " " " " " " " " " EJECT), " " " " " " " " " POWER " " " " " " " "...
- Page 51 ‚ " " Equalizer ( Flat , Classic, Pop, Rock DSP Off ‚ " " " " " " " TA Volum e ( TA) : ‚ " " " " Bass ( ‚ " " " " Treble ( ‚...
- Page 52 " " " " " " " " " " " " " " " " " " " " ( DVD) , USB " " " " " :" ( SD) " " " USB- ‚ " " " "...
- Page 53 " " " " " " " " " DUAL - " " " " " " " " " " " " " , USB " " " " " " " " " " " " " " "...
- Page 54 " " " " " " SETTI NG " " " " " " " " " " " " " " " " " " " " " " " ENTER " " " SEEK- / ;" SEEK+ / <" "...
- Page 55 " " RD S ( RD S an d Radio) ‚ " " " St ereo: STEREO MONO ( " " " " " " " " " " " " " ‚ " " " " " " LOCAL ( DX ( "...
- Page 56 " " " " " " " " " " " " " " MASK ALL. ‚ " " " Radio Area ( ( Europe/ USA/ ASI A/ SOUTH AMERI CA) . " " " ( Syst e m in fo) "...
- Page 57 " " " " " " " " " " " UTI L " " " " ( Calculat or) (Calendar) . " " " " " " " " Calculator " , " " " " " " " "...
- Page 58 " " " " " " " " " " " " " " " " " " " " " " " PTY. " " " " " " PTY. " " " " " " " " " "...
- Page 59 " " " " " " " " " BAND/ RDM : FM1 - FM2 - FM3 – MW1 ( AM2) - MW2 ( AM2) . " " ‚ " " " " " " " " SEEK- / ;" SEEK+ / <"...
- Page 60 " AF ( " " " " " " " " " AF/ TA " " " " " " " " " " " " " " " " " " " " " " " " " " "...
- Page 61 " " " " " " " " " " " " " " " " " " " " " " " " " " " " " " " " " " " " " " " " "...
- Page 62 AV- I N " " " " " " " " " AV- I N " " " " " MODE " " " " " " " " " " " " " " " " " AV- I N. "...
- Page 63 " " " / USB/ SD / MM C " USB/ SD / MM C " " " " USB: USB 1.1. . SD/ MMC: " " " " " " " " " ‚ " " " " " "...
- Page 64 " " " " " " " " " " " " " " PLAY/ PAUSE. " " STOP. " " " " " " " " " " " " " " " " " " " REPEAT. " "...
- Page 65 " M P3 / D ivX/ JPEG " " " " " " " " MP3/ DivX/ JPEG, " " " RDM. " " " " RPT. " " " I NT. " " " " " " " I D3- "...
- Page 66 " " " " " " " " " " " " " " " " " (saturat ion) , (brightness), " (cont rast ) , (sharpness) ( hue). " " " " " " " " " " " "...
- Page 67 ‚ " " " " " « », " " " " " " " 0000), ENTER. " " " " " " 0000, " " " " " " ( 0000) ‚ " " " " " " " "...
- Page 68 " " " " " " " " SEEK- / ;" SEEK+ / <" TUN/ TRK ;/ < " " " " " " " " " DVD/ VCD " " " " " " " " " " " PLAY/ PAUSE "...
- Page 69 " PBC ( VCD) " " " " " " VCD- PBC. " " " " " " " " STOP/ PBC PBC. " " " " " " " " " " " " " " " " " "...
- Page 70 " VCD ) " " " " " " AUDI O/ GOTO = > = > " D VD ) " " " " " " " " " " MENU " " " " " " " " " "...
- Page 71 " " ‚ " " " " " " " " " ‚ " " " " " " " " " " " " ‚ " " " " " " " " " " " ‚ " " "...
- Page 72 " " " " " " " " " " " " " " " " " " " " " " " " " " " " " " " " " " " " " " " " "...
- Page 73 " " " " " " " " " " " " " " " " " " " " " " " " " RESET. " " " " " " " " " " " " " " "...
- Page 74 " " – 74 / 87,5 – 108 " " AM ( M W ) " 522 – 1620 " " " " PAL/ SECAM 48,25 – 863,25 " DVD/ DVD± R/ ± RW, CD- R/ - RW, USB/ SD/ MMC "...
Need help?
Do you have a question about the SM-CMD5003G and is the answer not in the manual?
Questions and answers