Table of Contents
Advertisement
Quick Links
Installation, Operation, and Maintenance
Certifi cation: UL 197-2010
Report # 141-S-05d-2
Part # 10-0030-EL
Doc # OM-C-20E v2
Copyright © 2013
the natural way to cook
the natural way to cook
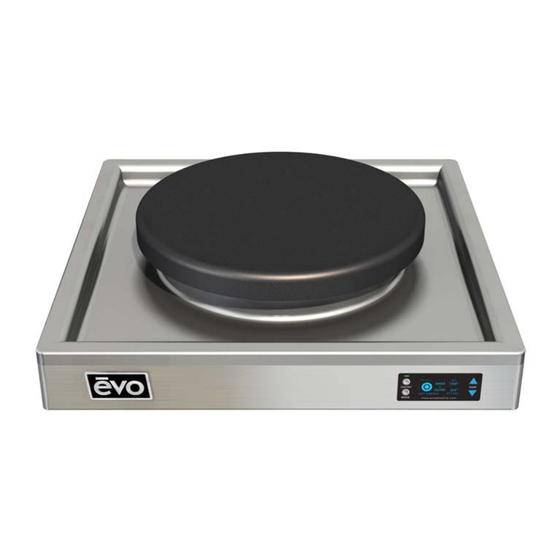
Evo Centric 20E Electric
Commercial Cooktop
Operator's Manual
For Indoor Use Only
®
®
Evo, Inc.
8140 SW Nimbus Ave., Bldg. 5
Beaverton, Oregon 97008 USA
503-626-1802
www.evoamerica.com
1
Advertisement
Table of Contents

Related Manuals for Evo Centric 20E Electric


Summary of Contents for Evo Centric 20E Electric
- Page 1 ® the natural way to cook the natural way to cook ® Evo Centric 20E Electric Commercial Cooktop Operator’s Manual Installation, Operation, and Maintenance For Indoor Use Only Evo, Inc. Certifi cation: UL 197-2010 8140 SW Nimbus Ave., Bldg. 5...
-
Page 2: Notes
Notes To Installer or Person Setting Up Centric 20E: Leave these instructions with the operator. To Foodservice Professional Keep these instructions for future reference. Complete Now For Future Reference Serial # _____________________________ Date of Purchase ______________________ Place of Purchase _____________________... -
Page 3: Table Of Contents
Evo Centric Travel Case. Table Of Contents --------------------------------------3 If you have purchased a Centric unit shipped Warnings --------------------------------------------------4 in the optional Evo Travel Case, then you will need to follow the instructions outlined in Limited Warranty ----------------------------------------5 page 6. -
Page 4: Warnings
READ FIRST IMPORTANT PRODUCT AND SAFETY INFORMATION WARNING THIS UNIT IS EQUIPPED WITH A THREE-WIRE NEMA 5-20P CORDED PLUG. THIS UNIT SHOULD BE FUSED SEPARATELY WITH A 20AMP CIRCUIT. FOR PERSONAL SAFETY, THIS APPLIANCE MUST BE PROPERLY GROUNDED. WARNING KEEP WATER AND ALL COOKING SPILL OVERS AWAY FROM FRONT CONTROL PANEL AND UNDERSIDE OF UNIT. -
Page 5: Limited Warranty
One Year from the original date of purchase from Evo, Inc. This warranty is for the benefi t of the original use purchaser and is non-transferable. -
Page 6: Remove Unit From Optional Travel Case
Remove Unit From Optional Travel Case Unloading From Travel Case Spatulas, Cleaning Kit Storage Front Case Latches Release Latches Rear Three Each Side Post Wheels Remove Case Top STEP #1 STEP #2 1 - POSITION CASE VERTICALLY WITH WHEELS AND FRONT POST AGAINST THE FLOOR - Allow case to rest on fl... -
Page 7: Remove Unit From Cardboard Crating
Remove Unit From Crating Uncrating STEP #2 STEP #1 EXTEND ELECTRICAL LIFT UNIT CORD FROM BOX Ensure electrical cord is Lift from outside edge of unit free from packaging and and not from cooking surface outside of unit when setting unit on table STEP #3 REMOVE PROTECTIVE... -
Page 8: Clearances To Combustible Surfaces
Clearance To Backwall From Cooking Surface The Evo Centric may be installed to back, side, and front combustible surfaces with a zero-clearance (0” or 0mm) tolerance to the outside of the stainless steel chassis. The top of the cooking surface requires 32” (813mm) to combustible surfaces. -
Page 9: Centric 20E Dimensions
Centric 20E Dimensions Dimensions 7 3/4” (197mm) 4 15/16” (126mm) 3/4” (19mm) 20” Ø (508mm) 314 Sq. Inches 29” (20,258cm) (737mm) 29” (737mm) -
Page 10: Installing Centric 20E To Counter
Installing Centric 20E To Counter Countertop Installation The Centric 20E may be recessed into a cabinet constructed from any suitable material such as wood, stainless steel, or composite. Example shown positions the unit with its chassis fl ush to the counter top and the cooking surface visible to a display-cooking audience. -
Page 11: Installing Centric 20E To Counter
Installing Centric 20E To Counter Countertop Installation Installation View Finished View... -
Page 12: Connecting To Electrical Service
DO NOT CONNECT TO DIRECT CURRENT (DC). INSTALLATION SHOULD CONFORM TO THE NATIONAL ELECTRIC CODE AND ALL LOCAL ELECTRIC RULES AND REGULATIONS. THE RECEPTACLE REQUIRED FOR THE EVO CENTRIC 20E IS A NEMA 5-20 SHOWN IN THE ILLUSTRATION BELOW. THE NEMA 5-20 IS A 20AMP RATED RECEPTACLE. THE MAXIMUM AMPERAGE DRAW OF THE CENTRIC 20E UNIT IS APPROXIMATELY 15.5 AMP. -
Page 13: Cooking Surface Temperature Zones
Cooking Surface Temperature Zones Temperature Zones 20” 10” (508mm) (254mm) Diameter Diameter INNER FOCUS EDGE EDGE EDGE EDGE Default Temperature Mode Optional Temperature Mode EDGE to EDGE mode provides temperature control across the entire cooking surface. EDGE EDGE EDGE EDGE When EDGE to EDGE mode is selected, heat is applied equally to both the inner and outer cooking surface zones. -
Page 14: Centric 20E Control Panel
Centric 20E Control Panel Basic Features e v o CENTRIC 20E REVISION 4.0 C O L D S U R FA C E Pressing the round button located above the ON/OFF label toggles between power ON and power OFF. When the unit is ON, a green light illuminates above the ON/OFF label indicating the unit is active. -
Page 15: Edge To Edge Temperature Mode
Centric 20E Control Panel Basic Feature EDGE to EDGE Temperature Mode EDGE EDGE S E T T E M P E R A T U R E H O T S U R FA C E EDGE to EDGE temperature mode is the default mode automatically selected when unit is powered ON. -
Page 16: Inner Focus Temperature Mode
Centric 20E Control Panel Advanced Feature INNER FOCUS Temperature Mode INNER FOCUS S E T T E M P E R A T U R E H O T S U R FA C E INNER FOCUS temperature mode is selected by pressing the MODE button for four seconds when the unit is powered ON. -
Page 18: Cooking Surface Maintenance
Afterwards you will want to wipe the cook surface with vegetable oil again before cooking. To condition the Evo cooking surface, you should use the grill cleaning kit supplied with your grill. The grill cleaning kit contains a professional 3M-brand grill pad handle, grill cleaning screens, and grill polishing pads. Use the polishing pad after the grill cleaning screens to achieve a smooth black oil-seasoned cooking surface for the most delicate foods and applications. -
Page 19: Quick Start Instruction Guide
- CAUTION - - CAUTION - NEVER LEAVE THIS APPLIANCE UNATTENDED DO NOT IMMERSE APPLIANCE IN WATER WHEN IN OPERATION OR SPRAY WITH WATER OR LIQUID CLEANERS Evo, Inc. 8140 SW Nimbus Ave., Bldg. 5, Beaverton Oregon 97008 USA Ph 503-626-1802 www.evoamerica.com...
Need help?
Do you have a question about the Centric 20E Electric and is the answer not in the manual?
Questions and answers