Table of Contents
Advertisement
Available languages
Available languages
Advertisement
Table of Contents

Subscribe to Our Youtube Channel
Related Manuals for Delta SOLIVIA 5.0 AP G3


Summary of Contents for Delta SOLIVIA 5.0 AP G3
- Page 1 Operation and installation manual for SOLIVIA 5.0 AP G3...
- Page 3 The technical instructions and illustrations contained in this manual are to be treated as confidential and no part may be reprodu- ced without the prior written permission of Delta Energy Systems Service engineers and end users may not divulge the information contained herein or use this manual for purposes other than those strictly connected with correct use of the equipment.
- Page 4 Operation and installation manual SOLIVIA 5.0 AP G3...
-
Page 5: Table Of Contents
Submenu S: Solar ISO / GND 7.3.7.2 Submenu S: Firmware Diagnostics and data evaluation Malfunction rectification Display messages Technical data 10 Appendix 10.1 Connection examples 10.2 Overview of connection diagrams 11 Glossary 12 Certificates Operation and installation manual SOLIVIA 5.0 AP G3... -
Page 6: Scope Of Delivery
• AC connector General warnings / Notes on safety Congratulations on the purchase of the SOLAR INVERTER SOLIVIA 5.0 AP G3. These directions will help you become familiar with this product. Please observe the safety regulations (see § 9) and technical connection conditions for local utility company). -
Page 7: Introduction
The best way of accessing this functionality is via the available accessories; comprehensive and seamless solar inverter monitoring is ensured. The data read-out over the integrated interface and the display is possible only in solar operation. Operation and installation manual SOLIVIA 5.0 AP G3... -
Page 8: Technical Structure Of The Solar Inverter
The disconnection equipment allows for automatic isolation for in-plant generation systems of nomi- nal power ≤ 4.6 kVA, with single-phase parallel feed-in through the solar inverter into the grid. Operation and installation manual SOLIVIA 5.0 AP G3... -
Page 9: Equipment Overview
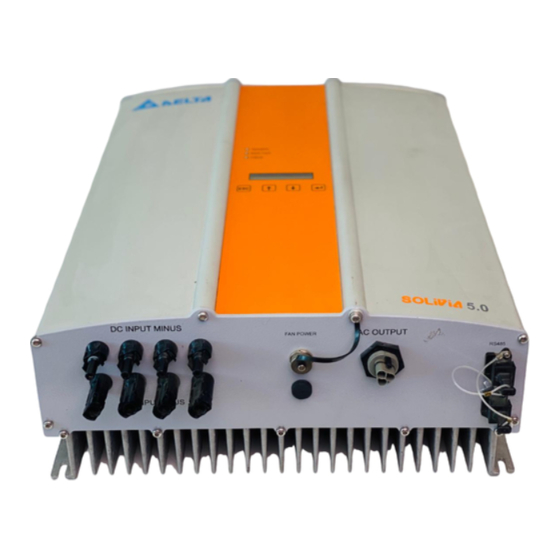
Equipment overview (1) Connections for PV modules (2) Grid connection (3) Interface connection RS485 (EIA485) (4) Display for status messages and keypad for operation (5) Light-emitting diodes for operational status display Operation and installation manual SOLIVIA 5.0 AP G3... -
Page 10: Installation
• Unused DC connectors and interfaces must be sealed airtight with sealing plugs to ensure protection class IP65 for the whole system (inverter & cables). 50 cm Wall 10 cm 10 cm 50 cm Operation and installation manual SOLIVIA 5.0 AP G3... -
Page 11: Maintenance
Fasten the supplied mounting nuts and washers on the threaded bolt intended for secu- ring the device. Check that the solar inverter is securely sealed. Mounting plate Locking screw Locking screw 319.5 410 ± 0.5 Operation and installation manual SOLIVIA 5.0 AP G3... -
Page 12: Ambient Temperature
Please note the cable length and the cable cross-section, due to the risk of undesirable temperature rise and power losses. The AC connector is protected from unintentional disconnection by a clip mechanism which can be released with a screwdriver. Operation and installation manual SOLIVIA 5.0 AP G3... -
Page 13: Connection Of Pv Modules
We suggest using Deltas grounding kit “Grounding Set A Solar” (EOE99000275). The grounding connection is monitored and should be configured in the Setup menu (see above). Alternatively, it is possible to turn off the insulation- and grounding monitoring: • ISO / GND OFF. Operation and installation manual SOLIVIA 5.0 AP G3... -
Page 14: Output Power Over Pv Voltage
1 0 0 0 W 1 5 0 VDC 2 0 0 VDC 2 5 0 VDC 3 0 0 VDC 3 5 0 VDC 4 0 0 VDC 4 5 0 VDC Operation and installation manual SOLIVIA 5.0 AP G3... -
Page 15: Efficiency
Order designation: 09 45 145 1510, Cable Manager Blue IP67 Push-Pull Data Plug 09 45 145 1500, Cable Manager White IP67 Push-Pull Data Plug RS485 (EIA485) terminating resistor 220 V / 230 V House connection line RS485 (EIA485) - Connection Datalogger Operation and installation manual SOLIVIA 5.0 AP G3... - Page 16 When several devices are connected in series and the total length of the data line measures 2 m or more, the following option is available for terminating the RS485 (EIA485) interface: Reserved TX_A Pin 7 100 ... 150 RX_B Ohm, 0,25W Pin 6 Reserved Operation and installation manual SOLIVIA 5.0 AP G3...
-
Page 17: Electrical Connection And Operational Start-Up
In no case must the device be opened! attached to the casing. In no case must the device be opened! Operation and installation manual SOLIVIA 5.0 AP G3 Operation and installation manual SOLIVIA 5.0 AP G3... -
Page 18: Setup / Settings
1) In certain states in Australia, power limitation is required. S -> ID-Number • With power limitation, the output (AC) power of SOLIVIA 5.0 AP G3 will be as followed : Input of the ID number of the solar inverter 001 ... 254... -
Page 19: Led Operation And Fault Display
Input voltages: red: <on> Initialization. UPV: 100 V to 150 V yellow: <on> (self test ongoing). green: <fl ashes> Input- and grid moni- red: <off> Starting conditions are tested. toring. yellow: <off> Operation and installation manual SOLIVIA 5.0 AP G3... -
Page 20: Operating Concept
Handling of the menu items: You can scroll the main menu by activating the selector keys Press the ENTER key to select the submenus. In order to exit the menus again, activate the ESC key. Operation and installation manual SOLIVIA 5.0 AP G3... - Page 21 Submenu T - Total ENTER Down Menu S - Setup inverter Submenu S - Setup ENTER Down to 2 Remarks: ESC in main menu jumps to first entry of corresponding sub menu Operation and installation manual SOLIVIA 5.0 AP G3...
-
Page 22: Submenu N (Now)
Down N -> Date Display of current day (WD.DD.MM.YYYY) of the week and date Down to 2 Remarks: ESC in main menu N jumps to first entry of sub menu N Operation and installation manual SOLIVIA 5.0 AP G3... -
Page 23: Submenu D (Day)
Display of the daily operating D -> Runtime Value (Min) time of the solar inverter Down to 2 Remarks: ESC in main menu D jumps to first entry of sub menu D Operation and installation manual SOLIVIA 5.0 AP G3... -
Page 24: Submenu W (Week)
Display of the annual operating Y -> Runtime Value (h) time of the solar inverter Down to 2 Remarks: ESC in main menu Y jumps to first entry of sub menu Y Operation and installation manual SOLIVIA 5.0 AP G3... -
Page 25: Submenu T (Total)
Display of the total operating T -> Runtime Value (Min) time of the solar inverter Down to 2 Remarks: ESC in main menu T jumps to first entry of sub menu T Operation and installation manual SOLIVIA 5.0 AP G3... -
Page 26: Submenu S (Setup)
S -> Time (HH:MM:SS) Adjustment of the internal clock Down S -> Date Adjustment of current day of the week and date (WD.DD.MM.YYYY) Down S -> Firmware Adjustment of the firmware Down to 2 Operation and installation manual SOLIVIA 5.0 AP G3... -
Page 27: Submenu S: Solar Iso / Gnd
AC-Ctrl maj.min.bug Down S -> Firmware DC-Ctrl maj.min.bug Down S -> Firmware SC-Ctrl maj.min.bug Down S -> Firmware Display-Ctrl maj.min.bug Down to 4 S -> Firmware IT GMon-Ctrl maj.min.bug Down to 4 Operation and installation manual SOLIVIA 5.0 AP G3... -
Page 28: Diagnostics And Data Evaluation
<off> - If the fault persists after the device has Internal communication red: <off> Error # 301 been reset, please inform your service error or hardware fault. yellow: <on> technician. Operation and installation manual SOLIVIA 5.0 AP G3... - Page 29 <off> should be replaced at the earliest oppor warning input is defective. yellow: <flashes> tunity. This will involve returning the device. Please follow the instructions above before contacting your service technician! Operation and installation manual SOLIVIA 5.0 AP G3...
-
Page 30: Technical Data
510 x 410 x 180 mm Weight 32.0 kg Cooling Free convection AC connector Wieland RST25i3S DC connector pairs 4 Multi-Contact MC4 Communication 2 Harting RJ45 / RS485 interfaces Display LCD; 3 LEDs Operation and installation manual SOLIVIA 5.0 AP G3... - Page 31 2) In certain states in Australia, power limitation is required. With power limitation, the output (AC) power of SOLIVIA 5.0 AP G3 will be as followed : Max power: 4990 W Nominal power: 4600 W Operation and installation manual SOLIVIA 5.0 AP G3...
-
Page 32: Appendix
Switching equipment Anti-islanding protection with voltage and frequency Consumer monitoring, as well as network impedance measurement equipment of the customer Photovoltaic Short-circuit protection generator with Overload protection power inverter max. 4.6 kVA Operation and installation manual SOLIVIA 5.0 AP G3... - Page 33 Switching equipment Anti-islanding protection with voltage and Consumer equipment frequency monitoring, as well as network of the customer impedance measurement Photovoltaic Short-circuit protection generator with Overload protection power inverter max. 4.6 kVA Operation and installation manual SOLIVIA 5.0 AP G3...
-
Page 34: Overview Of Connection Diagrams
PV generator DC disconnector DC disconnector Solivia 5.0 Solivia 5.0 Automatic circuit Automatic breaker circuit breaker type B 32 A type B 32 A Customer Meter for Meter for power power feed-in consumption Operation and installation manual SOLIVIA 5.0 AP G3... - Page 35 PV generator DC disconnector Solivia 5.0 Fuse Operation and installation manual SOLIVIA 5.0 AP G3...
-
Page 36: Glossary
The conversion of PV energy into electrical energy. The name is composed of the component parts: Photos - the Greek word for light - and Volta - after Alessandro Volta, a pioneer in electrical research. Operation and installation manual SOLIVIA 5.0 AP G3... - Page 37 Germany. These Technischen Anschlussbestimmungen or TAB for short have been in force since the year 2000. They define the requirements imposed by DSOs on the electrical systems operated by the end customers of utility companies. Operation and installation manual SOLIVIA 5.0 AP G3...
- Page 38 사용 및 설치 설명서SOLIVIA 5.0 AP G3...
- Page 39 이 설명서는 최종 사용자가 사용할 수 있도록 장비와 함께 제공됩니다. 이 설명서에 나온 기술적인 설명과 그림은 기밀 정보로 취급해야 하며 어떤 부분도 Delta Energy Systems 기술자의 사전 서면 동의를 받지 않고 복제할 수 없습니다. 최종 사용자는 장비의 올바른 사용과 엄격하게 관련되지 않은 용도로 이 설명서에 담긴 정...
- Page 40 사용 및 설치 설명서SOLIVIA 5.0 AP G3...
- Page 41 하위 메뉴 S: Solar ISO / GND 7.3.7.2 하위 메뉴 S: Firmware 진단 및 데이터 평가 오작동 교정 디스플레이 메시지 기술 데이터 10 부록 10.1 연결 예 10.2 연결 도면 개요 11 용어집 12 연락처 사용 및 설치 설명서SOLIVIA 5.0 AP G3...
- Page 42 • AC 커넥터 일반 경고/안전 지침 태양광 인버터 SOLIVIA 5.0 AP G3을 구입해 주셔서 감사합니다. 이 설명서에는 제품을 이해하는 데 도움이 되는 내용이 나와 있습니다. 안전 규정(9절 참조)과 현지 전력 회사를 위한 기술적 연결 조건을 준수하십시오. 사용 수명 및 내...
- Page 43 해 데이터를 다운로드하여 PC에서 평가할 수 있고 작동 데이터를 연속적으로 기록할 수 있습니다. 이러한 기능을 이용하는 가장 좋은 방법은 제공되는 부속품을 이용하는 것입니다. 이러한 부속품을 이용하면 종합적이고 빈틈 없이 태양광 인버터를 모니터링할 수 있습니다. 태양광 작동 중에만 일체형 인터페이스와 디스플레이에서 데이터를 읽을 수 있습니다. 사용 및 설치 설명서SOLIVIA 5.0 AP G3...
- Page 44 회로 분리 또는 전원 공급 중단이 발생했을 때 안전한 차단을 보장하고 분리된 상태에서 작동하는 것을 방지합니다. 차단 장비를 사용해 공칭 전력이 4.6kVA 이하인 시설 내의 발전 시스템에 대한 자동 분리가 가능 하며 태양광 인버터를 통해 그리드에 단상 병렬식으로 전력을 공급할 수 있습니다. 사용 및 설치 설명서SOLIVIA 5.0 AP G3...
- Page 45 장비 개요 (1) 태양광 모듈 연결 (2) 그리드 연결 (3) 인터페이스 연결 RS485(EIA485) (4) 상태 메시지 표시와 작동 키패드 (5) 작동 상태 표시 LED 사용 및 설치 설명서SOLIVIA 5.0 AP G3...
- Page 46 • 권장 설치 위치를 준수해야 합니다(수직). • 사용하지 않은 DC 커넥터 와 인터페이스는 밀봉 마개로 공기가 통하지 않게 밀봉해서 전 체 시스템(인버터와 케이블)에서 IP65 보호 등급을 유지해야 합니다. 50 cm Wall 10 cm 10 cm 50 cm 사용 및 설치 설명서SOLIVIA 5.0 AP G3...
- Page 47 태양광 인버터는 무게가 32.0kg이므로 최소한 두 명이 들어 운반해야 합니다. 최소한 두 명이 태양광 인버터를 들어 부착판에 올려놓습니다. 제공된 고정 너트와 와셔를 볼트에 조여 장치를 고정시킵니다. 태양광 인버터가 단단히 밀봉되었는지 확인합니다. 부착판 잠금 나사 잠금 나사 319.5 410 ± 0.5 사용 및 설치 설명서SOLIVIA 5.0 AP G3...
- Page 48 된 단자에 연결합니다. 여러 개의 인버터를 설치하고자 할 때에는 부록에 나온 그림과 같이 작업 합니다. 원하지 않는 온도 상승과 전력 손실의 위험이 있으므로 케이블 길이와 케이블 단면적에 주의해야 합니다. AC 커넥터는 나사 드라이버로 풀 수 있는 클립 장치에 의해 의도하지 않은 차단으로부터 보호됩 니다. 사용 및 설치 설명서SOLIVIA 5.0 AP G3...
- Page 49 모듈 제조 회사가 규정한 요구 조건을 충족시키기 위해 태양광 시스템의 양극이나 음극을 연결해 야 할 경우 다음과 같이 할 수 있습니다. 인버터와 가까운 곳에서 접지 연속성을 실행해야 합니다. Delta의 접지 키트 “Grounding Set A Solar”(EOE99000275)를 사용하는 것이 좋습니다. 접지 연 결을 모니터링하고 Setup(설정) 메뉴에서 구성할 수 있습니다(위 참조).
- Page 50 1 0 0 0 W 1 5 0 VDC 2 0 0 VDC 2 5 0 VDC 3 0 0 VDC 3 5 0 VDC 4 0 0 VDC 4 5 0 VDC 사용 및 설치 설명서SOLIVIA 5.0 AP G3...
- Page 51 연결 커넥터 공급 업체 HARTING Deutschland GmbH & Co. KG (P.O. 2451, 32381 Minden; Germany; www.harting.com). 주문 지정: 09 45 145 1510, Cable Manager Blue IP67 Push-Pull Data Plug 09 45 145 1500, Cable Manager White IP67 Push-Pull Data Plug RS485 (EIA485) 220V/230V RS485(EIA485) – 사용 및 설치 설명서SOLIVIA 5.0 AP G3...
- Page 52 RS485(EIA485) (RS485) RX_B (RS485) TX_A (RS485) RS485 (EIA485) TX_A Pin 7 100 ... 150 RX_B Ohm, 0,25W Pin 6 사용 및 설치 설명서SOLIVIA 5.0 AP G3...
- Page 53 전기 연결 및 시동 태양광 인버터의 전기 연결은 케이싱에 부착된 커넥터 접점을 사용해 실시합니다. 어떤 경우에도 장치를 열면 안 됩니다! 장치를 열면 안 됩니다! 사용 및 설치 설명서SOLIVIA 5.0 AP G3 사용 및 설치 설명서SOLIVIA 5.0 AP G3...
- Page 54 Down 1) 호주 일부 지역에서는, 출력제한이 필요로 합니다. S -> ID-Number • 이러한 출력제한으로, SOLIVIA 5.0 AP G3의 출력(AC)은 하기 와 같습니다: Input of the ID number of the solar inverter 001 ... 254 최대 출력: 4990 W 정격 출력: 4600 W Down •...
- Page 55 태양광 인버터가 전력을 그리드로 공급하지 않고 있습니다. 노란색:<꺼짐> 녹색:<켜짐> 입력 전압: 빨간색:<켜짐> 시작. UPV:100V - 150V 노란색:<켜짐 (자체 검사 진행 중) 녹색:<깜빡임> 입력 및 그리드 모니 빨간색:<꺼짐> 시동 상태를 검사하고 있습니다. 터링 노란색:<꺼짐> 사용 및 설치 설명서SOLIVIA 5.0 AP G3...
- Page 56 • 메뉴 M(월) • 메뉴 Y(연) • 메뉴 T(총합) • 메뉴 S(설정) 메뉴 항목 조작: 선택기 키를 활성화해 메인 메뉴를 이동할 수 있습니다 ENTER 키를 눌러 하위 메뉴를 선택합니다. 메뉴를 다시 끝내려면 ESC 키를 활성화합니다. 사용 및 설치 설명서SOLIVIA 5.0 AP G3...
- Page 57 Menu Y - Year statistic Submenu Y - Year ENTER Down Menu T - Total statistic Submenu T - Total ENTER Down Menu S - Setup inverter Submenu S - Setup ENTER Down to 2 사용 및 설치 설명서SOLIVIA 5.0 AP G3...
- Page 58 Value (V) Down N -> PV1-Current Value (A) Down N -> PV2-Voltage Value (V) Down N -> PV2-Current Value (A) Down N -> Time (HH:MM:SS) Down N -> Date (WD.DD.MM.YYYY) Down to 2 사용 및 설치 설명서SOLIVIA 5.0 AP G3...
- Page 59 Down D -> AC-Volt-Min Value (V) Down D -> AC-Curr-Max Value (A) Down D -> AC-Freq.-Max Value (Hz) Down D -> AC-Freq.-Min Value (Hz) Down D -> Runtime Value (Min) Down to 2 사용 및 설치 설명서SOLIVIA 5.0 AP G3...
- Page 60 Main menu Y - Year statistic Submenu Y - Year Up to 1 Y -> Energy Value (kWh) Down Y -> AC-Revenue Value (AUD / Won) Down Y -> Runtime Value (h) Down to 2 사용 및 설치 설명서SOLIVIA 5.0 AP G3...
- Page 61 T -> PV1-Pow. Max Value (W) Down T -> PV2-Vol. Max Value (V) Down T -> PV2-Cur. Max Value (A) Down T -> PV2-Pow. Max Value (W) Down T -> Runtime Value (Min) Down to 2 사용 및 설치 설명서SOLIVIA 5.0 AP G3...
- Page 62 Down S -> Solar ISO / GND ISO/GND Down S -> Baudrate 2400-38400 2400 ... 38400 Down S -> Time (HH:MM:SS) Down S -> Date (WD.DD.MM.YYYY) Down S -> Firmware Down to 2 사용 및 설치 설명서SOLIVIA 5.0 AP G3...
- Page 63 S -> Firmware AC-Ctrl maj.min.bug Down S -> Firmware DC-Ctrl maj.min.bug Down S -> Firmware SC-Ctrl maj.min.bug Down S -> Firmware Display-Ctrl maj.min.bug Down to 4 S -> Firmware IT GMon-Ctrl maj.min.bug Down to 4 사용 및 설치 설명서SOLIVIA 5.0 AP G3...
- Page 64 빨간색:<꺼짐> failure 가 너무 높음 면 서비스 센터에 문의하십시오. 노란색:<켜짐> 녹색:<꺼짐> 내부 통신 오류 또는 하드 - 장치를 초기화해도 문제가 계속 발생하 빨간색:<꺼짐> Error # 301 웨어 고장 면 서비스 센터에 문의하십시오. 노란색:<켜짐> 사용 및 설치 설명서SOLIVIA 5.0 AP G3...
- Page 65 계속 사용할 수 있지만 가능한 한 Varistor DC 입력측 내부 배리스터 빨간색:<꺼짐> 빨리 배리스터를 교환해야 warning 에 결함 발생 노란색:<깜빡임> 합니다. 이를 위해 장치를 반품해야 합니다. 서비스 센터에 연락하기 전에 위에 나온 문제 해결 방법을 따르십시오! 사용 및 설치 설명서SOLIVIA 5.0 AP G3...
- Page 66 SOLIVIA 5.0 AP G3 최대 효율 95.6 % 유로 효율 94.6 % 작동 온도 범위 -25 ... +60°C 보관 온도 범위 -25 ... +80°C 습도 0 ... 98 % 최고 해발고도 2000 m 사용 및 설치 설명서SOLIVIA 5.0 AP G3...
- Page 67 1) 최대출력용량 값은 인버터가 전달가능 한 용량이 표시됨. 그러나, 이와 같은 최대출력용량 값은 반드시 출력 될 필요 는 없음. 2) 호주 일부 지역에서는, 출력제한이 필요로 합니다. 이러한 출력제한으로, SOLIVIA 5.0 AP G3의 출력(AC)은 하기 와 같습니다: 최대 출력: 4990 W 정격...
- Page 68 부록 10.1 연결 예 ~ 400/220V ~ 400 / 230 V ~ 400 / 220 V ~ 400 / 230 V 4.6kVA 사용 및 설치 설명서SOLIVIA 5.0 AP G3...
- Page 69 ~ 400/220V ~ 400 / 230 V ~ 400 / 220 V ~ 400 / 230 V 4.6kVA 사용 및 설치 설명서SOLIVIA 5.0 AP G3...
- Page 70 10.2 연결 도면 개요 Solivia 5.0 32 A Solivia 5.0 Solivia 5.0 32 A 32 A 사용 및 설치 설명서SOLIVIA 5.0 AP G3...
- Page 71 Solivia 5.0 사용 및 설치 설명서SOLIVIA 5.0 AP G3...
- Page 72 전기 연구의 선구자인 Alessandro Volta의 이름에서 따옴. 전위 분리 두 구성품 사이에 전도성 연결이 없음. 전력 소실 전력 손실은 어떤 장치 혹은 과정상에서, 흡수된 전력과 생산된 전력간의 차이를 말합니다. 전력 소 실은 주로 열로 방출됩니다. 사용 및 설치 설명서SOLIVIA 5.0 AP G3...
- Page 73 TAB 2000은 독일의 배전 시스템 운용 회사가 운용하는 저전압 그리드에 대한 연결에 적용되는 기 술 규정입니다. 이 기술 규정은 2000년도 부터 시행되어 왔습니다. 이 규정은 전기 회사의 최종 고 객이 운용하는 전기 시스템에 대해 DSO가 부과하는 요구 조건을 규정합니다. 사용 및 설치 설명서SOLIVIA 5.0 AP G3...
- Page 74 操作和安裝手冊 SOLIVIA 5.0 AP G3...
- Page 75 本手冊如有更改,恕不另行通知。 歡迎隨時到我們的網站www.solar-inverter.com 參考最新版本的手冊。 © Delta Energy Systems (Germany) GmbH 版權所有 — 保留所有權利。 本裝置隨附本說明書,以供終端使用者使用。 本說明書所載的技術性指導與圖解被視作是保密資料,未經 Delta Energy Systems 服務工程師事先書面同意,不得複製該資料的任 何部份。終端使用者不得洩漏本說明書所載的資料,或將其用作與正確使用本設備無關的任何其他用途。 所有資料和規格如有更改,恕不另行通知。 操作和安裝手冊 SOLIVIA 5.0 AP G3...
- Page 76 操作和安裝手冊 SOLIVIA 5.0 AP G3...
- Page 77 7.3.4 子選單 M(月) 7.3.5 子選單 Y(年) 7.3.6 子選單 T(總值) 7.3.7 子選單 S(設置) 7.3.7.1 子選單 S:Solar ISO / GND 7.3.7.2 子選單 S:韌體 診斷及數據評估 排除故障 顯示資料 技術數據 10 附錄 10.1 連接示例 10.2 連接圖示概述 11 術語表 12 認證 操作和安裝手冊 SOLIVIA 5.0 AP G3...
- Page 78 商品內容 • 轉換器SOLIVIA 5.0 AP G3太陽能轉換器 • 安裝板 • 操作和安裝手冊 • 交流電連接器 警告事項/安全注意事項 感謝您選擇 轉換器SOLIVIA 5.0 AP G3太陽能轉換器。 本說明手冊將幫助您了解此項產品。 請遵守安全規定(見第 9 節)和本地電力公司的連接技術條件。妥善使用本產品將有助於延長本產 品的使用壽命,增加耐用性和可靠性。-遵循這些基本條件將有助於本產品發揮最大效能。 請注意下列安全事項: • 在電器裝置運作期間,裝置的某些部份存在危險電壓。 • 不當操作會造成人身傷害和重大毀損! • 遵照安裝規定。 • 安裝和初始操作僅能由合格電工執行。 • 裝置的維修工作僅能由製造商執行。 • 請遵守操作和安裝手冊中的全部事項! • 在執行任何工作之前,確保公共電網和太陽能模組均未連接至裝置上。 • 由於溫度極高,裝置之表面會變燙。...
- Page 79 系統 太陽能轉換器將太陽能電池的直流電轉換成交流電。該裝置能夠將產自太陽能的電能饋入公共電 網。 由於高效的最大功率點追蹤技術,即使在多雲天氣依然能最大化地利用太陽能設備。 串型的理念是指太陽能模組始終與太陽能轉換器串聯連接(組串)及/或處於相同電壓的組串並行 與太陽能轉換器連接,旨在大幅減少太陽能系統的配線要求。 模組的組串式連接亦保證太陽能系統可完美地配合太陽能轉換器的輸入電壓範圍。 資料評估和通訊 本裝置的整合資料整合顯示、處理和傳輸使太陽能轉換器操作更簡便。顯示器可監控運作狀態和發 送運作故障的信號。資料介面可下載電腦系統評估的資料,保證持續記錄運作數據。 使用該功能最好的方法是透過其他配件;以確保能完整且順暢地監控太陽能轉換器。 要透過整合介面或顯示器讀取數據,裝置必須進行太陽能運作狀態中。 太陽能轉換器的技術結構 要隔離太陽能轉換器的直流電與電網,必須透過附有整合高頻變壓器的直流/交流電轉換器來進 行。要調整電壓,使太陽能模組在太陽輻射水平及溫度不斷變化的條件下亦能實現最大輸出功率( 最大功率點追蹤 MPP-Tracking)。 太陽能轉換器的最大功率點的追蹤範圍在 150V到 450V之間,各家製造商均可藉此加強太陽能模組 的效能。因此必須採取一些方法以確保最大直流輸入開路電壓絕不超過 540V,請注意在最低溫度 下將產生最大開路電壓。有關溫度影響的詳細資料,請參見太陽能模組的數據資料。裝置的耗損的 能量需保持在最小值。 品質優異的鋁盒符合 IP65 防護等級(防水柱且防塵),其表面經改良後可抵抗風吹日曬的侵襲。 背面的金屬鰭狀設計可加強其散熱功能,使轉換器在 -25°C 至 +60°C 的環境溫度下運作。 具有散熱功能的背面也可消除因電壓轉換而產生的功耗。內部溫度控制器可保護裝置免受太陽能轉 換器溫度過高而造成的傷害。如果環境溫度過高,最大可轉換功率將受到限制。 太陽能轉換器由微控制器控制,微控制器亦能執行介面通訊及監控顯示器上的數值與資料。 操作和安裝手冊 SOLIVIA 5.0 AP G3...
- Page 80 兩個獨立的冗餘微控制器按照本地電力公司的饋入指示,以控制監控電網。太陽能轉換器即可安裝 在室內電網中。 為達到保護操作員的安全要求,電網應與太陽能模組絕緣。電網與太陽能模組之間的電絕緣相當於 基本絕緣。需加強電網、太陽能模組和可接入介面(顯示器、RS485 介面)之間的絕緣,為操作人 員提供最大程度的保護,以符合電磁相容性 (EMC) 和安全性的相關標準。 太陽能轉換器僅可於併網時運作,由一家認證機構認可的自動絕緣點能保證在短路或供電中斷時切 斷安全地終止連接,且避免於隔離狀態下之運作。 斷電設備與額定功率 ≤ 4.6 kVA的裝置內生成系統自動絕緣,單相並行饋入線透過太陽能轉換器進 入電網。 設備概況 設備概況 (1)太陽能模組連接頭 (2)電網連接頭 (3)RS485 接頭 (EIA485) (4)顯示狀態資料的顯示器及操作鍵盤 (5)顯示運作狀態器的LED指示燈 操作和安裝手冊 SOLIVIA 5.0 AP G3...
- Page 81 • 雖然本裝置配備防紫外線元件,但切勿將裝置直接暴曬於陽光下。 • 儘管擁有 IP65 外殼並獲得第三類汚損認證,仍不得將本裝置嚴重汚損。 • 多塵環境可能損害本裝置的性能。 最低要求 • 不得妨礙太陽能轉換器周圍的自由對流。 • 由於適當的空氣循環能幫助散熱,請保持裝置旁邊約 10 公分及裝置上下約 50 公分的空間無其他 物體。 • 遵守供電終端的電網電阻規定(電線長度、電線橫截面)。• 遵照建議的安裝位置(立式)進行 安裝。 • 閒置的直流連接器(Tyco) 和接頭頭一定要使用密封塞密封,以確保整個系統(轉換器及電線)達 到IP65 保護等級。 50 cm Wall 10 cm 10 cm 50 cm 操作和安裝手冊 SOLIVIA 5.0 AP G3...
- Page 82 維護 需確保本裝置在運作過程中不被物件覆蓋。為避免太陽能轉換器的外殼汚損,應定期清洗外殼。 使用者不得私自碰觸裝置內的零部件,也決不可打開太陽能轉換器! 安裝 您應該使用隨附的安裝板準確安裝太陽能轉換器。安裝至牆面須使用適當的螺絲絲。將掛架固定於 牆面後,就能輕易地裝上太陽能轉換器然後安全栓緊本裝置。 裝配指南 1. 使用適當的螺絲(最大 6 毫米)裝配安裝板,將螺絲鎖入最少 4 個孔中(共有 8 個孔)以固定 掛架。您可以 安裝板為模板,標記鑽孔的位置。 2. 由於太陽能轉換器重 32.0公斤,因此至少需要兩人才能將其從運輸櫃中搬出。 3. 至少需要兩人才能將太陽能轉換器放置在安裝板上。 4. 栓緊所附螺栓上的固定螺帽和墊圈,以便固定裝置。 5. 檢查太陽能轉換器是否安裝牢固。 安裝板 鎖緊螺絲 鎖緊螺絲 319.5 410 ± 0.5 操作和安裝手冊 SOLIVIA 5.0 AP G3...
- Page 83 50 °C 60 °C 70 °C 80 °C 電網連接 透過 Wieland RST25i3S 交流電連接器連接電網(輸出交流電)。您能在連接器的螺絲式終端連接 上找到正確的配置。太陽能轉換器必須使用三芯線(L、N、PE)接入電網。在中中斷連接連接或 插入交流電連接器之前,交流電線的開關必須切換,以確保零電勢。 連接 Wieland 交流電連接器必須使用軟線且其橫截面為4.0 mm²。 每台装置的 L 线上游装配自动断路器,额定电流为 32A,跳闸特性类型为 B 或是 C (請參考各國 當地關於正確跳閘 (tripping) 類型的安裝要求與法規)。此外,注意选择自动断路器上游附加的熔断 器。 太陽能轉換器必須透過交流電連接器的保護導體接地。將保護導體接入指定終端。如果您打算在安 裝時整合多台轉換器,請按照附錄圖示進行安裝。 請注意電線長度和電線橫截面,因為這可能會導致產生不良的溫度風險及功耗。 夾鉗結構能夠保護交流電連接器避免意外切斷,螺絲起子可鬆開夾鉗結構。 操作和安裝手冊 SOLIVIA 5.0 AP G3...
- Page 84 4.0 MM2 - 6.0 MM² 耦合器 耦合器 產品編號 極性 (AWG 14) (AWG 12-10) • • 正 32.0010P0001-UR 耦合器 32.0012P0001-UR • • 負 32.0011P0001-UR 耦合器 32.0013P0001-UR • • 正 32.0014P0001-UR 耦合器 32.0016P0001-UR • • 負 32.0015P0001-UR 耦合器 32.0017P0001-UR 操作和安裝手冊 SOLIVIA 5.0 AP G3...
- Page 85 1000 W 1500 W 2000 W 2500 W 3000 W 3500 W 4000 W 4500 W SOLIVIA 5.0 - 150 V SOLIVIA 5.0 - 250 V SOLIVIA 5.0 - 450 V SOLIVIA 5.0 - 350 V 操作和安裝手冊 SOLIVIA 5.0 AP G3...
- Page 86 配對連接器供應商 HARTING Deutschland GmbH & Co. KG (P.O. 2451, 32381 Minden; Germany; www.harting.com)。 訂單型號: 09 45 145 1510,Cable Manager Blue IP67 Push-Pull Data Plug 09 45 145 1500,Cable Manager White IP67 Push-Pull Data Plug RS485 (EIA485) (RS485) RX_B (RS485) TX_A (RS485) 操作和安裝手冊 SOLIVIA 5.0 AP G3...
- Page 87 RS485 (EIA485) TX_A Pin 7 100 ... 150 RX_B Ohm, 0,25W Pin 6 操作和安裝手冊 SOLIVIA 5.0 AP G3...
- Page 88 電力連接器和操作啟動 電力連接器和操作啟動 利用太陽能轉換器外殼上的連接器觸點與電力連接。任何情況下都不得開啟裝置! 利用太陽能轉換器外殼上的連接器觸點與電力連接。任何情況下都不得開啟裝置! 要將裝置與電力相連接,必須遵照以下步驟: 1. 直流電連接:首先,連接太陽能模組組串與直流電斷路器(未包含於本產品中)。 2. 連接直流電斷路器與太陽能轉換器(確保極性正確)。 3. 交流電連接:請將 Wieland 交流電配對連接器安裝至交流電輸出電纜,接著將交流電連接器安 裝到太陽能轉換器。請確認套筒螺母正確安裝並栓緊。 4. 打開電源前,最後再檢查一次所有饋電線和連接。 5. 關閉直流電斷路器。 6. 關閉交流電輸出側的斷路器。 7. 如太陽能電壓充足(UPV > 150V),裝置現在就進入啟動模式。 8. 如為新安裝,時間和日期都將列於子選單 S (Setup)(設定)(見第 7.3.7 節)。 所有閒置的連接器和接頭都必須用提供的密封塞密封。 操作和安裝手冊 SOLIVIA 5.0 AP G3...
- Page 89 Adjustment of current day of the week and date 幕右上方顯示「AU L」。 (WD.DD.MM.YYYY) Down S -> Firmware AU L 這表示 AUstralia Limitation Adjustment of the firmware Down to 2 下 ENTER * ESC * 下 ENTER * 操作和安裝手冊 SOLIVIA 5.0 AP G3...
- Page 90 UPV:100V至 150V 黃色:<亮燈> (自測中)。 綠色:<閃爍> 紅色:<熄滅> 輸入監測和電網監測。 已完成啟動條件檢測。 黃色:<熄滅> 綠色:<亮燈> 正常運作狀態: 紅色:<熄滅> 饋入式操作。 UPV:150V至 450V 黃色:<熄滅> 綠色:<熄滅> 內部或外部故障(中斷供給)。 紅色:<亮燈/熄滅> 設備故障。 請參閱顯示資料! 黃色:<亮燈/熄滅> 綠色:<熄滅> 太陽能轉換器未與電網連接。 常見故障 紅色:<亮燈/熄滅> 未傳送電力。 狀態。 黃色:<亮燈> 請參閱顯示資料! 綠色:<亮燈/熄滅> 您可以繼續使用太陽能轉換器。 紅色:<亮燈/熄滅> 警告資料。 請參閱顯示資料! 黃色:<閃爍> 操作和安裝手冊 SOLIVIA 5.0 AP G3...
- Page 91 在自動操作中按 ENTER(確定)鍵後,會開啟顯示器照明。如果 30 秒內未按動任何鍵,顯示器照 明將自動熄滅。設置選單中可選擇連續或自動照明。按 ENTER(確定)鍵,可再次開啟顯示器照 明。 主選單 主選單包括 7 個選單項目,各選單項目又被細分為子選單: • 選單 N(目前) • 選單 D(日) • 選單 W(週) • 選單 M(月) • 選單 Y(年) • 選單 T(總值) • 選單 S(設定) 選單項目操作: 您可以使用選擇鍵移動主選單 。 請按 ENTER(確定)鍵選擇子選單。請按 ESC(退出)鍵,再次退出子選單。 操作和安裝手冊 SOLIVIA 5.0 AP G3...
- Page 92 Menu Y - Year statistic Submenu Y - Year ENTER Down Menu T - Total statistic Submenu T - Total ENTER Down Menu S - Setup inverter Submenu S - Setup ENTER Down to 2 操作和安裝手冊 SOLIVIA 5.0 AP G3...
- Page 93 N -> PV1-Voltage Value (V) Down N -> PV1-Current Value (A) Down N -> PV2-Voltage Value (V) Down N -> PV2-Current Value (A) Down N -> Time (HH:MM:SS) Down N -> Date (WD.DD.MM.YYYY) Down to 2 操作和安裝手冊 SOLIVIA 5.0 AP G3...
- Page 94 Value (V) Down D -> AC-Volt-Min Value (V) Down D -> AC-Curr-Max Value (A) Down D -> AC-Freq.-Max Value (Hz) Down D -> AC-Freq.-Min Value (Hz) Down D -> Runtime Value (Min) Down to 2 操作和安裝手冊 SOLIVIA 5.0 AP G3...
- Page 95 Main menu Y - Year statistic Submenu Y - Year Up to 1 Y -> Energy Value (kWh) Down Y -> AC-Revenue Value (AUD / Won) Down Y -> Runtime Value (h) Down to 2 操作和安裝手冊 SOLIVIA 5.0 AP G3...
- Page 96 T -> PV1-Pow. Max Value (W) Down T -> PV2-Vol. Max Value (V) Down T -> PV2-Cur. Max Value (A) Down T -> PV2-Pow. Max Value (W) Down T -> Runtime Value (Min) Down to 2 操作和安裝手冊 SOLIVIA 5.0 AP G3...
- Page 97 ISO / GND 設置選單 Down S -> Baudrate 在 2400 至 38400 波特之間調節波特率 2400 ... 38400 Down S -> Time (HH:MM:SS) 調節內部時鐘 Down S -> Date 調整當天的星期和日期 (WD.DD.MM.YYYY) Down S -> Firmware 調節韌體 Down to 2 操作和安裝手冊 SOLIVIA 5.0 AP G3...
- Page 98 關於子選單 S(設置)中韌體選單的更多詳情。 Submenu Setup ENTER Firmware Up to 3 S -> Firmware AC-Ctrl maj.min.bug Down S -> Firmware DC-Ctrl maj.min.bug Down S -> Firmware SC-Ctrl maj.min.bug Down S -> Firmware Display-Ctrl maj.min.bug Down to 4 操作和安裝手冊 SOLIVIA 5.0 AP G3...
- Page 99 黃色:<熄滅> 綠色:<熄滅> DC injection 輸入端交流電的直流分量 — 如果重設裝置後仍存在故障,請通知您 紅色:<熄滅> failure 過高。 的客服技術人員。 黃色:<亮燈> 綠色:<熄滅> 內部通訊錯誤或硬體出現 — 如果重設裝置後仍存在故障,請通知您 紅色:<熄滅> Error # 301 故障。 的客服技術人員。 黃色:<亮燈> 綠色:<熄滅> 溫度下降時,裝置出錯並 — 檢查安裝地點(避免陽光直射、空氣對 紅色:<熄滅> Error # 302 回復到電網輸入模式。 流)。 黃色:<亮燈> 操作和安裝手冊 SOLIVIA 5.0 AP G3...
- Page 100 太陽能發電機電壓在 100V — 日照不足。 紅色:<熄滅> too low 到 150V之間。 — 根據選單 N 所示 黃色:<熄滅> 綠色:<閃爍> Synchronize 檢查電網輸入模式時的電 紅色:<熄滅> — 在輸入模式前正常運作。 to AC 網電壓及電網頻率。 黃色:<熄滅> 綠色:<亮燈> — 儘管理論上您可以繼續 Varistor 直流電輸入部份的內部變 紅色:<熄滅> 使用太陽能轉換器,但應儘早更換變阻器。 warning 阻器出現故障。 黃色:<閃爍> 這將涉及退還裝置的動作。 聯絡您的客服技術人員之前請遵循上述指示。 操作和安裝手冊 SOLIVIA 5.0 AP G3...
- Page 101 LCD螢幕與3 個 LED指示燈 一般規格 澳洲 中國 印度 泰國省電力局 型號 SOLIVIA 5.0 AP G3 最大效能 95.6 % 效能(歐盟標準) 94.6 % 運作溫度範圍 -25 ... +60°C 儲存溫度範圍 -25 ... +80°C 濕度範圍 0 ... 98 % 最高海拔高度 2000 m 操作和安裝手冊 SOLIVIA 5.0 AP G3...
- Page 102 電磁相容性 (EMC) 4777.3; EN 61000-6- GB 17799 IEC / EN 61000-6-3 IEC / EN 61000-6-3 2; IEC / EN 61000-6-3 1) 交流電的最大功率值為一部轉換器所可能輸出的最大值,然而此最大值不必然會達到。 2) 在澳洲的某些區域,轉換器的功率必須受到一定的限制。 • 在此限制之內,SOLIVIA 5.0 AP G3的最大(交流電)輸出功率如下: 最大功率: 4990 W 額定功率: 4600 W 操作和安裝手冊 SOLIVIA 5.0 AP G3...
- Page 103 附錄 10.1 連接示例 ~ 400 / 220 ~ 400 / 230 ~ 400 / 220 ~ 400 / 230 操作和安裝手冊 SOLIVIA 5.0 AP G3...
- Page 104 ~ 400 / 220 ~ 400 / 230 ~ 400 / 220 ~ 400 / 230 操作和安裝手冊 SOLIVIA 5.0 AP G3...
- Page 105 10.2 連接圖示概述 Solivia 5.0 B 32 A Solivia 5.0 Solivia 5.0 B 32 A B 32 A 操作和安裝手冊 SOLIVIA 5.0 AP G3...
- Page 106 Solivia 5.0 操作和安裝手冊 SOLIVIA 5.0 AP G3...
- Page 107 Nominal power 額定功率 額定功率是生產商就裝置或系統指定的允許的最大持續輸出功率。通常,裝置已經過優化,以便在 額定功率下操作時,也能達到最高效率。 Nominal current 額定電流 額定電流指在向裝置供應額定電壓並產生額定功率的情況下,電氣裝置所吸收的電流。 指保護接地,在電氣系統和電纜中經常會使用保護接地導體。亦稱作接地線、保護接地裝置、土、 接地或 PE (protective earth)。 Photovoltaics(縮寫為PV) 將光伏能量轉化為電能。 該名稱的組成部份為:Photos(光的希臘詞)和 Volta (以電氣研究先驅 Alessandro Volta 命名) 。 Potential isolation 潛在絕緣 兩個元件之間無導體連接。 Power dissipation功率耗散 功率耗散指裝置功率或程序的吸收功率和產生功率之間產生的差額。功率耗散主要因熱量產生。 PV cell 太陽能電池 太陽能電池是表面寬廣的光電二極管,可將光能(一般為太陽光)轉化為電能。這是利用光電效應 (光伏)而產生。 操作和安裝手冊 SOLIVIA 5.0 AP G3...
- Page 108 標準八極連接器連接的縮寫。RJ 代表接線套(標準插座)。 RS485 (ELA485) 正確信號被傳送到差分電壓接頭的某一核心,而錯誤(或否定)信號則被傳送到另一核心。 Separate grid system 獨立電網系統 完全獨立於一個互聯電網的電源供給設備。 Solar inverter 太陽能轉換器 是一個電氣裝置,它能將直流電壓轉化為交流電壓及/或將直流電轉化為交流電。 String 串型 指定一組帶有串聯開關的電氣太陽能模組。 String solar inverter (solar inverter concept)串型太陽能轉換器(太陽能轉換器概念) 在任何情況下,太陽能發電機被分成單獨的組串,它們透過自身的組串太陽能轉換器為電網供電。 這樣,大大地便利了安裝且減少了獲益下降(這可能是由於太陽能模組的安裝或不同的遮光條件) 得到大幅抑制。 TAB (2000) TAB 2000 是管理德國分配系統操作員的低壓電網操作技術規則。該技術連接規則(簡稱 TAB) 自2000 年開始生效其界定了由 針對電力公司的終端客戶操作的電氣系統制定的強制規 定。 操作和安裝手冊 SOLIVIA 5.0 AP G3...
- Page 109 操作和安裝手冊 SOLIVIA 5.0 AP G3...
- Page 110 操作和安装说明书 SOLIVIA 5.0 AP G3...
- Page 111 本手册如有更改,恕不另行通知。 本手册的最新版本将会 在我们的www.solar-inverter.com 上发布。 © Delta Energy Systems (Germany) GmbH 版权所有 — 保留所有权利。 本装置随附本说明书,以供终端用户使用。 本说明书所载的技术性指导与图解被视作是保密信息,未经 Delta Energy Systems 服务工程师事先书面同意,不得复制该信息的 任何部分。终端用户不得泄漏本说明书所载的信息,或将其用作与正确使用本设备无关的任何其他用途。 所有信息和规格如有更改,恕不另行通知。 操作和安装说明书 SOLIVIA 5.0 AP G3...
- Page 112 操作和安装说明书 SOLIVIA 5.0 AP G3...
- Page 113 7.3.4 子菜单 M(月) 7.3.5 子菜单 Y(年) 7.3.6 子菜单 T(总值) 7.3.7 子菜单 S(设置) 7.3.7.1 子菜单 S:Solar ISO / GND 7.3.7.2 子菜单 S:固件 诊断及数据评估 排除故障 显示信息 技术数据 10 附录 10.1 连接示例 10.2 连接图示概述 11 术语表 12 认证 操作和安装说明书 SOLIVIA 5.0 AP G3...
- Page 114 • 在执行任何步骤之前,确保装置与电网和光伏组件绝缘。 • 高温条件下,装置表面会变烫。 • 有必要进行充分散热处理。 • 太阳能逆变器很重(重量 > 18 公斤),至少需两个人抬起。 • 请注意装置存在高泄漏电流。开始运行之前一定要连接保护导体。 为避免触电的风险,请切勿打开太阳能逆变器。请勿私自触动逆变器内的 零部件。擅自打开机壳,本公司概不承担保修责任。 切断所有电源后,危险电压还会持续 5 分钟。 © Delta Energy Systems (Germany) GmbH 版权所有 — 保留所有权利。 本装置随附本说明书,以供终端用户使用。 本说明书所载的技术性指导与图解被视作是保密信息,未经 Delta Energy Systems 服务工程师事先书面同意,不得复制该信息的 任何部分。终端用户不得泄漏本说明书所载的信息,或将其用作与正确使用本设备无关的任何其他用途。 所有信息和规格如有更改,恕不另行通知。 操作和安装说明书 SOLIVIA 5.0 AP G3...
- Page 115 在下列技术性描述中,安装人员以及用户将了解安装、操作初装和处理太阳能逆变器所需的精确功 能信息。 系统 太阳能逆变器将太阳能电池的直流电转换成交流电。该装置能够将“自产”太阳能馈入公共电网。 得益于高效的最大功率跟踪技术,即使在多云天气依然能最大化利用太阳能设备。 本系统采用组串的连接方式,即多个光伏电池板先通过串联的方式构成一个电池组,然后电压相同 的电池组在太阳能并网逆变器的输入端并联,这样的连接方式可以有效的减少整个系统的配线要 求。 通过这样的连接方式也可以使得太阳能电池组的输出电压与逆变器输入电压范围有效地匹配。 数据评估和通讯 本装置集成了数据显示、数据处理和数据通讯,使操作更加简便。装置显示器可监控操作状态和发 送操作故障的信号。通过人机界面可以将逆变器的运行下载到电脑中进行评估,保证运行数据连续 存储。 使用该功能最好的方法是借助可用配件;以实现太阳能逆变器的监控全面顺畅。 数据通过集成界面读出,显示器只在执行太阳能操作时显示。 太阳能逆变器的技术结构 本太阳能逆变器通过带有集成高频变压器的直流电/交流电转换器实现与电网的电流隔离。通过调 整光伏电压,使光伏组件在太阳辐射水平及温度不断变化的条件下亦能实现最大输出功率(最大功 率追踪)。 本太阳能逆变器的最大功率范围在 150V到 450V之间,各种制造商均可使用该光电组件。必须采取 措施保证最大直流输入开路电压绝不超过 540V。请注意最低预期温度下将产生最大开路电压。有关 温度依赖性的详细信息,请参见光伏组件的数据表。装置的能耗保持在最小值。 高品质铝制外壳符合 IP65 防护等级(防水、防尘),其表面经过改良后可抵抗风吹日晒的侵袭。 背面设计具有散热功能,能使逆变器在 -25°C 至 +60°C 的环境温度下运行。 而具有散热功能的背面亦可消除由电压转换所产生功耗。内部温度控制器可保护太阳能逆变器免受 内部温度过高等问题的伤害。如果环境温度高,最大可转换功率将受到限制。 操作和安装说明书 SOLIVIA 5.0 AP G3...
- Page 116 本太阳能逆变器由微控制器控制,微控制器亦能执行界面通讯及监控显示器上的数值与信息。 两个独立的冗余微控制器按照本地电力公司的馈入指示,以控制监控电网。太阳能逆变器即可安装 在内部电网中。 电网与光伏组件实现绝缘,已达到保护操作人员安全的要求。电网与光伏组件之间的电绝缘相当于 基本绝缘。加强电网、光伏组件和可接入界面(显示器、RS485 界面)之间的绝缘,确保了操作人 员得到最大程度的保护。符合电磁兼容 (EMC) 和安全性的相关标准。 本太阳能逆变器仅可应用于电网操作。自动绝缘点经认证机构审批,能保证在供电中断或切断时安 全断路,且无需进行隔离操作。 断电设备可与额定功率≤4.6 kVA的内部生成系统自动绝缘。单相并行馈入线通过太阳能逆变器进入 电网。 设备概况 (1)光伏组件接头 (2)电网接头 (3)RS485 接头 (EIA485) (4)显示状态信息的显示器及操作键盘 (5)操作状态显示器的LED 操作和安装说明书 SOLIVIA 5.0 AP G3...
- Page 117 • 确保 LED 灯及显示器的查看方便(检查读取角度和安装高度)。 • 虽然本装置配备防紫外线元件,但仍应避免将装置直接暴晒在阳光下。 • 虽然拥有 IP65 外壳并获得第三类弄污认证,但本装置不得被严重弄污。 • 多尘环境会损害本装置的性能。 最低要求 • 必须保证太阳能逆变器周围的自由对流。 • 为保证适当的空气流通,以便达到散热作用,请保持装置旁边大约10cm和装置上下大约50cm的空 间内无其他物体。 • 请遵守供电终端的电网电阻规定(电线长度、电线横截面)。 • 遵照建议的安装位置(立式)进行安装。 • 闲置的直流连接器(Tyco) 和接口务必用密封塞密封,以保证整个系统(逆变器及电缆)达到 IP65 保护等级。 50 cm Wall 10 cm 10 cm 50 cm 操作和安装说明书 SOLIVIA 5.0 AP G3...
- Page 118 维护 请确保本装置在运作过程中不被覆盖。为避免太阳能逆变器的外壳受污,应定期清洗外壳。 用户不得私自触动装置内的零部件。决不打开太阳能逆变器! 安装 您应使用交付的安装板准确安装太阳能逆变器。贴墙安装须使用适当的螺钉。请安装墙托架,于简 易安装太阳能逆变器。随后,请确保本装置已被拴紧。 装配指南 请使用适当的螺钉(最大直径 6 毫米)装配安装板,至少将螺钉旋入 4 个孔中(共有 8 个孔)以固定墙托架。您可以以安装板为模板,标记钻孔的位置。 由于太阳能逆变器重 32.0 公斤,因此至少需要两人才能将其从运输柜中搬出。 至少需要两人才能将太阳能逆变器放置在安装板上。 拧紧提供的螺栓上的固定螺帽和垫圈,以固定装置。 请检查太阳能逆变器是否安装牢固。 安装板 锁紧螺钉 锁紧螺钉 319.5 410 ± 0.5 操作和安装说明书 SOLIVIA 5.0 AP G3...
- Page 119 40 °C 50 °C 60 °C 70 °C 80 °C 连接电网 本设备通过 Wieland RST25i3S 交流电连接器连接电网(输出交流电)。连接器处的螺钉可以保证 连接的正确性。太阳能逆变器必须使用三芯线(L、N、PE)接入电网。在断开连接或插入交流电连 接器之前,交流电线的开关必须切换,确保零电势。 连接 Wieland 交流电连接器必须使用软线及横截面介于 4.0 毫米之间的导线。每台装置的 L 线 上游装配自动断路器,额定电流为 32A,跳闸特性类型为 B 或是 C (请参考各国当地关于正确跳闸 (tripping) 类型的安装要求与法规)。此外,注意选择自动断路器上游附加的熔断器。 太阳能逆变器必须通过交流电连接器的保护导体接地。为此,请将保护导体接入指定终端。如果您 希望在安装时集成多台逆变器,请按照附录图则所示进行安装。 请注意电线长度和电线横截面,这些因素可能造成不良的升温及功耗。 连接器的卡锁能够保护交流电连接器免被无意切断,使用螺丝刀即可松开连接器卡锁。 操作和安装说明书 SOLIVIA 5.0 AP G3...
- Page 120 4.0 MM2 - 6.0 MM² 耦合器 耦合器 订单编号 极性 (AWG 14) (AWG 12-10) • • 正 32.0010P0001-UR 耦合器 32.0012P0001-UR 负 • • 32.0011P0001-UR 耦合器 32.0013P0001-UR 正 • • 32.0014P0001-UR 耦合器 32.0016P0001-UR 负 • • 32.0015P0001-UR 耦合器 32.0017P0001-UR 操作和安装说明书 SOLIVIA 5.0 AP G3...
- Page 121 1000 W 1500 W 2000 W 2500 W 3000 W 3500 W 4000 W 4500 W SOLIVIA 5.0 - 450 V SOLIVIA 5.0 - 150 V SOLIVIA 5.0 - 250 V SOLIVIA 5.0 - 350 V 操作和安装说明书 SOLIVIA 5.0 AP G3...
- Page 122 配对连接器供应商 HARTING Deutschland GmbH & Co. KG (P.O. 2451, 32381 Minden; Germany; www.harting.com)。 订单型号: 09 45 145 1510,Cable Manager Blue IP67 Push-Pull Data Plug 09 45 145 1500,Cable Manager White IP67 Push-Pull Data Plug TX_A Pin 7 100 ... 150 RX_B Ohm, 0,25W Pin 6 操作和安装说明书 SOLIVIA 5.0 AP G3...
- Page 123 电气连接与启动 利用与本太阳能逆变器外壳上的连接器触点可实现电力连接。任何情况下都不得打开装置! 操作和安装说明书 SOLIVIA 5.0 AP G3 操作和安装说明书 SOLIVIA 5.0 AP G3...
- Page 124 Entry of feed-in remuneration in AUD / Won per kWh (AUD / Won) xx,xx 开直流电压,再重新开启。 Down 1) 在澳大利亞的某些區域,逆变器的功率必须受到一定的限制。 S -> ID-Number • 在此限制之内,SOLIVIA 5.0 AP G3的最大(交流电)输出功率如下: Input of the ID number of the solar inverter 001 ... 254 最大功率: 4990 W 额定功率: 4600 W Down •...
- Page 125 Failure 是否中断。 LED 状态 运行状态 说明 绿色:<off>(<熄灭>) 输入电压 (UPV) 低于 100V。 红色:<off>(<熄灭>) 夜间断开。 太阳能逆变器未对电网供电。 黄色:<off>(<熄灭>) 绿色:<on>(<亮着>) 输入电压: 红色:<on>(<亮着>) 安装。 UPV:100V至 150V 黄色:<on>(<亮着>) (自测中)。 绿色:<flashes>(<闪烁>) 红色:<off>(<熄灭>) 输入监测和电网监测。 启动条件已检测。 黄色:<off>(<熄灭>) 绿色:<on>(<亮着>) 正常运行状态: 红色:<off>(<熄灭>) 馈入式操作。 UPV:150V至 450V 黄色:<off>(<熄灭>) 操作和安装说明书 SOLIVIA 5.0 AP G3...
- Page 126 在自动操作中按 ENTER(确定)键后,会开启显示器照明。如果 30 秒内未按动任何键,显示器照 明将自动熄灭。设置菜单中可选择连续或自动照明。按 ENTER(确定)键,可再次开启显示器照 明。 主菜单 主菜单包括 7 个菜单项目,各菜单项目又被细分为子菜单: • 菜单 N(当前) • 菜单 D(日) • 菜单 W(周) • 菜单 M(月) • 菜单 Y(年) • 菜单 T(总值) • 菜单 S(设置) 菜单项目操作: 您可以使用选择键 滚动主菜单。 请按 ENTER(确定)键选择子菜单。请按 ESC(退出)键,退出子菜单。 操作和安装说明书 SOLIVIA 5.0 AP G3...
- Page 127 Menu Y - Year statistic Submenu Y - Year ENTER Down Menu T - Total statistic Submenu T - Total ENTER Down Menu S - Setup inverter Submenu S - Setup ENTER Down to 2 操作和安装说明书 SOLIVIA 5.0 AP G3...
- Page 128 N -> PV1-Voltage Value (V) Down N -> PV1-Current Value (A) Down N -> PV2-Voltage Value (V) Down N -> PV2-Current Value (A) Down N -> Time (HH:MM:SS) Down N -> Date (WD.DD.MM.YYYY) Down to 2 操作和安装说明书 SOLIVIA 5.0 AP G3...
- Page 129 Value (V) Down D -> AC-Volt-Min Value (V) Down D -> AC-Curr-Max Value (A) Down D -> AC-Freq.-Max Value (Hz) Down D -> AC-Freq.-Min Value (Hz) Down D -> Runtime Value (Min) Down to 2 操作和安装说明书 SOLIVIA 5.0 AP G3...
- Page 130 Main menu Y - Year statistic Submenu Y - Year Up to 1 Y -> Energy Value (kWh) Down Y -> AC-Revenue Value (AUD / Won) Down Y -> Runtime Value (h) Down to 2 操作和安装说明书 SOLIVIA 5.0 AP G3...
- Page 131 T -> PV1-Pow. Max Value (W) Down T -> PV2-Vol. Max Value (V) Down T -> PV2-Cur. Max Value (A) Down T -> PV2-Pow. Max Value (W) Down T -> Runtime Value (Min) Down to 2 操作和安装说明书 SOLIVIA 5.0 AP G3...
- Page 132 S -> ID-Number 001 ... 254 Down S -> Solar ISO / GND Down S -> Baudrate 2400 ... 38400 Down S -> Time (HH:MM:SS) Down S -> Date (WD.DD.MM.YYYY) Down S -> Firmware Down to 2 操作和安装说明书 SOLIVIA 5.0 AP G3...
- Page 133 S -> Firmware AC-Ctrl maj.min.bug Down S -> Firmware DC-Ctrl maj.min.bug Down S -> Firmware SC-Ctrl maj.min.bug Down S -> Firmware Display-Ctrl maj.min.bug Down to 4 S -> Firmware IT GMon-Ctrl maj.min.bug Down to 4 操作和安装说明书 SOLIVIA 5.0 AP G3...
- Page 134 黄色:<off>(<熄灭>) 绿色:<off>(<熄灭>) DC injection 输入端交流电的直流分 — 如果重设装置后仍存在故障,请 红色:<off>(<熄灭>) failure 量过高。 通知您的客服技术人员。 黄色:<on>(<亮着>) 绿色:<off>(<熄灭>) 内部通讯错误或硬件出 — 如果重设装置后仍存在故障,请 红色:<off>(<熄灭>) Error # 301 现故障。 通知您的客服技术人员。 黄色:<on>(<亮着>) 绿色:<off>(<熄灭>) 温度下降时,装置出 — 检查安装地点(避免阳光直射、 红色:<off>(<熄灭>) Error # 302 错并回复到电网输入 保持空气对流)。 黄色:<on>(<亮着>) 模式。 操作和安装说明书 SOLIVIA 5.0 AP G3...
- Page 135 PV voltage too 光伏发电机电压在 红色:<off>(<熄灭>) — 根据菜单 N 所示检查光伏电 100V到 150V之间。 黄色:<off>(<熄灭>) 池电压。 绿色:<flashes>(<闪烁>) Synchronize 检查电网输入模式时的 红色:<off>(<熄灭>) — 在输入模式前正常运行。 to AC 电网电压及电网频率。 黄色:<off>(<熄灭>) 绿色:<on>(<亮着>) — 尽管理论上您可以继续使用太 Varistor 直流电输入部分的内部 红色:<off>(<熄灭>) 阳能逆变器,但应尽早伺 机更换 warning 变阻器出现故障。 黄色:<flashes>(<闪烁>) 变阻器。这将涉及退还装置。 联系您的客服技术人员之前请遵循上述指示。 操作和安装说明书 SOLIVIA 5.0 AP G3...
- Page 136 液晶屏,3 个 LED指示灯 一般规格 澳大利亚 中国 印度 泰国省电力局 型号名称 SOLIVIA 5.0 AP G3 最高效率 95.6 % 效率(欧盟标准) 94.6 % 工作温度 -25 ... +60°C 存储温度 -25 ... +80°C 湿度 0 ... 98 % 最高海拔高度 2000 m 操作和安装说明书 SOLIVIA 5.0 AP G3...
- Page 137 IEC / EN 61000-6-2; AS 4777.3; GB 17799 IEC / EN 61000-6-3 IEC / EN 61000-6-3 EN 61000-6-2; IEC / EN 61000-6-3 1) 交流電的最大功率值為一部轉換器所可能輸出的最大值,然而此最大值不必然會達到。 2) 在澳大利亞的某些區域,逆变器的功率必须受到一定的限制。 • 在此限制之内,SOLIVIA 5.0 AP G3的最大(交流电)输出功率如下: 最大功率: 4990 W 额定功率: 4600 W 操作和安装说明书 SOLIVIA 5.0 AP G3...
- Page 138 附录 10.1 连接示例 操作和安装说明书 SOLIVIA 5.0 AP G3...
- Page 139 操作和安装说明书 SOLIVIA 5.0 AP G3...
- Page 140 10.2 连接图示概述 操作和安装说明书 SOLIVIA 5.0 AP G3...
- Page 141 操作和安装说明书 SOLIVIA 5.0 AP G3...
- Page 142 电磁兼容性(EMC)是指电子装置工作过程中产生的电磁场以及对电磁场的抗干扰所必须满足的技 术及法规要求。 初始化 指在开始状态下程序的加载过程的一部分,其中,执行程序所需的储存空间(如变量、代码、缓冲 储存器等)被保留且填有初始值。 本地电力公司 本地电力公司是指发电并通过公共电网配电的公司。 最大功率点指光伏电池电流电压图的点值,在该点时可分出最大功率(即,在该点时,产品的电流 和电压达到最大值)。 额定功率 额定功率是生产商就装置或系统指定的允许的最大持续输出功率。通常,装置已经过优化,以便在 额定功率下操作时,也能达到最高效率。 额定电流 额定电流指在向装置供应额定电压并产生额定功率的情况下,电气装置所吸收的电流。 指保护接地,在电气系统和电缆中经常会使用保护接地导体。亦称作接地线、保护接地装置、土、 接地或 PE (protective earth)。 光伏(缩写为PV) 将光伏能量转化为电能。 该名称的组成部分为:Photos(光的希腊词)和 Volta (以电气研究先驱 Alessandro Volta 命 名)。 潜在绝缘 两个元件之间无导体连接。 功率耗散 功率耗散指装置功率或程序的吸收功率和产生功率之间产生的差额。功率耗散主要因热量产生。 光伏电池 光伏电池是表面宽广的光电二极管,可将光能(一般为太阳光)转化为电能。这是利用光电效应 (光伏)而产生。 操作和安装说明书 SOLIVIA 5.0 AP G3...
- Page 143 光伏发电机 由大量光伏组件构成的系统。 光伏组件 光伏发电机的零件;将光伏能量转化为电能。 RJ45 标准八极连接器连接的缩写。RJ 代表接线套(标准插座)。 RS485 (ELA485) 正确信号被传送到差分电压接口的某一核心,而错误(或否定)信号则被传送到另一核心。 独立电网系统 完全独立于一个互联电网的电源供给设备。 太阳能逆变器 是一个电气装置,它能将直流电压转化为交流电压及/或将直流电转化为交流电。 串组 指定一组带有串联开关的电气光伏组件。 组串太阳能逆变器(太阳能逆变器概念) 在任何情况下,光伏发电机被分成单独的组串,它们通过自身的组串太阳能逆变器为电网供电。这 样,极大地方便了安装且减少了获益下降(这可能是由于光伏组件的安装或不同的遮光条件)得到 大幅抑制。 TAB (2000) TAB 2000 是管理德国分配系统操作员的低压电网操作技术规则。该技术连接规则(简称 TAB)自 2000 年开始生效其界定了由 DSO 针对电力公司的终端客户操作的电气系统制定的强制规定。 操作和安装说明书 SOLIVIA 5.0 AP G3...
-
Page 144: Certificates
N136 ACMA supplier code number (AGENT) 18 Hood Street Rosedale Vic. Product details Product description – brand name, type, model, lot, batch or serial number (if available) Delta Brand Name SOLIVIA5.0APG3 Model Number Solar Inverter Description Compliance with Radiocommunications (Electromagnetic Compatibility) Standard 2008 The above mentioned product complies with the requirements of the Radiocommunications (Electromagnetic Compatibility) Standard 2008. - Page 148 +662 709 2826 Delta Electronics (Korea) Inc. Support Email: support.thailand@solar-inverter.com 1511, Byucksan Digital Valley 6-cha, Gasan-dong Geumcheon-gu, Seoul 153-704 Korea Delta Energy Systems (Australia) Pty. Ltd. Phone: +82 (2) 515-5303/5 Unit 6, 25 Howleys Road Fax: +82 (2) 515-5302 Notting Hill VIC3168 Support Email: support.korea@solar-inverter.com...
Need help?
Do you have a question about the SOLIVIA 5.0 AP G3 and is the answer not in the manual?
Questions and answers