Quadra-Fire CASTILEI-MBK Installation Manual
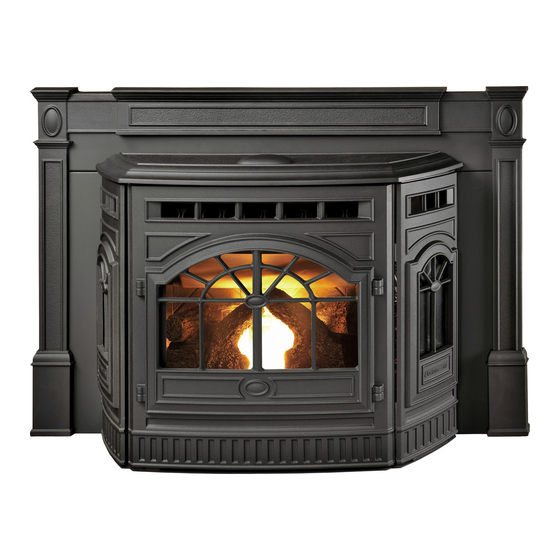
Castile pellet insert stove
Hide thumbs
Also See for CASTILEI-MBK:
- Owner's manual (56 pages) ,
- Owner's manual installation and operation (56 pages) ,
- Manual (36 pages)
Table of Contents
Advertisement
Quick Links
INSTALLER: Leave this manual with party responsible for use and operation.
OWNER: Retain this manual for future reference.
CASTILE PELLET INSERT STOVE
Model(s):
CASTILEI-MBK
CASTILEI-PMH
CASTILEI-CSB
CASTILEI-CWL
CAUTION
Tested and approved for wood pellets and corn pellets.
Burning of any other type of fuel voids your warranty.
CAUTION
Check building codes prior to installation.
• Installation MUST comply with local, regional, state and na-
tional codes and regulations.
• Consult local building, fi re offi cials or authorities having juris-
diction about restrictions, installation inspection, and permits.
1
Installation Manual
Installation & Appliance Set-Up
NOTICE: DO NOT DISCARD THIS MANUAL
Tested and
Portland
O-T L
Listed by
Oregon USA
C
US
OMNI-Test Laboratories, Inc.
If the information in these instruc-
tions is not followed exactly, a
fi re could result causing property
damage, personal injury, or death.
• Do not store or use gasoline or other fl am-
mable vapors and liquids in the vicinity of
this or any other appliance.
• Do not overfi re - If heater or chimney con-
nector glows, you are overfi ring. Overfi ring
will void your warranty.
• Comply with all minimum clearances to
combustibles as specifi ed. Failure to
comply may cause house fi re.
Hot glass will cause burns.
•
Do not touch glass until it is cooled
•
NEVER allow children to touch glass
•
Keep children away
•
CAREFULLY SUPERVISE children in same room as
fi replace.
•
Alert children and adults to hazards of high temperatures
•
High temperatures may ignite clothing or other
fl ammable materials.
•
Keep clothing, furniture, draperies and other fl ammable
materials away.
To obtain a French translation of this manual, please contact
your dealer or visit www.quadrafi re.com
Pour obtenir une traduction française de ce manuel, s'il vous
plaît contacter votre revendeur ou visitez www.quadrafi re.com
7022-514C
WARNING
WARNING
HOT SURFACES!
Glass and other surfaces are hot
during operation AND cool down.
NOTE
July 7, 2015
Advertisement
Table of Contents

Related Manuals for Quadra-Fire CASTILEI-MBK


Summary of Contents for Quadra-Fire CASTILEI-MBK
- Page 1 CASTILE PELLET INSERT STOVE fi re could result causing property damage, personal injury, or death. Model(s): CASTILEI-MBK • Do not store or use gasoline or other fl am- CASTILEI-PMH mable vapors and liquids in the vicinity of this or any other appliance.
-
Page 2: Table Of Contents
CASTILE INSERT Safety Alert Key: • DANGER! Indicates a hazardous situation which, if not avoided will result in death or serious injury. • WARNING! Indicates a hazardous situation which, if not avoided could result in death or serious injury. • CAUTION! Indicates a hazardous situation which, if not avoided, could result in minor or moderate injury. -
Page 3: Important Safety Information
E1509-2004, ULC S628-93, ULC/ORD-C-1482-M1990, (UM) 84-HUD • Outside Air Kit, part OAK-ACC must be installed in a mobile home installation. The Quadra-Fire Castile Pellet Insert meets the U.S. Environ- mental Protection Agency’s emission limits for pellet heaters WARNING sold after May 15, 2015. -
Page 4: Getting Started
CASTILE INSERT Install Guide Getting Started A. Design, Installation & Location Considerations Since pellet exhaust can contain ash, soot or sparks, you must consider the location of: 1. Appliance Location • Windows NOTICE: Check building codes prior to installation. • Air Intakes •... -
Page 5: Thermostat Wall Control Location
CASTILE INSERT B. Thermostat Wall Control Location WARNING The thermostat wall control’s location will have some affect on the appliance’s operation. Fire Risk. • Maximum wire length from appliance is 100 feet (30.48m) Damaged parts could impair safe operation. Do NOT continuous unspliced wire. -
Page 6: Install Checklist
Lot/Address: Location of Fireplace: Installer: Dealer/ Distributor Phone #: Serial #: CASTILEI-MBK CASTILEI-PMH CASTILEI-CSB CASTILEI-CWL Model (circle one): WARNING! Risk of Fire or Explosion! Failure to install fi replace according to these instructions can lead to a fi re or explosion. -
Page 7: Dimensions And Clearances
CASTILE INSERT Dimensions and Clearances A. Appliance Dimensions 28 in 707mm 24 in 594mm 8 in 203mm 25 in 19 in 629mm 483mm 10 in 13 in 2 in 32 in 249mm 330mm 819mm 51mm Figure 7.1 - Top View Figure 7.2 -Side View Figure 7.3- Front View Overall Size... -
Page 8: Clearance To Combustibles, Ul And Ulc
CASTILE INSERT B. Clearance To Combustibles, UL and ULC AS A BUILT-IN 0 in. Clearance To Exposed Section And Face Trim Figure 8.1 Inches Millimeters Top of Hopper Top Vent Rear Vent Side of Hopper Top or Rear Vent Back of Hopper Top or Rear Vent Vent Pipe to Combustible Top or Rear Vent... -
Page 9: Masonry And Zero Clearance Fireplaces
CASTILE INSERT C. Masonry and Zero Clearance Fireplaces NOTE It is necessary to permanently seal any opening between Maximum Mantel Depth: 12 inches (305mm) the masonry of the fi replace and the facing masonry. Face Mantel Trim E. Hearth Extension If employing a hearth extension, any parts or materials used in construction must be non-combustible. -
Page 10: Installation Into A Factory-Built Fireplace
CASTILE INSERT G. Installation into a Factory-Built Fireplace The following is only one example as there are many differ- ent models of factory-built fi replaces. The following modifi cations are permissible: NOTE: This example is for reference only. Any modifi ca- •... -
Page 11: Installation Into A Masonry Fireplace
CASTILE INSERT I. Prefabricated Metal Chimney Example Removal of Factory-Built Fireplace Cont. The chimney can be new or existing, masonry or prefabricated and must meet the following minimum requirements: • Must be minimum 6 inch (152mm) inside diameter of Keep sharp edge of high temperature chimney listed to UL 103 HT (2100 metal floor away from or ULC-S628. -
Page 12: Vent Information
CASTILE INSERT Vent Information A. Venting Termination Minimum Requirements Electrical Service Inside Corner FIXED FIXED OPEN CLOSED CLOSED OPEN J or K Termination Cap Air Supply Inlet Restricted Area Gas Meter Figure 12.1 All minimum clearances are listed with an Outside Air Kit (OAK) installed, unless otherwise noted in table below. 12 in. -
Page 13: Avoiding Smoke And Odors
CASTILE INSERT B. Avoiding Smoke and Odors Vent Confi gurations To reduce probability of reverse drafting during shut-down Negative Pressure, Shut-Down and Electrical Power conditions Hearth & Home Technologies strongly recom- Failure mends: To reduce the probability of back-drafting or burn-back in •... -
Page 14: Negative Pressure
Avoid installing the appliance near doors, walkways or (76-152mm) Top Vent Offset Adapter, use Listed double wall small isolated spaces fl ue connector. A Quadra-Fire Outside Air Kit must be used with manufactured home installations. • Recessed lighting should be a “sealed can” design 3. -
Page 15: Equivalent Feet Of Pipe
CASTILE INSERT F. Equivalent Feet of Pipe WARNING The table below can help you calculate the equivalent feet of pipe which is a method used to determine pellet vent size. Vent surfaces get HOT, can cause burns if Figure 15.1. touched. -
Page 16: Pellet Venting Charts
CASTILE INSERT H. Pellet Venting Charts WARNING The maximum horizontal venting allowed with no vertical vent- ing attached is 48 inches (1219mm) including one 90° elbow Fire Risk. or two 45° elbows. This is our recommended horizontal vent- • Only LISTED venting components may be used. ing installation. -
Page 17: Venting Systems
CASTILE INSERT Venting Systems A. Full Reline With Outside Air - Horizontal CAUTION WARNING Fire Risk. Never draw outside combustion air from: Inspection of Chimney: • Wall, fl oor or ceiling cavity • Masonry chimney must be in good condition. •... -
Page 18: Full Reline With Outside Air - Vertical
CASTILE INSERT B. Full Reline With Outside Air - Vertical NOTE: Check clearances carefully for this type of instal- NOTE: In Canada, only a full reline is allowed per ULC lation to ensure adequate room for outside air venting. S628-93, ORD ULC C1482-M1990. CAUTION NOTE: In Canada this fi... -
Page 19: Appliance Set-Up
CASTILE INSERT Appliance Set-Up B. Outside Air Kit Instructions A. Leveling System Parts Included in Kit: 1 piece of 2 inch x 3 ft. fl ex hose, 2 The leveling bolts are located at the rear of the appliance. hose clamps, 1 collar assembly, 1 termination cap assem- To access the bolts, remove the side access panels. -
Page 20: Door Handle Removal
CASTILE INSERT C. Door Handle Removal NOTE: 3/8 inch (9.5mm) thick tile or like material can be cut to size and fi t under lip of top trim edge for a decora- Tools Required: 5/32 Allen wrench tive touch. Figure 20.3. 1. -
Page 21: Hearth Support For Standard Surround Only
CASTILE INSERT F. Hearth Support for Standard Surround Only 1. Remove contents from box and lay on protective surface to avoid scratching the paint. 2. Lay hearth support front and sides face down. Bend the tab down toward the inside. 3. -
Page 22: Surround & Trim Set, Econo
CASTILE INSERT F. Hearth Support (Cont’d) place. 9. Slide surround over the top of the insert into Surround attaches to bottom and top of insert sides with Base Plate Only Installation the supplies 1/4 inch screws. Parts Needed: (1) cast ring (2) base zero clearance panel extensions. -
Page 23: Surround And Cast Trim Set
CASTILE INSERT H. Surround and Cast Trim Set 8. If power enters appliance on the left side: The cord will have to be routed through the back of the insert. When ncluded in Surround Kit: (2) side surrounds, left and right; routing the power cord, keep cord lying fl... -
Page 24: Optional Log Set Placement Instructions
CASTILE INSERT I. Optional Log Set Placement Instructions Two Piece Log Set Installation Open door to expose the fi rebox. Install the left log fi rst and then the right log. Figure 24.1 3. Lean the logs against the cast iron brick in the back of the fi... -
Page 25: Thermostat Installation
CASTILE INSERT J. Thermostat Installation The kit comes standard with a wall thermostat and 25’ of wire. If you need to run more than 25’ make sure you use a continuous strand of 18 to 22 gauge thermostat wire. For optimum performance your thermostat should be located on an inside wall approximately 5’... -
Page 26: Mobile Home Installation
CASTILE INSERT Mobile Home Installation You must use a Quadra-Fire Outside Air Kit CAUTION for installation in a mobile home. THE STRUCTURAL INTEGRITY OF THE MOBILE HOME An outside air inlet must be provided for the combustion air and FLOOR, WALL AND CEILING/ROOF MUST BE MAINTAINED must remain clear of leaves, debris, ice and/or snow. -
Page 27: Accessory List
CASTILE INSERT Accessory List Castile Insert-B Service Parts Beginning Manufacturing Date: Feb 2011 Ending Manufacturing Date: Active IMPORTANT: THIS IS DATED INFORMATION . Parts must be ordered from a dealer or Stocked Hearth and Home Technologies does not sell directly to consumers distributor. - Page 28 CASTILE INSERT Castile Insert-B Service Parts Beginning Manufacturing Date: Feb 2011 Ending Manufacturing Date: Active IMPORTANT: THIS IS DATED INFORMATION . Parts must be ordered from a dealer or Stocked Hearth and Home Technologies does not sell directly to consumers distributor.
- Page 29 CASTILE INSERT Castile Insert-B Service Parts Beginning Manufacturing Date: Feb 2011 Ending Manufacturing Date: Active IMPORTANT: THIS IS DATED INFORMATION . Parts must be ordered from a dealer or Stocked Hearth and Home Technologies does not sell directly to consumers distributor.
- Page 30 CASTILE INSERT 7022-514C July 7, 2015...
- Page 31 CASTILE INSERT July 7, 2015 7022-514C...
- Page 32 Hearth & Home Technologies 1445 North Highway Colville, WA 99114 Division of HNI INDUSTRIES Please contact your Quadra-Fire dealer with any questions or concerns. For the number of your nearest Quadra-Fire dealer log onto www.quadrafi re.com CAUTION DO NOT DISCARD THIS MANUAL...
Need help?
Do you have a question about the CASTILEI-MBK and is the answer not in the manual?
Questions and answers