Table of Contents
Advertisement
Quick Links
Advertisement
Table of Contents

Related Manuals for Planet VIP-255PT


Summary of Contents for Planet VIP-255PT
- Page 1 SIP PoE IP Phone VIP-255PT User’s manual Version 3.0...
- Page 2 PLANET has made every effort to ensure that this User’s Manual is accurate; PLANET disclaims liability for any inaccuracies or omissions that may have occurred.
- Page 3 WEEE as unsorted municipal waste and have to collect such WEEE separately. Trademarks The PLANET logo is a trademark of PLANET Technology. This documentation may refer to numerous hardware and software products by their trade names. In most, if not all cases, their respective companies claim these designations as trademarks or registered trademarks.
-
Page 4: Table Of Contents
TABLE OF CONTENTS Chapter 1 Introduction................6 Overview..........................6 Package Content .......................7 Physical Details .........................7 Rear View ........................7 Front View and Keypad function................8 Icon on the LCD ......................9 Chapter 2 Preparations & Installation ..........11 Physical Installation ....................... 11 Administration Interface ....................13 Web configuration access ..................13 Chapter 3 Network Service Configurations........ - Page 5 Case 2: Call Forward Feature Example..............47 Appendix B The method of operation guide ..............49 Call Transfer ......................49 3-Way Conference ....................49 Call Waiting ......................49 Do Not Disturb ......................49 Mute the Call ......................49 Appendix C Frequently Asked Questions List.............50 Appendix D VIP-255PT Specifications.................52...
-
Page 6: Chapter 1 Introduction
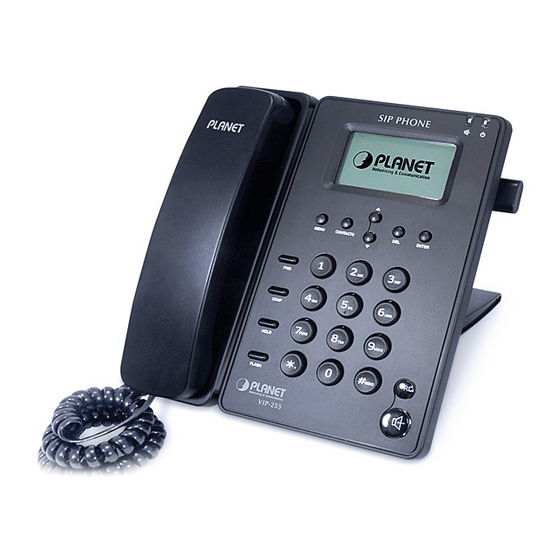
/ home use as well as installation for Internet Telephony Service Provider (ITSP). VIP-255PT is a SIP IP phone includes 2-voice line, 4 soft-buttons and with 802.3af Power over Ethernet (PoE) LAN interface supported. The built-in Graphic LCD of the VIP-255PT is with blue backlight and support multi-language on both LCD and webpage. -
Page 7: Package Content
• Supports standard encryption and authentication (MD5 and MD5-sess) • The phone can be configured via keypad, web browser or remote. • Firmware can be upgraded through HTTP, FTP or TFTP. Package Content The contents of your product should contain the following items: SIP PoE IP Phone Unit Power adapter Quick Installation Guide... -
Page 8: Front View And Keypad Function
Please don’t connect PoE injector and AC adapter to Note VIP-255PT at the same time, this may make the effect of current pulse and then cause device damage. Be noted to power the SIP IP phone either from 802.3af PoE or AC adapter. -
Page 9: Icon On The Lcd
if the phone is not powered. The screen will display labels for these keys, to identify their Hot Key functions. Use the navigation keys to navigate in the display menus and confirm Navigation Keys and cancel actions. 1. If you have set the voicemail number, clicking this button when you have new voice mails on the server, it will call out MESSAGE automatically. - Page 10 Account register successful Missed calls Call in Call out Input method: all letters and numbers Input method: numbers Input method: letters in lower case Input method: letters in upper case Mute microphone Call held Voice mail Call Fforward DND (Don’t disturb) Auto Answer In handset mode In speaker mode...
-
Page 11: Chapter 2 Preparations & Installation
Chapter 2 Preparations & Installation Physical Installation VIP-255PT: 802.3af PoE SIP IP Phone (2 x RJ-45, 1 x PoE for LAN interface) Step 1: Connecting Handset Handset Figure 2-1 handset installation Step 2: Connecting Power AC Power and Network Plug the Ethernet cable into the back of the base station. - Page 12 Please don’t connect PoE injector and AC adapter to Note VIP-255PT at the same time, this may make the effect of current pulse and then cause device damage. Be noted to power the SIP IP phone either from 802.3af PoE or AC adapter.
-
Page 13: Administration Interface
Administration Interface The IP Phone provides GUI (Web based, Graphical User Interface) for machine management and administration. Key pad administration also available for simple configuration. Web configuration access To start IP Phone web configuration, you must have one of these web browsers installed on computer for management •... -
Page 14: Chapter 3 Network Service Configurations
Chapter 3 Network Service Configurations Configuring and monitoring your IP Phone from web browser The IP Phone integrates a web-based graphical user interface that can cover most configurations and machine status monitoring. Via standard, web browser, you can configure and check machine status from anywhere around the world. -
Page 15: Network Configuration Via Web Configuration Interface
Figure 3-2 main page Network configuration via web configuration interface Execute your web browser, and insert the IP address (default: 192.168.0.1) of VIP-255PT in the address bar. After logging on machine with username/password (default: root / no password), browse to “Network” --> “LAN Settings” configuration menu: Figure 3-3. - Page 16 IP Phone Subnet Mask LAN mask of Default: 255.255.255.0 IP Phone Default Gateway Gateway of Default: 192.168.0.254 After confirming the modification you’ve done, please click on the Confirm button to apply settings and the machine will be reboot to make the settings effective. Connection Type Data required.
- Page 17 After confirming the modification you’ve done, Please click on the Confirm button to apply settings and the machine will be reboot to make the settings effective. Please consult your ISP personnel to obtain proper PPPoE/IP address related information, and input carefully. Hint If Internet connection cannot be established, please check the physical connection or contact the ISP service staff...
-
Page 18: Chapter 4 Voip Ip Phone Configurations
Chapter 4 VoIP IP Phone Configurations General Settings Phone Status You can view the status of your phone using the Phone interface or the Web interface. This option allows you to review: IP, MAC, Firmware version, etc. To check the Phone Status via Phone interface: Press Menu and Enter to check the phone status. - Page 19 Press Menu->Settings->Basic Settings->Time & Date. If SNTP Settings is chosen, the phone will automatically get the time from the specific NTP Server. Use the navigation keys to highlight the specific option and the relating changes. You can set the Time Zone, NTP Server1/Server2, Daylight Saving respectively. If Manual Setting is chosen, the time can be set manually.
- Page 20 instruction above for the parameters’ detail. To change the Daylight Saving Time via the Phone interface: 1. Press Menu->Settings->Basic Settings->Time & Date->SNTP Settings->Daylight Saving. 2. Press the Switch hot key to choose Off/On/Automatic options. 3. Press the Save hot key to save the changes. To change the Daylight Saving Time Settings via the Web interface: 1.
-
Page 21: Keypad Lock
Keypad Lock You can lock the keypad of your phone when you are temporarily not using it. This function helps you to protect your phone from unauthorized use. You can lock the following specific keys: Field Description The Menu hot key can not be used until unlocked. You can not access Menu Keys the menu of the phone. -
Page 22: Audio Settings
instruction above for the parameters’ detail. 1. The default password for unlock is null (no password). Note 2. Users can make emergency calls when the phone is locked. Audio Settings Volume You can adjust the volume of handset/speaker/Ring. To adjust the ring volume when you are in idle status: Press Menu->... -
Page 23: Ring Tone
Ring Tone You can adjust the type and volume of the ring tone. To adjust the Ring Style via Phone interface: 1. Press Menu->Settings–>Basic Settings->Ring Tone->Enter. 2. Use the up/down navigation keys to highlight the specific one. 3. Press Save hot key to save the change or Back to cancel. To change the Ring Tone Type via Web interface: Choose Phone->Preference->Ring Type, highlight the specific one in the pull-down menu, then click the Confirm button to save the changes. -
Page 24: Contact Managemens
Contact Managemens Edit/Add/Delete Contact You can store a large number of contacts in your phone's directory. You can add, edit, delete, dial, or search for a contact in this directory. To add a contact via Phone interface: 1. Press Menu->Directory->Contacts->Enter. 2. -
Page 25: Import/Export Contact List
3. Press the 2aB hot key to switch the input mode. 4. After the edition, press the Save hot key to save the change. Then you can go to Contact list to check the record. 5. You can also choose to move a contact in call history list to blacklist by the same way. If the contact is moved to the blocklist, then the call from Note this contact can not get through. -
Page 26: Remote Phone Book
2. Browse the specific contact list file in .XML format, and then click Import button. The imported contact lists will be shown in the directory. 3. You can also press the button behind the special number to dial out via web interface. 4. -
Page 27: Other Settings
the latest information released on the server in time, and display on the terminal for the user. To set the Remote phone book via Web interface: 1. Choose Contacts-> Remote Phone Book. 2. Input the Phone book URL and the phone book name, then click the Confirm button to save the change. -
Page 28: Hot Line
2. Press the Switch hot key to choose a button that you want to use as the send key: “#”, “*”, or disable this option. 3. Press the Save hot key to save the changes. To set the send key via the Web interface: 1. - Page 29 4. If you want to realize this function by server, please choose and enter the Call On Code and Call Off Code. When you choose to enable the anonymous call function on your IP phone, it will send information to the server, and the server will open the anonymous call function for your IP phone automatically.
-
Page 30: Auto Redial
Auto Redial Auto redial is a telephone feature that redials a busy number a fixed number of times before giving up. To set auto redial via the IP phone interface: 1. Press Menu->Features->Auto Redial Settings->Enter to enter the configuration page. 2. -
Page 31: Auto Answer
4. Press the navigation keys to choose and set the redial times. 5. Press the Save hot key to save the changes. To set auto redial via the Web interface: 1. Choose Phone->Features->Auto Redial. 2. Choose Enabled or Disabled in the pull-down menu, then click the confirm button to save the change. -
Page 32: Missed Call Log
Missed call log Defines whether to save the missed calls to the call history record. This function can only be set via the Web interface: 1. Choose Account->Basic->Missed call log. 2. Choose Enabled or Disabled in the pull-down menu, click confirm button to save the change. Logo Customization You can upload your own logo which will be shown in the idle screen. -
Page 33: Dial Now
2. Enter the desired Prefix and Replace. 3. Click Add/Del button to save the changes. 4. You can also delete a specific one from the dial plan list. Please contact with your system administrator for the Note country/area code if you want to set the Area Code. Dial Now Dial-now enables you to define the specific length of any number/letter in advance(for example xxx), next time when users dial out the 123 whose length matches the Dial-now rule, the phone will dial out... -
Page 34: Block Out
2. Enter the desired “x/.”. 3. Click Add button to save the changes. 4. You can also delete a specific one from the dial plan list by clicking Del button. x represents any numbers; . represents any letters. Note Block Out The specific phone numbers can be forbidden to be called out from your IP phone. - Page 35 the list, click Del button to delete the record. 3. You can not dial out the number from your IP phone unless it is removed from the Forbidden List. The numbers set in Emergency can not use the dial plan rule. Note...
-
Page 36: Chapter 5 Using The Advanced Phone Functions
Chapter 5 Using the Advanced Phone Functions Account Setting Please refer to the previous part “Configuration and Registration” for the basic Account setting information. The following table lists the instruction of the field about the advanced Account Setting. Field Name Description UDP Keep-alive Defines whether to active the phone UDP Keep-alive mechanism. -
Page 37: Vlan Setting
Field Name Description If you select the Bridge mode, then the two Fast Ethernet ports will As an Bridge be transparent. As an Router If you select the Router mode, the SIP phone will work as a router. IP address User could configure the PC port IP address. -
Page 38: Maintenance Tasks
Local RTP Port Define the port for voice transmission. IP address User could configure the PC port IP address. Users can choose the WebServer type: Disable, HTTP, HTTPS, or WebServer HTTPS & HTTP. To configure VLAN settings via Phone interface: 1. -
Page 39: Administrator/User Password
some other phone settings by the Phone interface. Administrator/User Password Administrator mode grants unlimited access to the phone configuration on both web and phone user interface. The administrator/user password is used to access: Web interface along with user name. the advance settings of the phone such as Network, Account, Reset to Factory Settings via the Phone interface. -
Page 40: Firmware Update
not functioning anymore. To maintain the configuration of the phone, you need your system administrator or service provider’s advice. To reset to factory via phone interface: 1. Press the Menu->Settings->Advanced Settings->Reset to factory. 2. Press the Enter hot key, you are prompted to confirm the change, press OK to reset to factory settings, or Cancel to cancel the operation and return to previous menu. -
Page 41: Decryption
2. Click Upgrade button to update the new firmware. 3. Please do not power off during the updating. To update the firmware automatically via Web interface: 1. Choose Upgrade->Advanced. 2. Choose Click here to Autoprovision Now option, Click autoprovision button to update the firmware immediately. -
Page 42: System Log Export
You can ask your system administrator for the decrypt Note password. Set AES Key via phone interface: 1. Go to Menu->Settings->Advanced Settings->Set AES Key. 2. Enter the Common AES and the MAC-oriented AES. 3. Press the Save hot key to save the changes. System Log Export If there is any errors happened to your phone, you can export the system log and send it to your system administrator for diagnosis. -
Page 43: Pcap Trace Export
PCAP Trace Export The PCAP Trace used to record the date transport of your IP phone. If there are any errors happened in your phone, you can export the PCAP trace and send to your system administrator for diagnosis. To export the PCAP Trace: Choose Upgrade->Advanced, select PCAP Trace option, click Export button to export the file to your local computer. -
Page 44: Ring
2. Set the following parameters shown in the table. Field Name Description Echo canceller Defines whether to enable the echo canceller. Voice activity detection (VAD), also known as speech activity detection or speech detection, is a technique used in speech processing in which the presence or absence of human speech is detected. - Page 45 2. Internal Ringer Text: To set group name. For example, family. 3. Internal Ringer File: To choose a special ring tone for the group. 4. Click the Confirm button to save the changes.
-
Page 46: Appendix A Voice Communications
200 / 123 (for VIP-255PT-B) for the voice calls. STEP 2: Please log in VIP-255PT-A via web browser, browse to the Account setting menu and. In the setting page, please insert the Account / Password and SIP Server information obtained from your service provider (in this sample, we’re using PLANET IPX-300 as the IP... -
Page 47: Case 2: Call Forward Feature Example
In the following samples, we’ll introduce the Call Forward Feature applications. In this example, there are three VIP-255PT register to IPX-300 and VIP-255PT_A had set Call Forward function to VIP-255PT_B. (The detail registration settings of IPX-300 and VIP-255PT please refer to the... - Page 48 Figure 30. Web page of VIP-255PT STEP 2: After set up completed, it will show the always forward icon on the LCD screen. Test the scenario: VIP-255PT_C pick up the telephone and dial the number 1001(VIP-255PT_A), because VIP-255PT_A had set up All Forward function to the number 2002(VIP-255PT_B), so the number 2002(VIP-255PT_B) will ring up then it pick up the telephone and communication with the number 3003(VIP-255PT_C).
-
Page 49: Appendix B The Method Of Operation Guide
Appendix B The method of operation guide In this section, we’ll introduce the features method of operation, and lead you step by step to establish these features. Call Transfer A. Blind Transfer 1. B call to A and they are in the process of conversation. 2. -
Page 50: Appendix C Frequently Asked Questions List
Appendix C Frequently Asked Questions List Q1 : I can not register to the server? A1 : 1. Check the IP address. If you set your LAN port in DHCP mode, please make sure that your DHCP server is on. 2. - Page 51 Q9 : How to update the firmware? A9 : 1. Update the firmware on the webpage Upgrade-> Select and Upgrade Firmware. 2. Select the correct file you want to download to the IP Phone then click the “Upgrade” button. Q10 : How to auto provision? A10 : Consult the auto provision server address with your ISP.
-
Page 52: Appendix D Vip-255Pt Specifications
Appendix D VIP-255PT Specifications Product SIP PoE IP Phone Model VIP-255PT Hardware 1 x 10/100Mbps RJ-45 port Power Over Ethernet 802.3af compliant 1 x 10/100Mbps RJ-45 port LCD display 132 x 64 dot matrix graphic LCD Speaker Full duplex hands free speaker phone... -
Page 53: Ec Declaration Of Conformity
EC Declaration of Conformity For the following equipment: *Type of Product : Multi–Language PoE IP Phone *Model Number : VIP-255PT * Produced by: Manufacturer‘s Name : Planet Technology Corp. Manufacturer‘s Address: 11F, No 96, Min Chuan Road, Hsin Tien, Taipei, Taiwan, R.O.C.
Need help?
Do you have a question about the VIP-255PT and is the answer not in the manual?
Questions and answers