Table of Contents
Advertisement
Quick Links
Advertisement
Table of Contents

Subscribe to Our Youtube Channel
Related Manuals for Planet VIP-190


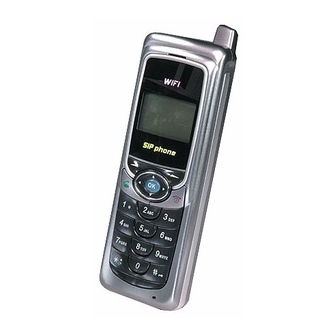
Summary of Contents for Planet VIP-190
- Page 1 802.11b SIP Wi-Fi Phone VIP-190 User’s manual...
- Page 2 Copyright (C) 2006 PLANET Technology Corp. All rights reserved. The products and programs described in this User’s Manual are licensed products of PLANET Technology, This User’s Manual contains proprietary information protected by copyright, and this User’s Manual and all accompanying hardware, software, and documentation are copyrighted.
-
Page 3: Table Of Contents
Contents Introduction..........................5 Getting Started ........................6 2.1. Package Contents ......................6 2.2. Keypad .........................6 2.3. Turn On/Off the Power ....................7 2.4. Load Default IP Address ....................7 2.5. Enter Administrative Mode..................8 2.6. Locking & Unlocking the Keypad ................8 2.7. Adjusting the Speaker Volume..................9 2.8. - Page 4 3.6.8. Don’t Disturb .....................34 Web Configuration.......................35 4.1. Login Password......................35 Basic Phone Tasks........................36 5.1. Dialing a Phone Number....................36 5.2. Redialing a Phone Number ..................36 5.3. Answering a Call......................36 Display Messages ........................37 6.1. Error Messages......................37 6.2. Warning Messages .....................38...
-
Page 5: Introduction
1. Introduction This is an Administrator’s manual describing the VIP-190 (Wi-Fi Phone in the following term) running in Administrative mode. Before using Wi-Fi Phone, some setup processes are required to make the phone work properly. You should at least setup the IP address of Wi-Fi Phone and router when DHCP is disabled. -
Page 6: Getting Started
2. Getting Started Please check the following before using the Wi-Fi Phone: Package contents How to install and remove the battery How to charge the battery How to turn on/off the device 2.1. Package Contents You should find the following contents in your Wi-Fi Phone package: Wi-Fi Phone Standard battery Wi-Fi Phone User’s Guide... -
Page 7: Turn On/Off The Power
DESCRIPTION This key is used for making selections on the bottom left side of the Soft key 1 phone LCD, such as: Menu, Select, OK... Its current function is indicated by the word appearing above the key. This key is used for making selections on the bottom right side of the Soft key 2 phone LCD, such as: Names, Back, Clear... -
Page 8: Enter Administrative Mode
2.5. Enter Administrative Mode 1. Turn of the power. 2. Press the “ ” + “ ” + ” ” keys and hold till the <ENGINEER MENU> is shown on the LCD screen. Then release the keys. 3. In approximately 10 seconds, you will enter the main screen of the administrative mode. -
Page 9: Adjusting The Speaker Volume
When locking, press any key would show, Figure 2.6-3. 10/20 12:00 Figure 2.6-3 Keypad Locked 2.7. Adjusting the Speaker Volume During conversation, press the ” “ key to increase the volume. “ To decrease the volume, during conversation, press the ” key. -
Page 10: Configuring Network Environment
3. Configuring Network Environment This chapter explains how to modify the network environment. 3.1. Network Configuration This section introduces modifications to the network information. 3.1.1. Fixed IP This section introduces how to select Fixed IP. 12:00 Wi-Fi Phone Not Registered Menu Names Menu... -
Page 11: Dhcp
3.1.2. DHCP This section provides instructions for performing the DHCP settings. The Dynamic Host Configuration Protocol (DHCP) client provides a mechanism for allocating IP address dynamically so that addresses can be reused when hosts no longer need them. 12:00 Wi-Fi Phone Not Registered Menu Names... -
Page 12: Pppoe
3.1.3. PPPoE The Point-to-Point Protocol over Ethernet (PPPoE) provides more than just IP address assignment, which is the primary purpose of DHCP (assigning a unique and available IP address based upon a unique network adapter address). PPPoE also allows for the movement of TCP/IP traffic between two known points. -
Page 13: Wireless Configuration
3.2. Wireless Configuration This section provides instructions for configuring the wireless, 802.11b, configuration submenu. 3.2.1. Wireless LAN Settings This section explains the following: Scanning for the Wireless Service Set Identifier Making wireless settings Setting up WEP Keys (Wireless Equivalent Privacy Keys) 3.2.1.1. - Page 14 12:00 Wi-Fi Phone Not Registered Menu Names Menu Select Select 7. Wireless 6. WEP Select [1]None [1]None 8. Restart 7. Profile [2]64bit [2]64bi t Select 1. Information 8. Auth Type [3]128bit [3]128b Select Back Select Back Select Back Select Back Back Back [2]64bit...
- Page 15 12:00 Wi-Fi Phone Not Registered Menu Names Menu 7. Wireless 8. Restart 1. Information Select Back Select Back 12. Profile Select 1. Create 1: (AP) PLANET 1: (AP) Select 13. Auth type 2. Activate Select 1. Site Survey 3. Remove Select Back Select...
-
Page 16: Sip Configuration
3.3. SIP Configuration This section provides information on the Session Initiation Protocol (SIP) settings. Please note that you have to configure both, Registrar Server , SIP Proxy Server and Outbound Proxy. 3.3.1. Registrar IP Settings 12:00 Wi-Fi Phone Not Registered Menu Names Menu... -
Page 17: Outbound Proxy Settings
3.3.2. Outbound Proxy Settings 12:00 Wi-Fi Phone Not Registered Menu Names Menu 5. SIP Setting 6. Settings 7. Wireless Select Back Select Back Input the Proxy IP Select Select 1. Proxy IP Proxy IP Proxy IP Outbound Proxy 3. Proxy Server 2. -
Page 18: Sip Proxy Server Settings
3.3.3. SIP Proxy Server Settings 12:00 Wi-Fi Phone Not Registered Menu Names Menu 5. SIP Setting 6. Settings 7. Wireless Select Back Select Back Input the Proxy IP Select Select 3. Proxy Server 1. Proxy IP Proxy IP Proxy IP 4. -
Page 19: Setting Up The User Account
3.3.4. Setting up the User Account This section explains how to set up your phone number, username and password you will be using to connect to the SIP server. 12:00 Wi-Fi Phone Not Registered Menu Names Menu 5. SIP Setting 6. -
Page 20: Using The Phonebook
3.4. Using the Phonebook This section provides information about accessing the phonebook and using its features. 3.4.1. Searching Phonebook Entries - Edit Entry 12:00 Wi-Fi Phone Not Registered Menu Names Menu 3. Phonebook 4. Net Setting 5. SIP Setting Select Back Select Back... -
Page 21: Searching Phonebook Entries - Erase Entry
3.4.2. Searching Phonebook Entries - Erase Entry 12:00 Wi-Fi Phone Not Registered Menu Names Menu 3. Phone book 4. Net Setting 5. SIP Setting Select Back Back Select 1. Search 1. Search Select 2. Add Entry 2. Add Entry 3. Erase 3. -
Page 22: Searching Phonebook Entries - Speed Dial Entry
3.4.3. Searching Phonebook Entries – Speed dial Entry 12:00 Wi-Fi Phone Not Registered Menu Names Menu 3. Phonebook 4. Net Setting 5. SIP Setting Select Back Select Back 1. Search 1. Search Select 2. Add Entry 2. Add Entry 3. Erase 3. -
Page 23: Adding A Phonebook Entry
3.4.4. Adding a Phonebook Entry This section provides information on adding a new entry in your Phonebook. 12:00 Wi-Fi Phone Not Registered Menu Names Menu 3. Phonebook 4. Net Setting 5. SIP Setting Select Back Back Press key , go back menu Select Back Input the name... -
Page 24: Erasing Phonebook Entries - One By One
3.4.5. Erasing Phonebook Entries - One By One This section explains how to erase an existing entry from your Phonebook. 12:00 Wi-Fi Phone Not Registered Menu Names Menu 3. Phonebook 4. Net Setting 5. SIP Setting Select Back Select Back 3. -
Page 25: Erasing Phonebook Entries - All
3.4.6. Erasing Phonebook Entries - All This section explains how to erase all entries from your Phonebook. 12:00 Wi-Fi Phone Not Registered Menu Names Menu 3. Phonebook 4. Net Setting 5. SIP Setting Select Back Select Back 3. Erase 1. Search 2. -
Page 26: Call History
3.5. Call History Call History is a useful feature for checking missed calls, received calls, and dialed calls. 3.5.1. Missed Call This option allows you to check for missed calls, then edit, save and dial the selected phone number. 12:00 Wi-Fi Phone Not Registered Menu... -
Page 27: Received Call
3.5.2. Received Call This option allows you to check for received calls, then edit, save and dial the selected phone number. 12:00 Wi-Fi Phone Not Registered Menu Names Menu 2. Call History 3. Phonebook 4. Net Setting Select Back Select Back 2. -
Page 28: Dialed Call
3.5.3. Dialed Call This option allows you to check for dialed calls, then edit, save and dial the selected phone number. 12:00 Wi-Fi Phone Not Registered Menu Names Menu 2. Call History 3. Phonebook 4. Net Setting Select Back Select Back 3. -
Page 29: Erasing Call
3.5.4. Erasing Call 12:00 Wi-Fi Phone Not Registered Menu Names Menu 2. Call History 3. Phonebook Are you sure? 4. Net Setting Select Back Back Back Select Select Select Select 4. Erase Call 1. Erase All 1. Missed Call 2. Erase Miss Are you sure? Are y ou su... -
Page 30: Settings
3.6. Settings This section describes how to modify melody, ring volume, time, banner, etc. 3.6.1. Setting the Ring Melody 12:00 Wi-Fi Phone Not Registered Menu Names Menu 6. Settings 7. Wireless 8. Restart Select Back Select Back Select 1. Melody Default Default 2. -
Page 31: Setting The Vibration Mode
3.6.2. Setting the Vibration Mode 12:00 Wi-Fi Phone Not Registered Menu Names Menu 6. Settings 7. Wireless 8. Restart Select Back Select Back Select 2. Vibrator Ring Only Ring Only 3. Ring Volume Vibrate Only Vibrate Only Select 4. Edit Time Vibrate - Vibrate -›... -
Page 32: Setting The Time
3.6.4. Setting the Time 12:00 Wi-Fi Phone Not Registered Menu Names Menu 6. Settings 7. Wireless 8. Restart Select Back Select Back Select 4. Edit Time Edit Time Edit Time 5. Edit Date 12:00| 12:00| Select 6. Banner Select Back Back Back Back... -
Page 33: Setting The Banner
3.6.6. Setting the Banner 12:00 Wi-Fi Phone Not Registered Menu Names Menu 6. Settings 7. Wireless 8. Restart Select Back Select Back Select 6. Banner Banner Banner 7. Key Lock Wi-Fi Phone Wi-Fi Phone-SIP 8. Don’t Disturb Select Back Ok Aa1@ Back Ok Aa1@ Back Back 3.6.7. -
Page 34: Don't Disturb
3.6.8. Don’t Disturb 12:00 Wi-Fi Phone Not Registered Menu Names Menu 6. Settings 7. Wireless 8. Restart Select Back Select Back Select 8. Don’t Disturb 9. Load Default Select 1. Melody Select Back Select Back Select Back Back... -
Page 35: Web Configuration
4. Web Configuration This chapter explains how to use the Wi-Fi Phone web interface to configure your wireless IP phone. 4.1. Login Password Use your browser to access the Wi-Fi Phone web page – in the Address field, type: http://<ipaddress> , then click the Go button. -
Page 36: Basic Phone Tasks
5. Basic Phone Tasks 5.1. Dialing a Phone Number 1. In idle state, enter a phone number by using the numerical keys. 2. If you have entered an incorrect number, press the key to delete it. 3. Press the key to connect your call. 5.2. -
Page 37: Display Messages
6. Display Messages 6.1. Error Messages Error messages are displayed to let you know that an error has occurred. These error messages may prevent you from connecting to the network or from using the phone. You may need to contact the system administrator to resolve the problem. Error 1: No AP found ( blinking) 12:00 The ESSID set on the phone does not match any of the Service... -
Page 38: Warning Messages
6.2. Warning Messages Warning messages are displayed when the phone detects a condition that may disrupt your phone service. Warning 1: No display when the phone is seated in the charger. - Situation 1: The phone is seated in the charger but there is no LCD display and back light, even if it has been powered - Situation 2: The phone is seated in the charger but there is no LCD display;...
Need help?
Do you have a question about the VIP-190 and is the answer not in the manual?
Questions and answers