
Related Manuals for Spirit ESPRIT EL455


Summary of Contents for Spirit ESPRIT EL455
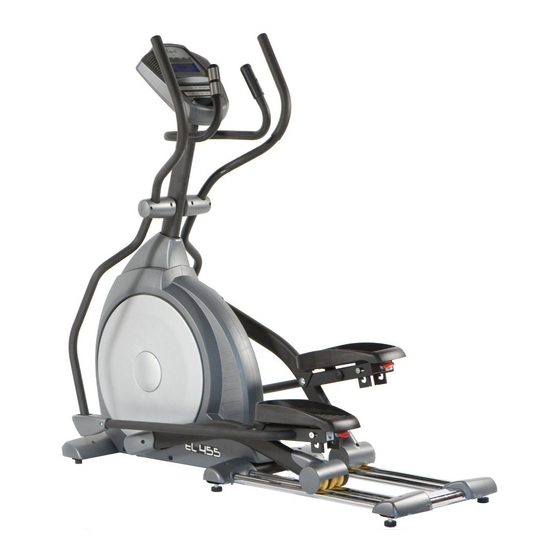
- Page 1 EL455 OWNER’S MANUAL PLEASE CAREFULLY READ THIS ENTIRE MANUAL BEFORE OPERATING YOUR NEW ELLIPTICAL!
-
Page 2: Table Of Contents
Table of Contents Product Registration . .2 Important Safety Instructions Important Electrical Information Important Operation Instructions Assembly Instructions Features .. 11 Operation of Your New Elliptical ..12 Manufacturer s Limited Warranty Serial Number Sticker Location EL455 Elliptical... -
Page 3: Product Registration
Through your dealer, Spirit will do all we can to make your ownership experience as pleasant as possible for many years to come. The local dealership where you purchased this elliptical is your administrator for all Spirit warranty and service needs. -
Page 4: Important Safety Instructions
Important Safety Instructions WARNING - Read all instructions before using this appliance. elliptical Do not operate the on deeply padded, plush or shag carpet. Damage to both the elliptical carpet and may result. Set the elliptical up on a hard, even surface. elliptical Keep children away from the . -
Page 5: Important Electrical Information
Do not use excessive pressure on console control keys. They are precision set to properly function with little finger pressure. Pushing harder is not going to make the unit go faster or slower. If you feel the buttons are not functioning properly with normal pressure, contact your Spirit dealer. EL455 Elliptical... -
Page 6: Assembly Instructions
Assembly Instructions ASSEMBLY PACK CHECK LIST Step 1 #96 - 3/8" #84 - 3/8" x 23mm #66 - M5 x 10mm Split Washer (1pc) Curved Washer (2pcs) Phillips Head Screw (4pcs) #103 - 3/8" x 3/4" #60 - 3/8" x 2-1/4" Hex Head Bolt (2pcs) Hex Head Bolt (1pc) Step 2... -
Page 7: Assembly Pack Check List
ASSEMBLY PACK CHECK LIST Step 4 #87 - 3.5mm x 12mm #105 - M5 x 15mm Sheet Metal Screw (8pcs) Phillips Head Screw (14pcs) Step 4 Tools #108 - Phillips Head Screw Driver (1pc) #107 - Short Phillips Head Screw Driver (1pc) #109 - 12mm Wrench (1pc) #106 - 13/14mm Wrench (1pc) EL455 Elliptical... - Page 8 STEP 1: CONSOLE MAST ASSEMBLY • Locate the console mast (12) and console mast cover (41) and slide the cover onto the mast as far as it will go. Make sure the cover is facing the correct way. • At the top opening of the main body of the elliptical is a wire harness (31). Unravel and straighten out the wire harness and feed it into the bottom of the console mast tube and out of the top opening.
- Page 9 STEP 2: SWING ARM ASSEMBLY • Install the two Wave Washers (83) onto the Left and Right sides of the Swing Arm axle. • Slide the Left and Right Swing Arms (10&11) onto the appropriate side of the axle. There is a small sticker on each swing arm that shows L (Left) or R (Right).
- Page 10 STEP 3: CONNECTING ARM ASSEMBLY • Align the hole in the rod end bearings at the ends of the Connecting Arms (8&9) with the hole in the bracket at the bottom of the Swing Arms (10&11). There is a sleeve spacer already installed in the rod ends and held in place with a twist tie;...
- Page 11 STEP 4: BEAUTY COVERS ASSEMBLY • Install the Connecting Arm Covers (57 & 58) over the connection of the rod end and Swing Arms with four M5 Phillips Head Screws (105) and two Self Tapping Screws (87). • Install the two Wheel Covers (52) on the pedal arms above the Wheels with four M5 Phillips Head Screws (105).
-
Page 12: Features
Through research performed with a leading sports scientist and physical rehabilitation expert, Spirit engineering has developed a breakthrough in pedal design. No other elliptical, at any price, offers these unique features. The history of elliptical use over the past few years tells us that many users suffer from numb toes while working out on elliptical trainers. -
Page 13: Operation Of Your New Elliptical
Operation of Your Elliptical Getting familiar with the control panel Console Operation Quick Start This is the quickest way to start a workout. After the console powers up you just press the Start key to begin, this will initiate the Quick Start mode. In Quick Start the Time will count up from zero and the workload may be adjusted manually by pressing the Up or Down buttons. -
Page 14: Preset Programs
Basic information The Message Window will initially be displaying Speed information. Each time the Enter button is pressed the next set of information will appear, four windows in all. In order: Speed in RPM and MPH, Work Level and Watts. If the Enter button is pressed during the Level and Watts display the Scan light will come on and the message window will show each set of data for four seconds then switch to the next set of data in a continuous loop. - Page 15 HILL The Hill program simulates going up and down a hill. The resistance in the pedals will steadily increase and then decrease during the program. Work Profile FATBURN The Fat Burn program is designed, as the name implies, to maximize the burning of fat. There are many schools of thought on the best way to burn fat but most experts agree that a lower exertion level that stays at a steady workload is the best.
- Page 16 Strength The Strength program is designed to increase muscular strength in your lower body. This program will steadily increase in resistance to a high level and then keeps you there. This is designed to strengthen and tone your legs and glutes. Work Profile Interval The Interval program takes you through high levels of intensity followed by periods of low intensity.
- Page 17 picture on the screen will not change. The reason for this is so that you can see the entire profile at all times. If the profile picture is changed, it also would be distorted and not a true representation of the actual profile. When you make a change to the workload, the message window will show the current column and program maximum levels of work.
- Page 18 Heart Rate programs Before we get started, a word about Heart Rate: The old motto, no pain, no gain , is a myth that has been overpowered by the benefits of exercising comfortably. A great deal of this success has been promoted by the use of heart rate monitors. With the proper use of a heart rate monitor, many people find that their usual choice of exercise intensity was either too high or too low and exercise is much more enjoyable by maintaining their heart rate in the desired benefit range.
-
Page 19: Rate Of Perceived Exertion
Rate of Perceived Exertion Heart rate is important but listening to your body also has a lot of advantages. There are more variables involved in how hard you should workout than just heart rate. Your stress level, physical health, emotional health, temperature, humidity, the time of day, the last time you ate and what you ate, all contribute to the intensity at which you should workout. - Page 20 Heart Rate Control Program operation You must have your hands in contact with the hand pulse sensors at all times for the heart rate program to work. To start the HRC program follow the instructions below or just select the HRC program then the Enter button and follow the directions in the message window.
- Page 21 Maintenance: 1. Wipe down all areas in the sweat path with a damp cloth after each workout. 2. If a squeak, thump, clicking or rough feeling develops the main cause is most likely one of two reasons: The hardware was not sufficiently tightened during assembly. All bolts that were installed during assembly need to be tightened as much as possible.
-
Page 22: Manufacturer S Limited Warranty
ELLIPTICAL LIMITED WARRANTY Spirit Fitness Inc. warrants all its home use elliptical parts for a period of time listed below, from the date of retail sale, as determined by a sales receipt or the absence of a sales receipt, eighteen (18) months from the original factory shipping date. Spirit s responsibilities include providing new or remanufactured parts, at Spirit s option, and technical support to our independent dealers and servicing organizations.
Need help?
Do you have a question about the ESPRIT EL455 and is the answer not in the manual?
Questions and answers