
Related Manuals for Dynatone UPRIGHT PIANO DPR2200


Summary of Contents for Dynatone UPRIGHT PIANO DPR2200
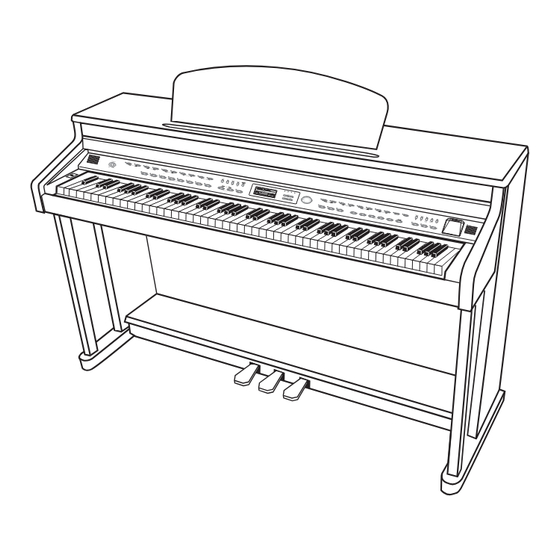
- Page 1 OWNER'S MANUAL H i g h Pe r f o r m a n ce D i g i t a l P i a n o UPRIGHT PIANO DPR2200 GRAND PIANO GPR2200 N e w f e e l , n e w l o o k a n d n e w s o u n d...
- Page 2 D Y N A T O N E C O R P . w w w . d y n a t o n e . b i z Part No. 11958210...
-
Page 3: Precaution
Precautions INSTRUCTIONS PERTAINING TO A RISK OF FIRE, ELECTRIC SHOCK, OR INJURY TO PERSONS. WARNING : TO REDUCE THE RISK OF FIRE OR ELECTRIC SHOCK, DO NOT EXPOSE THIS APPLIANCE TO RAIN OR MOISTURE. CAUTION RISK OF ELECTRIC SHOCK CAUTION TO REDUCE THE RISK OF ELECTRIC SHOCK DO NOT REMOVE COVER (OR BACK) NO USER SERVICEABLE PARTS INSIDE... -
Page 4: Important Safety Instructions
Precautions IMPORTANT SAFETY INSTRUCTIONS WARNING: When using electric products, basic precautions should always be followed, including the following: 1. Read all the instructions before using the product. 2. To reduce the risk of injury, close supervision in necessary when a product is used near children. 3. -
Page 5: Grounding Instructions
Precautions INFORMATION TO THE USER This equipment has been tested and is found to comply with the limits for a class B digital device, pursuant to part 15 of the FCC Rules. These limits are designed to provide reasonable protection against harmful interference in a residential installation. -
Page 6: Welcome/Main Features
Welcome Welcome... Thank you and congratulations on your purchase of the High-Performance DIGITAL PIANO. Your new High-Performance DIGITAL PIANO delivers various specifications. Sharing much in common with high-end models, your piano offers 128-polyphony, new Advanced Real Hammer Action keyboard(ARHA3), useful external memory(SD Card)slot, USB MIDI interface and hundreds of additional sounds and rhythm styles. -
Page 7: Table Of Contents
Contents Precaution Welcome/Main Features Contents Care of Your Digital Piano Unpacking (Upright Piano/ Grand Piano) 7/10 Assembling Your Piano (Upright Piano/ Grand Piano) 8/11 Setting up Your Piano Panel Controls and Terminals Performance Screen Adjusting the Volume VP Player Selecting Voices GM Voice Main Voice Volume Layer... -
Page 8: Care Of Your Digital Piano
Care of your Digital Piano Care of your Digital Piano Avoid heat, humidity or direct sunlight. Take care not to drop the unit and avoid strong impact. Keep the unit free from liquids, dust, etc... Never attempt to modify any parts of the unit. During thunderstorms, turn the product off and disconnect the plug from the power. -
Page 9: Unpacking (Upright Piano/ Grand Piano)
Unpacking (Upright Piano) Unpacking (Upright Piano) Carefully remove the Digital Piano and its accessories from the packing box. The Digital Piano set consists of the following items. SD Card Main unit Owner's Manual Rear Plate (d) Power Cord Right, Left Legs (a, b) Pedal Box (c) Eight Bolts Four Bolts for Main Unit... -
Page 10: Assembling Your Piano (Upright Piano/ Grand Piano)
Assembling Your Piano (Upright piano) Assembling Your Piano(Upright Piano) Attaching the both legs and pedal box assembly Securely combine both legs(a,b) and pedal box(c) by using four bolts(f) for pedal box. For pedal stability, rotate the adjusters on the bottom of the pedal assembly until they come in firm contact with the floor surface. -
Page 11: Connecting The Pedal Cord
Assembling Your Piano (Upright piano) Attaching the main unit and stand Set the stand upright and gently lower the main unit on the stand, then tighten the main unit with four bolts (g) for main unit as shown in illustration. Music Stand Raise the music stand on the piano s top panel by lifting two brackets on the back... - Page 12 Unpacking (Grand Piano) Unpacking (Grand Piano) Carefully remove the Digital Piano and its accessories from the packing box. The Digital Piano set consists of the following items. SD Card Owner's Manual Main Unit Power Cord Keyboard Protection Cover Pedal Nuts (2EA) Pedal Stand Brace(2EA) Bolt M10 X 60 (8EA) Wrench (1EA)
- Page 13 Assembling Your Piano (Grand Piano ) Assembling Your Piano (Grand Piano) To reduce the risk of injury, The Digital Piano should be assembled by qualified service personnel. Take care not to drop the unit and avoid strong impact. Attaching the main unit and three legs. The first, Set the both legs upright and After fixing the both legs to the main unit, hang the both legs at the main unit, then...
- Page 14 Assembling Your Piano (Grand Piano) Attach the pedal stand brace to the main unit and pedal stand assembly using four screws. Make sure the screws are securely tightened. Connecting the Pedal Cord Plug the Pedal Cord which is protruding from the top of the pedal assembly into the corresponding port in the bottom of the main unit.
-
Page 15: Setting Up Your Piano
Setting Up Your Piano Setting Up Your Piano TURNING ON THE POWER Connecting the power cord. Insert the plug at the ends of cord, one into AC inlet on the rear panel of the piano, and other into a standard AC outlet. Press POWER switch. - Page 16 Setting Up Your Piano CONNECTING THE PEDAL PEDAL CORD LEFT PEDAL CENTER PEDAL RIGHT PEDAL Connecting the pedal cord. Insert the pedal plug into the pedal connector on the rear panel of the piano. RIGHT PEDAL (Damper Pedal ) With piano tones, depressing the pedal causes notes to linger, much like a piano's damper pedal.
-
Page 17: Connecting Audio Devices
Setting Up Your Piano REAR PANEL CONNECTING AUDIO DEVICES Line out jacks (Standard phone jacks of L/Mono and R) When these are connected, you can use the instrument's MASTER VOLUME control to adjust the volume of the sound output to the external device. Connect the instrument's Line Out 'L/Mono' and 'R' jacks and the input jacks of a pair of powered speakers using appropriate audio cables. -
Page 18: Panel Controls And Terminals
Panel controls and Terminals Panel Controls and Terminals VOLUME SECTION SETUP SECTION Page 19 Page 18 MASTER VOLUME Multi Function LCD Display SETUP STYLE SECTION DATA CONTROL buttons Page 40 RHYTHM buttons DATA WHEEL Page 43 AUTO ACCOMP. DISPLAY HOLD Page 42 Page 38 START/STOP... - Page 19 Panel controls and Terminals VOICE SECTION PEDAL DAMPER PEDAL Page 23 Page 14 VOICE buttons SOSTENUTO PEDAL LAYER Page 25 Page 14 ASSIGNABLE PEDAL Page 25 Page 14 LAYER VOLUME Page 27 SPLIT POWER Page 28 SPLIT VOLUME POWER switch Page 30 Page 13 REVERB...
-
Page 20: Performance Screen
Performance Screen Performance Screen When you first turn on your piano. The power up status screen briefly appears in the display followed by the Performance Screen. The performance screen shows you all of the most important playing parameters. Main Voice This shows the selected main voice. -
Page 21: Adjusting The Volume
Adjusting the Volume Adjusting the Volume The piano has one volume knob on the panel for adjusting the volume. MASTER VOLUME This determines the entire volume of the piano. This also determines the volume level of the HEADPHONE(s). ACCOMPANIMENT VOLUME This determines the playback volume of the auto-accompaniment volume. -
Page 22: Vp Player
Install system data into an SD memory card 1) Format the SD memory card on your PC. (FAT32) 2) Download the SYSTEM INSTALL program at our website ww.dynatone.biz 3) Install the downloaded program into your SD memory card on your PC. - Page 23 VP Player Choose the desired music in the selected VP music group. Choose the desired music by pressing the DATA buttons or DATA wheel on the VP music pop-up screen. ' ' means Group and ' ' means VP tune. To go to the VP music group pop-up display, press the NO button or select ' ..' and press the YES button.
- Page 24 VP Player Stop playback of a music. Press the STOP button. When pressing the STOP button, the Repeat and the ALL options will be off. Change the VP music group. Press down the NO button on VP music tune pop-up. Then the VP music group will be displayed on the screen.
-
Page 25: Selecting Voices
Selecting Voices Selecting Voices The piano features a wealth of rich, authentic voices, including piano, strings and brass instruments. It also features a keyboard percussion function that lets you play realistic drum, percussion sounds, and various effect sounds directly from keyboard. Voice Types 80 Sounds with GM 128 Voice Sounds 7 Drum kits... -
Page 26: Gm Voice
GM Voice GM Voice There are 128 different voices in the piano. When the GM VOICE button is selected, one of 128 GM voices can be assigned. CHANGING THE GM VOICE BY DATA BUTTONS. Press the GM VOICE button. The Pop-up display shows you the current selected voice number and voice name. Default GM voice: 25 Nylon Guitar Select the desired voice by pressing the DATA buttons or the DATA wheel. -
Page 27: Layer
Layer Layer The layer mode of the piano allows you to select and play two different voices simultaneously in a layer. This makes it easy to create exceptionally rich and thick tonal textures. The volume balance can be set for the two voices. PLAYING WITH THE LAYER VOICE Select the main voice. - Page 28 Layer B. Adjusting the LAYER VOLUME by using the LAYER VOLUME UP and DOWN buttons. Call up the volume pop-up display. Press and hold down the SETUP button and press LAYER VOLUME UP or DOWN button. The Volume pop-up display appears. Adjust the layer volume.
-
Page 29: Split
Split Split The split mode of the piano allows you to select and play two different voices with your left and right hands - For example, play bass with the left and piano with the right . PLAYING WITH SPLIT VOICE Select the main voice. -
Page 30: Adjusting The Split Volume
Split ADJUSTING THE SPLIT VOLUME This determines the volume of the split voice. There two ways to adjust the split volume. A. Adjusting the SPLIT VOLUME in the split pop-up display. Call up the split mode. To call up the split mode, press the SPLIT button. Lamp lights and the split is set on. - Page 31 Split ADJUSTING THE MAIN VOICE VOLUME Call up the volume pop-up display. Press and hold down the SETUP button and press SPLIT(or LAYER) VOLUME UP or DOWN button. The volume pop-up display appears. Move the cursor to main voice in the volume pop-up display. Press the YES button on the volume pop-up display.
-
Page 32: Reverb
Reverb Reverb Reverb is an effect that recreates the decaying reflections of a sound in a performance space, and reproduces the special ambience of a concert hall. REVERB ON/OFF To turn on reverb, press the REVERB button. The lamp lights and reverb is set on. The reverb pop-up display appears. - Page 33 Reverb ADJUSTING THE TOTAL DEPTH This determines the total depth of the reverb. Call up the SETUP mode. Press and hold down the SETUP button. The setup pop-up appears in the LCD screen. Adjust the total depth. Adjust the total depth by using the REVERB DEPTH UP and DOWN buttons . If you press both UP and DOWN buttons at the same time automatically return to the default reverb total depth (50).
-
Page 34: Chorus
Chorus Chorus This control adds richness to the sound. There are four different Chorus types: Chorus 1, 2, 3, 4 , Feedback, Flanger Short delay and Feedback Delay. CHORUS ON/OFF To turn on chorus, press the CHORUS button. The lamp lights and chorus is set on. The chorus pop-up display appears. - Page 35 Chorus ADJUSTING THE TOTAL DEPTH This determines the total depth of the chorus. Call up the SETUP mode. Press and hold down the SETUP button. The setup pop-up appears in the LCD screen. Adjust the total depth. Adjust the total depth by using the CHORUS DEPTH UP and DOWN buttons . If you press both UP and DOWN Buttons at the same time automatically return to the default reverb total depth (50).
-
Page 36: Using The Metronome
Using the Metronome Using the Metronome The piano features a convenient metronome that is ideal for practicing. START/STOP OF THE METRONOME To start the metronome, simply press the METRONOME button. Press the METRONOME button again to stop the metronome sound. The LCD screen shows the metronome pop-up display. ADJUSTING THE TEMPO OF THE METRONOME You can set the tempo over range 40 ~ 250 beats per minute by using the TEMPO buttons. -
Page 37: Setup (Tune, Transpose)
Setup Setup TUNE The tune function lets you make fine adjustments to the pitch, allowing you to accurately match the tuning with that of other instruments. Press and hold down the SETUP button and press the TUNE UP or DOWN button. The Tune pop-up display appears and shows current value. - Page 38 Setup TOUCH Touch determines how your playing strength (velocity) affects the volume of the voices. 10 types are available for tailoring the keyboard response to the selected voice, type of song, or your own playing preference. Selecting the touch Press and hold down the SETUP button and press the TOUCH UP or DOWN button. The touch pop-up display appears and shows current touch.
-
Page 39: Setup (Brilliance, Octave Shift, Pedal)
Setup BRILLIANCE The sound timbre can be adjusted by using the BRILLIANCE function. Press and hold down the SETUP button and press the BRILLIANCE UP or DOWN button. The brilliance pop-up display appears and shows current value. This function affects all voice parts (main, Layer and split) The value can be changed by pressing BRILLIANCE UP and DOWN buttons. - Page 40 The Sound timbre can be adjusted by using the EQ. CHANGING THE MASTER EQUALIZER SETTING Press the EQ button. The button lamp lights and the EQ pop-up display appears in the LCD screen. Select the a desired preset EQ by using the DATA buttons or the DATA wheel. Eight different types are available : Normal, Piano, Live, Dance, Pops, Rock, Loud, and User.
-
Page 41: Midi
MIDI MIDI MIDI(Musical Instrument Digital Interface) is the international standard for digital communication of electronic musical instrument data. This means that any equipment that has a MIDI terminal (such as electronic musical instruments or personal computers ) can easily exchange digital data with other MIDI equipment without complicated conversions or connections. -
Page 42: Auto Accompaniment
Auto Accompaniment Auto Accompaniment This keyboard automatically plays bass and chord parts in accordance with the chords you finger. The bass and chord parts are played using sounds and voices that are automatically selected to select the rhythm you are using. All of this means that you get full, realistic accompaniments for the melody notes you play with your right hand, creating the mood of a one-person ensemble. - Page 43 Auto Accompaniment TEMPO CONTROL ADJUSTMENT Whenever you select a different style, the preset tempo for that style is also selected, and the tempo is shown on the Multi Function display after STYLE SELECT Pop-up display. (Unless you try changing the style during playback, in which case the same tempo is maintained.) Press the TEMPO buttons.
-
Page 44: Playing A Rhythm
Auto Accompaniment PLAYING A RHYTHM Starting the accompaniment style There are several ways to start the accompaniment style, as described. Immediate rhythm starting Press the START/STOP button. To stop the rhythm press the START/STOP button again. Synchronized starting Press the SYNCHRO button and then play the keyboard to start the rhythm. Rhythm starting with an Introduction Press the INTRO/ENDING button to begin the selected rhythm with an introduction arrangement. -
Page 45: Using The Auto Accompaniment
Auto Accompaniment USING THE AUTO ACCOMPANIMENT The following procedure describes how to use the keyboard's Auto Accompaniment feature. Before starting, you should first select the rhythm you want to use and set the tempo of the rhythm to the value you want. Select a rhythm style. -
Page 46: Single Finger
Auto Accompaniment START THE AUTO ACCOMPANIMENT To start Auto accompaniment, press the START/STOP button. Alternately, press the FILL1/SYNC or FILL1/SYNC button, then play the keyboard. TYPES OF AUTO ACCOMPANIMENT MODE Single Finger The Single Finger method makes it easy to produce accompaniment using major, minor, seventh and minor seventh chords by pressing certain key (according to simple rules) in the left range of the keyboard (lower than split point). - Page 47 Auto Accompaniment Fingered Allows you to play a complete style arrangement when you play three or four fingered chords in the left range of the keyboard split. Major: C Minor: Cm Dominant 7: C7 Minor 7th: Cm7 Major 7th: CM 7 Augmented: Caug Diminished: Cdim Suspended 4: Csus4...
-
Page 48: Full Keyboard
Auto Accompaniment Full Keyboard When the Full Keyboard mode is selected, the piano will automatically creates appropriate accompaniment while you play just about anything using both hands, anywhere on the keyboard. You don t have to worry about specifying the accompaniment chords. The name of the detected chord will appear in the display. -
Page 49: Recording
Recording Recording The piano features comprehensive song recording functions that allow you to record your own performance. Also your recorded song can be stored into an SD memory card. RECORDING A SONG Select the record mode. Select the desired voice and press the RECORD button, the RECORD lamp lights and the TRACK 1 lamp flashes. -
Page 50: Stop Recording
Recording Stop recording. Recording stops when pressing the STOP button. PLAYBACK OF THE RECORDER SONG Playback of the recorded song. Press the PLAY/PAUSE button again. The recorded song is played. To delete the recorded track, press and hold the TRACK button about 2~3 seconds. To delete the recorded song, press and hold the RECORD button about 2~3 seconds. - Page 51 Recording Call up the save song pop-up display. Go to the SAVE RECORDED SONG by using DATA buttons or wheel and press the YES button. The save song pop-up appears. Save the recorded song into the SD memory card. Change the big-character in the box by using the DATA buttons or the DATA wheel. When a desired character appears in the character box, press the YES button.
-
Page 52: Registration
Registration Registration A Registration is a particular setup of rhythm, sound, Auto Accompaniment or any other parameters or features you are using. To change the functions during playing you can store your desired conditions in one button. And then if you select the button, your desired conditions will be loaded immediately. - Page 53 Registration Call up the SD card menu. Press the SD CARD button. The LCD screen shows the SD card menu. Call up the save registration pop-up display. Go to the SAVE RECORDED SONG by using DATA buttons or wheel and press the YES button.
-
Page 54: Smf Player
SMF Player SMF Player The letters "SMF" stand for Standard MIDI file, which is a file format that allows MIDI data to be shared between different software and sequencers. There are actually three SMF formats, named SMF 0, SMF 1 and SMF 2. The piano supports the SMF 0 and SMF 1 format, which are widely used today, and so all mentions of "SMF data"... - Page 55 SMF Player Start Playback of the selected SMF. Press the PLAY/PAUSE button. Playback of the selected music will start. Adjusting volume of the SMF. (Same as the adjusting accompaniment.) Adjust the player volume by using the ACCOMP VOLUME UP and DOWN buttons . The volume can be changed by using the DATA buttons or the DATA wheel in the volume pop-up display.
-
Page 56: General Midi Voice & Drum Table
General MIDI Voice & Drum Table General MIDI Voice & Drum Table Piano1 Soprano Saxophone Piano2 Alto Saxophone Piano3 Tenor Saxophone Honky Tonk Baritone Saxophone Electric Piano 1 Oboe Electric Piano 2 English Horn Harpsichord Basson Clavinet Clarinet Celesta Piccolo Glockenspiel Flute Music Box... - Page 57 General MIDI Voice & Drum Table Prog 1 Prog 9 Prog 17 Prog 25 Prog 26 Standard Drum Room Drum Power Drum Elec. Drum TR-808 27 - D#2 High Q 28 - E2 Slap 29 - F2 Scratch Push 30 - F#2 Scratch Pull 31 - G2 Sticks...
- Page 58 General MIDI Voice & Drum Table Prog 33 Prog 41 Prog 49 Prog 57 REMARKS Jazz Drum Brush Drum Orchestra SFX 1 27 - D#1 Closed Hi Hat 28 - E1 Pedal Hi-Hat 29 - F1 Open Hi Hat 30 - F#1 Ride Cymbal 31 - G1 32 - G#1...
-
Page 59: Midi Implementation Chart
MIDI Implementation Chart MIDI Implementation Chart Function Recognized Transmitted Remark Basic Channel Default 1 -3 Mode Default OMNI OFF, POLY OMNI OFF, POLY Note ON/OFF 9nH kk vv #kk:note ON (0-127) #vv:velocity (1-127) Pitch Bender EnH bi bh Maximum swing +/- 1 tone 00 BnH 00H cc Bank Select 01 BnH 01H cc... -
Page 60: Vp Music Library
VP Music Library VP Music Library CLASSIC 01 - CHOPIN GROUP NAME Clssic01 Display Title Composer C H 0 0 1 E t u d e o p . 1 0 n o . 1 C h o p i n , F r y d e r k C H 0 0 2 E t u d e o p . - Page 61 VP Music Library CLASSIC 02 - Chopin GROUP NAME Clssic02 Display Title Composer C H 0 5 1 M a z u r k a o p . 2 4 n o . 3 C h o p i n , F r y d e r k C H 0 5 2 M a z u r k a o p .
- Page 62 VP Music Library CLASSIC 03 - Chopin and Brahms GROUP NAME Clssic03 Display Title Composer C H 1 0 1 B a l l a d e n o . 3 i n A f l a t M a j o r , o p . 4 7 C h o p i n , F r y d e r k C H 1 0 2 B a l l a d e n o .
- Page 63 VP Music Library CLASSIC 04 - Mozart and Others GROUP NAME Clssic04 Display Title Composer P i a n o S o n a t a n o . 9 i n a m i n o r , K V 3 1 0 M o z a r t , W o l f g a n g M 0 1 K 3 1 0 - 1 ( A l l e g r o m a e s t o s o )
- Page 64 VP Music Library CLASSIC 05 - Debussy and Others GROUP NAME Clssic05 Display Title Composer D 0 1 J a r d i n s s o u s l a p l u i e D e b u s s y , C l a u d e D 0 2 A r a b e s q u e N o .
- Page 65 VP Music Library CLASSIC 06 - Schumann and Others GROUP NAME Clssic06 Display Title Composer S C H U 0 1 P a p i l l o n o p . 2 n o . 1 , W i d m u n g S c h u m a n n , R o b e r t S c e n e s f r o m C h i l d h o o d o p .
- Page 66 VP Music Library CLASSIC 07 - Haydn and Others GROUP NAME Clssic07 Display Title Composer A N O N 0 1 F u g a g - m o l l A n o n y m o u s P i a n o S o n a t a O p .
- Page 67 VP Music Library CLASSIC 08 - Bach GROUP NAME Clssic08 Display Title Composer - H a r p s i c h o r d o r C l a v i c h o r d w o r k s - B a c h , J o h a n n S e b a s t i a n B A 1 - 0 1...
- Page 68 VP Music Library CLASSIC 09 - Bach GROUP NAME Clssic09 Display Title Composer - H a r p s i c h o r d o r C l a v i c h o r d w o r k s - B a c h , J o h a n n ( F o u r D u e t t o s ) D u e t t o s f r o m ' C l a v i e r U b u n g ' I I I S e b a s t i a n...
- Page 69 VP Music Library CLASSIC 10 - Bach GROUP NAME Clssic10 Display Title Composer - H a r p s i c h o r d o r C l a v i c h o r d w o r k s - B a c h , J o h a n n - F r e n c h S u i t e s S e b a s t i a n...
- Page 70 VP Music Library JAZZ 01 - Ensemble GROUP NAME JAZZ01 Display Title/Artist J E 0 0 0 1 B l u e s i n C - F u l l e r , L J E 0 0 0 2 G o o d B a i t - D a m e r .
- Page 71 VP Music Library JAZZ 02 - Ensemble GROUP NAME JAZZ02 Display Title/Artist J E 0 0 5 1 D e v o n i t e l y - R o n J o h n s t o n J E 0 0 5 2 D e v o n ' s D e l i g h t - R o n J o h n s t o n J E 0 0 5 3...
- Page 72 VP Music Library JAZZ 03 - Ensemble GROUP NAME JAZZ03 Display Title/Artist J E 0 1 0 1 C o n g a r a m a - C o n g a J E 0 1 0 2 D e s c a r g a n d o - M a m b o L a t i n J E 0 1 0 3 T h r e e 2 S a m b a - S a m b a J E 0 1 0 4...
- Page 73 VP Music Library JAZZ 04 - Piano Solo GROUP NAME JAZZ04 Display Title/Artist J S 0 0 0 1 O h l a d y b e g o o d - G e r s h w i n J S 0 0 0 2 S o m e o n e t o w a t c h o v e r m e - G e r s h w i n J S 0 0 0 3...
- Page 74 VP Music Library JAZZ 05 - Piano Solo GROUP NAME JAZZ05 Display Title/Artist J S 0 0 5 1 G r o w w o r m - L i n c k e J S 0 0 5 2 W h a t a r e y o u d o i n g t h e r e s t o f y o u r l i f e - L e G r a n d e , M .
- Page 75 VP Music Library JAZZ 06 - Piano Solo GROUP NAME JAZZ06 Display Title/Artist J S 0 1 0 1 M o o n W a l k - M i l e s B l a c k J S 0 1 0 2 O u t o f t h e V a l l e y - B r a d T u r n e r J S 0 1 0 3 T o m o r r o w ' s T u n e - M i l e s B l a c k...
- Page 76 VP Music Library GOSPEL GROUP NAME GOSPEL Display Title G E 0 0 0 1 A m a z i n g G r a c e G E 0 0 0 2 H o w G r e a t T h o u A r t G E 0 0 0 3 H o l y , H o l y , H o l y G E 0 0 0 4...
- Page 77 VP Music Library HOLIDAY GROUP NAME HOLIDAY Display Title C A E 0 0 1 G o d R e s t C A E 0 0 2 I t ' s B e g i n n i n g C A E 0 0 3 H a p p y X - m a s C A E 0 0 4...
- Page 78 VP Music Library CONTEMPORARY MUSIC PIANO 01 GROUP NAME CPiano01 Display Title C P 0 1 L a k e l o u i s e - Y u k i G u r a m o t o C P 0 2 R o m a n c e - Y u k i G u r a m o t o C P 0 3 A S o n g f r o m S e c r e t G a r d e n - S e c r e t G a r d e n...
- Page 79 VP Music Library CONTEMPORARY MUSIC PIANO 02 GROUP NAME CPiano02 Display Title C P 5 1 S h o j i C P 5 2 S k y w a r d C P 5 3 S o L o n g , M i g u e l C P 5 4 S o p h i a C P 5 5...
- Page 80 VP Music Library Ragtime 1 GROUP NAME RAGTIME1 Display Title/Artist R A G 0 0 1 A B r e e z e F r o m A l a b a m a ( 1 9 0 2 ) - S c o t t J o p l i n R A G 0 0 2 S c o t t J o p l i n ' s N e w R a g ( 1 9 1 2 ) - S c o t t J o p l i n R A G 0 0 3...
- Page 81 VP Music Library Ragtime 2 GROUP NAME RAGTIME2 Display Title/Artist R A G 0 5 1 C a t a r a c t R a g ( 1 9 1 4 ) - R o b e r t H a m p t o n R A G 0 5 2 C h i c k e n C h o w d e r ( 1 9 0 5 ) - I r e n e G i b l i n R A G 0 5 3...
-
Page 82: Troubleshooting
Troubleshooting Troubleshooting Be sure to check to following table whenever you encounter problems with the DIGITAL PIANO operation. PROBLEM CAUSE SOLUTION No sound 1. Power supply problem. 1. Check the power cord whether it's properly in AC outlet. 2. Volume setting is too low. 2. -
Page 83: Specifications
Specifications Specifications Section Contents PRODUCT HIGH PERFORMANCE DIGITAL PIANO KEYBOARD 88 KEYS (STANDARD) - 7 1/4 OCTAVES TOUCH RESPONSE OFF, HARD 1/2/3, SOFT 1/2/3, NORMAL1/2/3 MAX. POLYPHONY 128 NOTES SOUND GENERAL MIDI 128 VOICES 7 DRUM KIT, 1 SOUND EFFECT SET ACCOMPANIMENT STYLE 80 RHYTHM STYLES ACCOMPANIMENT MODE...
Need help?
Do you have a question about the UPRIGHT PIANO DPR2200 and is the answer not in the manual?
Questions and answers