
Related Manuals for Dynatone DPS-85


Summary of Contents for Dynatone DPS-85
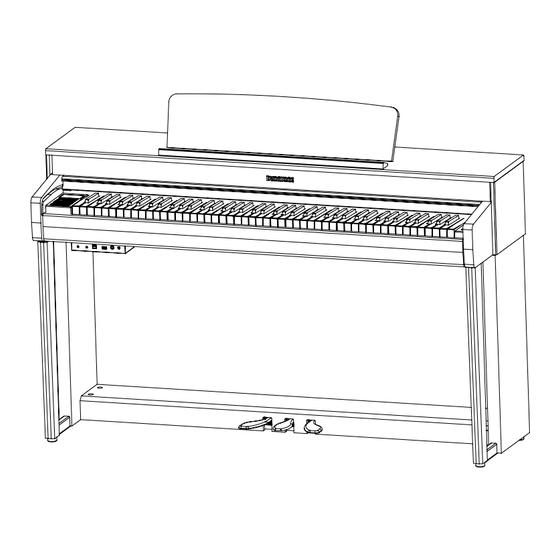
- Page 1 OWNER'S MANUAL High Performance USB Digital Piano New feel, new look and new sound...
-
Page 2: Before Reading
This section is intended to ensure the user's safety and Before Reading: prevent financial damage. Please read this section carefully and use the product Safety Instructions properly according to it. WARNING: Not following this warning may result in serious physical injury! CAUTION: Not following this caution may result in injury and/or financial loss! To avoid the risk of death or physical injury due to electric shock, short circuit, damage or fire,... - Page 3 CAUTION To avoid the risk of physical injury, damage of this product or other financial loss, please follow the fundamental safety instructions listed below. This caution includes the following: ㆍ Do not place the power cable nearby heat ㆍBe sure to use the piano at the place where circuit generators like heaters or radiators.
-
Page 4: Product Features
Product Features We thank you for purchasing our digital piano! This product contains a maximum polyphony of 256 notes and a massive sound data collection as much as 4G bit to offer its 5 distinguished concert grand piano sounds and other high quality voices. Also, its half-pedal feature that detects the precise movement of its keys add on its respectable quality. -
Page 5: Table Of Contents
Table of Contents Before Reading... Music Safety Instructions Choosing a Music Group Product Features Playing Built-in Music Playing USB Music Table of Contents Using VP Player Playback Settings Product Components Classic Demo List Beyer / Czerny / Burgmüller Etudes / Sonatines List Assembly Registration Parts... -
Page 6: Product Components
After purchasing the product, carefully unpack it and examine the existence and condition of the items listed below. If an item is missing or Product Components damaged, contact the place of purchase. Main Unit Owner’s Manual Left/Right Legs(a, b) Pedal Plate(c) Backplate(d) AC Adapter Pedal Plate Fixers... -
Page 7: Assembly
Assembly Assembling the legs and pedals 1 Place the pedal plate (c) between the legs (a, b) like the picture below and use the pedal plate fixers (e) to fix the pedal plate. 2 Manipulate the pedal plate knob (see picture) so that it would be in firm contact with the floor on which the piano is installed. - Page 8 Assembling the main unit 1 Carefully place the main unit onto the assembled lower unit according to the picture so that its holes would match the brackets attached to the legs. Use the Main Unit Fixers (h, 6EA) to secure the connection between the main and lower units.
-
Page 9: Parts
Parts Power Switch Power Switch (on the right of the keyboards) Insert the DC plug of the AC adapter into the piano and AC plug into a household AC power outlet, and press the POWER switch to turn on the piano. -
Page 10: Connections
Connections External Connection Terminals(on the bottom of the piano) q AUX IN - Stereo 3.5mm By connecting external devices to this jack, the piano may play via its internal speakers soundtracks provided by external sources such as smart devices or MP3 audio devices. Connect the output terminal of an external source and the AUX IN of the piano using an audio cable (sold separately). -
Page 11: Pedals
Pedals The piano consists of three pedals that correspond to the three pedals of an acoustic piano. Connecting the Pedal Cables Retrieve the pedal cable tied below the pedal box, and connect it to the pedal input located below the main body. Pedal Functions 1 Sustain Pedal (Right Pedal) This pedal performs the same function as the sustain pedal of an acoustic piano;... -
Page 12: Control Panel
Control Panel ⓐ LCD Screen ⓑ MOVE/ENTER(선) ⓒ BACK(뒤)/Reg.SAVE Page 27 ⓐ ⓓ HOME(홈)/Reg.LOAD Page 27 ⓔ TEMPO ⓑ Page 16 ⓒ ⓓ ⓕ FUNCTION Page 30 ⓖ VOICE/REGISTRATION ⓔ ⓕ Page 12, 27 ⓗ METRONOME Page 16 ⓖ ⓘ DUAL Page 13 ⓙ... -
Page 13: Basic Controls
Basic Controls Adjusting Volume Use the MASTER VOLUME to adjust the overall volume of the piano. ☞ This also affects the volume of headphones. Choosing a Voice This product is a high class digital piano which offers the refined deep sound of quality acoustic grand pianos along with the sound of other diverse acoustic and electric musical instruments. -
Page 14: Dual
The Dual Mode consists of Layer, Split and Twin Piano. Dual Mode Press the DUAL button to change the mode. Press the DUAL button repeatedly to select the desired mode. Dual mode changes in the order shown below. ☞ Dual mode can be used for Layer and Split, or as a Twin Piano. ☞... -
Page 15: Split
Split Split divides the piano keyboard into two sections, and allows the player to assign different voices to each of the sections. For example, by using Split the melody part on the right could be played in piano voice while the accompaniment on the left sounding in acoustic bass voice. q Choose the desired main voice first. -
Page 16: Changing The Split Point
Changing the Split Point Split Point refers to the point where the keyboard is divided. Change it in FUNCTION-VOICE-SPLIT POINT. (Refer to page 33) The split point is shown by the notes and octaves of the keyboard. (e.g.F#3, A4) ☞ The default split point is F# (third F# from the left) ▼... -
Page 17: Metronome
This product has a metronome that is essential for the rhythm and piano education, and can be used to raise the sense of the beat. Start and Stop Press the METRONOME button to start the metronome, and press it again to stop. Metronome Settings Move the cursor with the ▲... -
Page 18: Piano Assist
This product has a metronome that is essential for the rhythm and piano education, and can be used to raise the sense of the beat. There is also a piano assist function that allows you to easily play various genres of music. -
Page 19: Start And Stop
Start and Stop Piano Assist can be started in two ways. q Start immediately Press PLAY/STOP to start the accompaniment immediately. w Start at the same time as you play When you play the keyboard in the bass section, the accompaniment plays. Piano Player will play according to the chord played. -
Page 20: Piano Assist Settings
Fingered The fingered mode detects a chord only when it is fully spelled within the lower register, which is capable of generating more advanced chords and is the most commonly used method. Major: C Minor: Cm Dominant 7: C7 Minor 7th: Cm7 Major 7th: CM 7 Augmented: Caug Diminished: Cdim... -
Page 21: Record
The piano has a recording function that allows you to record your playing. With the recording function, you can record the song you have played, and this feature Record makes learning more effective. Recording and Playing Status Track Setting Details Remarks READY REC The track is waiting for recording. -
Page 22: Recording With Piano Assist
Recording with Piano Assist q Choose the desired Piano Assist rhythm. (Refer to page 17) ☞ Adjust the tempo using the TEMPO button. (Refer to page 16) w Press the RECORD button after setting Piano Assist. ☞ Piano Assist cannot be recorded to Track 2. ☞... -
Page 23: Music
This piano contains music data specifically designed for music education. The music data includes classic masterpieces, Bayer, Burgmüller, Czerny 100/30/40 and Sonatine. You can also play back SMF and MP3 files on USB flash drive (sold separately). Choosing a Music Group q Press the MUSIC button. -
Page 24: Playing Usb Music
How to download the AMD music files into your USB flash drive 1 Download ‘library.zip’ into your PC from our website. (http://dynatone.ipdisk.co.kr:80/publist/HDD2/music/library.zip) ☞ You can download the free music library from our sever. ☞ When entering the web address, be sure to type the uppercase and lowercase letters as same as above. -
Page 25: Playback Settings
Play the VP/AMD music file 1 Insert a USB flash drive that includes the downloaded VP music library. ☞ Before inserting the USB flash drive into the piano, You need check if the contents are in library folder. 2 Press the MUSIC button. 3 Select ‘VP PLAYER’. -
Page 26: Classic Demo List
Classic Demo List Title Composer Display Etude Op.10 No.4 in C-sharp minor ‘Torrent’ F.Chopin CHOPN Liebesträume S.541 No.3 F.Liszt LISZT Sonate No.8 in C minor 'Pathetique' Op.13 - 3. Rondo Allegro L.V.Beethoven BETVN Prelude Op.3 No.2 in C-sharp minor S.Rachmaninoff RACHM Moments Musicaux Op.94 No.3 F.Schubert... -
Page 27: Beyer / Czerny / Burgmüller Etudes / Sonatines List
Beyer / Czerny / Burgmüller Etudes / Sonatines List Group BEYER CZERNY100 CZERNY30 CZERNY40 Title BEYER No.01 ~ 106 CZN100 No.01 ~ 100 CZN30 No.01 ~ 30 CZN40 No.01 ~ 40 Display BURGMULLER Display SONATINES Composer BURG No.01 Burgmüller 25 Etude No.1 Sonatine01_1 Sonatines op.20 no.1 1 La Candeur... -
Page 28: Registration
Registration allows the user to save all current settings and parameters of the piano to the registration memories, so that they may be recalled for easy use in the future. Registration Saving a Registration After setting all the piano's performance settings, press and hold down the Reg.SAVE button and press the Register button (R1–R6) you want to save. -
Page 29: Braincare
This product has a BrainCare function that improves concentration and relaxation. Among these, binaural beats is a function to induce EEG, and it becomes more BrainCare effective when used with headphones. Use the mix of the binaural beats, white noise, and healing music as desired. BrainCare Mode Turn on the piano while holding down the FUNCTION button. -
Page 30: Braincare List
BrainCare List BrainCare Preset Binaural Beats White Noise Display Type Display Type Display Type PRESET 01 Study ALPHA WAVE 1 Relaxation WHITENOISE Study PRESET 02 Study ALPHA WAVE 2 Relaxation VACUUM Study PRESET 03 WorkingStress ALPHA WAVE 3 Relaxation FAN NOISE Study PRESET 04 WorkingStress... -
Page 31: Functions
This piano offers extensive utilities designed to allow adjusting the piano to suit either personal preferences of a user or a given performance Functions condition. Within the FUNCTION menu, various setting items are classified into six groups according to their characteristics. -
Page 32: System
Step 1 Step 2 Default Range Details This adjusts the piano's pitch in 1 Hz steps. When playing MASTER 415 ~ 465 with other instruments that are difficult to tune, you can TUNE (Hz) easily match the pitch between the two instruments. This piano may be transposed up or down by units of -12 ~ +12 semitones. -
Page 33: Controller
Step 1 Step 2 Default Range Details The Touch parameter determines how responsive the volume of a note is to the speed of the player's keystroke. The piano offers 10 different Touch settings to suit different types of players. FIXED All notes are pronounced equally regardless of FIXED/ the player's finger velocity. - Page 34 Step 1 Step 2 Default Range Details In addition to the sound of the player hitting the keyboard directly to the strings, the acoustic piano has a STRING RESO 0~100 unique string resonance phenomenon caused by sound (Resonance) interference between the piano strings. This feature allows you to adjust the string resonance volume.
-
Page 35: Balance
Step 1 Default Range Details MAIN 0~100 Adjust the volume of the main voice. LAYER 0~100 Adjust the volume of the layer voice. SPLIT 0~100 Adjust the volume of the split voice. METRONOME 50~100 Adjust the volume of the metronome voice. PIANO ASSIST 0~100 Adjust the volume of the Piano Assist. -
Page 36: Use Bluetooth
You can connect the piano with a Bluetooth enabled device. This piano supports both Bluetooth audio and Bluetooth MIDI. Bluetooth audio and Bluetooth MIDI are connected separately. q Connection (Bluetooth Audio) The default is pairing mode ON, which allows instant pairing. So it is ready to pair. Activate Bluetooth on the device you want to connect. -
Page 37: Midi Chart
MIDI Chart MIDI Implementation Chart Function Recognized Transmitted Remark Basic Channel Default 1 -3 Mode Default OMNI OFF, POLY OMNI OFF, POLY Note ON/OFF 9nH kk vv #kk:note ON (0-127) #vv:velocity (1-127) Pitch Bender EnH bi bh Maximum swing +/- 1 tone 00 BnH 00H cc Bank Select 01 BnH 01H cc... -
Page 38: Gm Voice & Percussion
GM Voice & Percussion GM Voice(when connected to MIDI) GM # VOICE GM # VOICE 0 6 5 0 0 1 Grand Piano 1 Soprano Saxophone 0 6 6 0 0 2 Grand Piano 2 Alto Saxophone 0 6 7 0 0 3 Grand Piano 3 Tenor Saxophone... -
Page 39: Percussion
Percussion Prog 59 Prog 59 SFX1 (SFX Set) SFX1 (SFX Set) 21 - A0 65 - F4 Chicks/Rooster 22 - A#0 Bass Drum 66 - F#4 Duck 23 - B0 Snare Drum Left Hand 67 - G4 24 - C1 Snare Drum Right Hand 68 - G#4 25 - C#1... - Page 40 Percussion Prog 1 Prog 9 Prog 17 Prog 25 Prog 26 Standard Drum (dru) Room Drum Rock Drum (9-2) Elec. Drum Analog Drum 27 - D#1 High Q High Q High Q High Q High Q 28 - E1 Slap Slap Slap Slap...
- Page 41 Prog 33 Prog 41 Prog 49 Prog 57 비고 Jazz Drum Brush Drum Orchestra Drum SFX2 27 - D#1 High Q High Q Closed Hi-Hat [EXC1] 28 - E1 Slap Slap Pedal Hi-Hat [EXC1] 29 - F1 Scratch Push Scratch Push Open Hi-Hat [EXC1] 30 - F#1 Scratch Pull...
-
Page 42: Trouble Shooting
Trouble shooting If a problem occurs while using this product, check the points listed below first prior to contacting customer service. Problem Cause Solution 1) The power cord is not properly 1) Properly plug the power cord. plugged. 2) Press the power switch. The piano does not turn on. -
Page 43: Product Specifications
Product Specifications Keyboard New RHA Touch 10 Levels (Soft 1/2/3, Normal 1/2/3, Hard 1/2/3, Fixed) MaximumPolyphony Voices 40 Voices, 1 Drum Set, 1 Effect Set (When connected to MIDI, GM128 Voices) Features Layer Split Twin Piano 9 types of Reverb, 4 types of Effect Demo Classic Demo: 50 Educational Music... - Page 44 DYNATONE CORP. www.dynatone.biz Part no. 11958382...
Need help?
Do you have a question about the DPS-85 and is the answer not in the manual?
Questions and answers