
Subscribe to Our Youtube Channel
Related Manuals for Dynatone SLP-210


Summary of Contents for Dynatone SLP-210
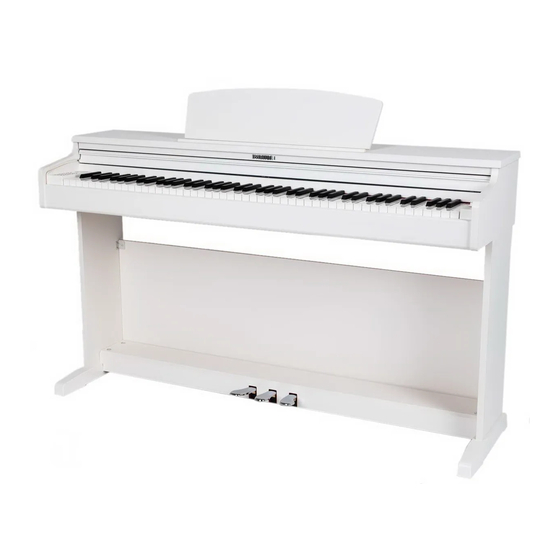
- Page 1 OWNER'S MANUAL High Performance USB Digital Piano New feel, new look and new sound...
-
Page 2: Before Reading
Before Reading: This section is intended to ensure the user's safety and prevent financial damage. Please read this section carefully and use the product Safety Instructions properly according to it. WARNING: Not following this warning may result in serious physical injury! CAUTION: Not following this caution may result in injury and/or financial loss! WARNING:... - Page 3 CAUTION To avoid the risk of physical injury, damage of this product or other financial loss, please follow the fundamental safety instructions listed below. This caution includes the following: ㆍ Do not place the power cable nearby heat ㆍWhen cleaning the instrument, always use soft and generators like heaters or radiators.
-
Page 4: Product Features
Product Features We thank you for purchasing our digital piano! This product contains a maximum polyphony of 81 notes and a sound data collection as much as 256Mbit to offer high quality voices. There are the two-track recording system designed to aid the learning process, a USB terminal for computer music and stereo audio terminals for audio devices like MP3 player. -
Page 5: Table Of Contents
Table of Contents Before Reading... Functions Safety Instructions Using Setup Product Features Master Tune Key Transpose Table of Contents Brilliance Touch Product Components Fixed Touch Velocity Demo Volume Assembly Play All Music Metronome Volume Parts Reverb Type Power Switch Effect Type Headphone Jacks Reverb Volume Connections... -
Page 6: Product Components
After purchasing the product, carefully unpack it and examine the existence and condition of the items listed below. If an item Product Components is missing or damaged, contact the place of purchase. Main Unit Left/Right Legs(a, b) Pedal Plate(c) Backplate(d) Pedal Plate Fixers Backplate Fixers Main Unit Fixers... -
Page 7: Assembly
Assembly Assembling the legs and pedals 1 Place the pedal plate (c) between the legs 2 Manipulate the pedal plate knob (see picture) (a, b) like the picture below and use the pedal so that it would be in firm contact with the floor on which the piano is installed. - Page 8 Assembling the main unit 1 Place the main unit onto the assembled lower body by pushing it from behind so that the screws (2EA) fixed under the main unit would fit into the rear holes of the brackets attached to the legs.
-
Page 9: Parts
Parts Power Switch Power Switch (on the right of the keyboards) Insert the DC plug of the AC adaptor into the piano and AC plug into a household AC power outlet, and press the Standby/ON switch to turn on the piano. ☞... -
Page 10: Connections
Connections External Connection Terminals(on the bottom of the piano) q Connecting to a Computer(USB TO HOST) The piano features a USB-to-host terminal to allow connecting directly to a computer. By using this jack, the piano and computer may exchange MIDI data via USB. 1 Use a USB cable (sold separately) to connect the piano to the computer. -
Page 11: Pedals
Pedals The piano consists of three pedals that correspond to the three pedals of an acoustic piano. Connecting the Pedal Cables Retrieve the pedal cable tied below the pedal box, and connect it to the pedal input located below the main body. Pedal Functions 1 Sustain Pedal (Right Pedal) This pedal performs the same function as the sustain pedal of an acoustic piano;... -
Page 12: Control Panel
Control Panel ⓐ LED Screen ⓐ ⓑ DATA Down ⓒ DATA Up ⓑ ⓒ ⓓ PIANO Page 12 ⓔ DUAL Page 13 ⓓ ⓔ ⓕ REC/DEMO Page 17,18 ⓖ ⓖ ▶/■/ENTER ⓕ Page 17,18,26 ⓗ TRACK1/L Page 17,18 ⓗ ⓘ ⓘ... -
Page 13: Basic Controls
Basic Controls Adjusting Volume Adjusting Master Volume Use the MASTER VOLUME knob to adjust the overall volume of the piano. ☞ This also affects the volume of headphones. Choosing a Voice This product is a high class digital piano which offers the refined deep sound of quality acoustic grand pianos along with the sound of other diverse acoustic and electric musical instruments. -
Page 14: Dual Mode
Dual Mode The Dual Mode consists of Layer, Split and Twin Piano. Choose the desired mode with pressing the DUAL button repeatedly. Each time pressing the DUAL button, the mode changes. Layer(LAr) → Split(SPL) → Twin Piano(tn) → Quit Split Twin Piano Layer ☞... -
Page 15: Split
Split Split divides the piano keyboard into two sections, and allows the player to assign different voices to each of the sections. For example, by using Split the melody part on the right could be played in piano voice while the accompaniment on the left sounding in acoustic bass voice. q Choose the desired main voice first. -
Page 16: Secondary Volume
Secondary Volume This determines the volume of the layer and split voice. When the secondary volume is changed, the layer and split volume will be changed at the same time. q Press SETUP button once, then press DUAL button. When SETUP button is pressed, the LED will show ‘---’, then press DUAL button. The LED will show the secondary volume. -
Page 17: Metronome
Metronome Metronome provides clicks over a steady beat to help the player keep in time while playing. Turning Metronome On/Off Press METRONOME to begin hearing metronome beats. Press METRONOME again to turn off the metronome. Default Tempo Adjusting Tempo The range of metronome tempo is from 40 to 250 bpm (beats per minute). It may be adjusted by using DATA buttons. -
Page 18: Record
This piano features an extensive recording system to record the player's performance. There are 2 tracks and each track may record up to Record 5,000 notes. Recording q Press REC/DEMO button. The button will be lighted, and the TRACK1/L button will begin flashing. The Dual features may be used for recording. -
Page 19: Demo/Etude
This piano features an extensive bank of demonstrational recordings of 50 selected works all performed by professional pianists. It also includes a dedicated music data bank consisting of pedagogical etudes by Beyer (106), Czerny (100/30/40), Burgmüller (25) and selected sonatines for students (45). Listening to Music q Press and hold down REC/DEMO button for 2~3 seconds. -
Page 20: Adjusting Tempo
Adjusting Tempo Each piece has its own default tempo. Each tempo is adjustable. Default Tempo q While playing a piece, press METRONOME button. If you press METRONOME button, you can hear metronome beats of each piece’s default tempo. The screen displays the default tempo. ☞The pieces in ‘Pno’... -
Page 21: Demo List
Demo List (Pno) Title Composer Display Etude op.10 no.1 in C major 'Waterfall' Etude op.10 no.4 in c-sharp minor 'Torrent' Etude op.10 no.5 in G-flat major 'Black Keys' Etude op.25 no.9 in G-flat major 'Butterfly' Nocturne op.9 no.1 in b-flat minor- Larghetto Nocturne op.9 no.2 in E-flat major- Andante Nocturne op.27 no.2 in D-flat major- Lento sostenuto Nocturne op.32 no.1 in B major- Andante sostenuto... -
Page 22: Beyer / Czerny Etudes
Beyer / Czerny Etudes (br / C10, C30, C40) Display Title Display Title Display Title Display Title Beyer Beyer 76 Czerny100-44 Czerny30-18 Beyer 77 Czerny100-45 Czerny30-19 Beyer 1 Beyer 78 Czerny100-46 Czerny30-20 Beyer 2 Beyer 79 Czerny100-47 Czerny30-21 Beyer 3 Beyer 80 Czerny100-48 Czerny30-22... -
Page 23: Burgmüller Etudes / Sonatines
Burgmüller Etudes / Sonatines (bur / Snt) Display Title Display Title Composer Burgmüller 25 Etude No.1 01.1 Sonatines op.20 no.1 1 01.2 Sonatines op.20 no.1 2 La Candeur Burgmüller 25 Etude No.2 01.3 Sonatines op.20 no.1 3 02.1 Sonatines op.20 no.2 1 L'Arabesque Burgmüller 25 Etude No.3 02.2... -
Page 24: Functions
This piano offers extensive utilities designed to allow adjusting the piano to suit either personal preferences of a user or a given performance Functions condition. By using SETUP button, many diverse parameters of the piano may be set. Press SETUP button once, it is lighted and the LED shows ‘---’. Navigate through the parameters (F01, F02, ..., F15) by using DATA buttons. -
Page 25: Master Tune
Master Tune Tune allows fine tuning of the piano by units of cents, which is useful when the piano is to be played alongside other acoustic instruments that are tune-sensitive. ☞ Cent: A unit of pitch; 1 cent equals to a hundredth of a semitone. ☞... -
Page 26: Fixed Touch Velocity
Fixed Touch Velocity When the Touch parameter is set to 'Fixed', all notes played will have the same velocity regardless of how it is played. You may also set the constant volume level that you wish to use while using Fixed Velocity. ☞... -
Page 27: Reverb Volume
Reverb Volume The volume of the Reverb may be adjusted. ☞ Range: 0 ~ 100 (Default: 40) ☞ Press both DATA buttons simultaneously to restore its default value (40). ☞ Refer to page 25 for Reverb type. ☞ Refer to page 23 for using the SETUP button. Effect Volume The volume of the Effect may be adjusted. -
Page 28: Memo
MEMO... -
Page 29: Midi Chart
MIDI Chart MIDI Implementation Chart Function Recognized Transmitted Remark Basic Channel Default 1 -3 Mode Default OMNI OFF, POLY OMNI OFF, POLY Note ON/OFF 9nH kk vv #kk:note ON (0-127) #vv:velocity (1-127) Pitch Bender EnH bi bh Maximum swing +/- 1 tone 00 BnH 00H cc Bank Select 01 BnH 01H cc... -
Page 30: Gm Voice & Percussion
GM Voice & Percussion GM Voice(when connected to MIDI) GM # VOICE GM # VOICE 0 6 5 0 0 1 Grand Piano 1 Soprano Saxophone 0 6 6 0 0 2 Grand Piano 2 Alto Saxophone 0 6 7 0 0 3 Grand Piano 3 Tenor Saxophone... -
Page 31: Percussion
Percussion Prog1 [Standard Drum] Prog58 [SFX] 27 - D#1 High Q Conga 28 - E1 Slap Whistle 29 - F1 Scratch Push Small Drum 30 - F#1 Scratch Pull Cymbal 31 - G1 Sticks Castanets 32 - G#1 Square Click Triangle 33 - A1 Metronome Click... -
Page 32: Trouble Shooting
Trouble shooting If a problem occurs while using this product, check the points listed below first prior to contacting customer service. Problem Cause Solution 1) The power cord is not properly plugged. 1) Properly plug the power cord. 2) The power switch is not pressed. 2) Press the power switch. -
Page 33: Product Specifications
Product Specifications Keyboard New RHA Touch Off, Soft, Normal, Hard Maximum Polyphony Voices 18 Voices, 1 Drum Set, 1 Effect Set (When connected to MIDI, GM128 Voices) Features Layer Split Twin Piano Transpose Master Tune Reverb, Effect Demo Educational Music Beyer/Czerny/Burgmüller etudes, selected Sonatines Metronome Yes (Tempo, Meter, Volume Adjustable) - Page 34 DYNATONE CORP. www.dynatone.biz Part no. 11958343...
Need help?
Do you have a question about the SLP-210 and is the answer not in the manual?
Questions and answers
What ac/DC adaptor do I use
The Dynatone SLP-210 is compatible with an AC adaptor, specifically the one included as an accessory. The power consumption of the piano is 23W.
This answer is automatically generated