Nibe VVM 500 User Manual
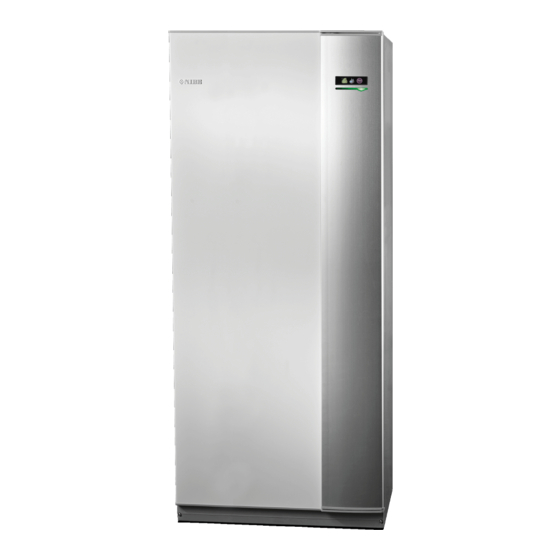
Indoor module
Hide thumbs
Also See for VVM 500:
- Installer manual (80 pages) ,
- Service manual (56 pages) ,
- User manual (44 pages)
Table of Contents
Advertisement
Quick Links
Advertisement
Table of Contents

Related Manuals for Nibe VVM 500


Summary of Contents for Nibe VVM 500
- Page 1 User manual NIBE™ VVM 500 Indoor module UHB GB 1212-1 431240...
- Page 2 A detailed explanation of the button functions can be found on page 12. How to scroll through menus and make different settings is described on page 16. The mode for setting the indoor temperature is reached, when in the start mode in the main menu, by pressing the OK button twice.
-
Page 3: Table Of Contents
2 The heating installation – the heart of the house Installation function Contact with VVM 500 Maintenance of VVM 500 3 VVM 500 – at your service Set the indoor climate Set the hot water capacity Get information Adjust the indoor module... -
Page 4: Important Information
(curve slope) 1.9.3 min. flow line temp. Serial number must always be given Certification that the installation is carried out according to instructions in NIBE's installer manual and applicable regulations. Date __________________ Signed _________________________ Chapter 1 | Important information... -
Page 5: Safety Information
Marking VVM 500 is CE marked and fulfils IP21. The CE marking means that NIBE ensures that the product meets all regula- tions that are placed on it based on relevant EU directives. The CE mark is obligatory for most products sold in the EU, regardless where they are made. -
Page 6: Serial Number
The serial number can be found at the bottom right of the front cover and in the info menu (menu 3.1). Caution Always give the product's serial number (14 digits) when reporting a fault. Chapter 1 | Important information NIBE™ VVM 500... -
Page 7: Contact Information
Tel: +43 (0)7662 8963-0 Fax: +43 (0)7662 8963-44 E-mail: mail@knv.at www.knv.at NIBE Wärmetechnik AG, Winterthurerstrasse 710, CH-8247 Flurlingen Tel: (52) 647 00 30 Fax: (52) 647 00 31 E-mail: info@nibe.ch www.nibe.ch Druzstevni zavody Drazice s.r.o, Drazice 69, CZ - 294 71 Benatky nad Jizerou Tel: +420 326 373 801 Fax: +420 326 373 803 E-mail: nibe@nibe.cz... - Page 8 For countries not mention in this list, please contact Nibe Sweden or check www.nibe.eu for more information. Chapter 1 | Important information NIBE™ VVM 500...
- Page 9 VVM 500 - An excellent choice VVM 500 is part of a new generation of products, which have been introduced to supply your home with inexpensive and environmentally friendly heating. Heat production is reliable and economical with integrated hot water coil, immersion heater, circulation pumps, solar coil and control system.
- Page 10 External heat source VVM 500 is prepared for easy connection to a solar panel installation and/or oil/gas/ wood fired boiler and district heating. Chapter 1 | Important information NIBE™ VVM 500...
-
Page 11: The Heating Installation - The Heart Of The House
Kompressor Förångare -7 °C 0 °C -3 °C 2 °C The temperatures are only examples and may vary between different installations and time of year. Chapter 2 | The heating installation – the heart of the house NIBE™ VVM 500... -
Page 12: Installation Function
The indoor module's integrated hot water heater is in the boiler section. The hot boiler water heats the hot water. The temperatures are only examples and may vary between different installations and time of year. Chapter 2 | The heating installation – the heart of the house NIBE™ VVM 500... -
Page 13: Contact With Vvm 500
Contact with VVM 500 External information When the indoor module door is closed, information can be received via an information window and a status lamp. Information window The information window shows part of the display that is on the display unit (located behind the door to the indoor module). -
Page 14: Display Unit
Display unit There is a display unit behind the indoor module door, which is used to communicate with VVM 500. Here you: switch on, switch off or set the indoor module in emergency mode. sets the indoor climate and hot water as well as adjusting the indoor module to your needs. -
Page 15: Ok Button
In this mode, the compressor switches off and the im- mersion heater engages. The indoor module display is not illuminated and the status lamp illuminates yellow. Chapter 2 | The heating installation – the heart of the house NIBE™ VVM 500... -
Page 16: Menu System
Display of temperature and other operating information and access to the alarm log. See page 43. MY SYSTEM Menu 4 Setting time, date, language, display, operating mode etc. See page 46. Chapter 2 | The heating installation – the heart of the house NIBE™ VVM 500... -
Page 17: Symbols In The Display
3.1 that you should note. These two symbols indicate whether the compressor or addition is blocked in VVM 500. These can, for example, be blocked depending on which oper- ating mode is selected in menu 4.2, if blocking is scheduled in menu 4.9.5 or if an alarm has occurred that blocks one of them. -
Page 18: Selecting Menu
OK button. A new window then opens with sub menus. Select one of the sub menus by marking it and then pressing the OK button. Chapter 2 | The heating installation – the heart of the house NIBE™ VVM 500... -
Page 19: Selecting Options
Mark the applicable option. One of the options is pre-selected (white). Press the OK button to confirm the selected option. The selected option has a green tick. Chapter 2 | The heating installation – the heart of the house NIBE™ VVM 500... -
Page 20: Setting A Value
Turn the control knob until one of the arrows in the top left corner (at the page number) has been marked. Press the OK button to skip between the steps in the start guide. Chapter 2 | The heating installation – the heart of the house NIBE™ VVM 500... -
Page 21: Help Menu
Use the control knob to select the help symbol. Press the OK button. The help text often consists of several windows that you can scroll between using the control knob. Chapter 2 | The heating installation – the heart of the house NIBE™ VVM 500... -
Page 22: Safety Valve
Maintenance of VVM 500 Regular checks Your indoor module is, in principle, maintenance free and therefore requires minimal care after commissioning. On the other hand, it is recommended that you check your installation regularly. If something unusual occurs, messages about the malfunction appear in the display in the form of different alarm texts. -
Page 23: Saving Tips
Power consumption Energiförbrukning fördelat över året mars april juni juli Månad Increasing the indoor temperature one degree increases the energy consump- tion by approx. 5%. Chapter 2 | The heating installation – the heart of the house NIBE™ VVM 500... - Page 24 Engine block heater (Operation: 1 h/day, 4 months a year) Passenger compartment heater (Operation: 1 h/day, 4 months a year) These values are approximate example values. Chapter 2 | The heating installation – the heart of the house NIBE™ VVM 500...
- Page 25 Chapter 2 | The heating installation – the heart of the house NIBE™ VVM 500...
-
Page 26: Vvm 500 - At Your Service
3 VVM 500 – at your service Set the indoor climate Overview Sub-menus For the menu INDOOR CLIMATE there are several sub-menus. Status inform- ation for the relevant menu can be found on the display to the right of the menus. - Page 27 An increase in the room temperature can be slowed by the thermostats for the radiators or under floor heating. Therefore, open the thermostats fully, except in those rooms where a cooler temperature is required, e.g. bedrooms. Chapter 3 | VVM 500 – at your service NIBE™ VVM 500...
- Page 28 If two settings conflict with each other a red exclamation mark is displayed at the end of the line. Chapter 3 | VVM 500 – at your service NIBE™ VVM 500...
- Page 29 °C. If you wish to set similar scheduling for every day of the week start by filling in “all” and then changing the desired days. Chapter 3 | VVM 500 – at your service NIBE™ VVM 500...
- Page 30 Setting the offset of the heating curve at a specific outdoor temperature. heating curve Menu 1.9.1 heating curve Setting range: 0 - 15 Default value: 9 Chapter 3 | VVM 500 – at your service NIBE™ VVM 500...
- Page 31 The heating curve is set when the heating installation is installed, but may need adjusting later. Thereafter the heating curve should not need further adjustment. Chapter 3 | VVM 500 – at your service NIBE™ VVM 500...
- Page 32 Use the control knob to set a new value. Confirm the new setting by pressing the OK button. Curve 0 is an own heating curve created in menu 1.9.7. Chapter 3 | VVM 500 – at your service NIBE™ VVM 500...
- Page 33 Press the OK or Back button to exit read off mode. Chapter 3 | VVM 500 – at your service NIBE™ VVM 500...
- Page 34 When the contact is on, the heat curve offset is changed by the number of steps selected in the menu. If a room sensor is installed and activated the desired room temperature (°C) is set. Chapter 3 | VVM 500 – at your service NIBE™ VVM 500...
- Page 35 Default value: 20 °C Set the minimum temperature on the supply temperature to the climate sys- tem. This means that VVM 500 never calculates a temperature lower than that set here. If there is more than one climate system the setting can be made separately for each system.
- Page 36 A higher value gives a greater change of the heating curve's set offset. If several climate systems are installed the above settings can be made for the relevant systems. Chapter 3 | VVM 500 – at your service NIBE™ VVM 500...
-
Page 37: Supply Temperature
You can create your own heating curve here, if there are special requirements, by setting the desired supply temperatures for different outdoor temperatures. Caution Curve 0 in menu 1.9.1 must be selected for this curve to apply. Chapter 3 | VVM 500 – at your service NIBE™ VVM 500... - Page 38 If it is cold in the house, at, for example -2 °C, "outdoor temp. point" is set to "-2" and "change in curve" is increased until the desired room temperat- ure is maintained. Chapter 3 | VVM 500 – at your service NIBE™ VVM 500...
- Page 39 Caution Wait 24 hours before making a new setting, so that the room temperature has time to stabilise. Chapter 3 | VVM 500 – at your service NIBE™ VVM 500...
-
Page 40: Set The Hot Water Capacity
"holiday setting" displays if vacation setting is in progress (menu 4.7), otherwise it displays "off". advanced Setting hot water circulation (accessory is required) Chapter 3 | VVM 500 – at your service NIBE™ VVM 500... - Page 41 OK button. The time to the right displays the remaining time at the selected setting. When the time has run out VVM 500 returns to the mode set in menu 2.2. Select “off" to switch off temporary lux Chapter 3 | VVM 500 –...
- Page 42 Scheduling is activated/deactivated by ticking/unticking"activated". Set times are not affected at deactivation. If two settings conflict with each other a red exclamation mark is displayed. Chapter 3 | VVM 500 – at your service NIBE™ VVM 500...
- Page 43 If the stop time is before the start time it means that the period extends past midnight. Scheduling always starts on the date that the start time is set for. Chapter 3 | VVM 500 – at your service NIBE™ VVM 500...
- Page 44 "operating time" decide how long the hot water circulation pump must run per operating instance. "downtime" decide how long the hot water circulation pump must be sta- tionary between operating instances. Chapter 3 | VVM 500 – at your service NIBE™ VVM 500...
-
Page 45: Get Information
Menu The information is on several pages. Turn the control knob to scroll between the pages. Symbols in this menu: Compressor Heating Addition Hot water Chapter 3 | VVM 500 – at your service NIBE™ VVM 500... - Page 46 You can see information for the 10 most recent alarms. To view the run status in the event of an alarm, mark the alarm and press the OK button. Chapter 3 | VVM 500 – at your service NIBE™ VVM 500...
- Page 47 You can now select to take read outs for different weeks by turning the control knob to the right or left and read off the average temperature. Press the OK or Back button to exit read off mode. Chapter 3 | VVM 500 – at your service NIBE™ VVM 500...
-
Page 48: Adjust The Indoor Module
Settings of indoor module work mode. plus functions Menu Settings for any additional functions installed in the heating system can be made in the sub menus. Chapter 3 | VVM 500 – at your service NIBE™ VVM 500... - Page 49 (start and stop temperature) pool heating must occur. When the pool temperature drops below the set start temperature and there is no hot water or heating requirement, VVM 500 starts pool heating. Untick "activated" to switch off the pool heating.
- Page 50 Change the operating mode by marking the desired mode and pressing the OK button. When an operating mode is selected it shows what in the indoor module is permitted (crossed out = not permitted) and selectable alternatives Chapter 3 | VVM 500 – at your service NIBE™ VVM 500...
- Page 51 "heating" means that you get heat in the accommodation. You can deselect the function when you do not wish to have heating running. Chapter 3 | VVM 500 – at your service NIBE™ VVM 500...
- Page 52 Menu You can select what icon should be visible when the door to VVM 500 is closed. You can select up to 3 icons. If you select more, the ones you selected first will disappear. The icons are displayed in the order you selected them.
- Page 53 Set the vacation setting in advance and activate just before departure in order to maintain the comfort. advanced Menu Menu advanced has orange text and is intended for the advanced user. This menu has several sub-menus. Chapter 3 | VVM 500 – at your service NIBE™ VVM 500...
- Page 54 You can also set the time over which (filtering time) the average temperature is calculated. If you select 0, the present outdoor temperature is used. Caution It cannot be set "stop additional heat" higher than "stop heating". Chapter 3 | VVM 500 – at your service NIBE™ VVM 500...
- Page 55 Caution Higher value on "start compressor" gives more compressor starts, which in- creases wear in the compressor. Too low value can give uneven indoor temperatures. Chapter 3 | VVM 500 – at your service NIBE™ VVM 500...
- Page 56 Menu 4.9.4 All settings that are available to the user (including advanced menus) can be reset to default values here. Chapter 3 | VVM 500 – at your service NIBE™ VVM 500...
- Page 57 Time period: The start and stop time for the selected day for scheduling are selected here. Blocking: The desired blocking is selected here. Blocking the compressor. Blocking additional heat. Chapter 3 | VVM 500 – at your service NIBE™ VVM 500...
- Page 58 If the stop time is before the start time it means that the period extends past midnight. Scheduling always starts on the date that the start time is set for. Caution Long term blocking can cause reduced comfort and operating economy. Chapter 3 | VVM 500 – at your service NIBE™ VVM 500...
-
Page 59: Disturbances In Comfort
In most cases it is enough to select "reset alarm" to correct the problem that caused the alarm. If a green light illuminates after selecting "reset alarm" the alarm has been remedied. If a red light is still visible and a Chapter 4 | Disturbances in comfort NIBE™ VVM 500... - Page 60 The status lamp will therefore continue to be red. If the alarm does not reset, contact your installer for suitable remedial action. NOTE Always communicate the product's serial number (14 digits) when reporting a fault. Chapter 4 | Disturbances in comfort NIBE™ VVM 500...
-
Page 61: Troubleshooting
If the room temperature is only low in cold weather the curve slope in the menu 1.9.1 (heating curve) needs to be adjusted Holiday mode activated in menu 1.3.4. Enter menu 1.3.4 and select “Off”. Chapter 4 | Disturbances in comfort NIBE™ VVM 500... - Page 62 Wait until the temperature condition has been reset. Minimum time between compressor starts has not been reached. Wait 30 minutes and check if the compressor has started. Alarm tripped. Follow the display instructions. Chapter 4 | Disturbances in comfort NIBE™ VVM 500...
-
Page 63: Technical Data
5 Technical data Detailed technical specifications for this product can be found in the installa- tion manual (www.nibe.eu). Chapter 5 | Technical data NIBE™ VVM 500... -
Page 64: Glossary
Condenser Heat exchanger where the hot gas state refrigerant condenses (cooled and becomes a liquid) and releases heat energy to the house heating and hot water systems. Chapter 6 | Glossary NIBE™ VVM 500... -
Page 65: Domestic Hot Water
Heat exchanger where the refrigerant evaporates by retrieving heat energy from the air which then cools. Expansion vessel Vessel with heating medium fluid with the task of equalising the pressure in the heating medium system. Chapter 6 | Glossary NIBE™ VVM 500... -
Page 66: Heat Exchanger
Radiator Another word for heating element. They must be filled with water in order to be used with VVM 500. Refrigerant Substance that circulates around a closed circuit in the heat pump and that, through pressure changes, evaporates and condenses. During evaporation, the refrigerant absorbs heating energy and during condensing, gives off heating energy. - Page 67 Supply temperature The temperature of the heated water that the indoor module sends out to the heating system. The colder the outdoor temperature, the higher the supply line temperature becomes. Chapter 6 | Glossary NIBE™ VVM 500...
-
Page 68: Item Register
9 Contact information, 5 Troubleshooting, 59 Installation data, 2 Serial number, 4 VVM 500 – An excellent choice, 7 VVM 500 – An excellent choice, 7 Information window, 11 VVM 500 – at your service, 24 Installation data, 2... - Page 69 Chapter 7 | NIBE™ VVM 500...
- Page 70 Chapter 7 | NIBE™ VVM 500...
- Page 72 NIBE AB Sweden Hannabadsvägen 5 Box 14 SE-285 21 Markaryd info@nibe.se www.nibe.eu 431240...
Need help?
Do you have a question about the VVM 500 and is the answer not in the manual?
Questions and answers