Nibe VVM 320 User Manual
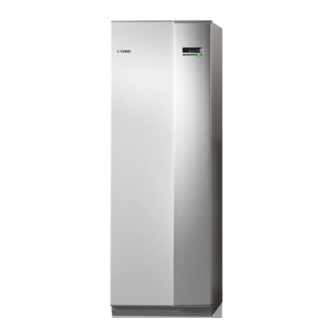
Indoor module
Hide thumbs
Also See for VVM 320:
- User manual (93 pages) ,
- Technical manual (88 pages) ,
- Installer manual (88 pages)
Table of Contents
Advertisement
Quick Links
Advertisement
Chapters
Table of Contents

Related Manuals for Nibe VVM 320


Summary of Contents for Nibe VVM 320
- Page 1 User manual NIBE™ VVM 320 Indoor module UHB GB 1524-3 231358...
- Page 2 Quick guide Navigation Ok button (confirm/select) Back button (back/undo/exit) Control knob (move/increase/reduce) A detailed explanation of the button functions can be found on page How to scroll through menus and make different settings is described on page 16. Set the indoor climate INDOOR CLIMATE HOT WATER MY INSTALLATION...
-
Page 3: Table Of Contents
2 The heating installation – the heart of the house Installation function Contact with VVM 320 Maintenance of VVM 320 3 VVM 320 – at your service Set the indoor climate Set the hot water capacity Get information Adjust the indoor module... -
Page 4: Important Information
(curve slope) 1.9.3 min. flow line temp. Serial number must always be given Certification that the installation is carried out according to instructions in NIBE's installer manual and applicable regulations. Date __________________ Signed _________________________ Chapter 1 | Important information... - Page 5 Rights to make any design or technical modifications are reserved. ©NIBE 2015. NOTE VVM 320 must be installed via an isolator switch with a minimum breaking gap of 3mm. NOTE If the supply cable is damaged, only NIBE, its service representative or similar authorised person may replace it to prevent any danger and damage.
- Page 6 Marking VVM 320 is CE marked and fulfils IP21. The CE marking means that NIBE ensures that the product meets all regu- lations that are placed on it based on relevant EU directives. The CE mark is obligatory for most products sold in the EU, regardless where they are made.
-
Page 7: Serial Number
Serial number The serial number can be found at the bottom right of the front cover and in the info menu (menu 3.1). The serial number can be found to the left, on top of VVM 320. Serial number Caution Always give the product's serial number (14 digits) when reporting a fault. -
Page 8: Contact Information
NIBE Energy Systems France Sarl, Zone industrielle RD 28, Rue du Pou du Ciel, 01600 Reyrieux Tel : 04 74 00 92 92 Fax : 04 74 00 42 00 E-mail: info@nibe.fr www.nibe.fr NIBE Energy Systems Ltd, 3C Broom Business Park, Bridge Way, Chesterfield S41 9QG Tel: 0845 095 1200 Fax: 0845 095 1201 E-mail: info@nibe.co.uk... - Page 9 NIBE AB Sweden, Box 14, Hannabadsvägen 5, SE-285 21 Markaryd Tel: +46-(0)433-73 000 Fax: +46-(0)433-73 190 E-mail: info@nibe.se www.nibe.se For countries not mention in this list, please contact Nibe Sweden or check www.nibe.eu for more information. Chapter 1 | Important information...
- Page 10 Excellent properties for VVM 320: ■ Water heater There is a water heater integrated in VVM 320, which is insulated with environmentally friendly cellular plastic for minimal heat loss. ■ Buffer vessel There is a buffer vessel integrated in the indoor module that equalises the temperature of the water that is sent out in the climate system.
-
Page 11: The Heating Installation - The Heart Of The House
-3 °C -3 °C 0 °C 2 °C Heat source Värmekälla The temperatures are only examples and may vary between different installations and time of year. Chapter 2 | The heating installation – the heart of the NIBE™ VVM 320 house... -
Page 12: Installation Function
The heating medium circulates in a closed system and transports the heated water's heat energy to the house radiators/heating coils. The temperatures are only examples and may vary between different installations and time of year. Chapter 2 | The heating installation – the heart of the NIBE™ VVM 320 house... -
Page 13: Contact With Vvm 320
Contact with VVM 320 External information When the indoor module door is closed, information can be received via an information window and a status lamp. Information window Status lamp Information window The information window shows part of the display that is on the display unit (located behind the door to the indoor module). -
Page 14: Display Unit
Switch VVM 320 There is a display unit behind the indoor module door, which is used to communicate with VVM 320. Here you: switch on, switch off or set the installation to emergency mode. ■ set the indoor climate and hot water as well as adjust the installation to ■... -
Page 15: Ok Button
In this mode, the compressor switches off and the immersion heater engages. The indoor module display is not illumin- ated and the status lamp illuminates yellow. Chapter 2 | The heating installation – the heart of the NIBE™ VVM 320 house... -
Page 16: Menu System
Display of temperature and other operating information and access to the alarm log. See page 49. MY SYSTEM Menu 4 Setting time, date, language, display, operating mode etc. See page 52. Chapter 2 | The heating installation – the heart of the NIBE™ VVM 320 house... - Page 17 3.1 that you should note. These two symbols indicate whether the compressor in the outdoor unit or additional heat is blocked in VVM 320. These can, for example, be blocked depending on which op- erating mode is selected in menu 4.2, if blocking is scheduled in menu 4.9.5 or if an alarm has occurred that blocks one of...
-
Page 18: Selecting Menu
1. Mark the applicable option. One of the options is pre-selected (white). 2. Press the OK button to confirm the selected option. The selected option has a green tick. Chapter 2 | The heating installation – the heart of the NIBE™ VVM 320 house... -
Page 19: Setting A Value
4. Press the OK button to confirm the value you have set. To change and return to the original value, press the Back button. Chapter 2 | The heating installation – the heart of the NIBE™ VVM 320 house... -
Page 20: Use The Virtual Keyboard
Back button. If a menu only has one character set the keyboard is displayed directly. When you have finished writing, mark "OK" and press the OK button. Chapter 2 | The heating installation – the heart of the NIBE™ VVM 320 house... -
Page 21: Scroll Through The Windows
1. Use the control knob to select the help symbol. 2. Press the OK button. The help text often consists of several windows that you can scroll between using the control knob. Chapter 2 | The heating installation – the heart of the NIBE™ VVM 320 house... -
Page 22: Maintenance Of Vvm 320
Maintenance of VVM 320 Regular checks Your indoor module is, in principle, maintenance free and therefore re- quires minimal care after commissioning. On the other hand, it is recom- mended that you check your installation regularly. If something unusual occurs, messages about the malfunction appear in the display in the form of different alarm texts. -
Page 23: Saving Tips
In the past it has been calculated that an average Swedish household has an approximate annual consumption of 5000 kWh domestic electri- city/year. In today's society it is usually between 6000-12.000 kWh/year. Chapter 2 | The heating installation – the heart of the NIBE™ VVM 320 house... - Page 24 WC, 2 bulbs in the bathroom, 4 bulbs in the kitchen, 3 bulbs outside, a washing machine, tumble drier, fridge, freezer, oven, vacuum cleaner, engine block heater = 6240 kWh domestic electricity/year Chapter 2 | The heating installation – the heart of the NIBE™ VVM 320 house...
- Page 25 Chapter 2 | The heating installation – the heart of the NIBE™ VVM 320 house...
-
Page 26: Vvm 320 - At Your Service
3 VVM 320 – at your service Set the indoor climate Overview Sub-menus INDOOR CLIMATE 1 For the menu INDOOR CLIMATE there are several sub-menus. Status information for the relevant menu can be found on the display to the right temperature of the menus. - Page 27 Use the control knob to set a new value. Confirm the new setting by pressing the OK button. Chapter 3 | VVM 320 – at your service NIBE™ VVM 320...
- Page 28 Default value: normal normal(50%) speed 1 (0%) speed 2 (40%) speed 3 (80%) speed 4 (100%) The ventilation in the accommodation can be temporarily increased or reduced here. Chapter 3 | VVM 320 – at your service NIBE™ VVM 320...
- Page 29 Without an activated room sensor the desired change is set (of setting in menu 1.1). One step is usually enough to change the room temperature by one degree, but in some cases several steps may be re- quired. Chapter 3 | VVM 320 – at your service NIBE™ VVM 320...
- Page 30 Conflict: If two settings conflict with each other a red exclamation mark is displayed. If you wish to set similar scheduling for every day of the week start by filling in “all” and then changing the desired days. Chapter 3 | VVM 320 – at your service NIBE™ VVM 320...
- Page 31 "all" is used, all days in the period are set for these times. Time period: The start and stop time for the selected day for scheduling are selected here. Chapter 3 | VVM 320 – at your service NIBE™ VVM 320...
- Page 32 Time period Adjusting Schedule: The schedule to be changed is selected here. Activated: Scheduling for the selected period is activated here. Set times are not affected at deactivation. Chapter 3 | VVM 320 – at your service NIBE™ VVM 320...
- Page 33 Settings regarding the room sensor. cooling settings Settings for cooling. fan return time Fan return time settings in the event of temporary ventil- ation speed change. Chapter 3 | VVM 320 – at your service NIBE™ VVM 320...
- Page 34 If there is access to cooling the same settings can be made for the cooling curve. Chapter 3 | VVM 320 – at your service NIBE™ VVM 320...
- Page 35 +2 steps increases the supply temperat- ure by 5 C at all outdoor temperat- ures. - 10 - 20 - 30 - 40°C UTETEMPERATUR Outdoor temperature Chapter 3 | VVM 320 – at your service NIBE™ VVM 320...
- Page 36 Curve 0 means that own curve (menu 1.9.7) is used. 5. Press the OK button to exit the setting. Chapter 3 | VVM 320 – at your service NIBE™ VVM 320...
- Page 37 When the contact is on, the heat curve offset is changed by the number of steps selected in the menu. If a room sensor is installed and activated the desired room temperature (°C) is set. Chapter 3 | VVM 320 – at your service NIBE™ VVM 320...
- Page 38 In menu 1.9.3 you select heating or cooling, in the next menu (min. supply temp.heating/cooling) set the minimum temperature on the supply tem- perature to the climate system. This means that VVM 320 never calculates a temperature lower than that set here.
- Page 39 Too high a set value for "factor system" can (depending on your climate system) produce an unstable room temperature. If several climate systems are installed the above settings can be made for the relevant systems. Chapter 3 | VVM 320 – at your service NIBE™ VVM 320...
- Page 40 Default value: 0 degree minutes cooling Setting range: -3000 - 3000 cooling degree minutes Factory setting: 0 time betw. switch heat/cool Setting range: 0 - 48 h Default value: 2 Chapter 3 | VVM 320 – at your service NIBE™ VVM 320...
- Page 41 Setting range: 1 – 100% Factory setting: 70% You can use VVM 320 to cool the house during hot periods of the year. Caution Certain setting options only appear if their function is installed and ac- tivated in VVM 320.
- Page 42 This setting option only appears if a room sensor for cooling/heating is installed and activated in VVM 320. Here you can set at which indoor temperature VVM 320 is to shift between heating respectively cooling operation. heat at room under temp.
- Page 43 This selection is only available in cooling 2 pipe systems. Here you can set how long VVM 320 is to wait before it returns to heating mode when the cooling demand has ceased or vice versa.
-
Page 44: Supply Temperature
Default value: 0 °C °C change in curve change in curve flow temperature °C Setting range: -10 – 10 °C Default value: 0 °C outdoor temp. °C Chapter 3 | VVM 320 – at your service NIBE™ VVM 320... - Page 45 +Adjust is to have on calculated supply temperature. The higher the value, the greater the effect. *Support for +Adjust required NOTE +Adjust must first be selected in menu 5.4 ”soft inputs/outputs”. Chapter 3 | VVM 320 – at your service NIBE™ VVM 320...
-
Page 46: Set The Hot Water Capacity
When hot water requirement has temporarily increased this menu can be used to select an increase in the hot water temperature to lux mode for a selectable time. Chapter 3 | VVM 320 – at your service NIBE™ VVM 320... - Page 47 OK button. The remaining time for the selected setting is shown to the right. When the time has run out VVM 320 returns to the mode set in menu 2.2. Select “off" to switch off temporary lux...
- Page 48 Conflict: If two settings conflict with each other a red exclamation mark is displayed. If you wish to set similar scheduling for every day of the week start by filling in “all” and then changing the desired days. Chapter 3 | VVM 320 – at your service NIBE™ VVM 320...
- Page 49 The length of time between increases can be selected here. The time can be set between 1 and 90 days. Factory setting is 14 days. Tick/untick "ac- tivated" to start/switch off the function. Chapter 3 | VVM 320 – at your service NIBE™ VVM 320...
- Page 50 "operating time" decide how long the hot water circulation pump must run per operating instance. "downtime" decide how long the hot water circulation pump must be stationary between operating instances. Chapter 3 | VVM 320 – at your service NIBE™ VVM 320...
-
Page 51: Get Information
-5.6 °C 6.2 % pump speed heating medium Symbols in this menu: 3.9 % charge pump speed Com- Heating pressor Addi- Hot wa- tion Cooling Pool Chapter 3 | VVM 320 – at your service NIBE™ VVM 320... - Page 52 No changes can be made. The information is on several pages. status: Turn the control knob to scroll time factor: between the pages. Chapter 3 | VVM 320 – at your service NIBE™ VVM 320...
- Page 53 4. You can now select to take read outs for different weeks by turning the control knob to the right or left and read off the average temper- ature. 5. Press the OK or Back button to exit read off mode. Chapter 3 | VVM 320 – at your service NIBE™ VVM 320...
-
Page 54: Adjust The Indoor Module
Settings of indoor module work mode. plus functions Menu plus functions4.1 Settings for any additional functions installed in VVM 320 can be made in the sub menus. pool internet smart price adaption Chapter 3 | VVM 320 – at your service... - Page 55 (start and stop temperature) pool heating must occur. When the pool temperature drops below the set start temperature and there is no hot water or heating requirement, VVM 320 starts pool heating. Untick "activated" to switch off the pool heating.
- Page 56 Request new connection string To connect a user account on NIBE Uplink™ to your installation, you must request a unique connection string. 1. Mark “request new connection string" and press the OK button.
- Page 57 3. Enter the correct details via the virtual keypad. 4. Mark “OK" and press the OK button. 5. Repeat 1 - 3 for "port", "user name" and "password". 6. Mark “confirm" and press the OK button. Chapter 3 | VVM 320 – at your service NIBE™ VVM 320...
- Page 58 2 °C. affect hot water Here you set whether the temperature of the hot water should be affected when activating "SG Ready". Chapter 3 | VVM 320 – at your service NIBE™ VVM 320...
- Page 59 With over capacity mode of "SG Ready", the desired pool temperature (start and stop temperature) is increased by 2 °C. NOTE The function must be connected and activated in your VVM 320. Chapter 3 | VVM 320 – at your service...
- Page 60 The function is based on hourly rates for the next 24 hours being retrieved via NIBE Uplink™ and therefore an inter- net connection and an account for NIBE Uplink™ are required.
- Page 61 In this operating mode the compressor is not active and only additional heating is used. Caution If you choose mode "add. heat only" the compressor is deselected and there is a higher operating cost. Chapter 3 | VVM 320 – at your service NIBE™ VVM 320...
- Page 62 Menu my icons 4.3 You can select what icon should be visible when the door to VVM 320 is outdoor/indoor temperature closed. You can select up to 3 icons. If hot water temperature you select more, the ones you selected analog clock first will disappear.
- Page 63 Complete holiday setting about a day before your return so that room temperature and hot water have time to regain usual levels. Set the vacation setting in advance and activate just before departure in order to maintain the comfort. Chapter 3 | VVM 320 – at your service NIBE™ VVM 320...
- Page 64 The indicator marks where in the cycle the installation is. If 0 minutes is selected it means that requirement is not prioritised, but will only be activated when there is no other requirement. Chapter 3 | VVM 320 – at your service NIBE™ VVM 320...
- Page 65 In systems where heating and cooling share the same pipes "stop heat- ing" cannot be set higher than "start cooling" if there is not a cool- ing/heating sensor. Chapter 3 | VVM 320 – at your service NIBE™ VVM 320...
- Page 66 When scheduling is active the relevant blocking symbol is shown in the main menu on the symbol for the indoor module. Chapter 3 | VVM 320 – at your service NIBE™ VVM 320...
- Page 67 Blocking the compressor in the outdoor unit. Blocking additional heat. If you wish to set similar scheduling for every day of the week start by filling in “all” and then changing the desired days. Chapter 3 | VVM 320 – at your service NIBE™ VVM 320...
- Page 68 "all" is used, all days in the period are set for these times. Time period: The start and stop time for the selected day for scheduling are selected here. Chapter 3 | VVM 320 – at your service NIBE™ VVM 320...
- Page 69 Scheduling always starts on the date that the start time is set for. Caution Long term scheduling of "quiet mode" can cause reduced comfort and operating economy. Chapter 3 | VVM 320 – at your service NIBE™ VVM 320...
-
Page 70: Disturbances In Comfort
This could mean that the heat pump's compressor is not running. In this case the immersion heater produces heat and/or hot water. Chapter 4 | Disturbances in comfort NIBE™ VVM 320... - Page 71 If the alarm does not reset, contact your installer for suitable remedial ac- tion. NOTE Always state the product's serial number (14 digits) when reporting a fault. See chapter Important information, page 2. Chapter 4 | Disturbances in comfort NIBE™ VVM 320...
-
Page 72: Troubleshooting
External switch for changing the room heating activated. ■ Check any external switches. ■ Air in the climate system. ■ Vent the climate system ■ High room temperature Too high set value on the automatic heating control. ■ Chapter 4 | Disturbances in comfort NIBE™ VVM 320... - Page 73 Wait until the temperature condition has been reset. ■ Minimum time between compressor starts has not been reached. ■ Wait 30 minutes and check if the compressor has started. ■ Alarm tripped. ■ Follow the display instructions. ■ Chapter 4 | Disturbances in comfort NIBE™ VVM 320...
-
Page 74: Technical Data
5 Technical data Detailed technical specifications for this product can be found in the in- stallation manual (www.nibe.eu). Chapter 5 | Technical data NIBE™ VVM 320... -
Page 75: Glossary
Convector Works in the same way as a radiator, but with the difference that the air is blown out. Chapter 6 | Glossary NIBE™ VVM 320... -
Page 76: Domestic Hot Water
Vessel with heating medium fluid with the task of equalising the pressure in the heating medium system. Flow pipe The line in which the heated water is transported from the indoor module out to the house's climate system (radiators/heating coils). Chapter 6 | Glossary NIBE™ VVM 320... -
Page 77: Heat Exchanger
Radiator Another word for heating element. They must be filled with water in order to be used with VVM 320. Refrigerant Substance that circulates around a closed circuit in the heat pump and that, through pressure changes, evaporates and condenses. During evap- oration, the refrigerant absorbs heating energy and when condensing gives off heating energy. -
Page 78: Safety Valve
Container where domestic water is heated. Is located inside the heat pump, but an extra hot water heater can be installed in the event of large hot water requirements. Container where domestic water is heated. Is located somewhere outside the heat pump. Chapter 6 | Glossary NIBE™ VVM 320... -
Page 79: Index
Troubleshooting, 70 Contact information, 6 Installation data, 2 Serial number, 5 Use the virtual keyboard, 18 VVM 320 – An excellent choice, 8 Information window, 11 Installation data, 2 VVM 320 – An excellent choice, 8 Chapter 7 | Item register... - Page 80 VVM 320 – at your service, 24 Adjust the installation, 52 Get information, 49 Set the hot water capacity, 44 Set the indoor climate, 24 Chapter 7 | Item register NIBE™ VVM 320...
- Page 84 WS name: -Gemensamt WS version: a6 WS release date: 2015-04-20 08:16 Publish date: 2015-06-03 10:51 NIBE AB Sweden Hannabadsvägen 5 Box 14 SE-285 21 Markaryd info@nibe.se www.nibe.eu 231358...
Need help?
Do you have a question about the VVM 320 and is the answer not in the manual?
Questions and answers