Nibe VVM 500 Service Manual
Indoor module
Hide thumbs
Also See for VVM 500:
- Installer manual (80 pages) ,
- User manual (72 pages) ,
- Service manual (56 pages)
Table of Contents
Advertisement
Quick Links
Advertisement
Table of Contents
Troubleshooting

Related Manuals for Nibe VVM 500


Summary of Contents for Nibe VVM 500
- Page 1 Service manual NIBE™ VVM 500 Indoor module SEM GB 1411-1 M11495...
-
Page 3: Table Of Contents
4 Current circuit 8 Technical data Load monitor Electrical circuit diagram, 3 x 400V Dimensions and setting-out coordinates 5 Component description Technical specifications Components Hot water capacity Sensors Electronics Item register External connection options NIBE™ VVM 500 Table of Contents |... -
Page 4: Important Information
1 Important information Marking Document information The CE marking means that NIBE ensures that the This technical manual is a complement to the Installer product meets all regulations that are placed on it handbook for VVM 500, containing: based on relevant EU directives. The CE mark is obligat- Component description. - Page 5 Puh: 09-274 697 0 Fax: 09-274 697 40 E-mail: info@nibe.fi www.nibe.fi AIT France, 10 rue des Moines, 67000 Haguenau Tel : 03 88 06 24 10 Fax : 03 88 06 90 15 E-mail: info@nibe.fr www.nibe.fr NIBE Energy Systems Ltd, 3C Broom Business Park, Bridge Way, Chesterfield S41 9QG Tel: 0845 095 1200 Fax: 0845 095 1201 E-mail: info@nibe.co.uk www.nibe.co.uk...
-
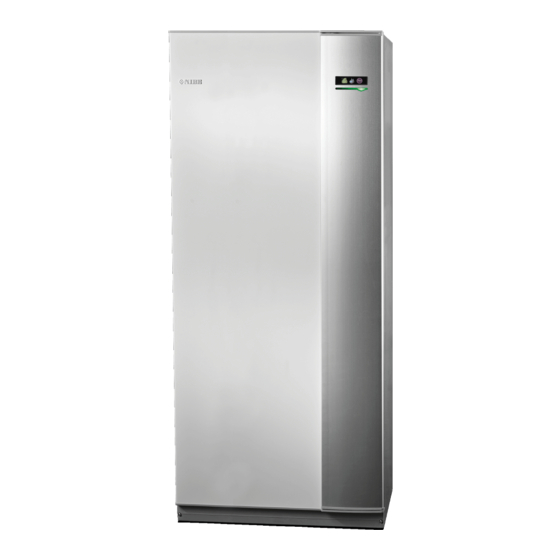
Page 6: Indoor Module's Design
2 Indoor module's design VVM 500 VVM 500 Chapter 2 | Indoor module's design NIBE™ VVM 500... - Page 7 Extra relay circuit board EB 1 Immersion heater FA 1 Miniature circuit-breaker FD 1 Temperature limiter SF 1 Switch Miscellaneous PF 1 Rating plate PF 3 Serial number plate Cable gland Cable gland NIBE™ VVM 500 Chapter 2 | Indoor module's design...
-
Page 8: System Description
Shuttle valve, climate system/water heater, re- turn line Sensors Temperature sensors, heating medium flow Temperature sensors, heating medium return Temperature sensor, hot water, control Temperature sensor, hot water, display BT54 Temperature sensor, solar coil Chapter 3 | System description NIBE™ VVM 500... -
Page 9: System Diagram
EB 100 F20XX/F2300 QN 11 Shunt valve EM 1 Oil, gas, or electric boiler QN 19 Three way valve, pool EP 5 Exchanger, pool RM X Non-return valve EP 8 Solar panel NIBE™ VVM 500 Chapter 3 | System description... -
Page 10: Current Circuit
Reconnection occurs when the current has fallen to a value low enough to permit reconnection. NOTE VVM 500 must be filled with water before the phase sequence is detected. For the heat pump to disconnect the electrical output in the correct phase, the phase sequence must have been detected in the installation. -
Page 11: Component Description
Operating temperature: 5 - 80 °C (90 °C briefly) Ø28 Ø28 Heating medium E6PWM7-15/130G NIBE STRONG pump (GP1) Control signal: PWM 0-10 V DC (max-min speed) 140,2 ± 3 Charge pump (GP12) 112,2 ± 2 ISO 228/1-G1 NIBE™ VVM 500 Chapter 5 | Component description... -
Page 12: Sensors
6.514 1.916 5.306 1.752 4.348 1.587 3.583 1.426 2.968 1.278 2.467 1.136 2.068 1.007 1.739 0.891 1.469 0.785 1.246 0.691 1.061 0.607 0.908 0.533 0.779 0.469 0.672 0.414 0.380 0.250 0.180 0.120 Chapter 5 | Component description NIBE™ VVM 500... -
Page 13: Electronics
Lights red Alarm tripped Output Function PWM1 Control signal HM pump (GP1) PWM2 Control signal charge pump (GP12). Reversing valve (QN10). Charge pump (GP12). Circ-pump (GP1). No function. NIBE™ VVM 500 Chapter 5 | Component description... -
Page 14: External Connection Options
(max 2 A) are activated in menu 5.4: Alarm output. Activation of pump for hot water circulation (GP11). Operating settings are made in menu 2.9.2. Activation of external heating medium pump (GP10). External, reversing valve for hot water. Chapter 5 | Component description NIBE™ VVM 500... -
Page 15: Troubleshooting
EP23- BT2 (EP23-BT3) (supply temperature sensor, extra climate system 3) Fault in the soft- Fuses on the soft-start card Compressor (EB101) blocked. See fault-tracing schedule page start card fuses (AA10) are blown. EB101 NIBE™ VVM 500 Chapter 6 | Troubleshooting... - Page 16 ACC cessory card missing for 15 SMS40. secs. Communication Communication with the ac- Accessory is blocked. See IHB Modbus40 for fault fault ACC Mod- cessory card missing for 15 tracing. bus40. secs. Chapter 6 | Troubleshooting NIBE™ VVM 500...
- Page 17 A l a r m Alarm text on Cause Heat pump action. May be due to the display Slave heat pump Communication with heat Compressor blocked. Faulty communication cable 1 comm fault. pump missing. NIBE™ VVM 500 Chapter 6 | Troubleshooting...
- Page 18 Activates if the heating is blocked and the outdoor temperature (BT1) falls below 3 ºC. Heating is permitted and con- trolled by min. supply. Unsuccessful periodic increase Periodic increase has failed to reach stop temp. within 5 hours. Chapter 6 | Troubleshooting NIBE™ VVM 500...
- Page 19 204 after 60 minutes or if activated 3 times in less than 120 minutes. Inverter error type III Temporary inverter fault. Switches to alarm 205 if activated 2 times in less than 60 minutes. NIBE™ VVM 500 Chapter 6 | Troubleshooting...
-
Page 20: Troubleshooting Guide
Troubleshooting guide Alarm 1 - sensor fault Chapter 6 | Troubleshooting NIBE™ VVM 500... - Page 21 Alarm 2, 3, 6, 31 - sensor fault NIBE™ VVM 500 Chapter 6 | Troubleshooting...
- Page 22 Alarm 33-38 – sensor fault Fault-tracing in accessory card. Chapter 6 | Troubleshooting NIBE™ VVM 500...
- Page 23 Alarm 70 - perm. com.error input card NIBE™ VVM 500 Chapter 6 | Troubleshooting...
- Page 24 Alarm 71 - perm. com.error input card Chapter 6 | Troubleshooting NIBE™ VVM 500...
-
Page 25: Function Check, Components
Shunt valve open (QN11) AA7-K3 Reversing valve (QN35) AA3-X7 Alarm output/HWC/Ext. heating medium pump. Climate system 2 (ECS 40/ECS 41) Output Function EB21-AA5-K2 Mixing valve, close EB21-AA5-K3 Mixing valve, open EB21-AA5-K4 External circulation pump NIBE™ VVM 500 Chapter 6 | Troubleshooting... - Page 26 Charge pump (GP12) Pump speed PVM2, X2:3-4 LED PWM2 on GP12 Card AA2 100 % approx 0 V DC Not lit 50 % approx 5 V DC Half lit approx 10 V DC Chapter 6 | Troubleshooting NIBE™ VVM 500...
-
Page 27: Component Replacement
5. Pull the cover forwards. Accessibility, electrical connection The plastic cap of the electrical boxes is opened using a screwdriver. NOTE The cover for the input card is opened without a tool. NIBE™ VVM 500 Chapter 7 | Component replacement... - Page 28 Removing the cover, input circuit board VVM 500 1. Push the catch down. 2. Angle out the cover and remove it. Removing the cover, immersion heater circuit board VVM 500 Chapter 7 | Component replacement NIBE™ VVM 500...
- Page 29 To remove the cover for the base board, the cover for the input circuit board must first be removed. VVM 500 1. Insert the screwdriver (A) and pry the catch carefully downwards (B). 2. Angle out the cover and remove it. NIBE™ VVM 500 Chapter 7 | Component replacement...
-
Page 30: Main Components
4 Drain the water by open- QM20 ing the drain valve (QM1) and allow air to enter via the vents (QM20) until the level is below the reversing valve (QN10). Reversing valve (QN10) Drain valve (QM1) Chapter 7 | Component replacement NIBE™ VVM 500... - Page 31 5 Remove the plastic cover above (AA1) using a screw- driver. 6 Cut off the two cable ties and remove the insulation from in front of the immer- sion heater. NIBE™ VVM 500 Chapter 7 | Component replacement...
- Page 32 8 Pull out the two bulbs from the immersion heater. 9 Disconnect the immersion heater at the marked coup- lings. 10 Remove the box for the immersion heater circuit board (AA1). 11 Remove the immersion heater. Chapter 7 | Component replacement NIBE™ VVM 500...
- Page 33 (QM20) until the level is below the part to be re- placed. Reversing valve (QN10) Shunt valve (QN11) Drain valve (QM1) Reversing valve (QN35) NIBE™ VVM 500 Chapter 7 | Component replacement...
- Page 34 6 Remove the pin and re- move the actuator. 7 Disconnect and remove the reversing valve. Shuttle valve Connections 8 At reassembly, the actuator can be used if the valve needs turning the right way. Actuator Chapter 7 | Component replacement NIBE™ VVM 500...
-
Page 35: Circuit Board And Electronics
During all the work on circuit boards and electronics ensure that the components are not damaged by electro static discharge (ESD). Immersion heater card (AA1) 1 Remove the plastic cover over (AA1). See instructions in IHB. 2 Remove the screw and connect cables. NIBE™ VVM 500 Chapter 7 | Component replacement... - Page 36 (AA2). See instructions in IHB. 3 Remove the screw and connect cables. Input circuit board (AA3) 1 Remove the plastic cover over (AA3). See instructions in IHB. 2 Remove the screw and connect cables. Chapter 7 | Component replacement NIBE™ VVM 500...
- Page 37 2 Press the catch on the up- per rear side of the display unit. 3 Slide the display unit up until it releases from the mounting. NIBE™ VVM 500 Chapter 7 | Component replacement...
-
Page 38: Technical Data
8 Technical data Electrical circuit diagram, 3 x 400V Chapter 8 | Technical data NIBE™ VVM 500... - Page 39 NIBE™ VVM 500 Chapter 8 | Technical data...
- Page 40 Chapter 8 | Technical data NIBE™ VVM 500...
- Page 41 NIBE™ VVM 500 Chapter 8 | Technical data...
- Page 42 Chapter 8 | Technical data NIBE™ VVM 500...
-
Page 43: Dimensions And Setting-Out Coordinates
Dimensions and setting-out coordinates 25-50 NIBE™ VVM 500 Chapter 8 | Technical data... -
Page 44: Technical Specifications
Height 1900 Required ceiling height 2000 Weight (excl packaging) Part no. 069 400 RSK No. 624 23 28 Applies with an outdoor air heat pump at 7/45 °C (outdoor temperature/flow line temperature) Chapter 8 | Technical data NIBE™ VVM 500... -
Page 45: Hot Water Capacity
Hot water capacity Capacity circulation pump Tap flow Hot water capacity VVM 500 (l/min) (l/min) Economy Normal Flow (litres) NIBE™ VVM 500 Chapter 8 | Technical data... -
Page 46: Item Register
Technical Data, 42 Temperature sensor data, 10 Hot water capacity, 43 Troubleshooting, 13 Alarm list, 13 Function check, components, 23 Important information, 2 Troubleshooting guide, 18 Document information, 2 Troubleshooting guide, 18 Chapter 9 | Item register NIBE™ VVM 500... - Page 48 NIBE AB Sweden Hannabadsvägen 5 Box 14 SE-285 21 Markaryd info@nibe.se www.nibe.eu...
Need help?
Do you have a question about the VVM 500 and is the answer not in the manual?
Questions and answers