
Related Manuals for Russell Hobbs RHCM50


Summary of Contents for Russell Hobbs RHCM50
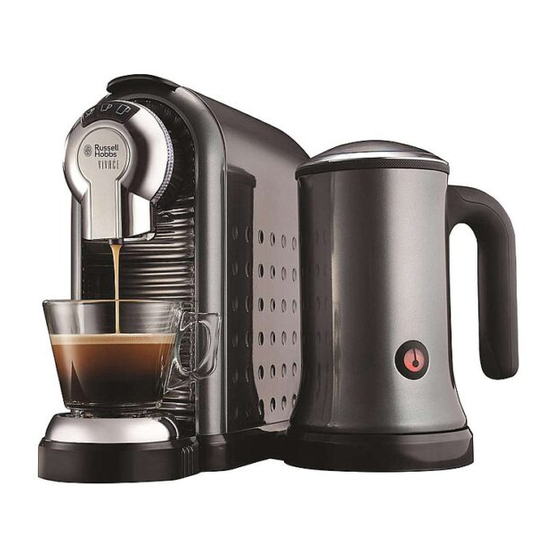
- Page 1 INSTRUCTIONS AND WARRANTY MODEL NO. RHCM50 VIVAĆE CAPSULE COFFEE MAKER WITH MILK FROTHER...
-
Page 2: Table Of Contents
Congratulations on purchasing our Russell Hobbs Vivaće Capsule Coffee Maker with Milk Frother. Each unit is manufactured to ensure safety and reliability. Before using this appliance for the first time, please read the instruction manual carefully and keep it for future reference. -
Page 3: Features Of The Russell Hobbs Vivaće Capsule Coffee Maker
Trouble Shooting 6. STORING THE APPLIANCE 7. SERVICING THE APPLIANCE 8. CHANGING THE PLUG 9. RECIPES TO GET YOU STARTED 10. WARRANTY FEATURES OF THE RUSSELL HOBBS VIVAĆE CAPSULE COFFEE MAKER • 1260W • 19 bar Italian pump •... -
Page 4: Important Safeguards
• Removable whisk • Convenient cordless 360 degree construction • Non-stick coating for easy cleaning • One touch operation with auto switch off • Non-slip rubber feet • With Min and Max level indicators IMPORTANT SAFEGUARDS When using any electrical appliance, basic safety precautions should always be followed including the following: 1. - Page 5 14. The use of accessory attachments or coffee capsules that are not recommended or supplied by the manufacturer may result in injuries, fire or electric shock. 15. A short cord is provided to reduce the hazards resulting from becoming entangled in or tripping over a longer cord.
- Page 6 32. Danger of scalding! Never touch very hot parts of the appliance (e.g. brew unit during operations). Do not touch the steam or water jets. Do not move the operating lever when the machine is building/ generating pressure. 33. Always unplug the appliance before: o relocating the machine o cleaning or maintenance o long periods of disuse...
- Page 7 52. The manufacturer does not accept responsibility for any damage or injury caused by improper or incorrect use, or for repairs carried out by unauthorised personnel. 53. In case of technical problems, switch off the machine and do not attempt to repair it yourself. Return the appliance to an authorised service facility for examination, adjustment or repair.
-
Page 8: Vivaće Capsule Coffee Maker
VIVAĆE CAPSULE COFFEE MAKER: PARTS DIAGRAM Short espresso button Normal Lungo espresso Espresso button button No. Name Operating Handle G. Water Reservoir with handle (removable) Control Panel with buttons H. Power Cord Coffee Dispenser Spout Main Power Switch (ON/ OFF) Drip Tray Set Used Capsule Container/ Bin... -
Page 9: Introduction
Proper care and maintenance will ensure the long life of the Russell Hobbs Vivaće Capsule Coffee Maker with Milk Frother and its reliable/ consistent operation. Save these instructions and refer to them often for cleaning and care tips. -
Page 10: Recommended Coffee Capsule Type
Tip: keep the packaging for transporting the appliance (e.g. for relocating, servicing, storage, etc.) Place the appliance on a dry, level surface. Please refer to the “PARTS DIAGRAM” section to familiarize yourself with the coffee maker and identify all the parts. Please make sure the unit is switched OFF/ “0”... -
Page 11: Operating Instructions
*Nespresso is the trade mark of Nestlé Nespresso S.A. Home of Living Brands is not affiliated with the coffee machine manufacturer or the machine distributor/seller. OPERATING INSTRUCTIONS INDICATOR LIGHT GUIDE Indicator Light What You Should See Status Action Required Refer to “Rinsing the Solid/ steady red light. -
Page 12: Filling Or Re-Filling The Water Reservoir
Solid/ steady control Ready. panel lights. Each control panel button appears to In energy-saving mode. flash in a circular pattern/ fashion. The blue capsule Blue Light in container/ bin light is the Used solid/ steady for visual Check if the used capsule Capsule checking when the container/ bin is full. -
Page 13: Rinsing The Appliance And Its Internal Piping
Filling by removing the water reservoir: Hold the water reservoir handle at a tilting angle as shown in figure 2. to remove the water reservoir from the appliance Fill the water reservoir up to the “MAX” level mark with cold fresh water (the maximum capacity is 0.8 litre), or fill at least the “MIN”... -
Page 14: Pre-Brewing Option
6. The lights on the buttons will stop flashing and turn a solid white colour when the machine has heated up. Heating up will take approximately forty (40) seconds. 7. Before pressing any buttons, make sure that: o the operating handle is closed without a capsule inside o the water reservoir is full o the water reservoir is firmly in place to... -
Page 15: Brewing Coffee
To enter the pre-brew mode, please follow the instructions below: 1. Turn the machine OFF. 2. Press the middle button and hold the button down (pressed). 3. Switch the machine ON whilst still pressing the middle button. 4. Release the button after three (3) seconds or once you have heard two (2) beeps. -
Page 16: How To Program Dispensing Volume
3. Insert a capsule so that it falls straight into the compartment correctly. 4. Close the operating handle firmly to load the capsule. 5. Now press the desired coffee button only once. 6. The selected button will begin flashing and the machine has started to brew coffee. The machine will stop automatically dispensing once it has reached the default brewing volume (25ml for Short Espresso, 40ml for Normal Espresso and 110ml for Lungo espresso). - Page 17 dispensing spout down so that it is closer to the lip of the cup. 2. Move the operating handle back completely. 3. Insert a capsule so that it falls straight into the compartment correctly. 4. Close the operating handle firmly to load the capsule.
-
Page 18: Energy-Saving Mode
ENERGY-SAVING MODE The appliance enters energy-saving mode automatically once the machine is idle for 15 minutes. The three (3) buttons will flash cyclically in energy-saving mode. If you would like to exit energy- saving mode, please press any button. The appliance will start to warm up and the lights will flash. Once the buttons are solid/ steady, the machine is ready to brew coffee. -
Page 19: Cleaning The Coffee Machine
7. Throw out the old water from the water reservoir. Rinse the water reservoir with fresh water. 8. After emptying/ cleaning, reassemble the parts in reverse order and insert them back into/ onto the appliance so that they are correctly in place. Note: the plastic parts of the appliance are not dishwasher safe. -
Page 20: Descaling/ Decalcification
DESCALING/ DECALCIFICATION Mineral deposits building up in the coffee maker will have an adverse effect in the operation of the appliance. Deposited residues in the machine can block the piping and cause damage. Your appliance must be descaled when you begin to notice an increase in the time required to brew espresso or when there is excessive steaming. - Page 21 Decalcification must be done correctly to prevent damage. It is essential to follow these instructions. Important: Never clean the machine with vinegar. This causes damage and makes your coffee taste terrible. Damage caused by incorrect decalcification or failure to decalcify is not covered by the guarantee.
-
Page 22: Factory Reset
Tip: if you need to empty the bowl under the dispenser spout during the decalcifying process, you can press the button so that it enters a ‘pause’ mode. Press it again to continue. FACTORY RESET If you would like to reset/ restore the appliance to its default settings, please follow the instructions below: 1. -
Page 23: Trouble Shooting
TROUBLE SHOOTING PROBLEM CAUSE SOLUTION CAPSULE COFFEE MAKER: No coffee is brewed. The water tank is empty. Fill water into the water reservoir. Cold ‘to the touch’ cups/ The coffee is not hot Preheat the cup/ mug. enough. - Page 24 brewing chamber without the drip tray set in place. The capsule drops down The capsule is deformed. Try it again with a slight directly into the used different angle. capsule container before I Use a new capsule. have started the loading and brewing process.
-
Page 25: Vivaće Milk Frother
VIVAĆE MILK FROTHER: PARTS DIAGRAM Whisk set for foam Carafe Indicator/Switch button Base BEFORE FIRST USE 1. It is important to use the Milk Frother with clean water for the first time. This is done in order to clean the appliance and remove any residual factory residue. 2. -
Page 26: Operating Instructions
12. CAUTION: Always remove the Milk Frother’s jug from its base when pouring. Not recommended to warm milk for baby. OPERATING INSTRUCTIONS USING THE MILK FROTHER Max capacity function Whisk option time (marked with circle) To make cold, less than 120S frothed milk To make hot, frothed milk... -
Page 27: Cleaning And Maintenance
3. Place the jug on its power base. Place the lid securely on to the jug. 4. Choose the mode you want to make with the milk: To make Cold, Frothed Milk: Make sure you have inserted the whisk (whisk with wire spring) and ensure that the jug is filled with milk up to the lower MAX level (150ml) or at least filled to MIN mark. - Page 28 NOTE: To reduce build-up of milk residues, always empty any residual milk and clean immediately after frothing is completed. Never leave liquid in the carafe overnight. Let the carafe cool down completely before cleaning. Unplug the power base from the Capsule Coffee Maker. ...
- Page 29 cleaning has been implemented after the last use. The dried residual milk may stall the frothing speed. Use whole or semi-skimmed milk, stored in the refrigerator at 6~10 degrees. The unit is hot after operation. Flashing red light. Cool it down by filling tap water into jug.
- Page 30 If the appliance still does not work after checking the above: - Consult the retailer for possible repair or replacement. If the retailer fails to resolve the problem and you need to return the appliance, make sure that: The unit is packed carefully back into its original packaging. ...
- Page 31 Next, create foam and top it over the frothed milk. Now, extract an espresso capsule into the cup by pressing the short espresso button. Café Latte Serving Size: Short Espresso Pour milk into the milk frother to the upper maximum level and heat to create frothed milk.
- Page 32 Using the milk frother, fill with milk to the lower maximum level and heat to create frothed milk. Now, extract an espresso capsule into the cup by pressing the short espresso button. Add the frothed milk on top of the espresso to fill the cup halfway then top with foam. This is the basic cappuccino recipe.
- Page 33 IN THE EVENT OF A CLAIM UNDER WARRANTY THIS RECEIPT MUST BE PRODUCED. W A R R A N T Y Home of Living Brands (Pty) Limited warrants to the original purchaser of this product (“the customer”) that this product will be free of defects in quality and workmanship which under normal personal, family or household use and purpose may manifest within a period of 1 (one) year from the date of purchase (“warranty period”).
Need help?
Do you have a question about the RHCM50 and is the answer not in the manual?
Questions and answers
Not piering **** es in capsules