
Related Manuals for Bertazzoni PM363I0X


Summary of Contents for Bertazzoni PM363I0X
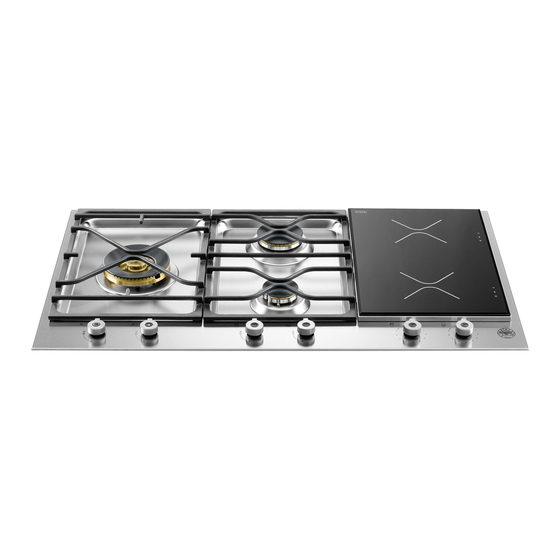
- Page 1 INSTALLATION,USE & CARE MANUAL DIMENSIONS: (W) x (890 mm) (520 mm) Models PM363I0X Cod. 310662...
- Page 2 IMPORTANT: SAVE FOR LOCAL ELECTRICAL INSPECTOR’S USE. READ AND SAVE THESE INSTRUCTIONS FOR FUTURE REFERENCE. OBSERVE ALL GOVERNING CODES AND ORDINANCES. WARNING: If the information in this manual is not followed exactly, a fire or explosion may result causing property damage, personal injury or death. Do not store or use gasoline or other flammable vapors and liquid in the vicinity of this or any other appliance.
-
Page 3: Table Of Contents
INDEX: Installation Instructions……………………………………..………………………………………… pag.2 Inserting the hotplate……………………………………………..………………………………….. pag.3 Requirements……………………………………..……………………………….…………………. pag.4 Attaching the hotplate……………………………………..…………………………………………. pag.4 Gas connection……………………………………..…………………………………………………. pag.5 Electrical connection……………………………………..……………………….…………………. pag.5 Room ventilation…………………………………….……………………………………………….. pag.6 Location and venting…………………………………….………………………………………….. pag.6 Replacement of nozzles……………………………………..……………………………………… pag.6 Regulation of burners……………………………………………...……………………………….. pag.6 Descriptions…………………………………………………………………………………………… pag.6 Service & maintenance instructions……………………………..…………………………………. pag.7 User instructions……………………………………………..………………………………………. -
Page 4: Requirements
Requirements 1. Overhead clearances (Minimum values) The minimum overhead clearances shall be in accordance with the minimum values indicated in the table n.1 and are shown and in the fig. 1- 2 Range hoods and exhaust fans shall be installed in accordance with the manufacturer’s instructions. However, in no case shall the clearance between the top of the highest burner of the cooking appliance and the range hood be less than 650mm. -
Page 5: Gas Connection
GAS CONNECTION Before connecting the appliance to the gas supply, first remove the plastic plug on which is press- fitted into the gas inlet union; to remove, just pull it off. IMPORTANT INFORMATION CONCERNING THE INSTALLATION OF THE APPLIANCE The hob can be installed by itself, in an isolated position or inserted between two kitchen units or between one kitchen unit and a wall. -
Page 6: Room Ventilation
ROOM VENTILATION – LOCATION AND VENTING. ATTENTION: An exhaust fan may be used with the appliance; in each case it shall be installed in conformity with the national standards in force. ATTENTION: Exhaust hood operation may affect other vented appliances; in each case it shall be installed in conformity with the national standards in force. -
Page 7: Service & Maintenance Instructions
SERVICE & MAINTENANCE INSTRUCTIONS Service and maintenance only to be carried out by an authorised person To replace parts such as burners, valves and electric components, the hotplate must be removed from the bench top by releasing the attachment hooks, loosening the attachment screws of each burner, unscrewing the hotplate attachments nuts which are visible at the bottom of the surface, removing the hotplate top and finally replacing the defective parts. -
Page 8: Installation Instructions
15. Do not Cook on Broken Cooktop - If cooktop should break, cleaning solutions and spillovers may penetrate the broken cooktop and create a risk of electric shock. Contact a qualified technician immediately. 16. Clean Cooktop With Caution - If a wet sponge or cloth is used to wipe spills on a hot cooking area, be careful to avoid steam burns. - Page 9 Table B Burner Recommended pan diameters (mm) Medium (140 – 260) Large (180 – 260) Dual (220 – 260) Correct usage of pans: - Dry the bottom of the pan before placing it on the hotplate. - Use pots with a flat, thick bottom, except for wok cooking. - When using the burners, ensure that the handles of the pans are correctly positioned.
- Page 10 When cooking, never use aluminum foil, never place products wrapped in aluminum foil or products deep- frozen in aluminum packs on the cooktop. Aluminum foil could melt and damage the vitroceramic glass beyond repair. The Principle of Induction When an induction element, also called: ‘a heating zone’ or simply: ‘a coil’ - is switched on, the appropriate piece of cookware used, and a desired level of heating power selected, the electronic circuit unit (‘induction generator’...
- Page 11 controlled.. Push and turn the knob to the right to set the zone's operating power; the settings range from a minimum of 1 to a maximum of 9. (fig.15-16) Heating accelerator Each cooking zone is equipped with a heating accelerator. This system allows the zone to be operated at peak power for a time proportional to the heating power selected.
- Page 12 warm. If the ceramic hob is not cleaned immediately, residues may form which cannot be removed once the hob has cooled. Important! Keep a close eye on children because they are unlikely to see the residual heat warming lights. The cooking zones are still very hot for some time after use, even if they are switched off.
-
Page 13: Cleaning The Appliance
-Never try heating up a closed can. - Avoid preheating your non-stick pans (e.g. with teflon coating) at maximum heat. - Avoid storing solid and heavy items in the cabinets above your cooktop.They may accidentally be dropped and damage the glass top. Your cooktop must never be used as a storage space or a surface for piling up of any material. - Page 14 Cleaning the stainless steel parts: Clean the parts with soapy water and dry them with a soft cloth. The shine is maintained by periodically using suitable products which can be found in the supermarket. Never use abrasive powders. Cleaning the burner caps: Lift the burner caps from the burner heads and wash them in soapy water and dry thoroughly.
- Page 15 Troubleshooting You have doubts about whether your cooktop is working correctly this does not necessarily mean there is a breakdown. Nevertheless, check the following points PROBLEMS POSSIBLE CAUSES WHAT SHOULD YOU DO? When you switch the unit on the Your unit may be connected Have the connection checked supply-line breaker trips off or the incorrectly, or there is an internal...
- Page 16 Fig 1 Fig 2 Fig.3 Fig. 4A Fig. 4B...
- Page 17 Fig.5 Fig.6 Fig.7 Fig.8...
- Page 18 Fig.9 Fig.10 Fig.11 Fig.12 Fig.13 Fig.14 Fig.15 Fig.16...
- Page 19 Fig.17 Fig.18...
Need help?
Do you have a question about the PM363I0X and is the answer not in the manual?
Questions and answers