Table of Contents
Advertisement
Advertisement
Table of Contents

Related Manuals for CUMMINS ALLISON JetScan iFX i100


Summary of Contents for CUMMINS ALLISON JetScan iFX i100
- Page 1 JetScan iFX ® i100 scanner User guide...
-
Page 2: Safety Information, Power Specifications
Do not attempt repairs. Repairs must be made by authorized Cummins Allison personnel. Use grounded plug and properly grounded outlet. Read and understand all instructions before use. Only use Cummins Allison supplied power adapter. Helv. Bold Oblique 41.29 Use of any other power adapter may damage equipment. -
Page 3: Table Of Contents
Table of contents Safety information, power specifications ..............2 About this guide ....................3 Machine diagram....................4 Getting started ...................... 7 Stopping conditions and recovery steps ..............14 Check order integrity process ................25 Daily cleaning procedures ..................27 Cleaning supplies ....................31 About this guide The JetScan iFX®... -
Page 4: Machine Diagram
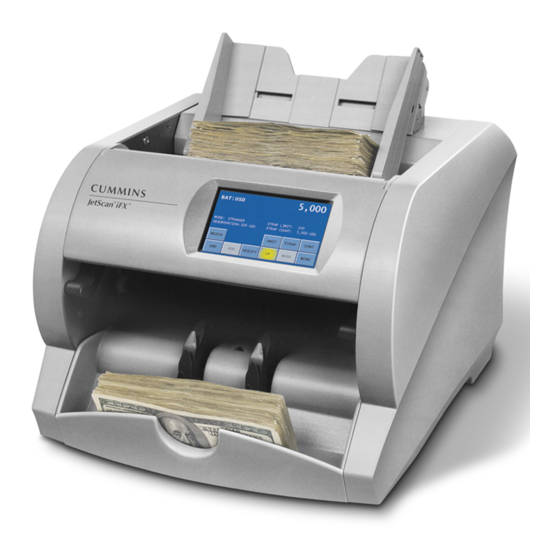
Machine diagram Thickness adjustment dial located behind hopper extension Feed roller Feed roller Adjustable hopper guides Power switch on back of unit Hopper Touch- Display screen panel display Release Release lever lever Stacker Stacking wheels sensor Pocket Pocket sensor Pocket mirror 4 | JetScan iFX ®... - Page 5 Communication port diagram The following diagram shows the communication ports located on the back of the machine. Two USB ports Ethernet port RJ45 serial port Radio frequency present. Helv. Bold Oblique 41.29 Install ferrite bead on all external communication cables; position ferrite bead near external port. Only connect Ethernet cable to Ethernet port.
- Page 6 Thickness adjustment dial The dial located on top of the machine adjusts the tightness of the feeder through which documents pass during operation. The dial has positive and negative adjustment numbers, with 0 at the center of the adjustment range. For normal feeding, start with 0 at the top of the dial. To help reduce the occurrence of doubles or chains, turn the dial to the right, so a negative number is at the top, decreasing the distance between the rollers.
-
Page 7: Getting Started
Getting started This section outlines basic features and functions of the JetScan iFX i100 scanner. Powering ON/OFF High-voltage levels may be present. Risk of electric shock. Turn power OFF and unplug power cord from machine before cleaning. Do not attempt repairs. Repairs must be made by authorized Cummins Allison personnel. - Page 8 Touch-panel display: Main screen USD note processing International note processing Main screen key Description Press MEDIA to prompt the MEDIA ENTRY screen and enter custom label data which has been enabled in SETUP. Use of these characters is prohibited in data entry: MEDIA ‘ “ / \ * ; ! = - - Label fields have a limit of 16 characters.
- Page 9 Main screen key Description Enables the verify function, which allows notes to be processed off-line. This function can be used to recount and reconcile any count suspected of being wrong without adding to current batch or day totals. When VERIFY is pressed, machine totals return to zero, and VERIFY the machine processes documents following rules of the indicated mode.
- Page 10 Operating modes Pressing MODE from the main screen displays all modes that have been enabled in SETUP and are available for use. The following screen shows all modes enabled. Each mode is described in the table. Mode key Description Scans for the first denomination processed, which is the target, and stops when another denomination is found.
- Page 11 Memory levels The machine has four memory levels: Memory level Description Strap limits can be set from 1 - 100 or infinite (INF). The machine stops when it reaches a strap limit. Available in STRAP STRANGER, SORT and COUNT modes. A sub-batch is a deposit processed from one or several sources and treated as sub-groups within a batch.
- Page 12 Strap counts and strap limits To view current strap limits and counts, press STRAP on the main screen. The STRAP SETTINGS screen is displayed, similar to the following example: Button toggles between VALUE and UNIT A strap limit may be set for any denomination by piece count or value in all operating modes, except for MIXED, MIXED/FACE and MIXED/ORIENTATION.
- Page 13 Printed reports When an optional printer is connected to and configured on the machine, reports: • Automatically print after batches or sub-batches are ended. • Can be generated on demand by navigating to the MAIN SUB-MENU and pressing REPORT MENU to prompt the screen below: Each automatically generated report shows the date and time of creation, as well as an audit number. Within the audit number: • The first five digits represent the transaction number of this report among all reports sent to the printer.
-
Page 14: Stopping Conditions And Recovery Steps
Stopping conditions and recovery steps The following conditions cause the machine to stop and require action by the user. Condition The machine identified a note that is different than those it has been processing while using SORT mode. The change in denomination is the top note in the pocket. - Page 15 Feed errors Conditions • The machine detected documents that were not adequately spaced apart. • The machine may have processed two or more documents as one. Action Remove all documents from the pocket and put them on the hopper. Press CONT. If an alarm repeatedly occurs, adjust the gray thickness dial on top of the machine behind the hopper extension.
- Page 16 Select i100-series models process checks, deposit slips and other financial institution MICR documents that meet U.S. and Canadian standard specifications. These screens only appear on machines with: • The check capture option. • The DOCUMENT DATA CORRECTION ADJUSTMENT settings configured. • CHECkS ON in the DOCUMENT CAPTURE SETUP MENU. Condition MICR-line correction screen The machine could not identify characters within a check MICR line.
- Page 17 Condition MICR-line correction – A no call occurred, and no call screen the machine could not identify the check MICR line. Action Do one of the following: • Press CHECK on the NO CALL screen to prompt the MICR-LINE CORRECTION screen. Red question marks denote all unidentified characters in the MICR line.
- Page 18 These screens only appear on machines with: • The ticket capture option. • The DOCUMENT DATA CORRECTION ADJUSTMENT settings configured. • TICKETS ON in the DOCUMENT CAPTURE SETUP MENU. Condition Ticket - no call screen The machine cannot read the bar code on a ticket. Question marks denote all unidentified characters. Action Correct the unidentified characters and include the ticket in the count by following these steps: 1.
- Page 19 Notes at limit Conditions • The number of documents in the pocket reached the pocket limit selected in SETUP. • The number of documents in the pocket reached the preset strap limit. Action Remove documents from the pocket. The machine automatically will continue processing if additional documents remain in the hopper. Condition The machine stopped on a non-oriented document.
- Page 20 These screens only appear on machines with: • The serial-number capture option. • NOTES ON in the DOCUMENT CAPTURE SETUP MENU and the DOCUMENT DATA STORAGE screen configured for all or select denominations. • The DOCUMENT DATA CORRECTION ADJUSTMENT screen configured for all or select denominations. Condition Serial-number correction screen The machine could not identify characters in a note serial number. Question marks denote unidentified characters. Action To correct unidentified characters and include the note in the count:...
- Page 21 Condition Serial-number correction – no call screen A no call occurred, and the machine could not identify the note serial number. Red question marks denote all unidentified characters in the serial number. A picture of the note’s serial number is absent from the screen. Action To return the note to the hopper for reprocessing: 1.
- Page 22 Condition Sensors detected a possible counterfeit note. The machine stopped with this note as the top note in the pocket. This note has not been included in the count. Action Inspect the top note in the pocket. Next there are three options: • If the note is deemed genuine, return it to the pocket and press ACCEPT.
- Page 23 Condition Notes, documents or foreign material are jammed in the paper path. Action To clear a jam, follow these procedures: Do not use tools or metal devices to remove jammed documents Helv. Bold Oblique from paper path. 41.29 Use of tools or metal devices could cause machine damage and void existing warranty.
- Page 24 How to manually remove documents from transport path Lift display panel to the upright position. Push release levers down to disengage the upper-transport plate. Lift upper-transport plate to the locked position. Remove jammed documents. Press down on the release levers to unlock the upper-transport plate from the open position.
-
Page 25: Check Order Integrity Process
Check order integrity process This section shows an example of an error recovery process that maintains check item order. For complete check configuration options, consult a Cummins Allison representative. These screens only appear on machines with: • The check capture option. • ORDERED RECOVERY ON in CHECK SETUP MENU 2. • BANK AND PRESENT ON in CHECK SETUP MENU 2. • ACCEPT DOUBLES ON in CHECK SETUP MENU 2. Condition The MISS-FEED DETECTED screen shown below appears when BANK AND PRESENT is ON and any error that requires checks to be reprocessed occurs. - Page 26 4. Examine the piggyback document and do one of the following: • Since the ACCEPT DOUBLES option is ON, the screen provides the option to accept a piggyback document, add it to the total, and continue. If the document is a thicker check, such as a rebate check, press ACCEPT to continue processing the checks.
-
Page 27: Daily Cleaning Procedures
Daily cleaning procedures Daily cleaning of i100-series machines is recommended to ensure maximum productivity and reliability. Recommended cleaning materials Simple Green, the recommended cleaning agent, can be an eye irritant. Avoid eye contact. If eye contact occurs, flush eye(s) with cool water for 5 minutes –... - Page 28 Turn power OFF (rocker panel to 0). Grasp release sleeve on power-cord connector. Disconnect power cord from machine. Release sleeve Lift adjustable hopper to the upright position. Use a dry microfiber towel to clean the black start sensor at the top, middle of the feeder plate (shown at left).
- Page 29 Vacuum underneath the upper-transport plate (shown at far left), as well as the top of the lower- transport plate (shown at left). Use a dry microfiber towel to wipe buildup off the image sensors shown at left. Image sensors Use a dry microfiber towel to clean the stacking sensor. Next, use a dry microfiber towel to clean the stacking-sensor reflector, which is located on the upper-transport plate directly above the stacking sensor.
- Page 30 Clean remaining hard-plastic exterior surfaces as necessary with a Simple Green Safety Towel. Return hopper to the operating position. Carefully reconnect power cord. Turn power ON (rocker panel to I). Perform a test run with some documents. 30 | JetScan iFX ®...
- Page 31 • 50 Simple Green Safety Towels. 022-2118-00 • Vacuum, for use in the United States only. Standard vacuum: 022-1959-00 Heavy-duty vacuum: 022-1308-00 How to order To place an order in the United States, visit store.cumminsallison.com. To place an order outside of the United States, contact your local Cummins Allison representative.
- Page 32 This manual contains proprietary information of Cummins-Allison Corp. It is intended solely for the information and use of parties authorized by Cummins Allison to maintain the equipment described herein. Such proprietary information may not be used, reproduced, or disclosed to any other parties for any other purpose without express written permission of Cummins Allison.
Need help?
Do you have a question about the JetScan iFX i100 and is the answer not in the manual?
Questions and answers
When I run currency it will only say No Call, how do I correct this so it will process my currency
To fix the "No Call" error on the JetScan iFX i100 when processing currency:
1. Inspect the top note in the pocket without removing all notes.
2. To include the note in the count:
- Keep the note in the pocket.
- Press the correct denomination key (e.g., $1, $5, $10).
- The machine will start and add the note to the count.
3. To reject the note:
- Remove the note from the pocket.
- Press CONT.
- The machine will restart, and the note will not be counted.
This answer is automatically generated
APC CARD ERROR
@junho Seo same error with our machine. Any solution ?