Table of Contents
Advertisement
Quick Links
Advertisement
Table of Contents

Related Manuals for New Rock Technologies MX8


Summary of Contents for New Rock Technologies MX8
- Page 1 MX Voice Gateway Series Installation Manual...
- Page 2 Revision Record Revision version 1.0 (2009-05-07 Author:ZNH) The first revision. Shanghai New Rock Technologies, Inc. Page 2/23...
-
Page 3: Table Of Contents
2.5.1 MX8 and MX51 Series ......................14 2.5.2 MX100-AG Series ........................15 2.5.3 MX120 Series........................... 16 2.6 Connecting the FXO Cable of MX8 or MX51 Series............... 16 2.7 Connecting the FXS/FXO Cable of MX100-AG Series ..............17 2.8 Connecting the FXS/FXO Cable of MX120 Series................17 2.9 Connecting the Grounding Cable .................... - Page 4 4.1 Wiring Scheme for MX100-AG CHAMP Connectors..............21 4.2 Wiring Scheme for MX120 Gateway....................22 4.3 Standard Table for Lead Wire of Pin at Configuration Port (CON)..........23 Shanghai New Rock Technologies, Inc. Page 4/23...
- Page 5 Figure 2-5 Front Panel of Double-chassis System of MX120 Series .................14 Figure 2-6 Back Panel of Double-chassis System of MX120 Series..................14 Figure 2-7 Connect to the FXS interface of MX8 and MX51 Series ...................15 Figure 2-8 FXS Interface Cable Connecting MX100-AG Series ..................15 Figure 2-9 FXS Interface Cable Connecting MX120 Series ....................16...
- Page 6 Table Contents Table 1-1 Tools and Meters for the Project ..........................7 Table 1-2 Power Requirements of MX Gateway Series......................8 Table 1-3 Standard Configuration of MX8 ..........................9 Table 1-4 Standard Configuration of MX51..........................9 Table 1-5 Standard Configuration of MX100-AG........................9 Table 1-6 Standard Configuration of MX120..........................10 Table 2-1 Composition of Double- chassis System of MX120 Series ................13...
-
Page 7: Installation Preparation
Long term high humidity may lead to bad insulation and even cause electricity leakage, mechanical property change and corrosion. Low humidity is likely to leave captive screws to loose due to static electricity built up and the insulation washer shrunk. Shanghai New Rock Technologies, Inc. Page 7/23... -
Page 8: Cleanliness
1.2.4 Grounding There is no ground tab on MX8 and it gets power from an AC to DC adapter. To maintain good voice quality, proper grounding of the AC supply is critical to minimize the noise from the AC interference. -
Page 9: Other Facilities
Ensure a good power grounding effect of equipment or add a lightning protector. 1.2.6 Other Facilities Rack/Workbench MX8 can be placed on a clean and flat workbench. Ensure that the workbench is stable and well ventilated. MX51, MX100-AG and MX120 are designed to be installed in a standard 19-inch rack, which should provide adequate air-flow to cool down the gateway, and should be firm enough to support the weight of the gateway. -
Page 10: Installation Precautions
Please pay special attention to the safety guidelines during installation and operation: Keep the site far from the heat and humidity. Take precautions with use of high-voltage electricity. Connect the interface cables correctly. Shanghai New Rock Technologies, Inc. Page 10/23... -
Page 11: Installation
Installation Flowchart 2.1.1 Installation Flowchart on the Workbench For MX8 or MX series products with other types that need installing on the workbench, the installation flow is shown in the Figure 2-1. Figure 2-1 Installation Flowchart on the Workbench... -
Page 12: Workbench Mounting
Connect the gateway to power Workbench Mounting 2.2.1 Install MX8 on the Workbench MX8 can be placed on a clean and flat workbench, please ensure the stability and good ventilation conditions of the workbench. 2.2.2 Install MX51, MX100-AG, and MX120 on the Workbench... -
Page 13: Mounting The Gateway
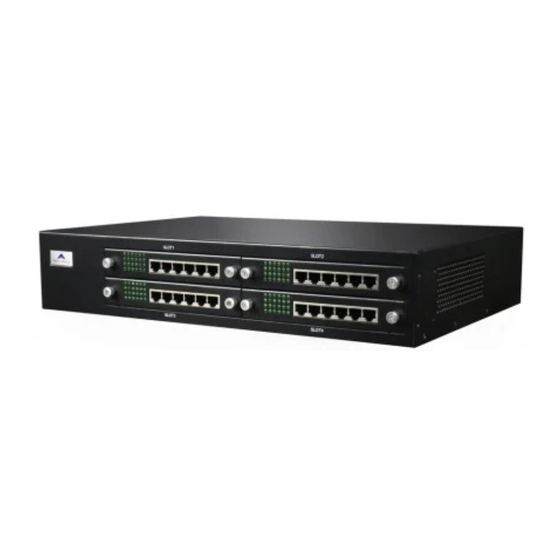
Status indicator, FXS/FXO ports, USB interface, CON interface and two Main MX120-MAIN Ethernet interfaces, expansion interface, independent power supply, heat chassis emission system, and ground column. Expansion FXS/FXO ports, independent power supply, expansion interface, heat MX120-EXT chassis emission system, and ground column. Shanghai New Rock Technologies, Inc. Page 13/23... -
Page 14: Connecting The Ethernet Cable
Ethernet switch or router. Check that the ETH LED on the front panel is lit, which indicates that the network cable is correctly connected. Connecting the FXS Cable 2.5.1 MX8 and MX51 Series FXS interface connects with the analogue telephones via a telephone line with RJ-11 connectors in each end. -
Page 15: Mx100-Ag Series
Step 2 Plug one end of the cable into a FXS port of the gateway, and plug the other end into a RJ11 jack of a telephone set, or a FAX machine, or a trunk interface of a PBX, as illustrated in the Figure 2-7. Figure 2-7 Connect to the FXS interface of MX8 and MX51 Series 2.5.2 MX100-AG Series FXS interface connects with the analog telephone via a 25-pair analog cable. -
Page 16: Mx120 Series
RJ11 connection line is used for both MX8 and MX51 to connect with the FXO interface as follows: Step 1 Prepare a two-wire telephone line with RJ11 connectors at each end. -
Page 17: Connecting The Fxs/Fxo Cable Of Mx100-Ag Series
Step 2 Insert one end of the cable into the RJ11 socket (MX8) or RJ45 socket(MX51)corresponding to the FXO interface of the equipment, and connect the other end of the cable with the interface of PBX extension line or the PSTN line. -
Page 18: Connecting The Grounding Cable
Step 1 Turn the switch of AC power outlet to “OFF” position. Step 2 For MX8, connect the DC output plug of the adaptor to the DC input socket at rear of the gateway and connect the AC power cord to the AC power outlet. For MX51, or MX100-AG or MX120, use the shipped power cord to connect between the AC input at rear of the chassis and the AC power outlet. - Page 19 Shanghai New Rock Technologies, Inc. Page 19/23...
-
Page 20: Powering Up The Gateway
Check whether the power supply is in normal operation with a multimeter. Powering up the Gateway Turn the power switch to “ON” position. Check the status of PWR LED, and if it is lit the gateway is powered properly. Shanghai New Rock Technologies, Inc. Page 20/23... -
Page 21: Appendix
FXS* (FXS) Green Black FXS* (FXS) Brown Black FXS* (FXS) Gray Yellow FXS* (FXS) Blue Yellow Orange Yellow Green Yellow Brown Yellow Gray Purple Blue Purple Orange Purple Green Purple Brown Purple Gray Shanghai New Rock Technologies, Inc. Page 21/23... -
Page 22: Wiring Scheme For Mx120 Gateway
Table 4-3 CAT-5 Analog Cable Break-out Table 4-4 Correspondence Table for MX120 RJ45 Socket and Line Number RJ45 socket number (from left to right) Line number 9~12 13~16 (m) 17~20 (m) 21~24 (m) Shanghai New Rock Technologies, Inc. Page 22/23... -
Page 23: Standard Table For Lead Wire Of Pin At Configuration Port (Con)
Standard Table for Lead Wire of Pin at Configuration Port (CON) Table 4-5 Standard Table for Lead Wire of Pin at Configuration Port (CON) Pin number of RJ45 plug Note Pairing connection with DB9 female plug Pairing connection with DB25 male plug Shanghai New Rock Technologies, Inc. Page 23/23...
Need help?
Do you have a question about the MX8 and is the answer not in the manual?
Questions and answers