Table of Contents
Advertisement
Quick Links
AdvAnced OperAtiOn
Groups
Use a Miro Wireless Plug-In Lamp Module in conjunction with MRD8 Wireless
Multilocation Controllers to control one plug-in lamp outlet from multiple
locations. Binding the lamp module and MRD8 devices together in the same
Group lets you operate the lamp module from any of the control locations.
You can include other Miro wireless devices in the Group. All devices in the
Group operate when one member operates. If, for example, you increase the
brightness on one device in the Group, all devices will increase brightness.
Set the House ID (see Set House ID) before setting up Groups.
1. Go to any device that you want to include in the Group. Press
LED flashes yellow, and all other devices in the House flash green. You now
have 5 minutes to complete this process.
2. To include or exclude a device in the Group press
LED changes color. Yellow flashing LED = Included in the Group
If you get to a device and it is NOT flashing, the 5 minute binding process
timer may have expired. Go back to step 1 and repeat.
3. Return to the device used in step 1 and press
All LEDs revert to solid green. Now, all the devices in the Group control their
load circuit in exactly the same manner.
Adding a Module to a Group in an Existing System
1. Go to a device that is in the Group where you want to add the module.
Press
. The device LED and all members of the Group flash yellow. The
new module flashes green.
2. Press
on the new module until its LED flashes yellow.
3. Return to the device used in step 1 and press
Deleting a Module from a Group in an Existing System
1. Go to a device other than the one you're deleting that is in the existing
Group. Press
2. Press
on the module you want to remove, until its LED flashes green.
3. Return to the device used in step 1 and press
Scene control
The Miro wireless plug-in lamp module may be easily incorporated into room
and whole house preset scenes. The Miro installation Guide provides more
information about configuring scenes and presets.
Instructions for installation and use are included with the relevant Miro
wireless room and whole house control devices. Application support
information and the Miro installation Guide is available online.
Green flashing LED = NOT included in the Group
until the LED flashes yellow on each member of the Group .
. The device
on the device until the
to terminate Group binding.
. All LEDs are solid green.
. All LEDs turn solid green.
Advertisement
Table of Contents

Subscribe to Our Youtube Channel
Related Manuals for LEGRAND MIRO MRP6


Summary of Contents for LEGRAND MIRO MRP6
- Page 1 AdvAnced OperAtiOn Groups Use a Miro Wireless Plug-In Lamp Module in conjunction with MRD8 Wireless Multilocation Controllers to control one plug-in lamp outlet from multiple locations. Binding the lamp module and MRD8 devices together in the same Group lets you operate the lamp module from any of the control locations. You can include other Miro wireless devices in the Group.
-
Page 2: Troubleshooting
cleAninG Clean using only a cloth dampened with water and a little mild detergent. Use of solvents or hydrocarbon-based cleaners may cause permanent damage. trOubleShOOtinG during Set house id, the led is not flashing on some wireless Miro devices. • if led is solid green before initiating house id binding: The device already has another house ID. -
Page 3: Fcc Notice
Please Recycle... -
Page 4: Specifications
Mrp6 Wireless plug-in lamp Module Specifications Operating Voltage ..........120VAC, 60Hz Maximum Load Rating ............. 300W Minimum Load Required ........... 25W Load Type Compatibility ..........25-300W Incandescent & quartz halogen lamps Dimmable electronic or magnetic low voltage transformers Dimmable cold cathode and neon ballasts Dimmable 2-wire fluorescent (Advance Mark X or equivalent) and compact fluorescent ballasts U.S. -
Page 5: Unit Description
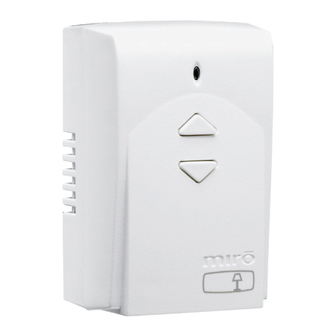
unit deScriptiOn The Miro™ MRP6 Wireless Plug-In Lamp module provides convenient dimming control for most floor and table lamps. This simple plug-in module makes it easy to include free- lamp Module standing plug-in lamps in the Miro lighting control system. identification icon Miro wireless devices use radio signals to communicate with each other to control lighting and other types of electric loads in selected... -
Page 6: Installation
inStAllAtiOn 1. Plug the Miro wireless lamp module into a convenient 15amp 120V grounded receptacle. 2. Plug the lamp into the grounded 15amp outlet on the base of the lamp module. 3. Check that the lamp is switched on by pressing the button on the lamp module. If the light does not come on, put its switch in the on position, and leave it there. - Page 7 Set hOuSe id All Miro wireless devices installed in the same home must acquire the same unique House ID before use. This process is known as house binding. Each Miro wireless device is bound to all other Miro wireless devices in the house. New Installation 1.
-
Page 8: Replacing Lamps
OPERATION Tap once Fade the load to its last-used level Tap twice Full bright – – Press and hold Increase the present level Tap once Fade the load to OFF – – Press and hold Decrease the present level When you When you in the in the... - Page 9 IF YOU HAVE ANY QUESTIONS REGARDING SPECIFICATIONS OR REQUIRE ADDITIONAL FILE FORMATTING, PLEASE CONTACT Mary Jo Sowinski. Phone: 408-486-7511 Email: maryjo.sowinski@wattstopper.com All information in this drawing is the property of Watt Stopper/Legrand and cannot be copied or used without the written approval of Watt Stopper/Legrand. Drawn by REVEL...
Need help?
Do you have a question about the MIRO MRP6 and is the answer not in the manual?
Questions and answers