Table of Contents
Advertisement
Available languages
Available languages
Quick Links
Céliane™
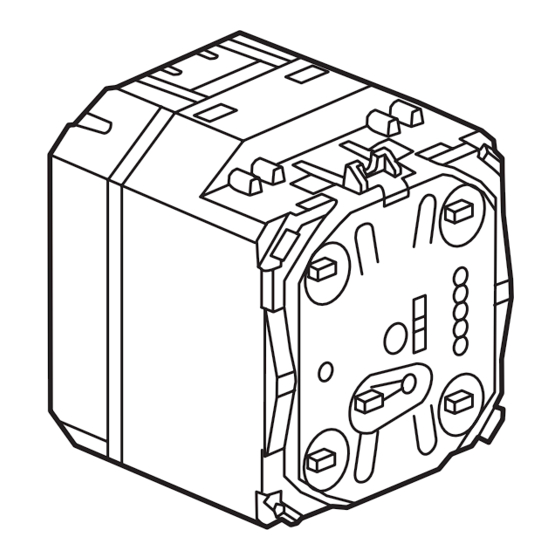
Inter variateur 600 W sans neutre
672 32
Caractéristiques
Min.
60 W
60 W
110 V
Max.
300 W
300 W
Min.
60 W
60 W
230 V
Max.
600 W
600 W
Lampe incandescente
Lampe halogène
Lampe halogène TBT à transformateur
ferromagnétique
Câblage
Important :
- Il est impératif de connecter ue charge avant de procéder à
l'apprentissage du produit dans scénario.
- Les transformateurs ferromagnétiques doivent être chargés
à plus de 60% de leur puissance nominale.
- Tenir compte du rendement des transformateurs
ferromagnétiques dans le calcul de la puissance admissible
(exemple : transformateur pour une lampe 50 W avec un
rendement de 0,78 = puissance réelle consommée par
le transformateur = 64 VA).
Consignes de sécurité :
Ce produit doit être installé de préférence par un électricien qualifié. Une installation et une utilisation incorrectes
peuvent entraîner des risques de choc électrique ou d'incendie.
Avant d'effectuer l'installation, lire la notice, tenir compte du lieu de montage spécifique au produit.
Ne pas ouvrir l'appareil. Tous les produits Legrand doivent exclusivement être ouverts et réparés par du personnel formé et
habilité Legrand. Toute ouverture ou réparation non autorisée annule l'intégralité des responsabilités, droits à remplacement
et garanties.
Utiliser exclusivement les accessoires de la marque Legrand.
60 VA
300 VA
60 VA
600 VA
Protection par dispositif électronique :
En cas de surchage et au-delà de la température maxi d'utilisation, le produit
régule automatiquement la puissance par diminution de l'éclairement.
2
Tension
Fréquence
2 x 1,5 mm
profondeur = 40 mm mini
Fréquence RF
Portée
environ 200 m en champs libre
±
100 - 240 V
50 - 60 Hz
2
ou 1 x 2,5 mm
2
868,3 MHz
+ 5°C à + 45°C
Advertisement
Table of Contents

Related Manuals for LEGRAND Celiane 672 32


Summary of Contents for LEGRAND Celiane 672 32
- Page 1 Avant d’effectuer l’installation, lire la notice, tenir compte du lieu de montage spécifique au produit. Ne pas ouvrir l’appareil. Tous les produits Legrand doivent exclusivement être ouverts et réparés par du personnel formé et habilité Legrand. Toute ouverture ou réparation non autorisée annule l’intégralité des responsabilités, droits à remplacement et garanties.
-
Page 2: Configuration D'usine
Description Configuration d’usine A la première mise sous tension, le produit peut-être commandé en ON / OFF par tous les émetteurs Indicateur de l'état d’éclairage de l’installation en mode de la charge (bleu) usine. Cette possibilité est offerte afin de pouvoir vérifier le bon fonctionnement et raccordement de tous les luminaires. - Page 3 Cette opération peut être réalisée avec les doigts montés. Remarques : Ce produit “In One by Legrand” peut être associé à des produits PLC par l’intermédiaire de l’interface modulaire PLC/RF (Réf. 036 06). Pour enregistrer un niveau lumineux lors de l’apprentissage, étape 2 de l’Apprentissage du scénario devient :...
- Page 4 Légende Le voyant s'éteint Le voyant clignote Le voyant clignote Le voyant flashe lentement rapidement Apprentissage du scénario Etape 1 : débuter l'apprentissage (sur L'ÉMETTEUR) Appuyer sur LEARN Appuyer sur la touche de commande qui doit piloter le scénario Etape 2 : ajouter un acteur au scénario (sur le RÉCEPTEUR) Appuyer sur LEARN Appuyer sur la touche de commande qui doit être associée à...
- Page 5 Effacement d’un scénario (sur L'ÉMETTEUR) Effacer tous les scénarios liés à la touche de commande Le scénario est effacé Appuyer sur LEARN Appuyer sur la touche de commande et maintenir 10 s Effacer tous les scénarios Retour du produit en configuration usine Appuyer sur LEARN Appuyer sur LEARN et maintenir 10 s...
-
Page 6: Technical Data
Before carrying out the installation, read the instructions and take account of the product's specific mounting location. Do not open up the device. All Legrand products must be exclusively opened and repaired by personnel trained and approved by LEGRAND. Any unauthorised opening or repair completely cancels all liabilities and the rights to repla- cement and guarantees. -
Page 7: Factory Settings
Description Factory settings On first powering up, pressing the ON, OFF , + or - buttons controls the load Charge status which is connected to the cut phase indicator (blue) terminal and can be controlled by lighting control products fitted with ON and OFF keys in factory mode. - Page 8 This operation can be performed with the rockers mounted. Notes : This "In One by Legrand" product can be linked to PLC products by means of the PLC/RF modular interface (Cat. No. 036 06). To save a lighting level during the learning, step 2 of “Learning the scenario” becomes :...
- Page 9 The indicator light The indicator light The indicator light The indicator light switches off flashes slowly flashes quickly flashes Learning a scenario Step 1 : start the learning phase (on the TRANSMITTER) Press LEARN Press one of the three control buttons Step 2 : add an actor to the scenario (on the RECEIVER) Press LEARN Press one of the three control buttons...
- Page 10 Deleting a scenario (on the TRANSMITTER) Delete all the scenarios linked to the control button The scenario is deleted Press LEARN Press the control button and hold for 10 secs Delete all the scenarios Product goes back to factory settings Press LEARN Press LEARN and hold for 10 secs...
- Page 11 Het apparaat niet openen. Alle Legrand mogen uitsluitend geopend en gerepareerd worden door personeel dat door Legrand is opgeleid en bevoegd verklaard. In geval van ongeoorloofd openen of repareren kan geen enkele aansprakelij- kheid aanvaard worden, vervalt het recht op vervanging en zijn de garanties niet meer geldig. Gebruik uitsluitend originele...
- Page 12 Omschrijving Standaardconfiguratie Bei erstmaliger Inbetriebnahme (Spannungsversorgung) werden alle Teilnehmer innerhalb einer Anlage über die ON und OFF , + oder -Taste zentral Aanwijzer van de angesteuert (Zentralbefehl). ladingstoestand (blauw) Deze mogelijkheid wordt geboden om de goede werking en aansluiting van alle lichten te kunnen controleren.
- Page 13 Deze handeling kan uitgevoerd worden terwijl de stiften gemonteerd zijn. Opmerking : Dit “In One by Legrand” product kan toegevoegd worden aan draagstroomproducten via de in twee richtingen werkende interface PLC/RF (ref. 036 06). Voor het registreren van een lichtniveau tijdens het inlezen wordt stap 2 van het Inlezen van het scenario :...
- Page 14 Legende Het controlelampje Het controlelampje Het controlelampje Het controlelampje gaat uit knippert langzaam knippert snel flitst Inlezen van het scenario Stap 1 : beginnen met inlezen (op de ZENDER) Druk op LEARN Druk op de bedieningstoets die het scenario moet besturen Stap 2 : voeg een ontvanger toe aan het scenario (op de ONTVANGER) Druk op LEARN Druk op de bedieningstoets die aan de...
- Page 15 Wissen van een scenario (op de ZENDER) Wis alle scenario's die verbonden zijn met de bedieningstoets Het scenario is gewist Druk op LEARN Druk op de bedieningstoets en houd deze 10s ingedrukt Wis alle scenario's die bij dit product horen Terugkeer van het product naar de standaardconfiguratie Druk op LEARN...
-
Page 16: Technische Daten
Risiko von elektrischem Schlag oder Brand.Vor der Installation die Anleitung lesen, den produktspezifischen Montageort beachten. Das Gerät nicht öffnen. Alle Produkte von Legrand dürfen ausschließlich von durch Legrand geschultes und anerkanntes Personal geöffnet und repariert werden. Durch unbefugte Öffnung oder Reparatur erlöschen alle Haftungs-, Ersatz- und Gewährleistungsansprüche. -
Page 17: Funktionsweise
Beschreibung Werkseinstellung Bei erstmaliger Inbetriebnahme (Spannungsversorgung) werden alle Anzeige des Teilnehmer innerhalb einer Anlage über Lastzustands (blau) die ON und OFF , + oder -Taste zentral angesteuert (Zentralbefehl). Dies ermöglicht ein Überprüfen aller Leuchtkörper auf einwandfreien Betrieb und Anschluss. ON/+ OFF/– 1/+ 2/–... - Page 18 Diese Einstellung kann mit montierten Wippschaltern erfolgen. Anmerkungen : Dieses „In One by Legrand” Gerät kann mit dem Schnittstellenmodul PLC/RF (Best.-Nr. 036 06) mit PLC-Geräten kombiniert werden. Zum Einspeichern einer Leuchtstärke beim Lernen wird in der Etappe 2 des Verfahrens „Lernen eines Szenarios“ wie...
- Page 19 Légende Die Leuchtdiode Die Leuchtdiode blinkt Die Leuchtdiode blinkt Die Leuchtdiode erlischt langsam schnell blitzt Einlernen des Szenarios Etappe 1 : Einlernmodus aktivieren (am SENDER) Die Lern-taste LEARN drücken Die Bedientaste drücken, mit der das Szenario gesteuert werden soll Etappe 2 : Einen Empfänger zum Szenario hinzufügen (am EMPFÄNGER) Die Lern-taste LEARN drücken Die Steuertaste drücken, die Empfänger zugeordnet werden Um einem Szenario mehrere Geräte zuzuordnen, bei jedem Empfängergerät die Arbeitsschritte...
- Page 20 Löschen eines Szenarios (am SENDER) Alle einer Steuertaste zugeordneten Szenarios löschen Das Szenario ist gelöscht Die Lern-taste Die Steuertaste drücken LEARN drücken und 10 s gedrückt halten Sämtliche Szenarios löschen Rückprogrammierung des Geräts Die Lern-taste Die Steuertaste drücken auf Werkseinstellung LEARN drücken und 10 s gedrückt halten...
- Page 21 Antes de efectuar la instalación, leer el manualy, tener en cuenta el lugar de montaje específico del producto. No abrir el aparato. Todos los productos Legrand deben ser abiertos y reparados exclusivamente por personal formado y autorizado por Legrand.
-
Page 22: Configuración De Fábrica
Descripción Configuración de fábrica Durante la primera puesta en tensión la pulsación de las teclas ON, OFF , + o - controla la carga conectada al meca- Indicador del estado de la carga (azul) nismo pudiendo ser controlada por los mecanismos de iluminación provistos de la tecla ON y OFF . - Page 23 Esta operación se puede realizar con los dedos montados. Observaciones : Este producto “In One by Legrand” se puede asociar a productos de PLC por medio de la interfaz modular PLC/RF (Ref. 036 06). Para grabar un nivel luminoso durante el aprendizaje, la etapa 2 del Aprendizaje del escenario se convierte en :...
- Page 24 Leyenda Led Off Parpadeo lento Parpadeo rápido Flash Aprendizaje del escenario Etapa 1 : iniciar el aprendizaje (en el EMISOR) Pulsar en LEARN Pulsar la tecla de mando que debe manejar el escenario Etapa 2 : añadir un receptor al escenario (en el RECEPTOR) Pulsar en LEARN Pulsar la tecla de mando que se debe asociar con el emisor Para añadir varios productos al escenario, repetir para cada receptor las operaciones...
- Page 25 Borrado de un escenario Borrado de un escenario (en el EMISOR) Borrar todos los escenarios vinculados a la tecla de mando El escenario se borra Pulsar en LEARN Pulsar en la tecla de mando y mantener por 10 s Borrar todos los escenarios Retorno del producto a la configuración de fábrica Pulsar en LEARN...
Need help?
Do you have a question about the Celiane 672 32 and is the answer not in the manual?
Questions and answers