
Related Manuals for Datavideo HDR-70


Summary of Contents for Datavideo HDR-70
- Page 1 Analogue / Digital Recorder DN-700 HD / SD RECORDER HDR-70 Instruction Manual www.datavideo.com Jan-06.2014 P/N: G082060648E1...
-
Page 2: Table Of Contents
HD / SD Recorder HDR-70 Contents Warnings and Precautions ..................4 Disclaimer of products and services ................. 4 Warranty ........................5 Standard Warranty ....................5 Two year warranty ..................... 5 Disposal........................5 Packing List ......................5 Product Overview ....................6 Features ........................ - Page 3 HD / SD Recorder HDR-70 Contents GPI Control ......................20 GPI Trigger cabling and circuit ................20 SET GPI ........................20 PULSE trigger Record process ................20 LEVEL trigger Record process ................20 PULSE trigger Playback process ................20 LEVEL trigger Playback process ................20 Transferring files to a computer ................
-
Page 4: Warnings And Precautions
Disclaimer of products and services The information offered in this instruction manual is intended as a guide only. At all times, Datavideo Technologies will try to give correct, complete and suitable information. However, Datavideo Technologies cannot exclude that some information in this manual, from time to time, may not be correct or may be incomplete. -
Page 5: Warranty
It must be handed over to the applicable take-back scheme for the recycling of Waste Electrical and Electronic Equipment. For more detailed information about the recycling of this product, please contact your local dealer or Datavideo office. Packing List The following items should be included in the box. -
Page 6: Product Overview
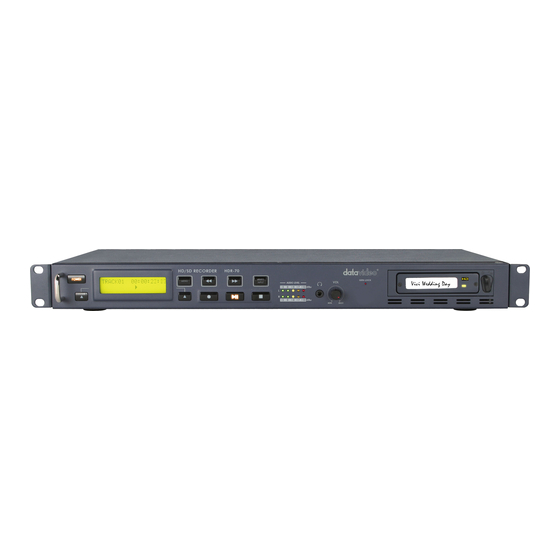
HD / SD Recorder HDR-70 Product Overview The Datavideo HDR-70 is a hard drive based video recorder with removable hard drive Features enclosure. The HDR-70 can be used as a Backlit LCD display and soft keys for desktop stand alone recorder in the studio or track confirmation and menu navigation. -
Page 7: How To Fit A Sata Drive To The Removable He-1 Enclosure
How to fit a SATA drive to the removable HE-1 enclosure Datavideo recommends using 2.5” SATA HDD 7200 RPM with 8 or 16 MB cache. If your unit was delivered without a hard drive fitted please follow these instructions to fit your drive to an HE-1 drive enclosure. -
Page 8: Connections And Controls
The main power on /off switch is on the rear panel. Display Panel. Displays the status of the HDR-70. The display will show Bin Number, time code, or if the Menu Button is pressed the Menu Display. -
Page 9: Rear Panel
HD / SD Recorder HDR-70 Rear panel XLR inputs and Outputs for Balanced Audio Connection. Note: The recorder needs a video source in order to record files. See page 19 also. The GPI socket can be used for simple external control. The recorder can accept pulse or level trigger inputs, which can trigger record or playback and pause commands. -
Page 10: Switching The Recorder On
Ensure the HDR-70 power supply is connected to the rear panel of the recorder and a HE-1 removable drive enclosure is fitted and locked in place. The HDR-70 has a power ON/OFF switch which is located on the rear panel. To turn the unit ON depress the dot side of this switch. -
Page 11: Menu Overview And Menu Navigation
HD / SD Recorder HDR-70 Menu Overview and Menu Navigation Your HDR unit is a menu driven unit; there are several menus which are used to initially set up the unit. The menu settings are non-volatile, so they are stored even when the unit is switched off. Many of these settings, such as file type and bit rate, may only need to be set once. -
Page 12: Record Setup
HD / SD Recorder HDR-70 Record Setup This menu allows you to configure the HDR-70 so that the unit is ready to record the incoming video signal. The options within this menu are: SUB MENU 2 MAIN MENU SUB MENU 1... -
Page 13: Set Sd Encode Format
It is recommended to have the recorder match the aspect ratio of the source equipment being recorded. Note: If you choose the wrong aspect ratio people or objects within the recorded HDR-70 SD footage may be changed to appear tall and thin or short and fat. -
Page 14: Before Recording
Use the LCD menu path [MENU] > SETUP > opposed to an archiving device, and it is best to SYSTEM SETUP > SET TIME CODE to confirm start out with a fresh HDR-70 HE-1 drive. If you your choice from: have video clips already recorded on the HE-1... -
Page 15: Recording
HD / SD Recorder HDR-70 Recording Before starting a new recording ensure the Record Pause recorder is set up correctly, please read pages 11 There are several ways of pausing a record to 14 first. session depending how the recorder is configured. -
Page 16: Special Record Functions
If SET TIMELAPSE FRAME is set to 2 frames and SET TIMELAPSE CYCLE is set to 15 seconds then the HDR-70 will display: CYCLE: 02 FRM / 15 S So 2 frames [FRM] of video will be added to the current BIN after each 15 second [S] cycle until the recording session is stopped. -
Page 17: Playback
HD / SD Recorder HDR-70 Playback Select a recorded BIN to Play back Playback in BIN or CLIP centric You can think of a video BIN as being like a folder mode for holding a single or group of related video CLIPS. -
Page 18: System Set Up
Analogue / Digital Recorder DN-700 System Set Up SYSTEM SETUP menu has the following options SUB MENU 2 MAIN MENU SUB MENU 1 TOOL SETUP STATUS RECORD SETUP PLAY SETUP SYSTEM SETUP SET AUDIO MONITOR See below section. SAVE SETUP SELECT AUDIO SOURCE See page 19. -
Page 19: Select Audio Source
HD / SD Recorder HDR-70 Select Audio Source Use the LCD menu path [MENU] > SETUP > SYSTEM SETUP > SELECT AUDIO SOURCE This recorder can accept audio signals which are already embedded in the SDI / HD-SDI video input. The recorder can alternatively accept analogue audio from the rear panel Balanced XLR audio inputs. -
Page 20: Gpi Control
HD / SD Recorder HDR-70 GPI Control GPI Trigger cabling and circuit into record pause mode for the length of the press. However, when the button is released the recording The recorder has a GPI socket on its rear panel. The process starts again. -
Page 21: Transferring Files To A Computer
Analogue / Digital Recorder DN-700 Transferring files to a computer Recorder File System limitations File Organization This recorders NTFS format is fully compatible All bins that contain video will appear to the with PCs and is read compatible with Macs. Its computer as folders named BINxx. -
Page 22: Safely Dis-Mounting The He-1 Drive From A Computer
HD / SD Recorder HDR-70 The drive will appear on the computer as a volume called HDR-SERIES. Where XX is the number value set up using HDD Volume ID feature Safely dis-mounting the HE-1 drive from a computer In order not to cause damage to the spinning drive within the HE-1 drive do not immediately disconnect the USB 2.0 cable straight away. -
Page 23: Updating The Firmware
HDR-70 Updating the Firmware From time to time Datavideo may release new firmware to fix reported bugs in the current recorder firmware or to add a new feature. Customers can update the recorder firmware themselves if they wish or they can contact their local dealer or reseller for assistance should they prefer this method. -
Page 24: Set Buzzer
HD / SD Recorder HDR-70 Set Buzzer Use the LCD menu path [MENU] > SET UP > SYSTEM SET UP > SET BUZZER Set Long Time Stop Use the LCD menu path [MENU] > SET UP > SYSTEM SET UP > SET LONGTIME STOP This setting changes the operation of the stop button. -
Page 25: Rs-232 Controller Command Set
HD / SD Recorder HDR-70 RS-232 Controller Command Set Connector Pin Assignment Interface : 9 pin D-Sub female to 9 pin D-Sub female The pin assignment of the Controller and recorder is shown in the following table: 9 Pin D-Sub... -
Page 26: System Control
HD / SD Recorder HDR-70 System Control 00h, 11h Device Type request The response is 00, 00 indicating Quick Capture 00h, F1h Next Bin When this command is issued from the Idle state the next bin is selected. If the present bin is 99 then the next bin is 1. -
Page 27: Transport Control
HD / SD Recorder HDR-70 24h, F4h, bb, nn Select Bin and Play from Offset Content of the bin number bb is played at 1x speed starting at Frame Offset nn. This command may be issued from the idle state or any other Play state. - Page 28 HD / SD Recorder HDR-70 Command Name Response Data Common Transport Control 20h, 00h, 20h Stop 10h, 01h, 11h 20h, 01h, 21h Play 10h, 01h, 11h 20h, 02h, 22h Record 10h, 01h, 11h Common Trick Play 21h, 11h,, 00h, 32h...
- Page 29 HD / SD Recorder HDR-70 Vendor Unique System Commands (External) 01h, F6h, 00, F7h Make Media File (Unlock Media) 10h, 01h, 11h 01h, F6h, 01, F8h Empty Current Bin 10h, 01h, 11h 01h, F6h, 02, F9h Empty All (Format Media)
- Page 30 HD / SD Recorder HDR-70 4. Return Data 21h 13h nn csum : Shuttle Forward 21h 23h nn csum : Shuttle Reverse speed Command Forward Command Reverse 21h 13h 62h 96h 21h 23h 62h A6h 5E h 21h 13h 5E h 92h...
- Page 31 HD / SD Recorder HDR-70 7. Status Sense Control Command Response Bytes Status Bit 7 Bit 6 Bit 5 Bit 4 Bit 3 Bit 2 Bit 1 Bit 0 Byte Cartridge Local Busy enable Stop Rewind Fast Forward Record Play...
-
Page 32: Dimensions & Weight
HD / SD Recorder HDR-70 Dimensions & Weight Depth [Front to Rear] : 288.4mm Width : 481mm / Standard 19” with rack ears Height : 49mm / Standard 1RU without feet Gross weight [Packed] : 4.86 Kg / 10.71 lbs... -
Page 33: Specifications
HD / SD Recorder HDR-70 Specifications HDD: 250 / 320 / 500 / 750 GB HDD Size SSD: 120GB/240 GB HD/SD-SDI Video Input Time code HD/SD-SDI Video Output HDMI Time code Time code IN/OUT Balance Audio Analog 2-CH Audio Input... -
Page 34: Service And Support
It is our goal to make your products ownership a satisfying experience. Our support staff are available to assist you in setting up and operating your system. Please refer to our web site www.datavideo.com for answers to common questions, support requests or contact your local office below.
Need help?
Do you have a question about the HDR-70 and is the answer not in the manual?
Questions and answers