Table of Contents
Advertisement
Quick Links
Advertisement
Table of Contents

Related Manuals for Siqura FD12


Summary of Contents for Siqura FD12
- Page 1 Installation and Operation Siqura FD12 Vandal Proof Fixed Dome Camera...
-
Page 3: Table Of Contents
HANGE CAUTIONS.......................3 OVERVIEW ......................5 3.1....................5 RODUCT EATURES PACKAGE CONTENTS ..................7 CAMERA CONFIGURATION .................9 5.1....................9 ARTS EFINITION 5.2. FD12 S ..........9 IQURA WITCHES ONNECTORS UTTONS 5.3. 10-P ..................10 WITCH 5.3.1. DIP switch settings ................11 5.4..................... 12... -
Page 5: Preface
The most recent version of this manual is on the Optelecom-NKF website, at www.optelecom-nkf.com. Notice To work with the Siqura FD12 camera, an installer or technician must have the following minimum qualifications: • A basic knowledge of CCTV systems and their components. -
Page 6: Change Log
Preface Regulations This device complies with Part 15 of the FCC Rules. Operation is subject to the following two conditions: (1) this device may not cause harmful interference, and (2) this device must accept any interference received, including interference that may cause undesired operation. -
Page 7: Cautions
Cautions CAUTIONS Only qualified service personnel or system installers should install and connect this product. Handle the camera carefully. Avoid striking, shaking, etc. as the camera can be damaged by improper handing or storage. Do not disassemble the camera. To prevent electric shock, do not remove screws or covers. There are no user serviceable parts inside. -
Page 9: Overview
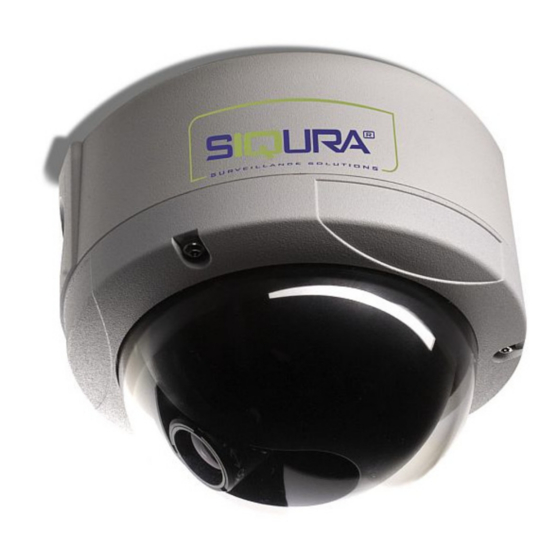
Overview OVERVIEW The Siqura FD12 is a 1/3” CCD color fixed dome camera designed for both indoor and outdoor video surveillance systems with ultraviolet ray prevention and vandal-proof housing, and compliant with the international IP66 water resistant standard. This dome camera is... -
Page 11: Package Contents
Package Content PACKAGE CONTENTS Before proceeding, please check that the box contains the items listed here. If any item is missing or defective, DO NOT install or operate the product. Contact Optelecom-NKF for assistance. Self tapping screws Safety Screw Dome Camera (with Power and Video cables Security TORX Plastic Screw Anchors... -
Page 13: Camera Configuration
Before installing, configure the camera settings according to the instructions below. 5.2. Siqura FD12 Switches, Connectors, and Buttons Users can enable or disable the functions on the switch board based on the camera’s installation environment to achieve better video quality and performance. This section... -
Page 14: 10-Pole Dip Switch
Camera Configuration 5.3. 10-Pole Dip Switch 5.1 Switch Board (10-pole Dip Switch) DC Auto Iris Switch: Use this switch to adjust camera video image brightness. Turn the switch clockwise to brighten the video image, and counter-clockwise to dim the image. Switch Definition Remarks... -
Page 15: Dip Switch Settings
Camera Configuration 5.3.1. DIP switch settings Switch Function Description OFF enables Auto Iris (AI) mode. In AE mode, the camera’s shutter and ON enables Auto Exposure (AE) AGC control circuits work together mode. automatically to compensate the light Default=OFF. exposure of the CCD sensor in order to get a consistent video output level. -
Page 16: Terminal Board
Video GND Reserved Reserved Reserved Reserved Table 5.2 12V DC terminal board pins Table 5.3 24V AC terminal board pins please note The optional Siqura PA01 24V AC is delivered without connectors. The installer must manually wire it to the camera. -
Page 17: Installation
6.1. Hard Ceiling Installation The Siqura FD12 can be installed directly on a wall or ceiling. Please note that the wall or ceiling must have enough strength to support the dome camera. To install your dome camera in a hard ceiling Use the hexagon tool to unscrew and remove the housing cover. - Page 18 Installation Press the sides of the snap-on module, as indicated in the figure, and detach it from the dome housing. Attach the dome housing to the appropriate mounting location on the wall, and mark the positions of the four screw holes with a pen or a pencil. In the marked locations, drill a hole slightly smaller than the supplied screw anchors.
- Page 19 Installation Attach the snap-on module into the dome housing. please note The terminal block should face the side conduit entry, as shown in the figure. Connect the power and video outputs Pan Adjustment After the dome body is mounted and the cables are connected, the image should be displayed on the monitor.
- Page 20 Installation Rotate the lens to adjust the camera's zoom level and focal length. Adjust the zoom ring screw to set the desired zoom and modify the focus ring screw to set the desired focal length. Determine the camera settings. Refer to Section 5.2 Camera Configuration: Switch Board for details.
-
Page 21: Mount Electrical Box
Installation 6.2. 4S Mount Electrical Box Before installing the dome camera in the electrical box, unscrew and remove the housing cover with the hexagon tool. Figure 6.3 4S Mount electrical box To install using a 4S Mount Electrical Box Disconnect the terminal block of power and video wires from the dome camera. - Page 22 Installation Assemble the inner plastic cover to the camera unit. Screw the housing cover to the camera unit.
-
Page 23: Appendix A: Technical Specification
Technical Specification APPENDIX A: TECHNICAL SPECIFICATION Item Siqura FD12 LENS Max Aperture Wide F1.4, Tele F2.8 Lens Focal Length F=3.7~12 mm Angle of View Wide end: Diagonal 97.61° / Horizontal 76.92° Tele end: Diagonal 28.37° / Horizontal 22.73° CAMERA Sensor 1/3"... -
Page 25: Appendix B: Troubleshooting
Troubleshooting APPENDIX B: TROUBLESHOOTING Use this table to troubleshoot Siqura FD12 cameras. Problem Solution Switch SW-1 OFF (on the switch board) and adjust DC Auto Iris. The displayed image is too dark or too bright Switch SW-1 ON to activate electronic shutter to adjust illumination in accordance with light changes. - Page 26 © Optelecom-NKF B.V. 2009 *%199925410760-00%* Version 1.3 (082507-1c) Siq. FD12 Installman (MW03SP3)
Need help?
Do you have a question about the FD12 and is the answer not in the manual?
Questions and answers