Table of Contents
Advertisement
Quick Links
Advertisement
Table of Contents

Subscribe to Our Youtube Channel
Related Manuals for Siqura IFD820V1IR


Summary of Contents for Siqura IFD820V1IR
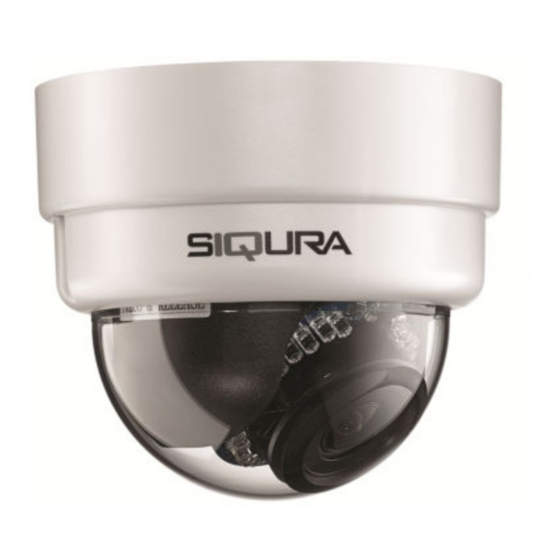
- Page 1 IFD820V1IR High-definition indoor fixed dome camera with D/N...
- Page 2 Any brand names mentioned in this manual are registered trademarks of their respective owners. Liability Siqura accepts no liability for claims from third parties arising from improper use other than that stated in this manual. Although considerable care has been taken to ensure a correct and suitably comprehensive description of all relevant product components, this manual may nonetheless contain errors and inaccuracies.
-
Page 3: Table Of Contents
Contents About this manual ..................Safety and compliance ................Safety ....................Cautions ..................... Compliance ..................Product overview ..................Model ....................Package contents ................. Dimensions ..................System requirements ................System compatibility ................Connectors and cabling ................Connectors ..................Power the camera ................Connect to network ................ -
Page 4: About This Manual
This manual is intended for technicians involved in the installation of IFD820V1IR cameras. What you should already know To be able to install and connect the IFD820V1IR properly, you should have adequate knowledge and skills in the following fields. ●... -
Page 5: Safety And Compliance
Failure to comply with any precaution, warning, or instruction noted in the manual is in violation of the standards of design, manufacture, and intended use of the module. Siqura assumes no liability for the customer's failure to comply with any of these safety requirements. - Page 6 European Union (EU) to enact the Directive on the Restriction of the use of certain Hazardous Substances (RoHS) (2002/95/EC). Siqura offers products that comply with the EU’s RoHS Directive. The full version of the Siqura RoHS statement can be viewed at www.siqura.com.
-
Page 7: Cautions
Do not aim the camera at bright objects. Whether the camera is in use or not, never aim it at the sun or other extremely bright objects, as this can damage the camera. Compliance The EU Declaration of Conformity for this product is available for download at www.siqura.com/support-files. -
Page 8: Product Overview
Product overview This chapter introduces the IFD820V1IR and its features. In This Chapter 3.1 Model........................8 3.2 Package contents....................9 3.3 Dimensions......................9 3.4 System requirements.................... 10 3.5 System compatibility..................... 10 Model IFD820V1IR HD Indoor fixed dome IP camera ● 1/2.7” Progressive scan CMOS imager ●... -
Page 9: Package Contents
Product overview Package contents 12 Vdc Power adapter IFD820V1IR Power terminal block (indoor use only) Plastic screw anchors Security TORX Self-tapping screws (x4) (x4) Quick Start Guide Rubber washers (x6) Dimensions IFD820V1IR dimensions (in millimetres) -
Page 10: System Requirements
Product overview System requirements You can get access to the IFD820V1IR camera from a standard web browser which supports ActiveX controls. The browsing PC must meet the system requirements given in the table below. Item System requirement Personal computer Intel Pentium M, 2.16 GHz (or higher) or Intel CoreTM2 Duo, 2.0 GHz (or higher) -
Page 11: Connectors And Cabling
Connectors and cabling This chapter describes the buttons and connectors on the printed circuit board (PCB) of the IFD820V1IR and gives instructions for connecting power, Ethernet, audio, and alarm I/O cables. In This Chapter 4.1 Connectors......................11 4.2 Power the camera....................12 4.3 Connect to network.................... -
Page 12: Power The Camera
10/100 Mbps Ethernet / PoE Power the camera Connect the power jack to the IFD820V1IR before plugging it into a power socket to avoid danger of electric shock. Note that the supplied DC power adapter is for indoor use only. -
Page 13: Connect Audio
Green on/off : 100/10 Mbit Yellow on/blink : link OK, active Yellow off/flash : link down, TX attempt Connect audio If microphones and speakers are configured to the network, the IFD820V1IR can be used to provide a two-way audio channel. To connect audio ●... -
Page 14: Microsd Card
Connectors and cabling microSD Card The IFD820V1IR supports a microSD card (max. 64 GB) for storing event-triggered and scheduled recordings. Users can format the SD card and implement automatic recording cleanup through the Storage page on the web interface of the camera. -
Page 15: Install The Camera
5.1 Surface Mount...................... 15 5.2 Recessed Ceiling Mount..................19 Surface Mount The IFD820V1IR camera can be installed directly on a wall or ceiling. Please note that the wall or ceiling must have enough strength to support the camera. Items Needed ●... - Page 16 Install the camera Unscrew the module-fastened screw, as indicated in the figure, with the philips-head screw driver. Press the sides of the snap-on camera module, as indicated in the figure, and detach it from the dome camera’s housing/plate. Mark the positions of the four screw holes on the base of the dome camera at the chosen installation location.
- Page 17 Install the camera In the marked locations, drill each hole slightly smaller than the supplied screw anchors, and insert the anchors into these holes. Fasten the dome camera’s housing/plate with the four supplied self-tapping screws. Thread the cables (power/Ethernet/audio/alarm) through the hole in the base plate. Note: The power cable is omitted if using PoE.
- Page 18 Users can also use the camera’s BNC connector for video output. Adjust the IFD820V1IR's lens and adjust the its zoom level and focal length via the zoom and focus ring screws. Note: The zoom level and focal length might be different with the dome cover on. In this case, we recommend adjusting zoom level and focal length through the dome cover.
-
Page 19: Recessed Ceiling Mount
Screw on the two Torx screws on the side of the dome cover tightly to fasten the dome cover. Recessed Ceiling Mount The indoor IFD820V1IR cameras can be installed directly on a wall or ceiling. Please note that the wall or ceiling must have enough strength to support the camera. In-ceiling mount package contents... - Page 20 The Surface Mount dimensions are provided in millimeters in the figures below. The IFD820V1IR recessed ceiling mount dimensions To install the IFD820V1IR on a hard ceiling Release the two captive security screws with the supplied security torx and open the dome cover.
- Page 21 Install the camera Unscrew the module-fastened screw, as indicated in the figure, with the screw driver. Press the sides of the snap-on camera module, as indicated in the figure, and detach it from the dome camera’s housing/plate. Attach the camera housing/plate’s base to the in-ceiling mount’s top plate, aligning the camera’s rear cable entry with the entry hole on the in-ceiling mount’s top plate.
- Page 22 Install the camera Position the supplied adhesive-backed ceiling sticker (Diameter: 176 mm) onto the ceiling where the camera will be mounted, and cut the ceiling hole using the template as a guide. Insert the dome camera with the attached in-ceiling mount into the opening and run the Ethernet cable through the desired cable entry.
- Page 23 Install the camera Bottom views of installed in-ceiling mount Attach the snap-on camera module to the dome camera’s housing/plate. Install the camera module with the terminal blocks facing the side cable entry. Tighten the module-fastening screw. Connect the Ethernet cable to the camera’s network connector.
- Page 24 Users can also use the camera’s BNC connector for video output. Adjust the IFD820V1IR's lens and adjust the its zoom level and focal length via the zoom and focus ring screws. Note: The zoom level and focal length might be different with the dome cover on. In this case, we recommend adjusting zoom level and focal length through the dome cover.
- Page 25 Install the camera Align the three holes in the trim ring with the retaining nut on the in-ceiling mount and snap the trim ring in place to complete the installation.
-
Page 26: Index
Index About this manual........4 Cautions..........7 Compliance..........7 Connect alarm I/O........13 Connect audio........13 Connect to network.........12 Connectors..........11 Connectors and cabling......11 Dimensions..........9 Install the camera........15 microSD Card.........14 Model............. 8 Package contents........9 Power the camera........12 Product overview........8 Recessed Ceiling Mount......
Need help?
Do you have a question about the IFD820V1IR and is the answer not in the manual?
Questions and answers