Table of Contents
Advertisement
Advertisement
Table of Contents

Related Manuals for Chausson V594S

Summary of Contents for Chausson V594S
- Page 1 USER’S MANUAL model...
- Page 2 CHAP. I Introduction ear Customer, You have just taken possession of your new CAMPER We thank you for your order and congratulate you on your choice. We suggest that you get to know your new camping car by reading this manual, and hope that you are fully satisfied with it. This user’s manual gives you all the information you need about the equipment in the living compartment and precautions to be taken and instructions to be followed in using it.
-
Page 3: Table Of Contents
Summary P. 1 Heating plate p. 36 Chap. I IntroDuCtIon Plancha “EASY CHEF” p. 37 Chap. II PrEPArAtIon BEForE LEAVInG Water heater / Heating P. 39 P. 3 Carrier preparation Combi TRUMA P. 43 Preparing the living compartment (outside) P. 3 P. -
Page 4: Chap. Ii Preparation Before Leaving
CHAP. II Preparation before leaving A camping car has two separate parts ; firstly the basic vehicle PREPARING THE LIVING COMPARTMENT (outside) or carrier that provides the transport, and secondly the living The first thing to do before you leave is to switch on the compartment in which you will spend your holidays. -
Page 5: Preparing The Living Compartment (Inside)
CHAP. II Preparation before leaving PREPARING THE LIVING COMPARTMENT (outside) (continued) PREPARING THE LIVING COMPARTMENT (INsIdE) The first thing to do is to switch on the electrical circuit on the The clean water tank is filled through an external orifice control panel. -
Page 6: Chap. Iii Carrying Passengers
CHAP. III Carrying passengers The number of authorized seated positions in your camping Their use while the vehicle is in motion may contravene road car when driving on the road is marked on the registration regulations and introduce risks about which the user should certificate. -
Page 7: Chap. Iv Loads And Loaded Weight
CHAP. IV Loads and loaded weight The camping car is a mobile home so everyone can lay it out as The maximum permitted loads on each axle are given on the he or she wishes, but some rules have to be respected ; these living compartment identification plate. - Page 8 CHAP. IV Loads and loaded weight ImPortAnt : Vent Be sure that you have correctly evaluated the weight of all flue objects you intend to transport in your vehicle, including Transparent passengers and fixed and movable accessories and options. Your clean water reservoir was tared at the factory for a Drain pipe 30-liter capacity, in compliance with regulations concerning...
-
Page 9: Chap. V Windows And Skylights
CHAP. V windows and skylights Our units are equipped with plastic windows (bays and «SKYROOF» front panoramic skylight skylight). In most cases, your camper is equipped with push-out bay windows that open directly to the outside and skylights, which must be closed and locked when the camper is on the road. It is strongly recommended not to use aerosols near the bay windows and skylights (risk of ring formation). - Page 10 CHAP. V windows and skylights Panoramic skylight Bathroom skylights Open Close Vérifier le bon verrouillage par une Check to see that it is properly locked poussée d'ouverture sur la vitre. by pushing to open the pane. A la mise en service Tourner à...
- Page 11 CHAP. V windows and skylights Type 1 Push-out Bay Windows Type 2 Push-out Bay Windows OPEN OUVERT FERMÉ CLOSED OUVERT OPEN and LOCKED VERROUILLÉ OUVERT OPEN Appuyer Push on sur le the center FERMÉ CLOSED Bouton button to and LOCKED central pour VERROUILLÉ...
-
Page 12: Chap. Vi Driving
CHAP. VI Driving Precautions - Signaling General - overtaking Avoid the following dangers: A camping car is driven in much the same way as a car. - Underground car parks. However, the vehicle is larger, both in height and in width, - Some service stations, which may have superstructures and heavier;... -
Page 13: Chap. Vii Tyres
CHAP. VII tyres Tyres Spare tyre The Fix and Go Kit system has been adopted in place of the Verification of pressure should be done when the motor home spare tyre. is loaded (cold tires). In case of a flat tire, please do the following: Tire pressure is given by the carrier manufacturer in the maintenance booklet and is also found on the front door frame. -
Page 14: Chap. Viii Signaling, Lights
CHAP. VIII Signaling Placement of lights and access... - Page 15 CHAP. VIII Signaling Lights 3rd brake light and LED sidelights: Brake lights / indicator lights / fog lights: - Remove the two fixation screws - Remove the fixation screws - Disconnect the wires - Remove the bulb from its housing - Replace the light and the connector by crimping - Turn the bulb support in the direction of the arrow to remove the bulb...
-
Page 16: Chap. Ix Parking Maneuvers
CHAP. IX Parking maneuvers When you have found a place to park, you can position your Signalling front rear vehicle using the rearview mirrors as a guide, but we suggest you call on someone to help you when backing up. Some of our models are fitting with a parking detector, an ideal aid for demanding motor caravanners. - Page 17 CHAP. IX Parking maneuvers Please note: Parking Some of our models have a front parking sensor; a switch on To ensure perfect stability of your rear (*) jacks, remember the dashboard allows turning it on for a delicate maneuver in to take along at least two wooden wedges to place on the a forward direction.
-
Page 18: Chap. X The Camper Driver's Charter
CHAP. X the camper driver’s charter As with all types of vehicles, you need to follow the highway warning: All water drain taps must be closed when traveling. code when driving a camping car. You must respect traffic Put domestic garbage in bags and leave the bags in locations rules applicable to private cars. -
Page 19: Chap. Xi Operation Of Appliances
CHAP. XI operation of appliances ELECtrICItY PowEr SuPPLY CB 516 charger: To access the contactor, open the hood (remove the two attachment screws) and look for it next to General the fan. The electrical energy necessary for your lighting and for operation of all household appliances, water pump, WC, etc. - Page 20 CHAP. XI operation of appliances BAttErIE The natural phenomenon by which batteries discharge slowly Battery level alarm and regularly means that they are often in a deep discharge A buzzer is installed on certains models. situation. Fitting «electrical options» It has been observed that only a very small percentage of We draw your attention to the need to connect the solar panel batteries are capable of accepting charge and therefore according to our recommendations.
- Page 21 CHAP. XI operation of appliances Intervention on the auxiliary battery for campers, excluding vans and integrals (cont.) Steps for accessing the battery on a FIAT carrier 1) Enlever la protection 1) Remove the plastic Push the seat plastique arrière Mettre le siège protection at the rear all the way to complètement...
- Page 22 CHAP. XI operation of appliances Intervention on the auxiliary battery for campers, excluding vans and integrals (cont.) Steps for accessing the battery on a FIAT carrier 4) Dégager la batterie 4) Free the battery Clamping plate Bride Protective Remove the Plaque de Enlever l'écrou plate...
- Page 23 CHAP. XI operation of appliances Intervention on the auxiliary battery for campers, excluding vans and integrals (cont.) Steps for accessing the battery on a FORD carrier 1) Enlever la protection plastique arrière 1) Remove the passenger seat Soulever les clips, Push up the clips puis enlever la and remove the...
- Page 24 CHAP. XI operation of appliances Intervention on the auxiliary battery for campers, excluding vans and integrals (cont.) Steps for accessing the battery on a FORD carrier (cont.) 3) Enlever la batterie 3) Free the battery Enlever la Remove the Batterie battery Soulever en Lift the bat-...
-
Page 25: Control And Instrumentation Panel
CHAP. XI operation of appliances ControL AnD InStrumEntAtIon PAnEL Our different models are equipped with different types of control panels; these are usually situated near the cooking unit ImPortAnt : to ensure all functions, battery charging, sensor, pump, etc.. It is essential that the control panel is turned on (Table PC 180 TR, Button 1). - Page 26 CHAP. XI operation of appliances MODEL PC 180 TR FUNCTIONS B1 engine battery alarm: It is possible to restore the uses for one minute by pressing on When the engine battery reaches a voltage below 12V, the self- the ON / OFF button. discharged battery alarm is automatically activated and the Electronic battery isolator: symbol ref.
- Page 27 CHAP. XI operation of appliances FuSE BoX Low VoLtAGE ControL An electronic device cuts off all 12V power supplies when the service battery drops to the minimum voltage of 10V. It is possible to manually re-establish functioning for roughly one minute by shutting off the overall power switch and turning it on again. The refrigerator, the electrical step-plate and the functions supplied directly by B2 (unit battery) are excluded from this arrangement.
-
Page 28: Fuses
CHAP. XI operation of appliances FuSE BoX An electronic system controlled by a microprocessor enables recharging the B1 engine battery, but only if the battery has a voltage less than 12.5 V and the unit battery has a voltage above 13.5 V. INFO FuSES 8/ 15A fuse for direct powering of... -
Page 29: Food Safety
CHAP. XI operation of appliances FooD SAFEtY warning about the use of your refrigerator: Always remember: When storing your food, be particularly carefui about the - Wrap up separately raur food and cook food in aluminium or special conditions of use of a refrigerator located in a vehicle. plastic wrap. -
Page 30: Refrigerator
CHAP. XI operation of appliances Winter operation rEFrIGErAtor 1. Check that the ventilation grills and the extractor have not Our products are fitted with several different refrigerator been blocked by snow, leaves or similar. models. 2. When the outside temperature drops below 8°C, the optional The following is an overview of their operation. - Page 31 CHAP. XI operation of appliances • Constant circulation of air must be supplied to, the refrigerator unit. Switching OFF • Defrost regularly. 1) Set energy selector switch (A) to position “0” (OFF). • Open the door only for a short time when removinq goods from the The device is completely stopped.
- Page 32 CHAP. XI operation of appliances Beware! - Flammable material should be kept well away from the refrigerator. - The gas cylinder must be changed outside, away from any ignition source. - It is forbidden to run the refrigerator on gas when travelling. If there should be a fire following an accident this could cause an explosion.
- Page 33 CHAP. XI operation of appliances - Do the preceding operations once again if the flame controller Energy does not reach the green area; 1) 12 V - operation (DC) - Adjust the temperature using the thermostat (B). The bigger the The refrigerator should only be used while the motor mark, the stronger the power.
- Page 34 CHAP. XI operation of appliances DOMETIC refrigerator THETFORD refrigerator LED control panel Dometic 1) On / Off switch 2) Directional button 3) Confirmation button 4) Directional button 5) Symbol for 230V / 12V / gas power sources 6) Cooling level indicator 7) Anti-condensation symbol 8) “Flat batteries”...
- Page 35 CHAP. XI operation of appliances GAS oVEn (Optional mounting on certain models only) The appliance can only be used for cooking and must never be used as a heater. Use of this appliance can generate heat and humidity. This means that proper ventilation of the kitchen must be provided. ImPortAntLY: If the oven or grill fails to light, the entire procedure must be •...
-
Page 36: Mini Grill (Uk Mobile Home Version Only)
CHAP. XI operation of appliances mInI GrILL (uK mobile home version only) In ovens with a thermostat, the different positions of the£ knob correspond to the following oven temperatures in Manual lighting of the oven-grill: Centigrade. Push slightly on the control knob and turn it to the lighting POS. -
Page 37: Heating Plate
CHAP. XI operation of appliances HEAtInG PLAtE Shutting off: Turn the knob to the stop position (0). Various brand-name heating Close the cooking plate valve. plates are installed in our different models. Breakdown: If the appliance no longer works, turn it off and consult a Operation: specialist. - Page 38 Verrou CHAP. XI operation of appliances «EAsY CHEF» OuTsIdE GRILL Fold-down installation: Open the flap while holding the panel Depending on your camper’s layout, the installation of the en utilisant la clef prévue. «Easy Chef» grill on the right side of the vehicle may be a Suggestion: Push on the flap to help drawer or a fold-down.
- Page 39 CHAP. XI operation of appliances FIRsT usE OF «EAsY CHEF» Note: At the rear of the grill, Open the gas delivery valve. a safety valve cuts off the flow of gas if the lid is closed. Unfasten the lid lock and open the lid. After removing them from their storage area, place the lateral fire guards in their holders.
- Page 40 CHAP. XI operation of appliances WATER HEATER (BOILER) Our different models are equipped with different types of appliances: simple boilers for heating water only and combined appliances for heating both water and the mobile home unit. If there is any risk of frost, drain the boiler. The guarantee does Activation, gas operation a = rotary “On”...
- Page 41 CHAP. XI operation of appliances Security/drainage valve (FrostControl) FrostControl is an autonomous security/drainage valve that The drainage valve can be shut off manually with the pressure operates without electrical current. If there is a risk of freezing, button (position b) and the boiler filled only when the the valve automatically evacuates the contents of the boiler via temperature on the evacuation valve is above 7°C.
- Page 42 CHAP. XI operation of appliances Filling the water heater position) until the water heater is full of water, all air has escaped and water is running freely. Before starting your water heater for the first time and after 4. If there has been a frost, it is possible that filling will not draining: take place due to an ice plug formed in remaining water.
- Page 43 CHAP. XI operation of appliances Switching off Maintenance Use control knob (a) to switch your water heater off (fig. A). When you want to remove scale from the water heater, use Fit the chimney cover. Empty the water heater if there is any wine vinegar or formic acid, putting it into the appliance danger of frost.
-
Page 44: Combi Truma
CHAP. XI operation of appliances ComBI trumA Un manuel d’utilisation spécifique est fourni avec la cellule camping-car. D4 / D6 / D6E / 6 / 6EH Description of operation D4 / D6 / D6E temperature depends on the selected Temperatures below freezing can operation and the heater output. - Page 45 CHAP. XI operation of appliances Control panel type 1: Control panel type 2: Room thermostat: An external room temperature sensor (i) is located in the vehicle to measure the room temperature. The position of this sensor is determined individually by the vehicle manufacturer based on the vehicle type.
- Page 46 CHAP. XI operation of appliances current room temperature. Once the warm-air fan continues to run slowly as room temperature set on the control long as the blowing temperature (on ComBI trumA D4 / D6 / D6E panel has been reached, the burner the unit) is less than 40°C.
- Page 47 CHAP. XI operation of appliances necessary, regularly reheat Fuses : ComBI trumA D4 / D6 / D6E the water in the water heater to Shutting down: The fuses are in the electronic control 70° C to maintain the effectiveness of unit underneath the connector cover.
- Page 48 CHAP. XI operation of appliances wAtEr HEAtEr/HEAtEr ComBI 6 . 6E Combi 6EH: Winter mode Starting operation Use the gas or 230V electricity supply to The device is not suitable for use as a - Heating with controlled water tem- produce hot water.
- Page 49 CHAP. XI operation of appliances - Heating without controlled water Shutdown temperature. Controlled or with the Combi 6 et 6EH: installation of water drained. Press the rotary button / pushbutton for more than 3 seconds. Combi 6EH : A switch-off timer to reduce the unit’s Choose gas, electricity or mixed ope- temperature is active.
-
Page 50: Air Heater Running On Diesel
CHAP. XI operation of appliances A green light appears in the centre of the knob when the AIr HEAtEr runnInG on DIESEL appliance is working. Some different makes of heater are used. Turn the knob to the maximum position to start off and when No more gas-oil for heating is supplied once the reserve level it has regulated turn to the required position (about half-way of the carburant reservoir has been reached (alarm on the... - Page 51 CHAP. XI operation of appliances Upkeep and safety instructions There is no known drawback to utilisation of additives. Servicing relative to the warranty concerning these devices If fuel is taken from the vehicle reservoir, follow the vehicle must be done only by repair shops that have been approved manufacturer’s instructions concerning additives.
-
Page 52: Eberspächer Heater
CHAP. XI operation of appliances Selecting the temperature on the control panel EBErSPäCHEr HEAtEr The inside temperature is pre-set using the rotary adjustment Switching on knob to between +10°C and +30°C depending on the heater The indicator lamp in the control panel lights on start-up. The selected, the area to be heated and the outside temperature. - Page 53 CHAP. XI operation of appliances Fan operation • Heating at an altitude above 1500 m up to 3000 m maximum: - Short stay (crossing a pass or stopping for a break), heating Under fan operation, the “heater/ventilation” changeover is possible in principle. switch must firstly be activated before the heater is triggered.
-
Page 54: Gas Circuit
CHAP. XI operation of appliances GAS CIrCuIt IntEGrAL CAmPEr has standard equipment for using VALVE OPENING Your either PROPANE or BUTANE gas The valves must be turned in the same direction as the distribution tube for each device. An arrow on Located in a sealed compartment and accessible from the the valve lets you check its position. - Page 55 CHAP. XI operation of appliances GAS CIrCuIt (cont.) Supply to appliances Recommendations All appliances operating on gas must not be used unless - Check that the valves to the various appliances are the vehicle is stopped. (parked vehicle). closed, Make sure that the cylinder(s) is or are properly closed before - Open the gas cylinder.
-
Page 56: Water Circuit
CHAP. XI operation of appliances wAtEr CIrCuIt If the control panel is in fill mode. Your camping car is equipped with - a clean water tank, An LED will light up to indicate that the - a waste water tank tank is almost full and that filling should be stopped. - Page 57 CHAP. XI operation of appliances Clean water Insulation When traveling, do not expect to be almost dry to stock. To Certain of our models feature specific insulation of the fill with clean water, enjoy a full tank for example. Some parks wastewater reservoirs, which are found under the vehicle have a tap but in all cases, be discreet and diplomatic.
-
Page 58: Circuit
230 V CHAP. XI operation of appliances CIrCuIt 230 V 230V power supply connector 230 V internal power outlets The mains power supply is connected to an EEC 230 V There are one or more 230 V power outlets in your living connector (2 pins + earth) on the right or left side of your compartment. -
Page 59: Panoramic Skylights
CHAP. XI operation of appliances PAnorAmIC SKYLIGHtS Suggested precautions • Close the roof lights fully before driving the vehicle (make The methacrylate glass of the panoramic windows, such as sure they are locked). that in the living cell bays, must be cleaned only with soapy •... -
Page 60: Beds
CHAP. XI operation of appliances BEDS Above the driver A label indicates this normative obligation. Fold the pivoting board down to the horizontal position, if there is one in your chosen model. Remember to lift it up again to increase your driving space Rear bed before you start driving. - Page 61 CHAP. XI operation of appliances Electrically controlled central bed 2) Low: The low position can be accessed from the intermediate Bedding on certain models is a central bed.. This bed is position by: electrically controlled and has the following characteristics: - Keeping your finger on the control button until the travel end stop.
-
Page 62: Electric Table Support
CHAP. XI operation of appliances A consulting ELECtrIC tABLE SuPPort Do not hesitate to ask your distributor / vendor to demonstrate Certain of our models have an electrically driven table support. all these operations when you collect your camping car. For safety reasons, this support cannot operate HE IS A SPECIALIST! unless it has been switched on by... - Page 63 CHAP. XI operation of appliances CHEmICAL wC moDEL 0250 Watch out for the air pressure when opening the WC cassette trap, especially when travelling in the mountains. Open it then with the WC bowl lid closed. You will find below a short description on using this equipment. Specific documentation is supplied with the camper.
- Page 64 CHAP. XI operation of appliances To open the blade, slide the blade handle under the toilet Pull the handle up and wheel the waste-holding tank to an bowl sideways. authorised waste disposal point. After use, open the blade (if it is still closed) and flush the Push the handle back into its locked position.
- Page 65 CHAP. XI operation of appliances toilet bowl: Storage - Squirt a few drops of Thetford bathroom cleaner into the It is important that you follow the instructions below if you toilet. do not expect to use your Thetford toilet for a long period - Flush the bowl with water and wipe the rest with a damp (winter).
-
Page 66: Chap. Xii Moving The Swivelling Seats
CHAP. XII moving the swivelling seats in the driver’s cab Some of our models feature swivelling cab seats which can be For safety reasons and before carrying out used to form an inviting front sitting area. any operation, you must make sure that you can proceed in all safety. -
Page 67: Chap. Xiii Safety Ventilation - Fire Extinguisher
CHAP. XIII SAFEtY (Ventilation – Fire Extinguisher) Fire Extinguisher Ventilation Your motorhome unit is equipped with safety ventilation in Your motorhome living area is equipped with an approved fire compliance with current legislation. These gratings, which are extinguisher. usually found under the refrigerator and furniture elements It is advisable to carry out the necessary checks to keep this and in the gas box, as well as in the access step to the unit device in good working order. -
Page 68: Chap. Xv Winter Use
CHAP. XIV winter use PrECAutIonS AnD rECommEnDAtIonS For winter driving, and particularly for driving on snow, you The most difficult problem to solve in the living compartment should use the same rules for a camping car as for a private during winter use is condensation. -
Page 69: Chap. Xv Cleaning
CHAP. XV Cleaning External cleaning Consequently, do not allow it to enter the living compartment To clean the body, never use a system with rollers since you at all costs. run he risk of deteriorating or tearing off the ventilation Do not use large quantities of water when cleaning the floor, structures of your mobile home. -
Page 70: Chap. Xvi Winter Storage
CHAP. XVI winter storage This is the period during which you no longer use your 2) The gas cylinder must be closed and, ideally, removed; camping car. in this case, block the gas line. Do not forget to close all INFO ventilation orifices so that insects cannot enter(blanking Like any other vehicle, it tends to age much more quickly when... -
Page 71: Chap. Xvii Camper A Class
2015 CHAP. XVII Camper A CLASS BAttErY ComPArtmEnt EXtInGuISHEr Coté Passenger passager side Batterie case 12V fuse box Boitier 230V Boitier 12V Extincteur Extinguisher Disjoncteurs, 230V circuit breaker / Fusibles fuses fuses Fusibles In the seat in Dans la banquette front of the en avant de la porte d’entrée... - Page 72 CHAP. XVII Camper A CLASS Not to perform a full tank, you only control the filling on the Reservoir : control panel. - Your camper is equipped with a drinking water tank located under the rear bench of the dining area or under the fixed bed. Water pump: This tank will not freeze when your camper is heated in the When the pump is turned on (see control panel in Chapter 8),...
- Page 73 CHAP. XVII Camper A CLASS ImPortAnt: It is strongly recommended to always empty water in the circuit, tank and water heater when there is a risk of freezing and your camper is not being used. DRAINING OF DRINKING WATER - Reservoirs are emptied using a manual valve for wastewater and by removing a stopper for the clean water containers located on To drain hot and cold water, proceed as follows: the side of and under the vehicle...
- Page 74 CHAP. XVII Camper A CLASS EnGInE HooD oPEnInG POLLEN FILTER There is a lid to the left of the driver. Slip your finger into 2015 the slot and pull the lid towards you to access the handle which opens the engine hood Accès par le capot moteur The pollen filter cover can be au cache du filtre a pollen...
- Page 75 CHAP. XVII Camper A CLASS THE REPLACEMENT OF THE BULBS ON THE VEHICLE THE PASSENGER WINDOW Top lights, access via the motor on the left and on the right. 2015 Lower lights, access by the chassis To open: Move the handle forward. Push on the handle to adjust the opening To close: Pull on the handle to close.
- Page 76 CHAP. XVII Camper A CLASS Gas security Drinking Heater pressure 230V outside water fillup power plug regulator Drinking Refrigerator Circuit purge water drain 230V outlet valve Outside 12V battery Heater Oven shower circuit drain outlet Valve for emptying Gas shut-off the waste water Cooktop...
- Page 77 moDELS PrESEntAtIon INFO PrEzEntAzIonE DEI moDELLI PrESEntASjon AV moDELLEnE Overcabs Fiat Mansardi Fiat Alkover Fiat Overcabs Ford Mansardi Ford Alkover Ford Vans Fiat Vans Fiat Vans Fiat Intégral Intégral Intégral Low Profiles Fiat Semintegrali Fiat Profiler Fiat Low Profiles Ford Semintegrali Ford Profiler Ford...
- Page 78 moDELS PrESEntAtIon INFO PrEzEntAzIonE DEI moDELLI PrESEntASjon AV moDELLEnE AnGLAIS - The optional «towing/motorcycle carrier» equipment can in accessories should be deducted from the payload and could certain cases change the number of passengers on the car possibly lead to a reduction in the actual passenger numbers. registration papers.
- Page 79 models presentation Prezentazione dei modelli Presentasjon av modellene INFO Rep.
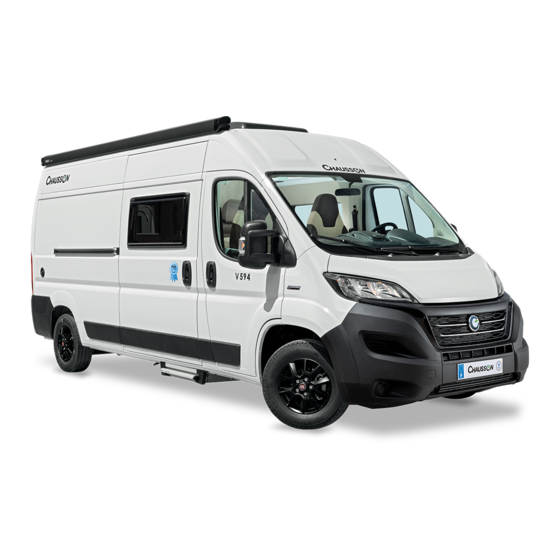
- Page 80 PrESEntAtIon INFO PrEzEntAzIonE DEI moDELLI PrESEntASjon AV moDELLEnE VANS TWIST TWIST TWIST TWIST TWIST TWIST V594S V594 V594Max V694 V694Max V697 FIAT FIAT FIAT FIAT FIAT FIAT 2,0L 2,0L 2,0L 2,3L 2,3L 2,3L 115-85 115-85 115-85 130-96 130-96 130-96 Suivant FINITION et Modèle, Voir document réglementaire prévu...
- Page 81 moDELS PrESEntAtIon INFO PrEzEntAzIonE DEI moDELLI PrESEntASjon AV moDELLEnE AA/AB CAPUCINES C INTEGRAUX Exaltis Exaltis Exaltis Exaltis Exaltis Exaltis Exaltis Exaltis FLASH FLASH FLASH FLASH C514 C516 C626 C636 6017 GA 6028 7017 7018 7028 7117 7117GA 7118 FORD FORD FORD FORD FIAT...
- Page 82 moDELS PrESEntAtIon INFO PrEzEntAzIonE DEI moDELLI PrESEntASjon AV moDELLEnE DA / DB PROFILES CLASSIQUE FLASH WELCOME FLASH WELCOME FLASH WELCOME FLASH WELCOME FLASH WELCOME FLASH WELCOME FLASH WELCOME FIAT/ FIAT/ FIAT/ FIAT/ FIAT/ FIAT/ FIAT/ FIAT/ FIAT/ FIAT/ FIAT/ FIAT/ FIAT/ FIAT/ FORD...
- Page 83 moDELS PrESEntAtIon INFO PrEzEntAzIonE DEI moDELLI PrESEntASjon AV moDELLEnE DA / DB PROFILES CLASSIQUE FLASH WELCOME FLASH WELCOME FLASH WELCOME FLASH WELCOME FLASH WELCOME FLASH WELCOME FLASH WELCOME 617GA 628EB 717GA 718EB 728EB FIAT/ FIAT/ FIAT/ FIAT/ FIAT/ FIAT/ FIAT/ FIAT/ FIAT/ FIAT/...
- Page 84 The technical information and maintenance recommendations in this publication were correct at the time of going to press. However, with a view to continuously improving our products, our company reserves the right to modify at any time and without warning the characteristics, design or the equipment without incurring any obligation.
Need help?
Do you have a question about the V594S and is the answer not in the manual?
Questions and answers