Table of Contents
Advertisement
Advertisement
Table of Contents

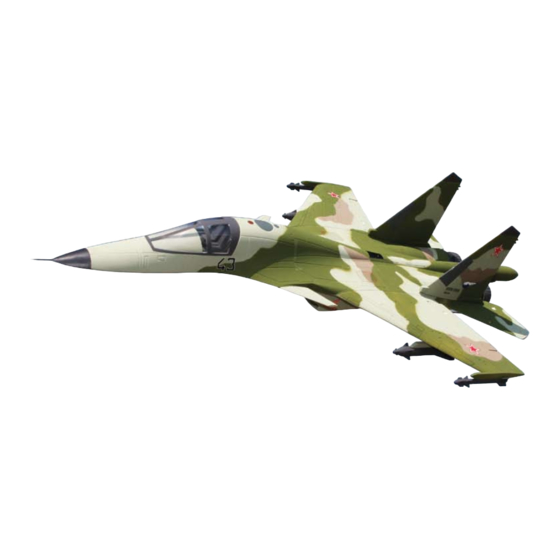
Summary of Contents for Hobby-Lobby SU-34 Fullback
-
Page 2: Table Of Contents
Linkage Install............9 Programming Your Radio .........10 Checking the Mixing ..........11 Retract Adjustment ...........12 70mm Fan Install ............12 Flying the Su-34 Fullback .........13 Center of Gravity ............13 Replacement Parts ...........14 Parts Included in Kit (receiver ready version) • Fuselage (pre-painted and decorated) •... -
Page 3: Main Specifications (Receiver Ready Version)
Main Specifications (receiver ready version) Safety Precautions Wingspan: 35-1/2" [900mm] 1. Please do not change any part of the plane Length: 57" [1450mm] without checking with Hobby Lobby. You will be Weight: 52.91oz [1500g] responsible for any damages caused by these Thrust: 52.91–56.43oz [1500–1600g] changes. -
Page 4: Battery Precautions
Battery Precautions Mixing Epoxy • Do not use the battery if it is damaged or When mixing epoxy, make sure to use equal amounts deformed. of Part A and Part B. Mix the epoxy thoroughly. You • Do not solder the motor leads directly to the will have about 3 minutes before the epoxy begins to battery. -
Page 5: Wing Install
Wing Install Attach the wing panels one at a time. Make sure each panel is tight to the side of the Read through the following steps before attaching fuselage and the upper surface of the wing is the wings to the fuselage. You will need to complete flush with the adjoining fuselage surface. -
Page 6: Front Winglet Install
Front Winglet Install Gluing the front winglets is the same as all the previous items installed. Make sure to align each part equally on each side of the fuselage. -
Page 7: Defensive Radar Pod Install
Defensive Radar Pod Install Nose Cone Install Gluing the defensive radar pod follows the Use epoxy to glue the nose cone to the fuselage. same procedure as gluing the wings. Make Make sure the nose cone fits tight on the fuselage. sure it is aligned with the center line of the fuselage vertically and horizontally. -
Page 8: Missile Install
Missile Install The large and small missiles are attached to the wing using epoxy. A small amount of epoxy is all that is required to glue them to the wing. Mix a small amount of epoxy and apply it to the notch in the large missile. Mix a small amount of epoxy and apply it to the small missile. -
Page 9: Linkage Install
Linkage Install Plug the leads for the servos into your receiver. Each lead is marked to the correct position on the receiver. Before installing the linkages to the control surfaces and vectored nozzles you will need to center the servos. Use the sub-trim feature of your radio system to center each servo. -
Page 10: Programming Your Radio
DX7 radio. Following these instructions to the Left Vectored Thrust Nozzle. will provide both elevator and aileron vectored thrust for your Su-34 Fullback. Different radios may require different settings than shown. Set the following functions under the Input Select screen. -
Page 11: Checking The Mixing
To provide smooth flying, you will want to adjust the radio for the following Dual Rate and Exponential settings. This will make your Su-34 Fullback easier to fly. When down elevator is given, the vectored thrust nozzles will move downward. -
Page 12: Retract Adjustment
When the "FLAP 2" switch is activated the vectored Retract Adjustment thrust nozzles will move in unison with the ailerons. The retracts are fully installed when you receive When the ailerons are centered, the vectored thrust the model and should not require adjustment. nozzles will be centered. -
Page 13: Flying The Su-34 Fullback
If you use our recommended equipment you will not need to adjust the balance of your model. If your equipment does not match our suggestions, or you change the airframe, you will need to balance your model. The balance point of the Su-34 Fullback is as shown in the drawing. CG: 3-13/16"... -
Page 14: Replacement Parts
Replacement Parts Ducted Fan Set - FWF90210 Main Wing Set - FWF900103 Vectored Thrush Nozzle Set - FWF900111 Tail Wing Set - FWF900102 Retract Set - FWF900106 Guided Missiles - FWF900110 Decal Set - FWF900107 Canopy - FWF900109... - Page 15 Fuselage Set - FWF900104 Brushless Power System - FW3070 40-Amp Speed Control - FWF550504 3000mAh 4-Cell Li-Poly Battery - FW3026 Brushless Motor - FWF90137...
- Page 16 Have Fun! We hope that you have many pleasant flights with your Sukhoi Su-34 Fullback. Hobby Lobby International 5614 Franklin Pike Circle Brentwood, TN 37027 www.hobby-lobby.com 0001...


Need help?
Do you have a question about the SU-34 Fullback and is the answer not in the manual?
Questions and answers