
Subscribe to Our Youtube Channel
Related Manuals for Hobby-Lobby HLI8601 F-86 Sabre Skyblazers


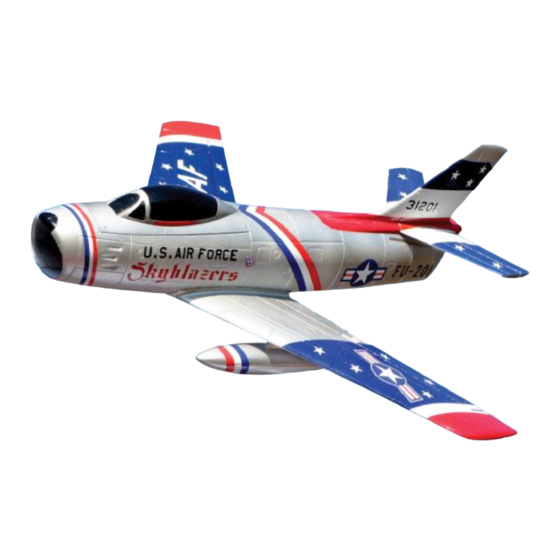
Summary of Contents for Hobby-Lobby HLI8601 F-86 Sabre Skyblazers
- Page 2 They contain information critical to the safe operation of this model. 5. If you have any further questions regarding the safe operation of your RC model, please contact your local hobby shop or flying club or Hobby-Lobby International for professional help and advice.
- Page 3 Safety Precautions! Please read this section and follow all recommendations! 1. Do not fly in strong wing or bad weather. 2. Never fly the model in crowded areas where there are lots of people, automobiles on the road or power lines overhead. Do not fly near full-scale airport. 3.
- Page 4 2. Locate horizontal tail parts. 3. Screw control horns in place. 4. Apply glue to mating surfaces on bottom of tail and rear of fuselage. Use either foam glue or 5-minute epoxy. 5. Press into position and check alignment. Apply glue to bottom of vertical fin.
- Page 5 6. Apply glue to tail fin slot in rear of fuselage, insert fin in slot and check alignment. 7. Locate control horns for ailerons. Screw in place with 2 screws each. 8. Install Z-bend end of aileron pushrod into outermost servo hole, attach clevis to control horn.
- Page 6 9. Locate the 4 wing mount screws and plywood washers. Apply glue to root of one wing panel. You are only gluing the 2 wing halves together, do not apply glue to surfaces that attach to fuselage 10. Slip on half of wing into position on the fuselage making sure that the lip of the ducted fan is in the groove on the wing.
- Page 7 12. Locate the plastic drop tank reinforcement. Apply glue and install on bottom of drop tanks. 13. Apply glue to drop tank pylon and install on bottom of each wing panel. 14. Attach the clevis to elevator control horns on each half of horizontal tail. Install receiver in rear of cockpit area and plug aileron, elevator and throttle into appropriate channels.
- Page 8 15. Place battery in fuselage and install Velcro through the slots in battery tray. Strap battery in place as shown. Battery and ESC have pre-installed genuine Deans Ultra plugs for excellent connectivity and reliable performance. 16. Canopy has pre-installed magnets at the front. Insert tab at rear of canopy and snap front into position.
- Page 9 18. The Center of Gravity range for the F-86 is from about 3” to 3-3/8” back from the front of the wing panels in the center. Adjust the position of the battery to achieve correct balance. Never attempt to fly a model that is not correctly balanced. Preparation before flight 19.
- Page 10 Have Fun We hope that you have many pleasant flights with your F-86 Hobby Lobby International 5614 Franklin Pike Circle Brentwood, Tn 37027 www.hobby-lobby.com...
Need help?
Do you have a question about the HLI8601 F-86 Sabre Skyblazers and is the answer not in the manual?
Questions and answers