Table of Contents

Related Manuals for Mountain Models EZ CUB


Summary of Contents for Mountain Models EZ CUB
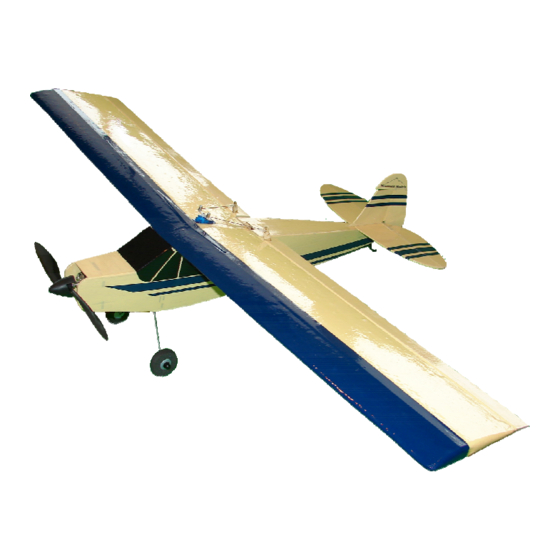
- Page 1 EZ Cub Specifications Wingspan: 36 in. Length: 22.6 in Wing Area: 232 sq. in. Weight (Ready to Fly): 12 oz Wing Loading: 7.4 oz/sq ft Controls: 3 or 4 Version 1.05, February 5, 2008 © 2008 Mountain Models all rights reserved...
- Page 2 Thank you for purchasing the EZ Cub™. The Mountain Models EZ Series™ planes are meant to be the easiest kit build possible, while still having great flying characteristics and high durability. The EZ Series™ can be flown as 4-channel versions (rudder, elevator, throttle, and aileron) or with the higher dihedral wings as 3 channel (rudder, elevator, and throttle).
-
Page 3: Before You Begin
Before You Begin Before you begin building your EZ Cub™, make sure that all the wood sheets and parts, and hardware are present in your kit. In the unlikely event that something is missing, please contact us immediately and we will send it to you right away. - Page 4 2 ea. 1/16” Plywood Aileron horns (Aileron version only) • 1 ea. 0.032” x 9” Wire (Aileron version only) • Parts Bag (Aileron Version Only) 2 ea. Micro EZ Servo Connectors 2 ea. DuBro Micro EZ Links © 2008 Mountain Models all rights reserved...
-
Page 5: General Building Tips
“dirty side” of the parts, NOT the side that is engraved. Secure the T- nuts with thin CA around the outside of the T-nuts AFTER you are sure they are fully seated and flat against the wood. © 2008 Mountain Models all rights reserved... - Page 6 MAKE SURE that the engraved “TOP” on the crutch is facing UP and that the engraved “FRONT” on the former is facing forward. Slide the former into place as shown in the image on the next page. Do NOT glue it yet. © 2008 Mountain Models all rights reserved...
- Page 7 6. Press the 1/16” balsa former into the crutch as shown above. No, you still don’t get to touch the glue bottle. 7. Press the 3/32” balsa lading gear top support into the front 1/16” plywood former as shown below. It gets placed on the “back” of the former. © 2008 Mountain Models all rights reserved...
- Page 8 On the nose, you can use thick CA applied to the doublers, BEFORE you pull the sides fully onto the doublers. This makes for a very well glued nose section with a good bond between doubler and side. © 2008 Mountain Models all rights reserved...
- Page 9 13. Test fit the 1/16” balsa front top sheet. Like above, after it’s in place, secure the joints with thin CA. 14. Put the 1/16” balsa canopy front in place and secure with thin CA, as shown below. © 2008 Mountain Models all rights reserved...
- Page 10 (See image below) 19. Press the 3/32” balsa rear top stab support in place, and glue with thin CA. (shown in above image) © 2008 Mountain Models all rights reserved...
- Page 11 24. Bevel the elevator, like you did the rudder, to a 30 degree angle. 25. Lightly sand the entire fuselage and tail parts. Slightly rounding the outside corners looks better than leaving them square, but you don’t have to if you don’t want to. © 2008 Mountain Models all rights reserved...
-
Page 12: Section 2: Assembling The Wing
5. Read steps 6 through 9 and try a “dry run” before you try gluing anything. You want to make sure you know what you’re about to do, so practice it without glue first. © 2008 Mountain Models all rights reserved... - Page 13 11. Glue the 1/64” plywood “darts” to the top AND bottom spars, as shown below. You can use thick CA if you are careful not to get any on the foam. Use some plastic wrap over your fingers, so you can hold them in place until the glue dries. © 2008 Mountain Models all rights reserved...
- Page 14 The last strip of tape you place should be on the leading edge, around to the top and bottom. Your finished wing will look something like the image below. © 2008 Mountain Models all rights reserved...
-
Page 15: Section 3: Finishing The Fuselage
You can use a balsa aileron or another straight edge across the wing seat area to help make sure the stab is parallel to the wing seat area. © 2008 Mountain Models all rights reserved... - Page 16 9. AILERON VERSION ONLY: Go ahead and hinge the ailerons to the wing at this time, using tape or covering, whichever you are using. Line the ailerons up with the wing tips and make sure the aileron horns are facing “up”. © 2008 Mountain Models all rights reserved...
-
Page 17: Section 4: Assembling The Landing Gear
3. Press the landing gear into the slot in the bottom of the fuselage. This is a fairly tight fit, so be careful. If it’s too tight to get in, LIGHTLY sand the balsa part inside the fuselage to get a good fit. © 2008 Mountain Models all rights reserved... -
Page 18: Section 5: Final Assembly And Flight Prep
CA in the servo holes. This will strengthen the threads that the screws cut. After the CA has fully cured, reinstall the servos. Leave the extra wire through the EZ Connectors, so you can adjust them later. © 2008 Mountain Models all rights reserved... - Page 19 Install the EZ Servo connectors in the aileron servo horn, and install the aileron linkages just like you did for the elevator and rudder. Leave the extra wire through the EZ Connectors, so you can adjust them later. © 2008 Mountain Models all rights reserved...
- Page 20 13. Tighten the EZ Servo connectors with the control surfaces neutral. IMPORTANT FOR AILERON VERSION: Neutral setting for the ailerons is about halfway between flush with the top and bottom surface of the wing. On the EZ Cub™, this is parallel with the top rear fuselage, as shown below.
- Page 21 I’ve seen it happen to a lot of new models. 18. After you’ve trimmed the plane and explored the stall, have some fun and tear up the skies! © 2008 Mountain Models all rights reserved...
Need help?
Do you have a question about the EZ CUB and is the answer not in the manual?
Questions and answers