
Related Manuals for IBM A50


Summary of Contents for IBM A50
-
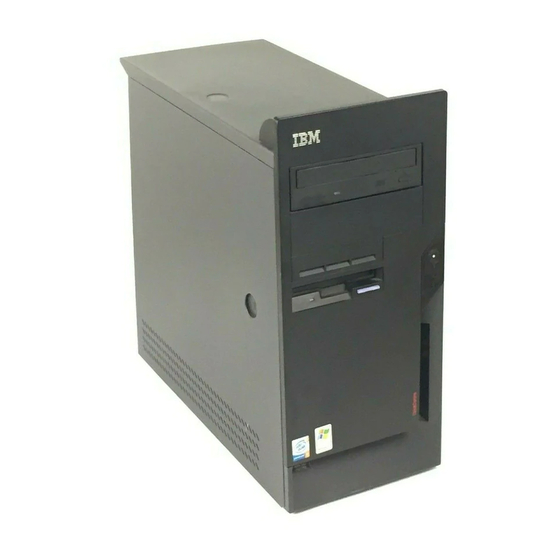
Page 1: User Guide
™ ThinkCentre User Guide Types 8084, 8085, 8126, 8147 Types 8148, 8149, 8174, 8175 Types 8176, 8177, 8178, 8179... - Page 3 ™ ThinkCentre User Guide Types 8084, 8085, 8126, 8147 Types 8148, 8149, 8174, 8175 Types 8176, 8177, 8178, 8179...
- Page 4 Note Before using this information and the product it supports, be sure to read the “Important safety information” on page v and Appendix E, “Notices,” on page 95. Third Edition (May 2004) © Copyright International Business Machines Corporation 2004. All rights reserved. US Government Users Restricted Rights –...
-
Page 5: Table Of Contents
Contents Important safety information ..v Conditions that require immediate action . General safety guidelines . Service . Power cords and power adapters . Extension cords and related devices . Plugs and outlets . Batteries . Heat and product ventilation . - Page 6 Chapter 4. Using the IBM Setup Utility program ....77 Starting the IBM Setup Utility program . Viewing and changing settings . Exiting from the IBM Setup Utility program Using passwords User password .
-
Page 7: Important Safety Information
IBM Support Center for further guidance. v Power cords, plugs, power adapters, extension cords, surge protectors, or power supplies that are cracked, broken or damaged. v Signs of overheating, smoke, sparks or fire. © Copyright IBM Corp. 2004 ® personal computer. Follow... -
Page 8: General Safety Guidelines
v Damage to a battery (such as cracks, dents, creases), discharge from a battery, or a buildup of foreign substances on the battery. v A cracking, hissing or popping sound, or strong odor that comes from the product. v Signs that liquid has been spilled or an object has fallen onto the computer product, the power cord or power adapter. -
Page 9: Extension Cords And Related Devices
Always connect power cords and signal cables in the correct order and ensure that all power cord connectors are securely and completely plugged into receptacles. Do not use any power adapter that shows corrosion at the ac input pins and/or shows signs of overheating (such as deformed plastic) at the ac input or anywhere on the power adapter. -
Page 10: Heat And Product Ventilation
Battery abuse or mishandling can cause the battery to overheat, which can cause gasses or flame to “vent” from the battery pack or coin cell. If your battery is damaged, or if you notice any discharge from your battery or the buildup of foreign materials on the battery leads, stop using the battery and obtain a replacement from the battery manufacturer. -
Page 11: Additional Safety Information
Additional safety information DANGER Electrical current from power, telephone, and communication cables is hazardous. To avoid a shock hazard: v Do not connect or disconnect any cables or perform installation, maintenance, or reconfiguration of this product during an electrical storm. v Connect all power cords to a properly wired and grounded electrical outlet. -
Page 12: Lithium Battery Notice
v Lorsque vous installez, que vous déplacez, ou que vous manipulez le présent produit ou des périphériques qui lui sont raccordés, reportez-vous aux instructions ci-dessous pour connecter et déconnecter les différents cordons. Connexion: 1. Mettez les unités hors tension. 2. Commencez par brancher tous les cordons sur les unités. -
Page 13: Laser Compliance Statement
Laser compliance statement Some IBM Personal Computer models are equipped from the factory with a CD-ROM drive or a DVD-ROM drive. CD-ROM drives and DVD-ROM drives are also sold separately as options. CD-ROM drives and DVD-ROM drives are laser products. - Page 14 DANGER: Certains modèles d’ordinateurs personnels sont équipés d’origine d’une unité de CD-ROM ou de DVD-ROM. Mais ces unités sont également vendues séparément en tant qu’options. L’unité de CD-ROM/DVD-ROM est un appareil à laser. Aux État-Unis, l’unité de CD-ROM/DVD-ROM est certifiée conforme aux normes indiquées dans le sous-chapitre J du DHHS 21 CFR relatif aux produits à...
-
Page 15: Overview
Overview Thank you for selecting an IBM the latest advances in computer technology and can be upgraded as your needs change. This publication supports several computer models. Information in this section will help you identify your computer and help you find the chapter that contains information specific to your computer. -
Page 16: Identifying Your Computer
Identifying your computer User Guide See Chapter 1, “Types 8149, 8177, and 8178,” on page 1. See Chapter 2, “Types 8126, 8174, 8175, and 8176,” on page 25. See Chapter 3, “Types 8084, 8085, 8147, 8148, and 8179,” on page 51. -
Page 17: Chapter 1. Types 8149, 8177, And 8178
Chapter 1. Types 8149, 8177, and 8178 This chapter provides an introduction to the features and options that are available for your computer. You can expand the capabilities of your computer by adding memory, adapters, or drives. When installing an option, use these instructions along with the instructions that come with the option. - Page 18 v EIDE CD drive or DVD drive (some models) Video subsystem v An integrated graphics controller for a Video Graphics Array (VGA) monitor v Accelerated graphics port (AGP) video adapter slot on the system board (some models) Audio subsystem v AC’97 with ADI 1981B Audio Codec v Line in, line out, and microphone connectors on the rear panel Connectivity v 10/100 Mbps integrated Intel Ethernet controller that supports the Wake on...
- Page 19 Security features v User and administrator passwords v Support for the addition of a rope clip and lockable cable v Support for the addition of an integrated cable lock v Startup sequence control v Startup without diskette drive, keyboard, or mouse v Unattended start mode v Diskette and hard disk I/O control v Serial and parallel port I/O control...
-
Page 20: Specifications
Specifications This section lists the physical specifications for your computer. Dimensions Height: 140 mm (5.5 in.) Width: 425 mm (16.7 in.) Depth: 425 mm (16.7 in) Weight Minimum configuration as shipped: 10.0 kg (22 lb) Maximum configuration: 11.4 kg (25.0 lb) Environment Air temperature: System on: 10°... -
Page 21: Available Options
Available options The following are some available options: v External options – Parallel port devices, such as printers and external drives – Serial port devices, such as external modems and digital cameras – Audio devices, such as external speakers for the sound system –... -
Page 22: Installing External Options
v Prevent others from touching components. v When you install a new option, touch the static-protective package containing the option to a metal expansion-slot cover or other unpainted metal surface on the computer for at least two seconds. This reduces static electricity in the package and your body. -
Page 23: Locating The Connectors On The Rear Of Your Computer
Locating the connectors on the rear of your computer The following illustration shows the locations of the connectors on the rear of the computer. 1 Power connector 2 Mouse connector 3 Parallel connector 4 Ethernet connector 5 Audio line in connector 6 PCI slots 7 AGP slot (some models) Note: Some connectors on the rear of the computer are color-coded to help you to... -
Page 24: Obtaining Device Drivers
Connector Mouse connector Parallel connector Ethernet connector Audio line in connector Audio line out connector Microphone connector USB connectors Serial connector Keyboard connector Obtaining device drivers You can obtain device drivers for operating systems that are not preinstalled at http://www.ibm.com/pc/support/ on the World Wide Web. Installation instructions are provided in README files with the device-driver files. -
Page 25: Removing The Cover
Removing the cover Important: Read “Important safety information” on page v and “Handling static-sensitive devices” on page 5 before removing the cover. To remove the cover: 1. Shut down your operating system, remove any media (diskettes, CDs, or tapes) from the drives, and turn off all attached devices and the computer. 2. -
Page 26: Locating Components
Locating components The following illustration will help you locate the various components in your computer. 1 CD drive or DVD drive 2 USB connector 3 USB connector 4 Optional drive bay 5 Hard disk drive 6 Diskette drive Identifying parts on the system board The system board (sometimes called the planar or motherboard) is the main circuit board in your computer. -
Page 27: Installing Memory
The following illustration shows the locations of parts on the system board. 1 Microprocessor 2 DIMM connector 1 3 DIMM connector 2 4 DIMM connector 3 5 DIMM connector 4 6 Power connector 7 Diskette drive connector 8 Primary IDE connector 9 Secondary IDE connector 10 SATA1 connector Installing memory... -
Page 28: Installing Adapters
To install a DIMM: 1. Remove the cover. See “Removing the cover” on page 9. 2. You might have to remove an adapter to gain access to the DIMM slots. See “Installing adapters” on page 12. 3. To locate the DIMM connectors. See “Identifying parts on the system board” on page 10. - Page 29 2. Remove the adapter-slot-cover latch and the slot cover for the appropriate expansion slot. 3. Remove the adapter from its static-protective package. 4. Install the adapter into the appropriate slot on the system board. 5. Install the adapter-slot-cover latch. What to do next: v To work with another option, go to the appropriate section.
-
Page 30: Installing Internal Drives
Installing internal drives This section provides information and instructions for installing and removing internal drives. Internal drives are devices that your computer uses to read and store data. You can add drives to your computer to increase storage capacity and to enable your computer to read other types of media. -
Page 31: Installing A Drive
The following illustration shows the locations of the drive bays. The following list describes some of the drives that you can install in each bay and their height requirements: 1 Bay 1 - Maximum height: 43.0 mm (1.7 in.) 2 Bay 2 - Maximum height: 43.0 mm (1.7 in.) 3 Bay 3 - Maximum height: 25.8 mm (1.0 in.) 4 Bay 4 - Maximum height: 25.8 mm (1.0 in.) Notes:... - Page 32 4. Remove the metal shield from the drive bay by inserting a flat-blade screwdriver into one of the slots and gently prying it loose. 5. Pivot the drive-bay latch handle toward the front of the computer and then pivot the drive-bay cage upward, as shown, until it is latched in the upright position.
-
Page 33: Connecting The First Cd Drive Or Dvd Drive
7. Install the drive into the bay. Align the screw holes and insert the two screws. 8. Pivot the drive-bay cage back into place. 9. A hard disk drive requires two cables; a power cable that connects to the power supply and a signal cable that connects to the system board. -
Page 34: Connecting A Serial Ata Hard Disk Drive
3. Connect one end of the signal cable to the drive and the other to the secondary IDE connector on the system board. To reduce electronic noise, use the connectors at the end of the cable only. 4. Your computer has extra power connectors for additional drives. Connect a power connector to the drive. -
Page 35: Identifying Security Locks
Identifying security locks The following illustration shows the locations of the security features on the rear of the computer. 1 Rope clip 2 Integrated cable lock Rope clip Using a 3/16-inch or 5-mm rope clip (sometimes referred to as a U-bolt), a steel security cable, and a padlock can secure your computer to a desk, table, or other non-permanent fixture. - Page 36 5. Thread the cable through the rope clip and around an object that is not a part of or permanently secured to the building structure or foundation, and from which it cannot be removed; then fasten the cable ends together with a lock. User Guide...
-
Page 37: Integrated Cable Lock
Integrated cable lock With an integrated cable lock (sometimes referred to as a Kensington lock), you can secure your computer to a desk, table, or other non-permanent fixture. The cable lock attaches to a security slot at the rear of your computer and is operated with a key. -
Page 38: Erasing A Lost Or Forgotten Password (Clearing Cmos)
Refer to “Lithium battery notice” on page x for information about replacing and disposing of the battery. To change the battery: 1. Turn off the computer and all attached devices. 2. Remove the cover. See “Removing the cover” on page 9. 3. -
Page 39: Replacing The Cover And Connecting The Cables
6. Replace the cover and connect the power cord. See “Replacing the cover and connecting the cables.” 7. Restart the computer, leave it on for approximately 10 seconds. Turn off the computer by holding the power switch for approximately 5 seconds. The computer will turn off. - Page 40 User Guide...
-
Page 41: Chapter 2. Types 8126, 8174, 8175, And 8176
Chapter 2. Types 8126, 8174, 8175, and 8176 This chapter provides an introduction to the features and options that are available for your computer. You can expand the capabilities of your computer by adding memory, adapters, or drives. When installing an option, use these instructions along with the instructions that come with the option. - Page 42 Internal drives v 3.5-inch, 1.44 MB diskette drive v Internal hard disk drive v EIDE CD drive or DVD drive (some models) Video subsystem v An integrated graphics controller for a Video Graphics Array (VGA) monitor v Accelerated graphics port (AGP) video adapter slot on the system board (some models) Audio subsystem v AC’97 with ADI 1981B Audio Codec...
- Page 43 v Automatic 50/60 Hz input frequency switching v Advanced Power Management support v Advanced Configuration and Power Interface (ACPI) support Security features v User and administrator passwords v Support for the addition of a rope clip and lockable cable v Support for the addition of an integrated cable lock (see Access IBM) v Support for a padlock on the chassis v Startup sequence control v Startup without diskette drive, keyboard, or mouse...
-
Page 44: Specifications
Specifications This section lists the physical specifications for your computer. Dimensions Height: 398 mm (15.67 in.) Width: 180 mm (7.08 in.) Depth: 402 mm (15.82 in.) Weight Minimum configuration as shipped: 7.6 kg (16.8 lb) Maximum configuration: 9.97 kg (22 lb) Environment Air temperature: System on: 10°... -
Page 45: Available Options
Available options The following are some available options: v External options – Parallel port devices, such as printers and external drives – Serial port devices, such as external modems and digital cameras – Audio devices, such as external speakers for the sound system –... -
Page 46: Installing External Options
v Prevent others from touching components. v When you install a new option, touch the static-protective package containing the option to a metal expansion-slot cover or other unpainted metal surface on the computer for at least two seconds. This reduces static electricity in the package and your body. -
Page 47: Locating The Connectors On The Front Of Your Computer
Locating the connectors on the front of your computer The following illustration shows the locations of the USB connectors on the front of the computer. 1 USB connector 2 USB connector Chapter 2. Types 8126, 8174, 8175, and 8176... -
Page 48: Locating The Connectors On The Rear Of Your Computer
Locating the connectors on the rear of your computer The following illustration shows the locations of the connectors on the back of the computer. 1 Power connector 2 Mouse connector 3 Keyboard connector 4 USB connectors 5 Serial connector 6 Parallel connector 7 VGA monitor connector Note: Some connectors on the rear of the computer are color-coded to help you to determine where to connect the cables on your computer. -
Page 49: Obtaining Device Drivers
Connector Mouse connector Keyboard connector USB connectors Serial connector Parallel connector Ethernet connector Microphone connector Audio line out connector Audio line in connector Obtaining device drivers You can obtain device drivers for operating systems that are not preinstalled at http://www.ibm.com/pc/support/ on the World Wide Web. Installation instructions are provided in README files with the device-driver files. -
Page 50: Removing The Cover
Removing the cover Important Read “Important safety information” on page v and “Handling static-sensitive devices” on page 29 before removing the cover. To remove the cover: 1. Shut down your operating system, remove any media (diskettes, CDs, or tapes) from the drives, and turn off all attached devices and the computer. 2. -
Page 51: Locating Components
Locating components The following illustration will help you locate the various components in your computer. 1 Microprocessor and heat sink 2 DIMMs 3 AGP slot (some models) Identifying parts on the system board The system board (sometimes called the planar or motherboard) is the main circuit board in your computer. -
Page 52: Installing Memory
The following illustration shows the locations of parts on the system board. 1 Microprocessor 2 DIMM connector 1 3 DIMM connector 2 4 DIMM connector 3 5 DIMM connector 4 6 Power connector 7 Diskette drive connector 8 Primary IDE connector 9 Secondary IDE connector 10 SATA1 connector Installing memory... - Page 53 To install a DIMM: 1. Remove the cover. See “Removing the cover” on page 34. 2. You might have to remove an adapter to gain access to the DIMM slots. See “Installing adapters” on page 38. 3. Locate the DIMM connectors. See “Identifying parts on the system board” on page 35.
-
Page 54: Installing Adapters
Installing adapters This section provides information and instructions for installing and removing adapters. Your computer has three expansion slots for PCI adapters. One slot, used for an AGP adapter, is available on some models. You can install an adapter up to 228 mm (9 inches) long in the AGP slot, PCI slot 2, or PCI slot 3. -
Page 55: Installing Internal Drives
5. Secure the adapter with the screw as shown. What to do next v To work with another option, go to the appropriate section. v To complete the installation, go to “Replacing the cover and connecting the cables” on page 48. Installing internal drives This section provides information and instructions for installing and removing internal drives. -
Page 56: Drive Specifications
Drive specifications Your computer comes with the following IBM-installed drives: v A CD drive or DVD drive in bay 1 v A 3.5-inch diskette disk drive in bay 3 v A 3.5-inch hard drive in bay 4 Any bay that does not have a drive installed has a static shield and bay panel installed. -
Page 57: Installing A Drive
Installing a drive To install an internal drive, follow these steps: 1. Remove the cover. See “Removing the cover” on page 34. 2. If your computer has a CD drive or DVD drive, you might need to remove the signal and power cables from the drive. 3. -
Page 58: Connecting The First Cd Drive Or Dvd Drive
6. Install the drive into the bay. Align the screw holes and install two screws to secure the drive. 7. A hard disk drive requires two cables; a power cable that connects to the power supply and a signal cable that connects to the system board. v A parallel ATA hard disk drive requires a four-wire power cable. -
Page 59: Connecting A Serial Ata Hard Disk Drive
Connecting an additional CD drive, DVD drive, or parallel ATA hard disk drive An additional drive can be connected to either the primary IDE or secondary IDE connector. 1. Locate an available IDE connector on the three-connector signal cable attached to either the primary IDE or secondary IDE connector on the system board. -
Page 60: Identifying Security Locks
Identifying security locks The following illustration shows the locations of the security features on the rear of the computer. 1 Rope clip 2 Integrated cable lock 3 Padlock loop Rope clip Using a 3/16-inch or 5-mm rope clip (sometimes referred to as a U-bolt), a steel security cable, and a padlock can secure your computer to a desk, table, or other non-permanent fixture. - Page 61 5. Thread the cable through the rope clip and around an object that is not a part of or permanently secured to the building structure or foundation, and from which it cannot be removed; then fasten the cable ends together with a lock. Chapter 2.
-
Page 62: Integrated Cable Lock
Integrated cable lock With an integrated cable lock (sometimes referred to as a Kensington lock), you can secure your computer to a desk, table, or other non-permanent fixture. The cable lock attaches to a security slot at the rear of your computer and is operated with a key. -
Page 63: Erasing A Lost Or Forgotten Password (Clearing Cmos)
configuration information (including passwords) are lost. An error message is displayed when you turn on the computer. Refer to “Lithium battery notice” on page x for information about replacing and disposing of the battery. To change the battery: 1. Turn off the computer and all attached devices. 2. -
Page 64: Replacing The Cover And Connecting The Cables
4. If necessary, see “Installing adapters” on page 38 to remove any adapters that impede access to the Clear CMOS/Recovery jumper. 5. Move the jumper from the standard position (pins 1 and 2) to the maintenance or configure position (pins 2 and 3). 6. - Page 65 5. To update the configuration, see Chapter 4, “Using the IBM Setup Utility program,” on page 77. Chapter 2. Types 8126, 8174, 8175, and 8176...
- Page 66 User Guide...
-
Page 67: Copyright Ibm Corp
Chapter 3. Types 8084, 8085, 8147, 8148, and 8179 This chapter provides an introduction to the features and options that are available for your computer. You can expand the capabilities of your computer by adding memory, adapters, or drives. When installing an option, use these instructions along with the instructions that come with the option. - Page 68 v 512 KB flash memory for system programs Internal drives v 3.5-inch, 1.44 MB diskette drive v Internal hard disk drive v EIDE CD-ROM or DVD-ROM drive (some models) Video subsystem v An integrated graphics controller for a Video Graphics Array (VGA) monitor v Accelerated graphics port (AGP) video adapter slot on the system board (some models) Audio subsystem...
- Page 69 Power v 230 W power supply with manual voltage selection switch v Automatic 50/60 Hz input frequency switching v Advanced Power Management support v Advanced Configuration and Power Interface (ACPI) support Security features v User and administrator passwords v Support for the addition of a rope clip and lockable cable v Support for the addition of an integrated cable lock v Support for a padlock on the chassis v Startup sequence control...
-
Page 70: Specifications
Specifications This section lists the physical specifications for your computer. Dimensions Height: 413 mm (16.25 in.) Width: 191 mm (7.5 in.) Depth: 406 mm (16 in.) Weight Minimum configuration as shipped: 9.1 kg (20 lb) Maximum configuration: 11.4 kg (25.0 lb) Environment Air temperature: System on: 10°... -
Page 71: Available Options
Available options The following are some available options: v External options – Parallel port devices, such as printers and external drives – Serial port devices, such as external modems and digital cameras – Audio devices, such as external speakers for the sound system –... -
Page 72: Installing External Options
v Always handle components carefully. Handle adapters and memory modules by the edges. Never touch any exposed circuitry. v Prevent others from touching components. v When you install a new option, touch the static-protective package containing the option to a metal expansion-slot cover or other unpainted metal surface on the computer for at least two seconds. -
Page 73: Locating The Connectors On The Front Of Your Computer
Locating the connectors on the front of your computer The following illustration shows the locations of the connectors on the front of the computer. Note: Not all computer models will have the following connectors. 1 IEEE 1394 connector 2 Microphone connector 3 Headphone connector 4 USB connector 5 USB connector... -
Page 74: Locating The Connectors On The Rear Of Your Computer
Locating the connectors on the rear of your computer The following illustration shows the locations of the connectors on the back of the computer. 1 Power connector 2 Mouse connector 3 Keyboard connector 4 USB connectors 5 Serial connector 6 Parallel connector 7 VGA monitor connector Note: Some connectors on the rear of the computer are color-coded to help you to determine where to connect the cables on your computer. -
Page 75: Obtaining Device Drivers
Connector Mouse connector Keyboard connector USB connectors Serial connector Parallel connector Ethernet connector Microphone connector Audio line out connector Audio line in connector Obtaining device drivers You can obtain device drivers for operating systems that are not preinstalled at http://www.ibm.com/pc/support/ on the World Wide Web. Installation instructions are provided in README files with the device-driver files. -
Page 76: Removing The Cover
Removing the cover Important Read “Important safety information” on page v and “Handling static-sensitive devices” on page 55 before removing the cover. To remove the cover: 1. Shut down your operating system, remove any media (diskettes, CDs, or tapes) from the drives, and turn off all attached devices and the computer. 2. -
Page 77: Locating Components
Locating components The following illustration will help you locate the various components in your computer. 1 Microprocessor and heat sink 2 DIMMs 3 AGP slot (some models) Identifying parts on the system board The system board (sometimes called the planar or motherboard) is the main circuit board in your computer. -
Page 78: Installing Memory
The following illustration shows the locations of parts on the system board. 1 Microprocessor 2 DIMM connector 1 3 DIMM connector 2 4 DIMM connector 3 5 DIMM connector 4 6 Power connector 7 Diskette drive connector 8 Primary IDE connector 9 Secondary IDE connector 10 SATA1 connector Installing memory... -
Page 79: Installing Adapters
To install a DIMM: 1. Remove the cover. See “Removing the cover” on page 60. 2. You might have to remove an adapter to gain access to the DIMM slots. See “Installing adapters.” 3. Locate the DIMM connectors. See “Identifying parts on the system board” on page 61. - Page 80 2. Remove the adapter-slot-cover latch and the slot cover for the appropriate expansion slot. 3. Remove the adapter from its static-protective package. 4. Install the adapter into the appropriate slot on the system board. 5. Install the adapter-slot-cover latch. What to do next v To work with another option, go to the appropriate section.
-
Page 81: Installing Internal Drives
Installing internal drives This section provides information and instructions for installing and removing internal drives. Internal drives are devices that your computer uses to read and store data. You can add drives to your computer to increase storage capacity and to enable your computer to read other types of media. -
Page 82: Installing A Drive
The following illustration shows the locations of the drive bays. The following list describes some of the drives you can install in each bay and their height requirements: 1 Bay 1 - Maximum height: 43.0 mm (1.7 in.) 2 Bay 2 - Maximum height: 43.0 mm (1.7 in.) 3 Bay 3 - Maximum height: 25.8 mm (1.0 in.) 4 Bay 4 - Maximum height: 25.8 mm (1.0 in.) 5 Bay 5 - Maximum height: 25.8 mm (1.0 in.) - Page 83 4. Remove the metal shield from the drive bay by inserting a flat-blade screwdriver into one of the slots and gently prying it loose. 5. Make sure the drive that you are installing is set correctly as either a master or a slave device.
- Page 84 7. Install the drive into the bay and lock it into position. Note: Some drives might require screws to secure the drive into the bay. If this 8. A hard disk drive requires two cables; a power cable that connects to the power supply and a signal cable that connects to the system board.
-
Page 85: Installing Security Features
2. Locate the secondary IDE connector on the system board. See “Identifying parts on the system board” on page 61. 3. Connect one end of the signal cable to the drive and the other to the secondary IDE connector on the system board. To reduce electronic noise, use the connectors at the end of the cable only. -
Page 86: Identifying Security Locks
Identifying security locks The following illustration shows the locations of the security features on the rear of the computer. 1 Rope clip 2 Integrated cable lock Rope clip Using a 3/16-inch or 5-mm rope clip (sometimes referred to as a U-bolt), a steel security cable, and a padlock can secure your computer to a desk, table, or other non-permanent fixture. - Page 87 5. Thread the cable through the rope clip and around an object that is not a part of or permanently secured to the building structure or foundation, and from which it cannot be removed; then fasten the cable ends together with a lock. Chapter 3.
-
Page 88: Integrated Cable Lock
Integrated cable lock With an integrated cable lock (sometimes referred to as a Kensington lock), you can secure your computer to a desk, table, or other non-permanent fixture. The cable lock attaches to a security slot at the rear of your computer and is operated with a key. -
Page 89: Erasing A Lost Or Forgotten Password (Clearing Cmos)
The battery normally requires no charging or maintenance throughout its life; however, no battery lasts forever. If the battery fails, the date, time, and configuration information (including passwords) are lost. An error message is displayed when you turn on the computer. Refer to “Lithium battery notice”... -
Page 90: Replacing The Cover And Connecting The Cables
3. Locate the Clear CMOS/Recovery jumper on the system board. See “Identifying parts on the system board” on page 61. 4. If necessary, see “Installing adapters” on page 63 to remove any adapters that impede access to the Clear CMOS/Recovery jumper. 5. - Page 91 4. Reconnect the external cables and power cords to the computer. See “Installing external options” on page 56. 5. To update the configuration, see Chapter 4, “Using the IBM Setup Utility program,” on page 77. Chapter 3. Types 8084, 8085, 8147, 8148, and 8179...
- Page 92 User Guide...
-
Page 93: Chapter 4. Using The Ibm Setup Utility Program
Chapter 4. Using the IBM Setup Utility program The IBM Setup Utility program is stored in the electrically erasable programmable read-only memory (EEPROM) of your computer. The IBM Setup Utility program is used to view and change the configuration settings of your computer, regardless of which operating system you are using. -
Page 94: Administrator Password
Administrator password Setting an administrator password deters unauthorized persons from changing configuration settings. If you are responsible for maintaining the settings of several computers, you might want to set an administrator password. After you set an administrator password, a password prompt is displayed each time you try to access the IBM Setup Utility program. -
Page 95: Selecting A Temporary Startup Device
Selecting a temporary startup device Use this procedure to startup from any boot device. Note: Not all CDs, hard disks, and diskettes are startable (bootable). 1. Turn off your computer. 2. Press and hold the F12 key then turn on your computer. When the Startup Device Menu displays, release the F12 key. - Page 96 User Guide...
-
Page 97: Appendix A. Updating System Programs
Appendix A. Updating system programs This appendix contains information about updating system programs and how to recover from a POST/BIOS update failure. System programs System programs are the basic layer of software that is built into your computer. They include the power-on self-test (POST), the basic input/output system (BIOS) code, and the IBM Setup Utility program. -
Page 98: Recovering From A Post/Bios Update Failure
8. From your browser, Click Back to return to the list of files. Carefully follow the printed instructions to download, extract, and install the update. Recovering from a POST/BIOS update failure If power to your computer is interrupted while POST/BIOS is being updated (flash update), your computer might not restart correctly. -
Page 99: Appendix B. Cleaning The Mouse
Appendix B. Cleaning the mouse This appendix provides instructions on how to clean your mouse. The procedure will be different depending on which type of mouse you have. Cleaning an optical mouse If you experience some problems with your optical mouse, check the following: 1. - Page 100 3. Place your hand over the retainer ring and ball 2 , and then turn the mouse over, top side up, so that the retainer ring and ball fall out into your hand. 4. Wash the ball in warm, soapy water then dry it with a clean cloth. Blow air carefully into the ball cage 4 to dislodge dust and lint.
-
Page 101: Appendix C. Manual Modem Commands
Appendix C. Manual modem commands The following section lists commands for manually programming your modem. Commands are accepted by the modem while it is in Command Mode. Your modem is automatically in Command Mode until you dial a number and establish a connection. - Page 102 Command Sr=n User Guide Function Force modem off-hook (make busy) Note: H1 command is not supported for Italy Display product-identification code Factory ROM checksum test Internal memory test Firmware ID Reserved ID Low speaker volume Low speaker volume Medium speaker volume High speaker volume Internal speaker off Internal speaker on until carrier detected...
-
Page 103: Extended At Commands
Extended AT commands Command &C_ &D_ &F_ &G_ &K_ &M_ &P_ &R_ &S_ &T_ &V Function &C0 Force Carrier Detect Signal High (ON) &C1 Turn on CD when remote carrier is present &D0 Modem ignores the DTR signal &D1 Modem returns to Command Mode after DTR toggle &D2 Modem hangs up, returns to the Command... -
Page 104: Mnp/V.42/V.42Bis/V.44 Commands
Command &W_ +MS? +MS=? +MS=a,b,c,e,f MNP/V.42/V.42bis/V.44 commands Command &Q_ +DS44=0, 0 +DS44=3, 0 +DS44? +DS44=? User Guide Function &V1 Display Last Connection Statistics &W0 Stores the active profile as Profile 0 &W1 Stores the active profile as Profile 1 Disable auto-retrain Enable auto-retrain Displays the current Select Modulation settings... -
Page 105: Fax Class 1 Commands
Fax Class 1 commands +FAE=n +FCLASS=n +FRH=n +FRM=n +FRS=n +FTH=n +FTM=n +FTS=n Fax Class 2 commands +FCLASS=n +FAA=n +FAXERR +FBOR +FBUF? +FCFR +FCLASS= +FCON +FCIG +FCIG: +FCR +FCR= +FCSI: +FDCC= +FDCS: +FDCS= +FDIS: +FDIS= +FDR +FDT= +FDTC: +FET: +FET=N +FHNG +FLID= +FLPL +FMDL? -
Page 106: Voice Commands
+FPHCTO +FPOLL +FPTS: +FPTS= +FREV? +FSPT +FTSI: Voice commands #BDR #CID #CLS #MDL? #MFR? #REV? #VBQ? #VBS #VBT #VCI? #VLS #VRA #VRN #VRX #VSDB #VSK #VSP #VSR #VSS #VTD #VTM #VTS #VTX User Guide Phase C time out. Indicates polling request. Page transfer status. - Page 107 Attention Switzerland User: If your Swisscom phone line does not have Taxsignal switched OFF, modem function may be impaired. The impairment may be resolved by a filter with the following specifications: Telekom PTT SCR-BE Taximpulssperrfilter-12kHz PTT Art. 444.112.7 Bakom 93.0291.Z.N Appendix C.
- Page 108 User Guide...
-
Page 109: Appendix D. Customer Replaceable Unit (Cru) Parts List
Appendix D. Customer replaceable unit (CRU) parts list For your computer, the following parts are designated customer replaceable unit (CRU) parts. Refer to the warranty section of your Quick Reference for more information. CRU parts list Air duct with/without fan All bezels All cables All external speakers... - Page 110 User Guide...
-
Page 111: Appendix E. Notices
Appendix E. Notices IBM may not offer the products, services, or features discussed in this document in all countries. Consult your local IBM representative for information on the products and services currently available in your area. Any reference to an IBM product, program, or service is not intended to state or imply that only that IBM product, program, or service may be used. -
Page 112: Television Output Notice
Television output notice The following notice applies to models that have the factory-installed television-output feature. This product incorporates copyright protection technology that is protected by method claims of certain U.S. patents and other intellectual property rights owned by Macrovision Corporation and other rights owners. Use of this copyright protection technology must be authorized by Macrovision Corporation, and is intended for home and other limited viewing uses only unless otherwise authorized by Macrovision Corporation. -
Page 113: Index
Index adapters accelerated graphics port (AGP) 5, 29, 55 installing Types 8084, 8085, 8147, 8148, and 8179 63 Types 8126, 8174, 8175, and 8176 38 Types 8149, 8177, and 8178 12 peripheral component interconnect (PCI) 5, 29, 55 slots 12, 38, 63 audio line in connector 8, 33, 59 audio line out connector 8, 33, 59 audio, subsystem 2, 26, 52... - Page 114 mouse connector 8, 33, 59 noise level 4, 28, 54 options available 5, 29, 55 external 5, 29, 55 internal 5, 29, 55 parallel connector 8, 33, 59 password erasing 22, 47, 73 lost or forgotten 22, 47, 73 setting, changing, deleting 78 physical specifications Types 8084, 8085, 8147, 8148, and 8179 54 Types 8126, 8174, 8175, and 8176 28...
- Page 116 Part Number: 19R0764 Printed in USA (1P) P/N: 19R0764...
Need help?
Do you have a question about the A50 and is the answer not in the manual?
Questions and answers