
Related Manuals for Unicorn LS2-H520


Summary of Contents for Unicorn LS2-H520
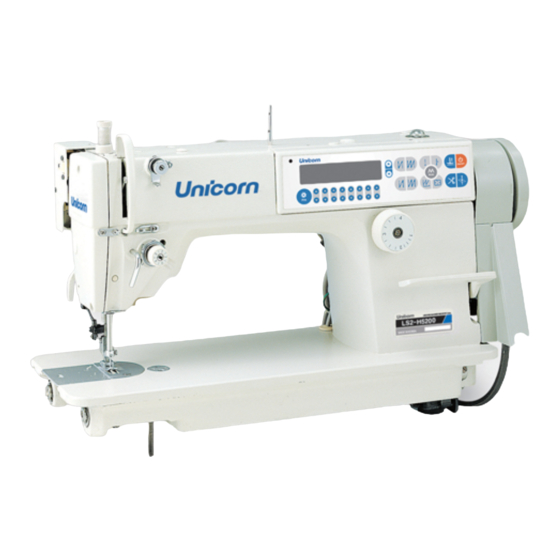
- Page 1 LS2-H520 / LS2-H5200 SINGLE NEEDLE NEEDLE FEED LOCK STITCH SEWING MACHINE / WITH THREAD TRIMMER 1본침 침송 본봉 재봉기 / 자동 사절 재봉기 OPERATION MANUAL 사 용 설 명 서 PART BOOK 부 품 명 세 서...
- Page 2 지침서 매뉴얼 안 전 지 침 서 ★ 먼저, 유니콘 공업용 미싱을 구입해 주셔서 감사의 말씀을 드립니다. 구입 후 제품을 사용하시기 전에 별도로 첨부된 안전 지침서를 숙지하시여 안전사고를 예방합시다. 자사의 미싱은 작업 시 이송기구, 바늘, 천평이 정상적으로 작동이 되도록 조립되어 있으나 사용자의 사용 의도에...
-
Page 3: Safety Instructions
INSTRUCTION MANUAL SAFETY INSTRUCTIONS ★ Thank you very much for buying a UNICORN sewing machine. Before using your new machine, please read there safety instructions together with the separate instruction manual for the machine. With industrial sewing machines, it is normal to carry out work while positioned directly in front of moving parts such as the needle and thread take-up lever, and consequently there is always a danger of injury that can be caused by these parts. - Page 4 ꍾ 안전 주의 ★ 사용 후 최소한 5분 대기후 전원을 off 시켜 콘센트로부터 전원코드를 분리시켜 놓으세요. 그렇지 않으면 화재 시 높은 전압에 의한 심한 상해를 초래할 수 있습니다. 설 치 시 ★ 모든 코드는 작동부로부터 25㎜ 떨어져 ★ 기계 설치 시 반드시 숙련된 기술자가 있어야...
-
Page 5: Notes On Safety
★ Machine installation should onl y be ★ All cords should be secured at least carried out by a qual ified technician. ★ Conta ct your Unicorn dealer or a 25 mm away from any moving parts. qualified electricia n for any electrical Furthermore. - Page 6 ․ when threading the needle Unicorn dea ler or a qualified technician. ․ when replacing the bobbin and needle ★ If the machine develops a problem, ․ when not using the machine and conta ct your nearest Unicorn dealer or when leaving the machine una ttended.
-
Page 7: Maintenance And Inspection
★ Ask your Unicorn dealer or a qualified observe all saf ety precautions. el ectrician to carry out any maintenance ★ Use only the proper replacement parts and inspection of the electrica l system. -
Page 8: Warning Labels
Please follow the instruction on the labels at all times when using the machine. if the label have been removed or are difficult to read, please contract your nearest UNICORN dealer ※ The positions of the labels may vary slightly depending on the model of sewing machine or motor. - Page 9 작동전 주의사항 / PRECAUTIONS BEFORE STARTING OPERATION ☞ 기계를 작동하기 전에 필히 유수판의 기름을 확인하시고 기름이 없는 상태에서는 절대로 기계를 작동하지 마십시오 Please check oil of oil pan before sewing the machine. If the machine is lubricated by a drop, never operate the machine before lubricating.
-
Page 10: Table Of Contents
ꌯ 차례 / CONTENTS 2. 와이퍼기구/Thread wiper ········································ 7 사양 / SPECIFICATIONS ······································ 1 조 정 / ADJUSTMENT ···································8~16 벨트 거는 방법 / INSTALLING THE BELT 1. 침봉높이의 조정/Adjusting the needle bar ··················································································· 1 height ··········································································· 8 2. 바늘과 가마의 타이밍 조정/Adjusting the rotary 급... -
Page 11: 사양 / Specifications
미싱의 사양/ SPECIFICATIONS 모델/Modal LS2-H520 LS2-H5200 용도/Application 중후물/Medium materials 미싱회전수/Max. Sewing speed 4500spm 최대땀길이/Max. Stitch length 5.4 mm 톱니높이/Feed dog height 0.8 mm 무릎올림/Using knee 13 mm 최대노루발높이/ Max.Presser foot height 올림대/presser bar lifter 6 mm 바늘/Needle type DB× 1#14(#11∼#18) 노루발압/Presser foot pressure... -
Page 12: 급 유 / Lubrication
급 유 / LUBRICATION 1. 급 유 / Lubrication ★ 기름은 좌측의 선(HIGH)까지 천천히 넣어주십시오. 우측의 선(LOW)에서 기름이 내려가면 급유해 주십시오. ★ 기름이 오염되었으면 기름덮개나사①을 빼내고, 기름을 바꿔주십시오. ★ 자석②와 유수판에 쌓인 오염을 깨끗이 닦아주십시오. ※ 기름은 스핀들15 기름을 사용해주십시오. ★... -
Page 13: 올바른 사용방법 / Operation
올바른 사용방법 / OPERATION 1. 발판조작 / Pedal operation ★ 발판을 가볍게 ①까지 밟아서 저속재봉을 확인해주십시오. ②까지 밟으면 고속재봉을 합니다. ★ 발판을 앞으로 밟은후 중립(발판에서 발을 때었을때)③이 되면 바늘이 침판에서 내려간 위치에서 정지하는 것을 확인해주십시오. (침하정지를 설정한 경우) ★ 발판을 ④쪽으로 역으로 밟으면(또는 발판을 ④쪽으로 역으로 밟은 후, 중 립③으로 돌아온 경우 ) 사절후 바늘이 침판에서... -
Page 14: 윗실 통과시키는 방법/Threading The Needle
올바른 사용방법 / OPERATION 3. 윗실 통과시키는 방법 / Threading the needle - 4 -... -
Page 15: 보빈의 설치방법/Removing And Attaching
올바른 사용방법 / OPERATION 4. 보빈의 설치방법 / Removing and attaching the bobbin 1. 탈착방법 ★ 보빈케이스의 손잡이①를 잡고, 탈착해주십시오. (보빈②은 손잡이를 놓으면 빠집니다.) . 설치방법 (1) 보빈케이스에 보빈을 넣어주십시오. (2) 실을 틈③에 통과시켜 스프링④ 아래를 빠져나가게 해주십시오. (3) 실을 스프링④에서 잡아 당겨주십시오. 1. -
Page 16: 사조자의 조절 / Adjusting The Thread Tension
올바른 사용방법 / OPERATION 6. 사조자 / Adjusting the thread tension ★ 밑 실 의 상 태 는 실 끝 을 잡 았 을 때 , 보 빈 케이 스 가 저 절 로 흘 러 내리 지 않 을 정 도 로 약 하 게 나 사 ①를 돌려 서 조... -
Page 17: Mechanism
기구 설명 / MECHANICAL DESCRIPTION 1. 상축․침봉기구 / Upper shaft and deedle bar mechanism 1. 사절기구 (Thread trimmer) 사절기구는 그림과 같이 이동칼①, 고정칼②, 실가리개③, 이동칼잡이④, 이동칼잡이스토퍼⑤, 사절축⑥, 사절캠레버(조)⑦, 사절캠⑧, 사절 솔레노이드⑨로 구성되어 있습니다. The thread trimmer cinsists of the movable knife①, fixed knife②, lower thread finger③, movable knife holder④, knife holder presser⑤, forked shaft⑥, thread trimmer cam... -
Page 18: 조 정 / Adjustment
조 정 / ADJUSTMENT 1. 침봉높이의 조정 / Adjusting the needle bar height [침봉높이] ★ 미싱풀리를 천천히 돌리고, 바늘①을 최대로 내린 위치로 해주십시오. 이때 침봉②의 아래에서 두 번째 기선과 침봉 부싱(하)③의 A면이 일치하는 것을 확인해주십시오. (미싱바늘DB×1의 조정) (나사④을 풀고, 침봉②의 아래에서 두 번째의 기선을 침봉 부싱(하)③의 A면에 맞춰주십시오. 조정후, 나사④을... -
Page 19: 가마와 가마고정의 간격조정/Adjusting The Rotary
조 정 / ADJUSTMENT 3. 가마와 가마고정의 간격조정 / Adjusting the rotary hook holder poaition ★ 내가마①와 가마고정②의 간격은 약0.7~0.9mm가 되도록 죔나사③을 풀고, 가마고정②를 앞 뒤 움직여서 정해 주십시오. ★ Loosen the screw ③. Move the rotary hook holder ② forward or backward so that the gap between the rotary hook ①... -
Page 20: 침이송조정/Adjusting The Needle Feed
조 정 / ADJUSTMENT 5. 침이송조정 / Adjusting the needle feed 1. 바늘흐름의 조정 / Needle bar bracket position ★ 다이얼을 0위치로 하고, 미싱풀리를 돌렸을 때 침봉①과 압봉②이 평행하게 되어있는 것을 확인해주십시오. [침봉①과 압봉②이 평행하지 않을때의 조정방법] 침이송아암③의 죔나사④를 풀고, 침봉대⑤를 전후로 이동시켜 침봉①과 압봉②이 평행하게 되도록 조정해주십시오. -
Page 21: 사절타이밍 조정/Adjusting The Thread
조 정 / ADJUSTMENT 3. 침이송량의 조정 / Needke feed amount ★ 침이송량을 표준이송량에 대해서 1.2배(20%) 크게 할수가 있습니다. 미끌리기 쉬운 옷감이나 후물용의 옷감봉제를 할 때 조정해주십시오. 표준침이송량의 경우는 단나사①이 수평이송완②의 타원형구멍의 수평이송축 측에 부착되어 있습니다. 침이송량을 크게할 때는 너트③을 풀고, 침이송연간④을... -
Page 22: 이동 칼과 고정 칼의 위치 조정 / Adjusting The Movable And Fixed Knives
조 정 / ADJUSTMENT 7. 이동칼과 고정칼의 위치조정 / Adjusting the movable and fixed knives ★ 사절캠에 사절캠레버(조)의 고로축이 올라갔을 때 이동칼①과 고정칼②의 날 부분의 맞물리는 양이 약1mm로 되어있는 것을 확인해주십시오. 1. 미싱풀리를 돌리고 침봉은 최하위치에서 5mm상승시켜주십시오. 2. 사절솔레노이드③을 손으로 누르면 사절캠④의 홈부에 고로축이 들어갑니다. 3. -
Page 23: 톱니 높이 조정 /Adjusting The Feed Dog Height
조 정 / ADJUSTMENT 8. 톱니 높이 조정 / Adjusting the feed dog height and angle ꁴ 톱니의 높이조정 / Feed dog height 1. 톱니①이 침판상면에서 최대한 올라갔을 때의 표준높이는, 박물용․ 중 후물용에서 0.8mm, 후물용에서 1.2mm입니다. 2. 톱니①이 침판상면에서 최대한 올라갔을 때, 죔나사②를 풀고, 상하이송아암③을 돌리고, 이송대를 상하 움직여 조절해주십시오. -
Page 24: 정이송과 역이송 피치의 조정/Adjusting The Forward And Backward Stitch Length
조 정 / ADJUSTMENT 9. 정이송과 역이송 피치의 조정 / Adjusting the forward and backward stitch lengths ★ 정이송과 역이송 피치를 맞출 수가 있습니다. 1. 다이얼①을 눈금 3에 맞춰주십시오. 2. 최하속도(215spm)로 정이송․역이송 재봉을 해주십시오(11침) 3. 조정이 필요한 경우는 아래의 조정을 해주십시오. (1) 측판을... -
Page 25: 위치검출기의 조정/ Adjusting The Synchronizer
조 정 / ADJUSTMENT 10. 위치검출기의 조정 / Adjusting the synchronizer 1. 위치검출기는 2개의 소자로 침위치를 검출합니다. 또 침하신호와 사절신호를 하나의 소자로 제어합니다. 2. 전원스위치를 넣고, 침하정지위치에서 미싱을 정지했을 때 침판 상면에서 침 고정나사 하단까지 18~22 mm 에 정지합니다. ★조정이 필요한 경우는 전원스위치를 끊어주십시오. ꁴ... -
Page 26: Fixed And Movable Knives
조 정 / ADJUSTMENT 11. 고정칼과 이동칼의 설치방법 / Removing the fixed and movable knives 1. 고정칼의 빼내는 방법 / Removing the fixed knife ◎ 실의 잘림이 나쁘게 되었을 때 고정칼④을 위의 그림과 같이 갈아주십시오. (If the knife ④ becomes dull, sharpen it as shown in the figure above.) 1 전원스위치를... - Page 27 조정 개소의 보기 현 상 원 인 점 검 처리․대책 페이지 바늘을 바르게 바늘 설치방법이 나쁘다 바늘의 방향․높이 향하도록 설치한다. 바늘이 휘어져있다 바늘끝의 부서짐,눈이 바늘 -바늘을 바꾼다 막힘 [이송타이밍 조정]을 이송 타이밍이 나쁘다 ― 한다 [바늘과 가마의 타이밍 바늘 부러짐 침봉상승량...
- Page 28 TROUBLESHOOTING GUIDE Problem Cause Check Solution Page Improper needle Needle facing, Reinstall needle. installation height Bent needle Blunt needle tip Needle Replace needle jammed eye Improper feed timing Adjust feed timing. Needle Adjust needle to Needle bar stroke breakage rotary hook timing. Adjust needle to Improper needle to Needle bar height...
- Page 29 조정 개소의 보기 현 상 원 인 점 검 처리․대책 페이지 실 지나가는 곳에 ― 페이퍼 등으로 닦는다 상처가 있다 닳아서 끊어짐 바늘끝이 부러져있다 ― 바늘을 바꾼다 바늘의 설치방법이 바늘을 올바른 바늘의 방향․높이 나쁘다 방향으로 설치한다 1등급 크기의 바늘로 바늘의 선택불량 바늘의...
- Page 30 TROUBLESHOOTING GUIDE Problem Cause Check Solution Page Remove with Thread Burr in thread path ― sandpaper. fraying or breakage Blunt needle tip ― Replace needle. Improper needle Needle facing, Reinstall needle. installation height Wrong needle for Replace needle with Needle size, length application larger count needle.
- Page 31 조정 개소의 보기 현 상 원 인 점 검 처리․대책 페이지 윗실 장력을 강하게 윗실 장력이 너무 약하다 ― 한다 윗실이 죄이지 않는다 밑실 장력을 강하게 밑실 장력이 너무 강하다 ― 한다 윗실 장력을 약하게 윗실 장력이 너무 약하다 ― 한다...
- Page 32 TROUBLESHOOTING GUIDE Pro blem Cau se Check Solution Page Insufficient needle Increase needle ― thread tension thread tension. Needle thread Excessive needle Decrease bobbin slack. ― thread tension thread tension. Excessive needle Decrease needle ― thread tension thread tension. Bobbin thr ead slack.
- Page 33 조정 개소의 보기 현 상 원 인 점 검 처리․대책 페이지 조자접시의 열림 조자접시의 열림량이 적다 실조절장치의 조정 량 프리텐션이 너무 강하다 ― 프리텐션 조정 처음 재봉의 윗실 실에 대해서 바늘이 빠짐 ― 1등급 바늘로 바꾼다 너무 크다 침상정지위치가 너무 높아 침상정지위치에서...
- Page 34 TROUBLESHOOTING GUIDE Problem Cause Check Solution Page Tension disc Adjust tension Tension disc does not open sufficiently. opening release. Needle thread Excessive pretension ― Adjust pretension. escapes at Needle too heavy for Use smaller size ― start of thread needle. sewing.
- Page 35 - 25 -...
Need help?
Do you have a question about the LS2-H520 and is the answer not in the manual?
Questions and answers
Hi! I just bought an old Unicorn LS2-P5100 sewing machine, and unfortunately the control buttons don't work or they're locked, and the trimming doesn't work either. I did not find the user manual, please send me the instructions for this machine.