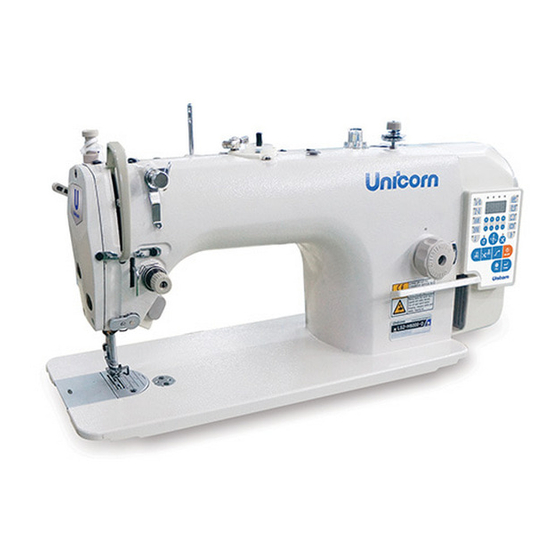
Summary of Contents for Unicorn LS2-H6000-D
- Page 2 CONTENTS 목차 사용설명서 INSTRUCTION MANUAL 1. SPECIFICATIONS 사양 ................................1 2. INSTALLATION 설치 ................................1 3. ADJUSTING THE HEIGHT OF THE KNEE LIFTER 무릎올림 높이 조절 ................2 4. INSTALLING THE THREAD STAND 사립봉 설치 ......................... 2 5. RUBRICATE 윤활 ..................................3 6.
- Page 3 1. 사양 / SPECIFICATIONS 응용 박물, 중후물 이하의 소재 재봉 속도 최대 5,000 rpm 최대 땀 길이 바늘 DB x 1 #9 to #18 노루발 올림 10mm (표준) 13mm (최대) 재봉 속도에서의 작업공간 소음 −1 n=4,500 min ≤ 83 dB(A) 소음...
- Page 4 (1) Installing the under cover The oil pan should rest on the four corners of the machine table groove. Fix two rubber seats① on sideⒶ(operator's side) using nails② as illustrated above. Fix two cushion seats③ on sideⒷ(hinged side) using a rubber-based adhesive. Then place oil pan④ on the fixed seats.
- Page 5 5. 조절핀 / PIN 주의 작업 시작 전에 기계의 갑작스러운 작동으로 인한 사고를 방지하기 위해 전원을 꺼주십시오. WARNING Turn OFF the power before starting the work so as to prevent a accidents caused by abrupt start of the sewing machine. 실채기...
- Page 6 7. 가마급유 조정 방법 / ADJUSTING THE AMOUNT OF OIL (OIL SPLASHES) IN THE HOOK 주의 오일량은 가마를 고속으로 돌려 확인해야 하므로 기기를 작동할 때 특히 주의해야 합니다. WARNING Be extremely careful about the operation of the machine since the amount of oil has to be checked by turning the hook at a high speed.
- Page 7 • 적절한 오일량 샘플 / Sample showing the appropriate amount of oil 좌측 샘플에 표시된 오일량은 재봉 공정에 따라 증 가마에서의 오일 튐 / Splashes of oil from the hook 감 미세 조정이 필요하기 때문에 가마에서 오일량 이 과도하게 늘어나지/줄어들지 않도록 주의하십시 오(오일량이...
- Page 8 9. 보빈 넣는 방법 / SETTING THE BOBBIN INTO THE BOBBIN CASE 실을 실홈Ⓐ 사이로 끼우고 실을 Ⓑ방향으로 당깁 니다. 그렇게 함으로써 실이 장력조절 스프링 밑을 통과하여 실구멍Ⓑ으로 나오게 됩니다. 밑실Ⓒ을 당겼을 때 보빈이 화살표 방향으로 회전 하는지 확인합니다. Pass the thread through thread slit Ⓐ, and pull the thread in direction Ⓑ.
- Page 9 13. 노루발 높이 조절 / ADJUSTING THE HEIGHT OF THE PRESSER BAR 주의 작업 시작 전에 기계의 갑작스러운 작동으로 인한 사고를 방지하기 위해 전원을 꺼주십시오. WARNING Turn OFF the power before starting the work so as to prevent a accidents caused by abrupt start of the sewing machine.
- Page 10 15. 실 장력 조절 / THREAD TENSION (1) 윗실 장력 조절 실 장력 1번 너트①를 시계방향(방향 Ⓐ)으로 돌리 면 사절 후 바늘에 남은 실이 짧아집니다. 너트①를 반시계방향(방향 Ⓑ)으로 돌리면 실 길이 가 길어집니다. 실 장력 2번 너트②를 시계방향(방향 Ⓒ)으로 돌리 면...
- Page 11 17. 천평 실채기량 조절 / ADJUSTING THE THREAD TAKE-UP STROKE 주의 작업 시작 전에 기계의 갑작스러운 작동으로 인한 사고를 방지하기 위해 전원을 꺼주십시오. WARNING Turn OFF the power before starting the work so as to prevent a accidents caused by abrupt start of the sewing machine. 무거운...
- Page 12 (1) Adjust the timing between the needle and the hook as follows: Turn the handwheel to bright the needle bar down to the lowest point of its stroke, and loosen set screw①. (Adjusting the needle bar height) [For a DB needle] Align marker lineⒶ on needle bar② with the bottom end of needle bar lower bushing③, then tighten set screw①.
- Page 13 20. 톱니의 기울기 / TILT OF THE FEED DOG 주의 작업 시작 전에 기계의 갑작스러운 작동으로 인한 사고를 방지하기 위해 전원을 꺼주십시오. WARNING Turn OFF the power before starting the work so as to prevent a accidents caused by abrupt start of the sewing machine. 톱니의...
- Page 14 1) Loosen screws② and ③ in feed eccentric cam①, move the feed eccentric cam in the direction of the arrow or opposite direction of the arrow, and firmly tighten the screws. 2) For the standard adjustment, adjust so that the top surface of feed dog and the top end of needle eyelet are flush with the top surface of throat plate when the feed dog descends below the throat plate.
- Page 15 23. 발판의 조절 / ADJUSTMENT OF THE PEDAL 주의 작업 시작 전에 기계의 갑작스러운 작동으로 인한 사고를 방지하기 위해 전원을 꺼주십시오. WARNING Turn OFF the power before starting the work so as to prevent a accidents caused by abrupt start of the sewing machine. (1) 연결...
- Page 16 25.역전이송 기구 / ONE-TOUCH TYPE REVERSE FEED STITCHING MECHANISM 주의 작업 시작 전에 기계의 갑작스러운 작동으로 인한 사고를 방지하기 위해 전원을 꺼주십시오. WARNING Turn OFF the power before starting the work so as to prevent a accidents caused by abrupt start of the sewing machine. (1) 작동...
- Page 17 26. 와이퍼 / WIPER 주의 작업 시작 전에 기계의 갑작스러운 작동으로 인한 사고를 방지하기 위해 전원을 꺼주십시오. WARNING Turn OFF the power before starting the work so as to prevent a accidents caused by abrupt start of the sewing machine. (1) 와이퍼...


Need help?
Do you have a question about the LS2-H6000-D and is the answer not in the manual?
Questions and answers