Table of Contents
Advertisement
Quick Links
Advertisement
Table of Contents

Related Manuals for GRASS VALLEY T2


Summary of Contents for GRASS VALLEY T2
- Page 1 INTELLIGENT DIGITAL DISK RECORDER Quick Start Guide(SP2) 14 June, 2010...
-
Page 2: About This Manual
This manual is written for people who have a basic knowledge of how to use a computer. If there are no special instructions, perform the same operation as a normal computer operation. • In this manual, the system of the T2 is called "Workstation". Quick Start Guide (SP2) June 14, 2010 Copyright © 2009-2010 Thomson All rights reserved. -
Page 3: Part Names And Functions
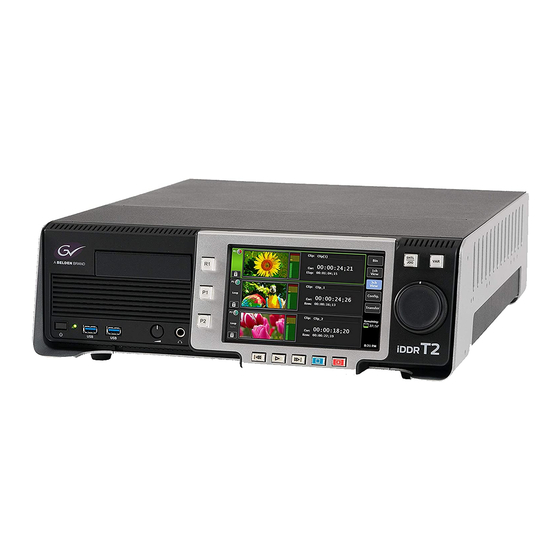
Control buttons Jog/Shuttle Power switch Volume control IEEE1394 port Displays the T2 screens. By tapping on the items displayed on screen, T2 Touch screen LCD can be operated. Used to import video/audio media files stored on DVD-ROM. DVD-ROM drive * Does not support DVD-Video playback. -
Page 4: Control Buttons
Moves to the previous event. While playing a clip Moves to the next IN/OUT point, or the end of the clip. FF + Stop buttons While playing a playlist Moves to the next event. T2 ― Quick Start Guide (SP2) ―... -
Page 5: Rear Panel
NOTE To set the AC power supply cable fastener, use the supplied screws to fix the power cable and the AC power supply cable fastener to your T2. Never loosen the screws that fasten the fan. T2 ― Quick Start Guide (SP2) ―... -
Page 6: Connecting Devices
Keyboard port (PS/2) ➋ Connect Recorder inputs Video types and ports Composite DVI-I Analog audio YPbPr * Conversion connector cable for analog RGB signal is required. (Separate purchase required.) Digital audio T2 ― Quick Start Guide (SP2) ―... - Page 7 720 x 576 50i BT.470 259M EBU N10 1280 x 1024 60p DVI 1.0 1024 x 768 60p DVI 1.0 800 x 600 60p DVI 1.0 640 x 480 59.94p DVI 1.0 DVI-I port YPbPr signal is output via the analog RGB pins of the DVI-I port. Conversion connector cable for analog RGB signal is required. T2 ― Quick Start Guide (SP2) ―...
- Page 8 KOTRON Front Panel Layout (2009/8/18) KOTRON Front Panel Layout (2009/8/18) ➋ Turn on the Power switch on the front panel. ➌ T2 starts up and the 3ch View screen appears on the LCD. T2 ― Quick Start Guide (SP2) ―...
- Page 9 KOTRON Front Panel Layout (2009/8/18) Panel mode.” For the details on basic operations in the Front Panel mode, see page 11 of this document. Workstation mode For details on hardware settings, see page 22 in the “T2 Users Manual (SP2) – Workstation KOTRON Front Panel Layout (2009/8/18) mode.” For details on basic operations in the Workstation mode, see page 17 of this document. T2 ― Quick Start Guide (SP2) ―...
- Page 10 Select Shut Down and tap OK. * I f you don’t use your T2 for a long period of time, turn off the Main power switch on the rear panel and unplug it from the outlet. Note Never shutdown your T2 by pressing and holding the Power switch, or by turning off the Main power switch. Doing so may cause serious malfunctions. Workstation mode ➊ In the System menu select Exit.
- Page 11 3ch View. ➍ Press the Rec button to start recording, the KOTRON Front Panel Layout Stop button to stop. (2009/8/18) ➐ The recorded clip is registered to the Bin. T2 ― Quick Start Guide (SP2) ―...
- Page 12 Tap the Menu button. ➋ Tap the Bin button. ➌ Open the Browse tab. KOTRON Front Panel Layout (2009/8/18) ➎ Choose New Connection. ➏ Browse and choose a folder to connect to, and tap OK. T2 ― Quick Start Guide (SP2) ―...
-
Page 13: Front Panel Mode
Front Panel Layout (2009/8/18) ➐ Choose the media files to import. KOTRON Front Panel Layout (2009/8/18) ➑ Tap the Import button, and open the Import tab. ➒ Press the Start button to start importing. T2 ― Quick Start Guide (SP2) ―... - Page 14 To play the clip repeatedly, set Loop to ON. Set Sync to On, when the clips loaded on the P1 channel and the P2 channel are set as “Pairing” Sync clips, to make the channels played in sync. T2 ― Quick Start Guide (SP2) ―...
-
Page 15: Trimming A Clip
If you want to create a sub-clip with points to the current frame and the range between the IN-OUT points and register it to the Bin, tap the Creating sub- trim the clip. clip button. T2 ― Quick Start Guide (SP2) ―... -
Page 16: Creating A Playlist
Tap the Edit Playlist button. KOTRON Front Panel Layout (2009/8/18) ➎ Choose clips to add to the playlist. ➐ Tap the Close button. ➑ ➏ Press the Play button to Tap the Add button. play the playlist. T2 ― Quick Start Guide (SP2) ―... -
Page 17: Switching To The Workstation Mode
Workstation mode Switching to the Workstation mode Just after the T2 starts up, it is running in the Front Panel mode. To switch to the Workstation mode, perform the following procedure. On the PC monitor connected to the T2, choose Switch to Workstation mode from the System menu. * T o switch back to the Front Panel mode, tap the touch screen LCD, or choose Switch to Front Panel mode from the System menu on the PC monitor. -
Page 18: Recording A Clip
Disp) button to switch to the 1ch Disp) button to switch back Display to specify the detailed to the 3ch Display. information on the clip. ➏ Click the clip name box to change the clip name. T2 ― Quick Start Guide (SP2) ―... -
Page 19: Playing A Clip
To play the clip repeatedly, set Loop to ON. Set 3D Sync to On, when the clips loaded on the P1 channel and the P2 channel are set as 3D Sync “Pairing” clips, to make the channels played in sync. T2 ― Quick Start Guide (SP2) ―... - Page 20 Click the Set button to set the IN/OUT points to this clip. If you want to create a sub-clip with the range between the IN-OUT points and register it to the Bin, click the Creating sub-clip button. T2 ― Quick Start Guide (SP2) ―...
- Page 21 Drag & drop the clips to add to player channel. the playlist from the Bin to the Event list. ➋ Click the Switch View (1ch Disp) button. ➎ Click the Play button to play the playlist. T2 ― Quick Start Guide (SP2) ―...
-
Page 22: Supported File Import Format
960x720 23.98p 1280x720 ** In this list, "(DVD)" means "top field first", while "(DV)" means "bottom field first." T2 ― Quick Start Guide (SP2) ―... - Page 23 T2 ― Quick Start Guide (SP2) ―...
- Page 24 F2431006143...
Need help?
Do you have a question about the T2 and is the answer not in the manual?
Questions and answers