Table of Contents
Advertisement
Advertisement
Table of Contents

Related Manuals for ZALMAN MS800


Summary of Contents for ZALMAN MS800
- Page 1 ATX Mid Tower PC Case MS800 Series MS800 MS800 Plus Ver. 130130...
- Page 2 ENGLISH...
- Page 3 8) Please wear gloves while handling this product to prevent injuries. and performance. Disclaimer) Zalman Tech Co., Ltd. is not responsible for any damages due to external causes, including but not limited to, improper use, problems with electrical power, accident, neglect,...
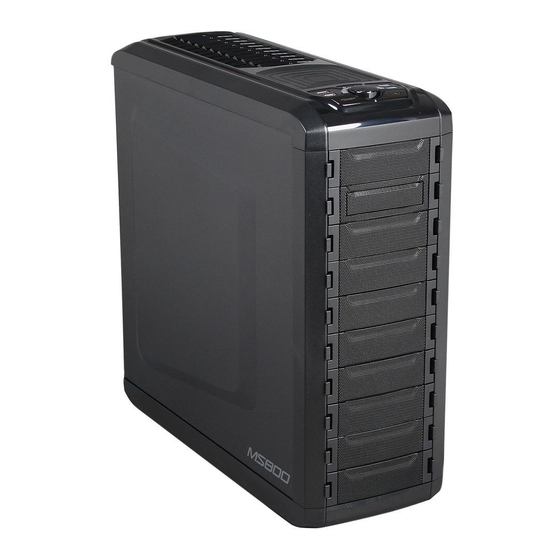
- Page 4 MS800 Series Product Details Model Name MS800 MS800 Plus Type ATX Mid Tower Dimensions (W x H x D) 207 X 533 X 541mm Weight 9kg (19.84lb) Materials Plastic, Steel Color Black Motherboard Standard ATX / Micro ATX Compatibility Power supply...
- Page 5 MS800 Series (1) Product Information MS800 Front Rear Side MS800 PLUS Front Rear Side...
- Page 6 MS800 Series (2) Parts [MS800] [MS800 Plus] A Bolt B Bolt( M3*5mm) × 55 [M/B, FDD, SSD, ODD] Manual C Bolt [FAN] (FH Tap5*10mm X 2) FAN 92mm x1 VGA Guide x 1 CPU 12V Extension Cable × 1 × 5...
- Page 7 MS800 Series (3) Front I/O Ports Part Name Power Button Fan Cotroller HDD LED Reset Button USB 2.0 USB 3.0 High Fan Controller Headphones...
- Page 8 Units Part Name Units Chassis 3.5”/2.5” to 5.25"Tray Top Cover Front I/O Panel Front Cover Side Panel (Right) 5.25” Bay Covers Side Panel (Left) VGA Guide Fan Filter Bottom Cover *Acrylic Side Panel is only available on the MS800 Plus.
- Page 9 3.5”/2.5” to 5.25"Tray Chassis Front I/O Panel Top Cover Front Cover Side Panel (Right) 5.25” Bay Covers Side Panel (Left) VGA Guide Fan Filter HDD Module 1 set Bottom Cover *Acrylic Side Panel is only available on the MS800 Plus.
- Page 10 MS800 Series Installation (1) Side Panel Removal (2) Motherboard Installation screwing down B Bolts. B Bolt...
-
Page 11: Vga Card Installation
MS800 Series VGA Card Installation Unfasten the Hand Screw holding the PCI Cover and disassemble the cover. Remove the PCI Slot Cover. 1. The VGA support system is designed to support the weight of high Guide Clip Guide Nut C Bolt... - Page 12 MS800 Series (4) ODD Installation Remove the 5.25” drive bay cover by pressing the latches on the side; rotate the knob (see below image) clockwise to unlock the drive bay; insert the ODD and (5) 3.5" / 2.5" Tray Installation...
- Page 13 MS800 Series Attach Drive to Tray A. 3.5” FDD Installation B Bolt B. 3.5” HDD Installation A Bolt C. 2.5” SSD Installation B Bolt...
- Page 14 MS800 Series (7) 3.5" HDD Tray Installation Remove the HDD tray after removing the HDD Cover as shown. Attach 3.5"/2.5" HDD to Tray 1. To install 3.5"HDD pull the tray sideways as shown. 3.5"HDD Installation B Bolt 2.5"HDD/SSD Installation...
- Page 15 MS800 Series (8) Hot swap Installation Caution PC and HDD might be damaged during the installation of *1) HDD and if the power is not turned off. Even when the desktop and the storage system support *2) HOT plugging it is still strongly recommended to turn the power off.
- Page 16 MS800 Series (9) Cable Connection 1) Power Button Cable Power Button Power LED Power Motherboard 2) 2) Front I/O Panel Cables Front I/O Panel Port Audio Reset HD Audio USB 2.0 USB 3.0 USB 3.0 Motherboard To connect USB 2.0 audio cables, please refer to the motherboard manual.
- Page 17 MS800 Series Fan Controller Display connection Fan Controller PSU Power Fan (1 ~ 6)
- Page 19 MS800 Series...
- Page 20 MS800 Series...
- Page 21 MS800 Series...
- Page 22 MS800 Series...
- Page 23 MS800 Series...
- Page 24 MS800 Series...
- Page 25 MS800 Series...
- Page 26 MS800 Series...
- Page 27 MS800 Series...
- Page 28 MS800 Series...
- Page 29 MS800 Series...
- Page 30 MS800 Series...
- Page 31 MS800 Series...
- Page 32 MS800 Series Power LED Power Audio Reset HD Audio USB 2.0 USB 3.0 USB 3.0...
- Page 33 MS800 Series...
- Page 35 MS800 Series...
- Page 36 MS800 Series...
- Page 37 MS800 Series...
- Page 38 MS800 Series...
- Page 39 MS800 Series...
- Page 40 MS800 Series...
- Page 41 MS800 Series...
- Page 42 MS800 Series...
- Page 43 MS800 Series...
- Page 44 MS800 Series...
- Page 45 MS800 Series...
- Page 46 MS800 Series...
- Page 47 MS800 Series...
- Page 48 MS800 Series...
- Page 49 MS800 Series...
- Page 51 MS800 Series...
- Page 52 MS800 Series...
- Page 53 MS800 Series...
- Page 54 MS800 Series...
- Page 55 MS800 Series...
- Page 56 MS800 Series...
- Page 57 MS800 Series...
- Page 58 MS800 Series...
- Page 59 MS800 Series...
- Page 60 MS800 Series...
- Page 61 MS800 Series...
- Page 62 MS800 Series...
- Page 63 MS800 Series...
- Page 64 MS800 Series...
- Page 65 MS800 Series...
Need help?
Do you have a question about the MS800 and is the answer not in the manual?
Questions and answers