Table of Contents
Advertisement
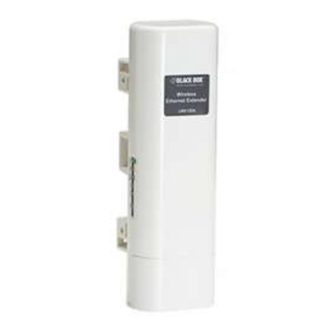
Wireless Ethernet Extender
User Manual
• Operates at 2.4-GHz to provide superior Wi-Fi connectivity at a low cost.
• Use for SMB or hotspot networks.
• Provides centralized management and monitoring of all the VAC-managed
APs on the network.
Order toll-free in the U.S.: Call 877-877-BBOX (outside U.S. call 724-746-5500)
Customer
FREE technical support 24 hours a day, 7 days a week: Call 724-746-5500 or fax 724-746-0746
Support
Mailing address: Black Box Corporation, 1000 Park Drive, Lawrence, PA 15055-1018
Information
Web site: www.blackbox.com • E-mail: info@blackbox.com
LWE120A
LWE120A-KIT
LWE120AE
LWE120AE-KIT
Advertisement
Table of Contents

Related Manuals for Black Box LWE120A


Summary of Contents for Black Box LWE120A
- Page 1 Order toll-free in the U.S.: Call 877-877-BBOX (outside U.S. call 724-746-5500) Customer FREE technical support 24 hours a day, 7 days a week: Call 724-746-5500 or fax 724-746-0746 Support Mailing address: Black Box Corporation, 1000 Park Drive, Lawrence, PA 15055-1018 Information Web site: www.blackbox.com • E-mail: info@blackbox.com...
-
Page 2: Trademarks Used In This Manual
Disclaimer: Black Box Network Services shall not be liable for damages of any kind, including, but not limited to, punitive, consequential or cost of cover damages, resulting from any errors in the product information or specifications set forth in this document and Black Box Network Services may revise this document at any time without notice. - Page 3 FCC and IC RFI Statements/FCC Radiation Exposure Statement Federal Communications Commission and Industry Canada Radio Frequency Interference Statements This equipment generates, uses, and can radiate radio-frequency energy, and if not installed and used properly, that is, in strict accordance with the manufacturer’s instructions, may cause inter ference to radio communication. It has been tested and found to comply with the limits for a Class A computing device in accordance with the specifications in Subpart B of Part 15 of FCC rules, which are designed to provide reasonable protection against such interference when the equipment is operated in a com- mercial environment.
-
Page 4: Instrucciones De Seguridad
NOM Statement Instrucciones de Seguridad (Normas Oficiales Mexicanas Electrical Safety Statement) 1. Todas las instrucciones de seguridad y operación deberán ser leídas antes de que el aparato eléctrico sea operado. 2. Las instrucciones de seguridad y operación deberán ser guardadas para referencia futura. 3. -
Page 5: Table Of Contents
Table of Contents Table of Contents 1. Specifications ..................................8 2. Overview ...................................9 2.1 Description ..................................9 2.2 Features ..................................9 2.3 What’s Included ................................9 2.4 Hardware Description ..............................10 2.5 Typical Management Scenario ............................. 12 3. Installation 3.1 Preparing for Installation .............................. 14 3.2 Safety Precautions ............................... - Page 6 Table of Contents 5.1.3 Management ..............................48 AP Management ..............................48 System Settings ..............................50 Time Settings ..............................51 Firmware Upgrade ............................51 Backup/Retrieve Settings ..........................52 Restore Factory Default Settings ........................53 Reboot................................53 Password Settings ............................54 Syslog Settings ..............................54 System Log ...............................55 System Alert ..............................55 5.1.4 Tools .................................56 Ping ..................................56 Trace Route ..............................57...
- Page 7 Table of Contents SNMP Management ............................82 Certificate Settings ............................83 5.3.5 Tools ..................................84 System Log ...............................84 Ping Watchdog ..............................84 Appendix. ASCII ..................................86 724-746-5500 | blackbox.com Page 7...
-
Page 8: Specifications
Chapter 1: Specifications 1. Specifications Environmental Operating temperature -4 to +158° F (-20 to +70° C) Storage temperature -40 to +158° F (-40 to +70° C) Humidity 10-95% noncondensing Management Access Method Web User Interface (HTTP/S), Telnet, SSH, FTP, SNMP V1, V2c, V3 Configuration on File Backup and restore, Reset to factory default, Reboot device injector via PoE Operating Modes... -
Page 9: Overview
2. Overview 2.1 Introduction The Wireless Ethernet Extender is a 2x2 outdoor access point. The LWE120A operates at 2.4-GHz band. Ideally suited for SMB or hotspot networks, this breakthrough innovation provides superior Wi-Fi network solutions at significantly lower cost. In addition, the easy-to-install Wireless Ethernet Extender is also a high-performance last-mile broadband solution that provides reliable wireless network coverage for outdoor broadband application. -
Page 10: Hardware Description
Chapter 2: Overview 2.4 Hardware Description Figure 2-1. Front view. Figure 2-2. Back view. 724-746-5500 | blackbox.com Page 10... - Page 11 Chapter 2: Overview Grounding point Reset button RJ-45 port Figure 2-3. Inside the bottom cover. Figure 2-4. Pole-mounting ring. Figure 2-5. Power supply. 724-746-5500 | blackbox.com Page 11...
-
Page 12: Typical Management Scenario
This section describes the typical management of Wireless Ethernet Extender. By default, it is set to thin AP mode (managed AP) which allows it to be managed by the Wireless Ethernet Extender in AC mode. The following figure illustrates a VAC wireless network. LWE120A LWE121A operating as an... - Page 13 Chapter 2: Overview When a thin AP mode joins a wired network, it will start to look for a Wireless Ethernet Extender in AC mode. If the thin AP fids the AP controller on the network, it will send the registration request to the AP controller. Once the registration is successfully made, the AP that acts as the AP controller will add the thin AP to its management list and provides it configuration information.
-
Page 14: Installation
Chapter 3: Installation 3. Installation 3.1 Preparing for Installation CAUTION: Professional Installation Required. Seek assistance from a professional installer who is well trained in RF installation and knowledgeable in the local regulations. 3.2 Safety Precautions To keep you safe and install the hardware properly, read and follow these safety precautions. 1. -
Page 15: Using The Grounding Wire
Chapter 3: Installation 2. Plug a standard Ethernet cable into the RJ-45 port. Figure 3-2. Plugging a standard Ethernet cable into the RJ-45 port. 3. Slide the cover back and press down the lock button to seal the bottom of the Wireless Ethernet Extender. Figure 3-3. -
Page 16: Mount The Ap On A Pole
Chapter 3: Installation 2. Put the grounding wire on the grounding point at the bottom of the Wireless Ethernet Extender. Then screw the grounding wire to tighten up. Figure 3-5. Tighten the grounding wire. 3. Connect the grounding wire to earth ground. 3.4.3 Mount the AP on a Pole 1. -
Page 17: Power Up
Chapter 3: Installation 2. Mount the Wireless Ethernet Extender steadily to the pole by locking the pole mounting ring tightly. Figure 3-7. Extender mounted on a pole. 3.4.4 Power Up 1. Plug the power cord into the DC port of the power supply as the following picture shows. Figure 3-8. -
Page 18: Connect To The Extender
Chapter 3: Installation 3.4.5 Connect to the Extender To be able to configure and manage the extender, do the following: 1. Open the ferrite core by unsnapping the connector latches. The core will open, revealing a concave surface. Figure 3-10. Open the connector latches. 2. - Page 19 Chapter 3: Installation 4. Close the core and snap the halves back together. Figure 3-13. Close core. 5. Connect the Ethernet cable with suppression core to the “Data In” port of the PoE injector. Figure 3-14. Connecting cable to data-in port. 724-746-5500 | blackbox.com Page 19...
- Page 20 Chapter 3: Installation 6. Connect the other end of the Ethernet cable to a PC or a switch hub. The harware installation is complete. Figure 3-15. Completed installation. 724-746-5500 | blackbox.com Page 20...
-
Page 21: Quick Setup Tutorial
Chapter 4: Quick Setup Tutorial 4. Quick Setup Tutorial 4.1 Access the Web Configurator The Wireless Ethernet Extender provides you with user-friendly Web-based management interface to easily manage the access point. • Configure the computer with a static IP address of 192.168.1.x, as the default IP address of the VAC Access Point is 192.168.1.1. (X cannot be 0, 1, or 255);... -
Page 22: Configure The Ac+Thin Ap Mode
Chapter 4: Quick Setup Tutorial 4.2 Configure the AC+Thin AP mode To operate as AC+Thin AP mode, go to Basic Settings. From the Device Mode drop-down list, select “Virtual AC” mode. To use the extender as a virtual controller and access point concurrently, select “Virtual AC + Thin AP” mode. Then assign an IP address to the Wireless Ethernet Extender and specify subnet mask, gateway, and DNS address, respectively. - Page 23 Chapter 4: Quick Setup Tutorial Figure 4-5. Wireless Settings screen. The wireless setting will also apply to the VAC-managed APs. A dialog message will pop up to remind you changes will also apply to other extender-managed APs. Click “Apply” to apply the configuration immediately. Figure 4-6.
-
Page 24: Firmware Upgrade For Ethernet Extender In Ac Mode
Chapter 4: Quick Setup Tutorial 4.3 Firmware Upgrade for Ethernet Extender in AC mode To upgrade the firmware for the Wireless Ethernet Extender in AC mode, go to Management —> Firmware Upload and from Upgrade AC Firmware, browse the firmware file where it is placed. Press “Upload” to start the upgrade process. It will take approximately two minutes to complete the update. -
Page 25: Manage The Extender-Managed Aps
Chapter 4: Quick Setup Tutorial 4.5 Manage the extender-managed APs To configure and manage the managed APs: 1. Enter the web page of the Wireless Ethernet Extender in AC mode and go to Management —> AP Management. The following screen appears. Figure 4-11. -
Page 26: Firmware Upgrade For Managed Thin Aps
Chapter 4: Quick Setup Tutorial 4.6 Firmware Upgrade for the Ethernet Extender in AC mode For firmware upgrade, you may choose to upgrade the selected managed AP by pressing “Upgrade Selected,” or do the group upgrade by pressing “Upgrade All.” Before upgrading the managed AP, you need to locate the new firmware in the Wireless Ethernet Extender. -
Page 27: Monitor The Ethernet Extender-Managed Aps
Chapter 4: Quick Setup Tutorial 4.7 Monitor the Ethernet Extender-Managed AP To view each managed AP’s status, go to Status —> Managed APs. Besides viewing device information such as device name, MAC address, IP address, and FW version, you may also monitor the wireless clients that are currently associated with the man- aged APs as well as packets statistics. -
Page 28: Ap Mode
Chapter 4: Quick Setup Tutorial The Fat AP covers “AP mode,” “Wireless Client mode,” “Bridge mode,” and “AP Repeater mode.” 4.8.1 AP Mode 1. Choose Wireless —> Basic Settings. The default is AP mode already. Here, you can set the parameters to optimize your applica- tion, or you can leave them as the default. -
Page 29: Wireless Client Mode
Chapter 4: Quick Setup Tutorial 4. To decrease the chances of data retransmission at long distances, †he extender can automatically adjust proper ACK timeout value by specifying the distance between the nodes. Go to WIreless —> Advanced Settings and fill in the number in the Distance field. - Page 30 Chapter 4: Quick Setup Tutorial Figure 4-24. Select the preferred extender. Figure 4-25. Wireless Site Survey screen. 3. If the AP you connect to require authentication or encryption keys, click “Profile Settings” in the left column, fill out the corre- sponding items, and click “...
-
Page 31: Bridge Mode
Chapter 4: Quick Setup Tutorial 4. To check whether the association with the extender has been successfully made, go to Status —> Connections. If the connec- tion is established, it will display association information including MAC addres, wireless mode, signal strength, and connection time. - Page 32 Chapter 4: Quick Setup Tutorial 1. Repeat the above procedures to configure the remote IEEE 802.11b/g/n Wireless Ethernet Extender. 2. Enter the actual distance in meters. For example, if the distance between the two VAC bridges is 3 kilometers, enter 3000 in the field.
-
Page 33: Ap Repeater Mode
Chapter 4: Quick Setup Tutorial 4.8.4 AP Repeater Mode 1. Choose Wireless > Basic Settings. Choose “AP Repeater” from Wireless Mode, and click “Apply” to save it. You can also change the other parameters to optimize your application before clicking “Apply.” Figure 4-32. -
Page 34: Navigating The Web Configurator
Chapter 5: Navigate the Web Configurator 5. Navigate the Web Configurator 5.1 Virtual AC+Thin AP Mode 5.1.1 Status View Basic Information Open “Information” in “Status” to check the basic information of the Wireless Ethernet Extender, which is read only. Information includes system information, IP settings, and wireless network setting. -
Page 35: View Wireless Users
Chapter 5: Navigate the Web Configurator View Wireless Users Open “Wireless Users” in “Status” to check the information of all the wireless clients such as MAC address, SSID of the managed APs that are associated with, signal strength, connection up time, and uploaded/downloaded packets. All options are read only. Click “Refresh”... - Page 36 Chapter 5: Navigate the Web Configurator Figure 5-5. Wireless Networks screen. Figure 5-6. VAP Profile1 Settings screen. 724-746-5500 | blackbox.com Page 36...
- Page 37 Chapter 5: Navigate the Web Configurator Basic Setting SSID: This wireless network name is shared among all associated devices in your wireless network. Keep it identical on all those devices. NOTE: The SSID is case-sensitive and cannot exceed 32 characters. Description: Name of the VAP profile Broadcast SSID: In AP mode, hiding the network name is necessary when you are in a wireless environment that may have potential risk.
- Page 38 Chapter 5: Navigate the Web Configurator Network Authentication Open System: Allows any device to join the network without performing any security check. Shared Key: Data encryption and key are required for wireless authentication (Not available in Bridge/AP Repeater mode). Legacy 802.1x: Provides the rights to access the wireless network and wired Ethernet. With User and PC identity, centralized authentication as well as dynamic key management, it reduces the security risk.
-
Page 39: Network Basic Setting
Chapter 5: Navigate the Web Configurator Network Basic Setting Figure 5-8. Network Basic Setting screen. Network Mode: Specify the network mode. It includes Bridge and Router. When switched to Router mode, the LAN IP address for web page access will become 192.168.0.99. Wireless Protocols Allows the user to change country code, 802.11 mode and other advanced parameters for the Wireless Ethernet Extender. - Page 40 Chapter 5: Navigate the Web Configurator Advanced Settings Figure 5-10. Advanced Settings screen. A-MPDU/A-MSDU Aggregation: The data rate of your AP except wireless client mode could be enhanced greatly with this option enabled; however, if your wireless clients don’t support A-MPDU/A-MSDU aggregation, we do not recommend enabling it. Short GI: Under 802.11n mode, enables better data rate if there is no negative compatibility issue.
- Page 41 Chapter 5: Navigate the Web Configurator Distance: To decrease the chances of data retransmission at long distance, the Wireless Ethernet Extender can automatically adjust proper ACK timeout value by specifying distance of the two nodes. Access Control The Access Control appoints the authority to wireless client for accessing the Wireless Ethernet Extender, thus a further security mechanism is provided.
-
Page 42: Traffic Shaping
Chapter 5: Navigate the Web Configurator Traffic Shaping This allows the administrator to manage the traffic flow to ensure optimal performance. Figure 5-12. Traffic Shaping screen. Enable Traffic Shaping Check this box to control the overall bandwidth for a specific VAP network. Interface Selection Select the VAP network you would like to enable traffic shaping. -
Page 43: Tcp/Ip Settings
Chapter 5: Navigate the Web Configurator Figure 5-13. RADIUS Settings. Authentication RADIUS Server This is for RADIUS authentication. It can communicate with RADIUS through IP Address, Port, and Shared Secret. IP Address: Enter the IP address of the Radius Server; Port: Enter the port number of the Radius Server;... -
Page 44: Captive Portal
Chapter 5: Navigate the Web Configurator LAN Settings IP Address: Specify the IP address for the Wireless Ethernet Extender . Subnet Mask: Specify the Subnet mask for the Wireless Ethernet Extender . DHCP Server: Select to enable or disable DHCP server on the Wireless Ethernet Extender . DHCP IP Address Range: When the DHCP Server is enabled, users may specify DHCP IP Address Range for the Wireless Ethernet Extender . -
Page 45: Firewall Settings
Chapter 5: Navigate the Web Configurator Radius NAS ID: Enter the name of the radius server if any. Radius Administrative-User Radius Admin Username: Enter the username of the Radius Administrator. Radius Admin Password: Enter the password of the Radius Administrator. Captive Portal UAM Portal URL: Enter the address of the UAM portal server. - Page 46 Chapter 5: Navigate the Web Configurator Destination IP Filtering Figure 5-17. Destination IP Filtering screen. You may create and activate a rule that filters a packet based on the destination IP address to restrict the local computers from accessing certain websites. Check “Enable Destination IP Filtering” to activate rule. Destination IP Address: Enter the IP address to be restricted.
- Page 47 Chapter 5: Navigate the Web Configurator Comment: Make comments to record your filtering rule. Click Apply and the IP address will be added in the list. To delete the restricted source ports, click Select checkbox of the desig- nated ports and click the Delete Selected button. You may delete all the IP addresses in the list by clicking Delete All. Destination Port Filtering Figure 5-19.
-
Page 48: Management
Chapter 5: Navigate the Web Configurator Port forwarding allows you to automatically redirect common network services to a specific machine behind the NAT firewall. These settings are only necessary if you wish to host some a server such as a web server or mail server on the private local network behind the Wireless Ethernet Extender NAT firewall. - Page 49 Chapter 5: Navigate the Web Configurator Radio: Allows you to configure the channel bandwidth, operating channel, antenna, and output power for the selected VAC- managed Access Point. Figure 5-23. Radio channel screen. From the AP Management list, move the mouse cursor to the MAC address of the selected VAC-managed AP the screen will pop up radio configuration information.
-
Page 50: System Settings
Chapter 5: Navigate the Web Configurator System Settings Allows you to configure device and IP settings for the Wireless Ethernet Extender in AC mode. Figure 5-26. System Settings screen. Device Settings Device Mode: Three modes are provided: AC+Thin AP, Thin AP, and FAT AP. Select AC+Thin AP to have the device act as a virtual access controller to manage other VAC-managed APs on your network. -
Page 51: Time Settings
Chapter 5: Navigate the Web Configurator DHCP Server The Wireless Ethernet Extender in AC mode can perform a DHCP server to assign IP address to the VAC-managed APs. Default is enabled. Figure 5-28. DHCP Server screen. DHCP IP Address Range: Specify the IP range. DHCP Subnet Mask: Specify the DHCP Subnet Mask. -
Page 52: Backup/Retrieve Settings
Chapter 5: Navigate the Web Configurator Figure 5-30. Upgrade Firmware screen. Upload AC Firmware Allows the network administrator to upgrade firmware for the Wireless Ethernet Extender in AC mode. Upload TAP Firmware Before updating the firmware for the VAC-managed APs, you need to upload the firmware into the VAC Access Point in AC mode that allows the virtual controller AP to do the firmware upgrade for VAC-managed APs. -
Page 53: Restore Factory Default Settings
Chapter 5: Navigate the Web Configurator Load Settings from File Import ac.cfg load into the VAC Access Point in AC mode. Restore Factory Default Settings The IEEE 802.11n VAC Access Point provides two ways to restore the factory default settings: Restore factory default settings via Web From Configuration File in Management, click Reset restore factory default settings. -
Page 54: Password Settings
Chapter 5: Navigate the Web Configurator Password Settings You can change the password for your Wireless Ethernet Extender. Figure 5-34. Password Settings screen. Current Password Enter the current password. New Password Enter the new password. Confirm Password Enter the new password again for confirmation. NOTE: The password is case-sensitive and its length cannot exceed 19 characters! Syslog Settings The Wireless Ethernet Extender provides remote syslog management by sending logs to an external syslog server. -
Page 55: System Log
Chapter 5: Navigate the Web Configurator Remote Syslog Server Enable Remote Syslog: Enable to send log to remote syslog server. IP Address: Specify the IP address of the remote server. Port: Specify the port number of the remote server. Send Syslog via Email Log Schedule: Configure the frequency of logs being sent. -
Page 56: Tools
Chapter 5: Navigate the Web Configurator Figure 5-37. System Alert screen. 5.1.4 Tools The IEEE 802.11n VAC Access Points provide two tools to test the link status with other VAC-managed Access Points or anyone on the network. Ping Figure 5-38. Ping screen. Ping Address Enter IP address of the remote destination. -
Page 57: Trace Route
Chapter 5: Navigate the Web Configurator Trace Route This tool is used to discover the routes that packets take when traveling to the destination destination. Figure 5-42. Trace Route screen. Destination IP Address Enter IP address of the remote destination and click Start to start. 5.2 Thin AP Mode 5.2.1 Information You may see some VAC-managed AP’s basic information such as model name, firmware version, MAC address, current up time,... -
Page 58: Basic Settings
Chapter 5: Navigate the Web Configurator 5.2.2 Basic Settings Allows you to configure device and IP settings for the VAC-managed AP. Figure 5-40. Basic Settings screen. General Settings Device Mode: Three modes are provided: AC+Thin AP, Thin AP, FAT AP. Select AC+Thin AP to have the device act as virtual access controller to manage other VAC-managed APs on your network. -
Page 59: View Association List
Chapter 5: Navigate the Web Configurator Figure 5-41. Information screen. View Association List Open “Connections” in “Status” to check the information of associated wireless devices such as MAC address, signal strength, connection time, IP address, etc. All options are read only. Click “Refresh” at the bottom to update the current association list. Figure 5-42. -
Page 60: View Network Flow Statistics
Chapter 5: Navigate the Web Configurator Figure 5-43. Association Node Details screen. View Network Flow Statistics Open “Statistics” in “Status” to check the data packets received on and transmitted from the wireless and Ethernet ports. Click “Refresh” to view current statistics. Figure 5-44. -
Page 61: View Arp Table
Chapter 5: Navigate the Web Configurator View ARP Table Open “ARP Table” in “Status” as below. Click “Refresh” to view current table. Figure 5-45. ARP Table screen. View Bridge Table Open “Bridge Table” in “Status” as shown next. Click “Refresh” to view current connected status. Figure 5-46. -
Page 62: View Network Activities
Chapter 5: Navigate the Web Configurator View Network Activities The network activities allows you to monitor the current Wireless and Ethernet TX/RX data traffic in graphical and numerical form on the Web of the Skyport. The chart scale and throughput dimension (Bps, Kbps, Mbps) changes dynamically according to the mean throughput value. - Page 63 Chapter 5: Navigate the Web Configurator Figure 5-49. TCP/IP Settings screen. Obtain IP Address Automatically: If a DHCP server exists in your network, you can check this option, so the Wireless Ethernet Extender can obtain IP settings automatically from that DHCP server. NOTES: When the IP address of the VAC Access Point is changed, the clients on the network often need to wait for a while or even reboot before they can access the new IP address.
-
Page 64: Time Settings
Chapter 5: Navigate the Web Configurator WAN Settings: Specify the Internet access method to Static IP, DHCP, or PPPOE. Users must enter WAN IP Address, Subnet Mask, and Gateway settings provided by your ISPs. LAN Settings: When DHCP Server is disabled, users can specify IP address and subnet mask for the Wireless Ethernet Extender manually. -
Page 65: Firewall Settings
Chapter 5: Navigate the Web Configurator Open “RADIUS Settings” in “System” to make RADIUS configuration. Figure 5-52. RADIUS Settings screen. Authentication RADIUS Server This is for RADIUS authentication. It can communicate with RADIUS through IP Address, Port, and Shared Secret. IP Address: Enter the IP address of the Radius Server;... - Page 66 Chapter 5: Navigate the Web Configurator You may create and activate a rule that filters a packet based on the source IP address from your local network to Internet. Check “Enable Source IP Filtering” to activate rule. Local IP Address: Enter the IP address you would like to restrict. Comment: Make comments to record your filtering rule.
- Page 67 Chapter 5: Navigate the Web Configurator Port Range: Enter the port range you would like to restrict. Protocol: Select port protocol: Both, TCP, UDP. Comment: Make comments to record your filtering rule. Click Apply and the IP address will be added in the list. To delete the restricted source ports, click Select checkbox of the designated ports and click the Delete Selected button.
-
Page 68: Udp Passthrough
Chapter 5: Navigate the Web Configurator Port forwarding allows you to automatically redirect common network services to a specific machine behind the NAT firewall. These settings are only necessary if you wish to host some sort of server like a web server or mail server on the private local network behind th Wireless Ethernet Extender’s NAT firewall. -
Page 69: Wireless
Chapter 5: Navigate the Web Configurator DMZ Host IP Address: Enter the local host IP address. 5.3.3 Wireless Open “Basic Settings” in “Wireless” as shown next to make basic wireless configuration. Figure 5-60. Wireless Basic Settings screen. Disable Wireless LAN Interface Check this option to disable the WLAN interface, then the wireless module of Wireless Ethernet Extender will stop working and no wireless device can connect to it. - Page 70 Chapter 5: Navigate the Web Configurator HT Protect Enable HT (High Throughput) protect to ensure HT transmission with MAC mechanism. Under 802.11n mode, a wireless client can be divided into HT STA and Non-HT STA, among which the one with HT protect enabled gets higher throughput. Frequency/Channel Channel varies much as the available band differs from country to country.
-
Page 71: Vap Profile Settings
Chapter 5: Navigate the Web Configurator Open “Basic Settings” in “Wireless” by clicking the “Site Survey” button beside the “Wireless Mode” option. The wireless site survey window will pop up with a list of available AP in the vicinity. elect the AP you would like to connect and click “Selected” to establish connection. - Page 72 Chapter 5: Navigate the Web Configurator Figure 5-63. VAP Profile1 Settings screen. Basic Setting Profile Name: Name of the VAP profile. Wireless Network Name: Enter the virtual SSID for the VAP. Broadcast SSID: In AP mode, hiding network name is necessary when you are in a wireless environment that may have potential risk.
-
Page 73: Vlan
Chapter 5: Navigate the Web Configurator WPA with RADIUS: Wi-Fi Protected Access (WPA) is a subset of the IEEE 802.11i standard. With warrant (username, password and etc.) offered by user, this kind of authentication can be realized with specific RADIUS server. This is the common way to be adopted in large enterprise network. -
Page 74: Advanced Settings
Chapter 5: Navigate the Web Configurator Figure 5-64. VLAN screen. Advanced Settings Open “Advanced Settings” in “Wireless” to make advanced wireless settings. A-MPDU/A-MSDU Aggregation The data rate of your AP except wireless client mode could be enhanced greatly with this option enabled; however, if your wireless clients don’t support A-MPDU/A-MSDU aggregation, we do not recommend to enabling it. -
Page 75: Access Control
Chapter 5: Navigate the Web Configurator IGMP Snooping Available in AP/Router mode, IGMP snooping is the process of listening to IGMP network traffic. By enabling IGMP snooping, the AP will listen to IGMP membership reports, queries, and leave messages to identify the ports that are members of multicast groups. - Page 76 Chapter 5: Navigate the Web Configurator Figure 5-65. Wireless Access Control screen. Profile Selection Select the VAP network you would like to enable access control. Access Control Mode If you select “Allow Listed,” only those clients whose wireless MAC addresses are in the access control list will be able to connect to your AP.
-
Page 77: Traffic Shaping
Chapter 5: Navigate the Web Configurator Traffic Shaping This allows the administrator to manage the traffic flow to ensure optimal performance. Figure 5-66. Traffic Shaping screen. Overall Traffic Shaping Check this box to control the overall bandwidth of the Wireless Ethernet Extender. Incoming Traffic Limit: To specify the maximum incoming bandwidth to a certain rate in kbps. -
Page 78: Wds Settings
Chapter 5: Navigate the Web Configurator Figure 5-67. Captive Portal screen. To enable Captive Portal, check “Captive Portal” and select the VAP network needed for captive portal. Radius Settings Primary Radius Server: Enter the name or IP address of the primary radius server. Secondary Radius Server: Enter the name or IP address of the secondary radius server if any. -
Page 79: Management
Chapter 5: Navigate the Web Configurator Figure 5-68. Wireless Broadband Access Point screen. Enter the MAC address of another AP you wirelessly want to connect to into the appropriate field and click “Apply” to save the settings. NOTES: WDS Settings is available only under Bridge and AP Repeater Mode. Bridge uses the WDS protocol that is not defined as the standard, so compatibility issues between equipment from different vendors may arise. -
Page 80: Upgrade Firmware
Chapter 5: Navigate the Web Configurator Current Password Enter the current password. New Password Enter the new password. Confirm Password Enter the new password again for confirmation. NOTE: The password is case-sensitive and its length cannot exceed 19 characters! Upgrade Firmware Open “Firmware Upload”... -
Page 81: Restore Factory Default Settings
Chapter 5: Navigate the Web Configurator Figure 5-71. Configuration File screen. Save Setting to File Click “Save,” and a dialog box will pop up. Save it, then the configuration file ap.cfg will be generated and saved to your local computer. Load Settings from File Click “Browse,”... -
Page 82: Reboot
Chapter 5: Navigate the Web Configurator Reboot You can reboot your Wireless Ethernet Extender from the “Configuration File” screen in “Management” as shown next: Click “Reboot” and click “Yes” when the prompt appears to start reboot process. This takes a few minutes. Figure 5-73. -
Page 83: Certificate Settings
Chapter 5: Navigate the Web Configurator Get Community: Specify the password for the incoming Get and GetNext requests from the management station. By default, it is set to public and allows all requests. Set Community: Specify the password for the incoming Set requests from the management station. By default, it is set to private. Trap Destination: Specify the IP address of the station to send the SNMP traps to. -
Page 84: Tools
Chapter 5: Navigate the Web Configurator 5.3.5 Tools System Log System log is used for recording events occurred on the Wireless Ethernet Extender, including station connection, disconnection, system reboot and etc. Open “System Log” in “Tools” as shown next. Figure 5-76. System Log screen. Remote Syslog Server Enable Remote Syslog: Enable System log to alert remote server. - Page 85 Chapter 5: Navigate the Web Configurator Figure 5-77. Ping Watchdog screen. Ping Watchdog Enable Ping Watchdog: To activate ping watchdog, check this checkbox. IP Address to Ping: Specify the IP address of the remote unit to ping. Ping Interval: Specify the interval time to ping the remote unit. Startup Delay: Specify the startup delay time to prevent reboot before the Wireless Ethernet Extender is fully initialized.
-
Page 86: Appendix: Ascii
Appendix: ASCII Appendix. ASCII WEP can be configured with a 64-bit, 128-bit or 152-bit Shared Key (hexadecimal number or ACSII). As defined, a hexadecimal number is represented by 0–9, A–F or a–f; ACSII is represented by 0–9, A–F, a–f, or punctuation. Each one consists of a two-digit hexadecimal value. - Page 87 NOTES 724-746-5500 | blackbox.com Page 87...
- Page 88 About Black Box Black Box provides an extensive range of networking and infrastructure products. You’ll find everything from cabinets and racks and power and surge protection products to media converters and Ethernet switches all supported by free, live 24/7 Tech support available in 60 seconds or less.
Need help?
Do you have a question about the LWE120A and is the answer not in the manual?
Questions and answers