
Subscribe to Our Youtube Channel
Related Manuals for SoundMax SM-CMD3014


Summary of Contents for SoundMax SM-CMD3014
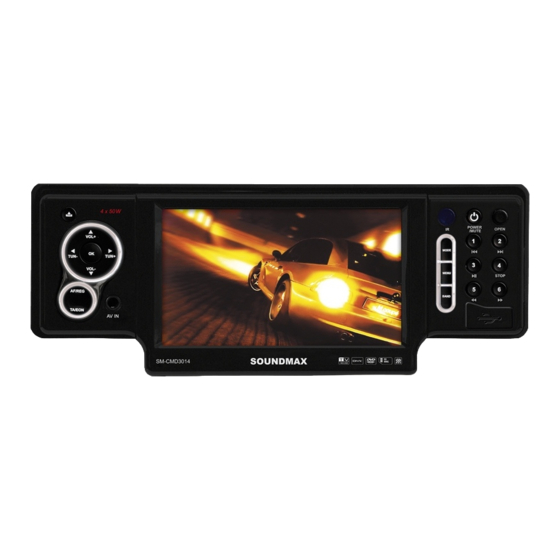
- Page 1 SM-CMD3014 MULTIMEDIA DVD/CD/MP3 RECEIVER with built-in 4” TFT display and TV tuner Instruction manual DVD/CD/MP3- 4” TFT-...
-
Page 2: Table Of Contents
Dear customer! Thank you for purchasing our product. For safety, it is strongly recommended to read this manual carefully before connecting, operating and/or adjusting the product and keep the manual for reference in the future. Table of contents Table of contents ....................2 Important safeguards .................. -
Page 3: Important Safeguards
Important safeguards Read carefully through the manual to familiarize yourselves with this unit. Keep this manual handy as a reference for operating procedures and precautions. Do not allow persons who have not read through this manual to use this unit. “CLASS 1 LASER PRODUCT”... -
Page 4: Accessories
Make sure you disconnect the power supply if the system appears to be working incorrectly, is making an unusual sound, has a strange smell, has smoke emitting from it or liquids have got inside it. Let a qualified technician check the system. Always keep the volume low enough so that you can hear sounds from outside the vehicle. -
Page 5: Installation/Connection
Installation/connection Choose the mounting location where the unit will not interfere with the normal driving function of the driver. Before finally installing the unit, connect the wiring and make sure that the unit works properly. Consult with your nearest dealer if installation requires the drilling of holes or other modifications of the vehicle. - Page 6 1. Install the sleeve into the dashboard; ensure it is installed with the correct side and there are no obstacles (wires, dashboard elements, etc) for the unit installation. 2. After installing the sleeve into the dashboard, bend tabs fitting to the size of the dashboard to fix the sleeve in place.
- Page 7 2. DIN REAR-MOUNT (Method B) For this method, use the screw holes in the lateral sides of the unit. Fix the unit with the help of the factory radio mounting brackets. 1. Select a position in which the screw holes of the brackets (3) are aligned with the screw holes in the unit body, and screw in two screws (2) in each side.
- Page 8 Electrical Connection ISO Connection table Location Function Connector A Connector B Rear right (+) - Purple Tel mute/Grey Rear right (-) - Purple/Black Front right (+) - Grey Battery +12V/Yellow Front right (-) - Grey/Black Auto Antenna - Blue Front left (+) - White Front left (-) - White/Black Ignition/Red Rear left (+) - Green...
- Page 9 Parking wire connection If Parking cable is connected to hand brake switch, the video display of the TFT monitor will be controlled by driving status. When the car is moving ahead, if the video disc is played, the screen shows warning and blank screen.
-
Page 10: Unit Controls
Unit controls Front panel 1. TUN- button 2. EJECT button 3. VOL+ button 4. OK button 5. TUN+ button 6. TFT display 7. MODE button 8. IR sensor 9. 3/PLAY/PAUSE button 10. POWER/MUTE button 11. OPEN button 12. 1/PREVIOUS and 2/NEXT buttons 13. - Page 11 Inner panel 1. Disc slot (available when front panel is open) 2. RESET button (hole) 3. Panel status indicator (blinks when front panel detached) 4. Memory card slot...
- Page 12 Remote controller (RC) 1. MODE button 2. POWER button 3. UP cursor button 4. BND/RDM button 5. ENTER button 6. LEFT cursor button 7. DOWN cursor button 8. EJECT button 9. PTY/PROG button 10. P.SCN/RPT button 11. SEEK-/PREVIOUS button 12. AF button 13.
- Page 13 Changing the battery 1. Press the catch and at the same time pull out the battery tray (pic. 1). 2. Insert the 1 lithium battery, type CR2025 (3V) battery with the stamped (+) mark facing upward. Insert the battery tray into the remote controller (pic.2).
-
Page 14: General Operations
General operations Reset the unit Operating the unit for the first time or after replacing the car battery, you must reset the unit. Press EJECT button and then press RESET button (hole) under the panel to restore the unit to the original factory settings. - Page 15 Setting the sound characteristics Press SEL button to enter the audio setting menu consisting of following items: Bass =>Treble => Balance => Fader => EQ. Press UP/DOWN cursor buttons on the RC or VOL+/VOL- buttons on the panel to select a setting. Press LEFT/RIGHT cursor buttons on the RC or TUN-/TUN+ buttons on the panel to adjust the setting.
- Page 16 PICTURE (available in DVD and TV modes): Red: Adjust level of red color. Support 50 levels. Default level is 25. Green: Adjust level of green color. Support 50 levels. Default level is 25 Blue: Adjust level of blue color. Support 50 levels. Default level is 25. Brightness: Support 50 levels.
- Page 17 REG: REG ON (the receiver accepts regional variants of the tuned station with REG icon turned on), and REG OFF (the receiver ignores regional variants). TA VOL: Adjust level of TA volume, support 50 levels. Default level is 15. EXPERT (available in Radio, DVD and TV modes): DX: Set radio station search by DX or LOCAL mode.
- Page 18 Subwoofer Connect a subwoofer to this unit using the Subwoofer output of this unit. For subwoofer operation an external amplifier is required. Dual zone function DUAL - dual zone function enabling user to listen to radio or watch TV in the front zone, and at the same time play audio or video from disc, USB or memory card.
-
Page 19: Radio Operations
Radio operations Band selection Select the RADIO mode. Press BAND button on the panel or BND/RDM button on the RC to select the desired band: FM1, FM2, FM3 (OIRT), AM (MW). Manual/automatic tuning Manual tuning: press TUN-/TUN+ buttons on the panel or SEEK-/PREVIOUS and SEEK+/NEXT on the RC and hold for 2 seconds to enter the manual tuning mode. - Page 20 RDS function RDS (Radio Data System) service availability varies with areas. Please understand if RDS service is not available in you area, the following service is not available, either. AF (Alternative frequencies) function Press AF button on the RC or AF/REG button on the panel to enable AF function. When the radio signal strength is poor, enabling the AF function will allow the unit to automatically search another station with the same PI (Program Identification) as the current station but with stronger signal strength.
-
Page 21: Tv-Tuner Operations
TV-tuner operations Connect the TV antenna to the TV antenna jack on the rear of the unit. Select TV mode. To access the TV mode menu, press MENU button. To select a menu page (Auto Program or Manual Program) press UP/DOWN cursor buttons on the RC or VOL+/VOL- buttons on the panel. -
Page 22: Disc/Usb/Sd/Mmc Operations
Disc/USB/SD/MMC operations USB/SD/MMC notes USB format supports 2.0. Capacity: up to 8 Gb. For correct and satisfactory operation, licensed SD/MMC memory cards of famous brands should be used with this unit. Avoid using memory cards of unknown brands. Capacity: up to 8 Gb. Insert/Eject disc Press EJECT button and insert a disc into the disc slot with label side up. - Page 23 MP3/DivX/JPEG file playback When you insert a storage containing MP3/DivX/JPEG file, the screen will show following interface: 1. Storage folder list 2. Scroll bar 3. Current playback info 4. Current folder content (current file is highlighted) 5. Scroll bar 6. Audio track selection 7.
- Page 24 Fast forward/rewind Press and hold repeatedly SEEK-/PREVIOUS or SEEK+/NEXT buttons on the RC or press repeatedly 6/F.FWD and 5/REWIND buttons on the panel for fast backward or forward playing correspondingly. With each pressing playback speed will increase. While fast playback, press PLAY/PAUSE button on the RC or 3/PLAY/PAUSE button on the panel to resume normal speed.
- Page 25 Programming the playback Press PTY/PROG button to open program menu. Use cursor buttons to select the program position and use number buttons to input the desired track/title/chapter (depending on the disc type). Press PLAY/PAUSE button on the RC or 3/PLAY/PAUSE button on the panel to start program play, or move the cursor to select PLAY and press ENTER button on the RC or OK button on the panel to play.
- Page 26 Selecting audio language (for DVD only) During DVD disc playback, press AUDIO/GOTO button on the RC repeatedly to select the audio language to listen. This function will not work if a disc does not support multi-language audio. Selecting subtitle language (for DVD only) If your DVD disc supports multi-language subtitle, press SUB-T button on the RC repeatedly to switch among disc-supported languages.
-
Page 27: Dvd Setup Menu
DVD setup menu Press SETUP button on the RC to display setup screen, use LEFT/RIGHT cursor buttons and ENTER button to select the desired setup page: System, Language, Audio, Video, Digital. In the selected page select an option using UP/DOWN cursor buttons, then press RIGHT cursor button to go to setting list. Use UP/DOWN cursor buttons to select the needed setting. - Page 28 Note: The rating can be selected only under the password unlocked status, and the limits can be worked only under the password locked status. Default If this item is selected, the unit will return to original setting. Language setup OSD language Select the language to be used for the on-screen display.
- Page 29 Video setup Set a parameter with UP/DOWN cursor buttons: Brightness, Contrast, Hue, Saturation, Sharpness. Digital setup Dynamic range If watching large dynamic scope movie program at night, selecting this mode you can reduce the volume to a very low level, at the same time, to keep the fine details sound.
-
Page 30: Handling And Cleaning Discs
Handling and cleaning discs Dirty, scratched or warped discs may cause skip ping or noise. Handle the disc only by the edges. To keep clean do not touch its surface. Discs should be stored in their cases after use to avoid scratches. Do not expose discs to direct sunlight, high humidity, high temperature or dust. -
Page 31: Troubleshooting Guide
Troubleshooting guide Below is a table describing simple measures that can help you eliminate most problems likely to emerge when this unit is in use. If below measures do not help, turn to a service center or to the nearest dealer. Symptom Cause Solution... -
Page 32: Specification
Specification General Power supply: 12 V DC Maximum power output: 4 x 50 W Unit dimensions/Net weight: 178 x 50 x 180 mm/1.8 kg Gift box dimensions/Gross weight: 286 x 122 x 230 mm/2.5 kg Temperature range: C - +60 TFT display Display: Built-in digital 4”... - Page 33 Storage support DVD/DVD±R/DVD±RW, CD/CD-R/CD-RW, USB, SD/MMC Format support DVD-video/DVD-audio/SVCD/VCD/HDCD/MP3/CDDA/Picture- CD/Photo-CD/JPEG/MPEG4 (DivX/XviD) ESP function: 8 sec. DVD, 40 sec. ESP for CD, 120 sec ESP for MP3 Line out Output: 2 Stereo outputs (4 RCA) (2 V) Specifications are subject to change without notice. Mass and dimensions are approximate.
- Page 34 ....................34 ...................35 ..................37 ...................38 ..................45 .....................49 ....................55 ...................58 /USB- ........59 DVD ..................64 ..................67 ............68 ................70...
- Page 37 5. ISO- (5X25...
- Page 38 30°, « » « » « » ( « » ( DIN,...
- Page 39 « » (...
- Page 40 – – – « » (...
- Page 41 OPEN.
- Page 43 (+) - (-) - (+) - (-) - (+) - (-) - (+) - (-) -...
- Page 45 TUN- EJECT VOL+ TUN+ 6. TFT- MODE 3/PLAY/PAUSE POWER/MUTE OPEN 1/PREVIOUS 2/NEXT AF/REG TA/EON MENU BAND 5/REWIND 19. USB- 6/F.FWD 4/STOP...
- Page 46 ) RESET...
- Page 47 MODE POWER BND/RDM ENTER EJECT PTY/PROG P.SCN/RPT SEEK-/PREVIOUS STOP/PBC PLAY/PAUSE MUTE MENU SUB-T SETUP ANGLE VOL+ VOL- A-B/ZOOM AUDIO/GOTO DUAL SEEK+/NEXT TILT...
- Page 48 (CR 2025 3V), –...
- Page 49 EJECT RESET POWER/MUTE POWER TILT, : 0 => 1 => 2 => 3 => 4 => 5 => 6. VOL+, VOL-, POWER/MU MUTE MODE, : RADIO ( ) => DVD => USB ( ) => SD/MMC (SD/MMC ) => TV=> AV IN. OSD,...
- Page 50 SEL, : Bass ( ) => Treble => Balance => Fader ) => EQ ( VOL+/VOL- TUN+/TUN- SEL, MENU, MENU VOL+/VOL- ENTER TUN+ VOL+/VOL- ENTER MENU, AUDIO (« ») - , DVD Bass: Treble:...
- Page 51 Balance: Fader: DSP OFF - FLAT - CLASSICS - POP - ROCK - DSP OFF. PICTURE (« ») - Red: Green: Blue: Brightness: Contrast: Sharpness: Screen: : 16:9 - 4:3 - FULL ( Color rerset: YES ( NO ( ENTER DUAL («...
- Page 52 PI: MUTE/SOUND. PI sound: . PI mute: RETUNE: LONG/SHORT. Retune-S Retune-L – TA Seek. Retune S: TA SEEK 30 Retune L: TA SEEK 90 Retune TA SEEK. MASK: DPI/ALL. MASK DPI. MASK ALL. EON TA: DX/LOCAL. EON TA LOCAL ( .
- Page 53 Stereo: , STEREO/MONO. Beep: . 2ND ( )/ALL ( )/OFF ( Loud: (ON)/ (OFF) Subwoofer: (ON) (OFF) Backlight: )/HIGH( )/LOW( color: Dark blue )/Violet )/Light blue ( CLOCK (« ») - , DVD Clock: Clock hour: Clock adjust: TILT (“ ”) - , DVD...
- Page 54 DUAL - , USB...
- Page 55 BND/RDM BAND : FM1 - FM2 - FM3 (OIRT) – MW (AM). SEEK-/PREVIOUS SEEK+/NEXT TUN+/TUN- SEEK-/PREVIOUS SEEK+/NEXT TUN+/TUN- SEEK-/PREVIOUS SEEK+/NEXT TUN+/TUN- (18 FM, 6 AM). P.SCN/RPT...
- Page 56 P.SCN/RPT RDS ( AF ( AF/REG RDS. TA (Traffic Alarm) /EON...
- Page 57 /EON PTY ( PTY/PROG (PTY), “PTY NONE” («PTY »).
- Page 58 MENU. (Auto Program Manual Program) VOL+/VOL- ENTER VOL+/VOL- ENTER MENU AUTO PROGRAM System: (SECAM1/SECAM2/PAL). Audio: (DK/BG/I). Search: MANUAL PROGRAM ( Storage: System: (SECAM1/SECAM2/PAL). Audio: (DK/BG/I). Channel: Fine: Memory: ON ( OFF (...
- Page 59 /USB- USB/SD/MMC USB: USB 2.0. SD/MMC: EJECT EJECT. SD/MMC/USB- SD/MMC USB- USB- MMC/SD USB. /USB).
- Page 60 PLAY/PAUSE 3/PLAY/PAUSE MP3/DivX/JPEG MP3/DivX/JPEG, ENTER AVI- /USB/ STOP/PBC 4/STOP PLAY/PAUSE STOP/PBC 4/STOP...
- Page 61 SEEK-/PREVIOUS 1/PREVIOUS SEEK+/NEXT 2/NEXT (0-9) SEEK-/PREVIOUS SEEK+/NEXT 6/F.FWD 5/REWIND DVD/VCD PLAY/PAUSE 3/PLAY/PAUSE A-B/ZOOM, P.SCAN/RPT,...
- Page 62 BND/RDM, PTY/PROG, PLAY/PAUSE 3/PLAY/PAUSE « » ENTER « », ENTER PTY/PROG, PBC ( VCD) VCD- PBC. STOP/PBC PBC. B/ZOOM : X2 => X3 => X4 => X1/2 => X1/3 => X1/4 =>...
- Page 63 AUDIO/GOTO; ENTER DVD) ANGLE DVD) AUDIO/GOTO DVD) SUB-T VCD) AUDIO/GOTO => => => DVD) MENU ENTER PLAY/PAUSE ID3- ID3-tag...
- Page 64 SETUP ENTER ENTER (NTSC, PAL, PAL60, (interlace-S-Video). 4:3 PS: 4:3. 4:3 LB: 4:3, 16:9: 16:9. – 0000.
- Page 66 “Full”, “Off”, (L+R).
- Page 68 “ ”.
- Page 69 RESET.
- Page 70 4 x 50 /1,8 /2,5 C - +60 4” TFT- 480 RGB x 272 16:9 400:1 , 130 – 74 /87,5 – 108 522 – 1620 SECAM/PAL...
- Page 71 DVD/DVD±R/DVD±RW, CD/CD-R/CD-RW, USB, SD/MMC DVD-video/DVD-audio/SVCD/VCD/HDCD/MP3/CDDA/Picture- CD/Photo-CD/JPEG/MPEG4 (DivX/XviD) DVD, 40 CD, 120 c RCA (2 )
Need help?
Do you have a question about the SM-CMD3014 and is the answer not in the manual?
Questions and answers