Table of Contents
Advertisement
Quick Links
Download this manual
See also:
Instruction Manual
Advertisement
Table of Contents

Related Manuals for SoundMax SM-CMD3000


Summary of Contents for SoundMax SM-CMD3000
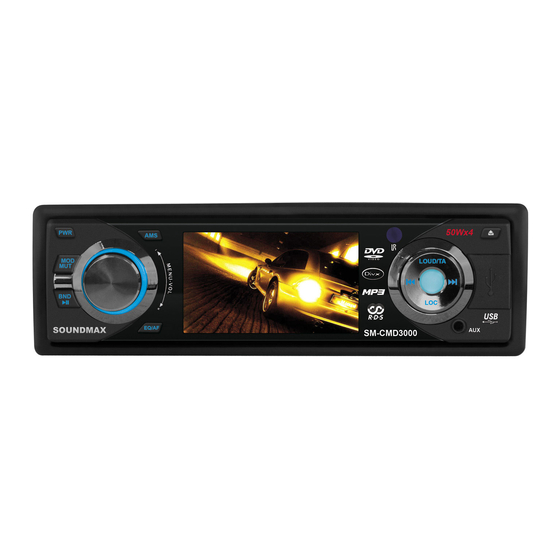
- Page 1 SM-CMD3000 MULTIMEDIA DVD/CD/MP3 RECEIVER WITH BUILT-IN 3” TFT DISPLAY Instruction manual DVD/CD/MP3- 3” TFT-...
-
Page 2: Table Of Contents
Dear customer! Thank you for purchasing our product. For safety, it is strongly recommended to read this manual carefully before connecting, operating and/or adjusting the product and keep the manual for reference in the future. Table of contents Table of contents..........................2 Important safeguards ........................3 Installation/Connections........................4 Panel controls ..........................8... -
Page 3: Important Safeguards
Important safeguards Read carefully through this manual to familiarize yourself with this high-quality sound system. Disconnect the vehicle's negative battery terminal while mounting and connecting the unit. When replacing the fuse, be sure to use one with an identical amperage rating. Using a fuse with a higher amperage rating may cause serious damage to the unit. -
Page 4: Installation/Connections
Installation/Connections First complete the electrical connections, and then check them for correctness. Installation way It is an anti-theft installation way. The chassis wear a metal sliding housing. Please have the wiring connection of the power supply, speakers and antenna as for the requirement of the manual, and then install the metal sliding housing into the car according to the diagram. -
Page 6: Attaching The Control Panel
Attaching the control panel Insert the right side of the control panel (pic. 1, A) into the shaft of the main unit (pic. 1, B). Push the panel to the right and insert the left side of it (pic. 2). Note: the control panel must be attached into the T-Joint. -
Page 7: Connection Scheme
Connection scheme Notes: In spite of having any kinds of speaker system, must use 4 ohms impedance of speaker to reduce the distortion during high volume level. Prohibit to make the conductors of auto antenna and ground touch with each other. For your driving safety, please link your parking wire with low power level, and keep it controlled by manual brake switch. -
Page 8: Panel Controls
Panel controls PWR BUTTON Press it to turn the power on. Press again to turn the power off. MENU-VOL KNOB/SEL button Rotate VOLUME knob clockwise to increase the volume level; rotate anticlockwise to decrease the volume level. Briefly press it (the SEL button) to set the volume characteristics. Press and hold it to show the system menu, rotate it to set the item. -
Page 9: Inner Panel
BUTTONS During playback repeatedly press the buttons to go to previous/next track. In RADIO mode press the buttons to search the station manually. Press and hold for 2 seconds to start automatic station searching. LOUD/TA BUTTON Briefly press it to active the TA function. Press and hold it to active LOUD function. REL BUTTON Press it to flip down the front panel. -
Page 10: Remote Control
Remote control EQ/AF BUTTON PWR BUTTON GOTO BUTTON BND/TITLE BUTTON AMS/MENU BUTTON LOC/SUB-T BUTTON ST/AUDIO BUTTON OSD BUTTON ANGLE BUTTON (PTY) SLOW BUTTON 11. ZOOM BUTTON 12. PROG BUTTON 13. P/N BUTTON 14. VOL +/VOL- BUTTONS 15. MUTE BUTTON 16. LOUD/ TA BUTTON 17. -
Page 11: General Operations
General operations Reset the unit Operating the unit for the first time or after replacing the car battery, you must reset the unit. Press REL button, then press the RESET button to restore the unit to the original factory settings. Power button Press the PWR button to switch the unit on. - Page 12 Press SEL or ENTER to confirm. Select BACK to return to settings list. Select EXIT to exit settings list window. Mode selection Press the SOURCE button on the RC or briefly press MOD/MUT button on the panel to select the mode: RADIO =>...
-
Page 13: Radio Operations
Radio operations Note: RDS (Radio Data System) service availability varies with areas. Please understand if RDS service is not available in you area, the following service is not available, either. BAND selection Repeatedly press the BAND/TITLE button on the RC or BND/PLAY/PAUSE on the panel to select your desired radio band during RADIO mode: FM1, FM2, FM3, FM 4 (OIRT), AM1, AM2. - Page 14 Preset scan Select a band. Press AMS button to scan all preset stations in the memories of the current band and stay on each memory stations for about 7 seconds. To stop preset scan, press the button again. Number Buttons During radio mode, Number Buttons from 1 to 6 can help you store your favorite station.
- Page 15 TA (Traffic Alarm) function Briefly press the LOUD/TA button to turn on or turn off the TA function. When TA is enabled (on), the tuner starts searching the traffic announcement. AF (Alternative Frequencies) function Briefly press the EQ/AF button to turn on or turn off the AF function. The RDS program will be automatically searched and received.
-
Page 16: Dvd/Cd Operations
DVD/CD operations Disc glossary PBC (PlayBack Control) PBC is a menu recorded on the disc with SVCD or VCD2.0 format. For the discs contained PBC, it can playback interactive software with the menu displayed on TV. And if the disc contains still images, it can playback high definition of still image. - Page 17 Inserting the USB device Insert the USB device into USB jack. Then the playing mode will be changed into USB mode. The first USB device track playback will start. Note: USB functions (flash memory type) MP3 music play FAT 12/ FAT 16/FAT 32 is possible FAT 12/16 (dir: 200 support, file:500 support), FAT 32 (dir: 200 support, file:500 support).
- Page 18 Playing the previous/next track During DVD playback, press to replay the current track, press and hold within 3 seconds to play the previous track, press to play the next track. During MP3/USB playback, press the buttons to play the previous/next track. During VCD/CD/MPEG-4 playback, press the button to replay the current track, press button within 3...
- Page 19 Selecting the channel (for VCD only) During VCD disc playback repeatedly press the ST/AUDIO button on the RC to select the channel: Left => Right => Stereo. Selecting subtitle language (for DVD only) Subtitle language is in disc initiation setting during playback. If DVD disc supports multi-subtitle playback, press the LOC/SUB-T button on the RC repeatedly to switch among languages.
- Page 20 Then press Number buttons to input the desired track/chapter number (or use the buttons to select the setting for Audio or Subtitle mode). After the number is inserted the playback from this chapter/title starts automatically in small window. Press GOTO to start playback in normal window. Program playing (for VCD/CD only) During playback press the PROG button on the RC to open the program menu.
-
Page 21: Mp3 Overview
MP3 overview Notes on MP3 MP3 is short for MPEG Audio Layer 3 and refers to an audio compression technology standard. This product allows playback of MP3 files on CD-ROM, CD-R or CD-RW discs. The unit can read MP3 files written in the format compliant with ISO 9660. However it does not support the MP3 data written by the method of packet write. - Page 22 Notes on creating your own CD-Rs or CD-RWs containing MP3 files To enjoy high quality sound, we recommend converting to MP3 files with a sampling frequency of 44.1 kHz and a fixed bit rate o f 128 kbps. DO NOT store more than 256 MP3 files per disc. For ISO 9660 - compliant format, the maximum allowable depth of nested folders is 8, including the root directory (folder).
-
Page 23: System Setup
System setup Press and hold SETUP button on the RC to enter the setup menu. In Setup mode, press SETUP key again to quit the setup page. Use the buttons to choose the setup page: General page, Dolby setup, Preference page, Exit. Press the button to enter the setup page selected. -
Page 24: Dolby Digital Setup
Dolby digital setup DUAL MONO Choose the mode of the audio output: Set stereo: choose this setting, when 5.1-channel sound playing, two channels of signals will be output from the left and right soundtrack; when 2-channel sound playing, stereo signal will be output. - Page 25 Set the control level: (1) with the least limits when playing. (8) with the most limits when playing. Original setting: OFF. Note: The rating can be selected only under the Password unlocked status, and the limits can be worked only under the password locked status. PASSWORD In Old password field enter 8888 digits.
-
Page 26: Anti-Theft System
Anti-theft system This unit is equipped with a slide-down detachable and mask panel. Panel can be detached and taken with you, helping to deter theft. Detaching the front panel Press the PWR button to turn the power off. Press the REL button on the front panel. The panel will go down. Push the panel to the right and pull it towards you. -
Page 27: Handling Compact Discs
Handling compact discs Dirty, scratched or warped discs may cause skip ping or noise. Handle the disc only by the edges. To keep clean do not touch its surface. Discs should be stored in their cases after use to avoid scratches. Do not expose discs to direct sunlight, high humidity, high temperature or dust. -
Page 28: Troubleshooting Guide
Troubleshooting guide Symptom Cause Solution General The car ignition is not on. If the power supply is properly connected to No power the car accessory switch the ignition key to " The fuse is blown. ACC ". Replace the fuse. Disc Presence of CD disc inside the Remove the disc in the player then put a new... -
Page 29: Specification
Specification General 12 V DC Power supply Current consumption max. 14 A Maximum power output 50 W x 4 channels Fuse 15 A Dimensions (L x W x H) 192 x 178 x 50 mm DSP: Classic, Pop, Rock, Flat FM stereo radio Frequency range 65.0 –... - Page 30 ..........................30 ........................ 31 ........................ 32 ........................36 ........................39 ..........................42 DVD/CD ..................45 3 ............................ 51 ........................53 ......................56 ....................... 57 ................... 58 ......................60...
- Page 34 ( ) ( . 1). . 2), . 3).
- Page 36 VOLUME/ SEL/ MENU SEL ( SEL, AMS (RPT) RADIO ( 1 – 6.
- Page 37 RADIO ( LOUD/TA LOUD ( EJECT MOD/MUT : RADIO => DISC ( ) => USB => AUX. BND/PLAY/PAUSE RADIO ( EQ/AF (Local) (Reg) AUX IN...
- Page 38 EJECT RESET EQ/AF GOTO BND/TITLE AMS/MENU LOC/SUB-T ST/AUDIO ANGLE (PTY) SLOW ZOOM PROG VOL +/VOL- MUTE LOUD/TA SOURCE 0~9 NUMBER CLEAR / / / ENTER/ SETUP PAUSE STOP...
- Page 39 RESET ( REL. RESET, PWR, VOLUME VOL+/- SEL ( : VOL ( ) => BAL ) => FAD ( ) => BAS ( ) => TRE ( BASS TREBLE SEL ( : AUDIO ( ) => VIDEO ( ) => SOURCE SEL ( ) =>...
- Page 40 Audio: Balance, Fader, Bass, Treble, Equalizer, Loudness, Back. Video: : Bright ( ), Contrast ( ), Color ), Hue ( ), Wide ( ), Default ( ), Back ( Source: : Radio ( ), USB, DVD, AUX, Back ( Preference: : Clock system ( Clock adjustment ( ), Key beep (...
- Page 41 ZOOM, : 4:3 16:9. : PAL, NTSC, AUTO MOD/MUT EJECT...
- Page 42 RDS ( BND/TITLE, : FM1, FM2, FM3, FM4 (OIRT), AM1, AM2. 1~6, GOTO. «FR». 1~6.
- Page 43 (1-6) FM1, FM2, FM3 FM4) AM1/MW AM2/LW). ST/AUDIO STEREO MONO. MONO Local/Distant LOC/SUB-T LOCAL DISTANT (DX) ( TA ( LOUD/ (ON) (OFF) AF ( EQ/AF, (ON) (OFF) ON (...
- Page 44 PTY ( ANGLE : POP M ( ) => NEWS ( ) => EDUCATE ) => ANGLE, POP M Rock M/ Easy M/ Light M/ Classic/ Other M/ Jazz/ Country/ Nation M/ Oldies/ Folk M/ Drama NEWS Affairs/ Info/ Weather/ Finance/ Sport/ Varied/ Culture/ Social travel/ Leisure/ Document EDUCATE Science/ Children/ Religion/ Phone in PTY.
- Page 45 DVD/CD PBC ( – PBC, – : CD/DVD/DVD±R/CD-R/- : DVD/SVCD/VCD/HDCD/MP3/WMA/CDDA/JPEG/MPEG4/DivX. : MP3 (*.mp3) WMA (*.wma) : MPEG 2(*.vob) MPEG 1(*.dat) : JPEG (*.jpg) ISO 9660 ISO 9660 + Joliet -...
- Page 46 44,1 : 32 - 320 : *.ACC, *.DLF, *.M3U, *.PLS, MP3 PRO, DRM. USB. USB. FAT 12/FAT 16/FAT 32 FAT 12/16 ( , 500 FAT 32 ( , 500 : 32 : 32 (id3tag ver 2.0) USB 2.0. : 8 M ~ 1 REL, EJECT PLAY/PAUSE,...
- Page 47 MP3/MPEG-4/USB STOP PLAY/PAUSE, VCD/CD STOP PLAY/PAUSE, STOP 0-9. MP3/USB CD/VCD/MPEG-4 : X2 => X4 => X8 => X16. SLOW : 1/2, 1/4, 1/8, => ) =>...
- Page 48 DVD- ANGLE DVD- ST/AUDIO CD/VCD ST/AUDIO : Left channel ( ) => Right channel ( ) => Stereo ( DVD- LOC/SUB-T DVD/VCD ZOOM 2 => 3 => 4 => – – – – BAND/TITLE...
- Page 49 / / / ENTER PLAY/PAUSE, PBC ( PBC, PLAY/PAUSE, PBC, DVD/VCD GOTO / / / : Title ( ) => Chapter ) => Audio ( ) => Subtitle ( ENTER, GOTO, PROG START ENTER,...
- Page 50 ENTER, EXIT ENTER. STOP ENTER. MP3/MPEG-4/USB ENTER...
- Page 51 MPEG 3 CD-ROM, CD-R CD-RW. ISO 9660. “.mp3”. “.mp3”, “ MP3” “ ”, PC “ ” “ ” 256. VBR, . VBR: CD-R CD-RW, 44,1 ISO 9660, CD-R MP3 CD-R CD-RW...
- Page 52 CD-R CD-RW CD-R CD-RW 1. ID3TAG.
- Page 53 SETUP SETUP DOLBY, ENTER 4:3 PS: 4:3 LB: 16:9: – SUBTITLE...
- Page 54 DOLBY 5,1- FULL OFF ( PAL: NTSC: ST/AUDIO – LOC/SUB-T...
- Page 55 8888), ENTER. 8888, (8888) ENTER,...
- Page 56 PWR, . 3). . 1).
- Page 58 « ». RESET.
- Page 60 . 14 Classic, Pop, Rock, Flat 65.0 – 74.0 / 87.5 – 108.0 522-1620 CD/DVD/DVD±R/±RW CD-R/-RW DVD/SVCD/VCD/HDCD/MP3/WMA/CDDA/JPEG/MPEG4/DivX - 20 ± 5 . 2000...
Need help?
Do you have a question about the SM-CMD3000 and is the answer not in the manual?
Questions and answers