
Related Manuals for SoundMax SM-CMD3011


Summary of Contents for SoundMax SM-CMD3011
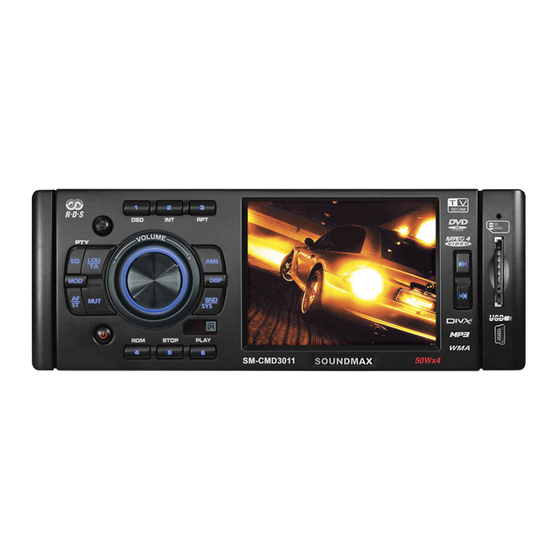
- Page 1 SM-CMD3011 MULTIMEDIA DVD/CD/MP3 RECEIVER WITH BUILT-IN 3.5” TFT DISPLAY AND TV TUNER Instruction manual DVD/CD/MP3- 3.5” TFT-...
-
Page 2: Table Of Contents
Dear customer! Thank you for purchasing our product. For safety, it is strongly recommended to read this manual carefully before connecting, operating and/or adjusting the product and keep the manual for reference in the future. Table of contents Table of contents...2 Important safeguards ...3 Accessories...4 Installation/Connection ...5... -
Page 3: Important Safeguards
Important safeguards Using the device at temperature below -10º may cause the breakage of the device. Before using please heat up the passenger compartment to the recommended temperature! Disconnect the vehicle's negative battery terminal while mounting and connecting the unit. When replacing the fuse, be sure to use one with an identical amperage rating. -
Page 4: Accessories
1. Mounting Sleeve 2. Bracket 3. Key 4. Screw 2.6X4 5. Outer Frame 6. Rear Mounting Bolt 7. Harness Rubber 8. Customer information 9. Warranty card Instruction manual Receiver USB extension cable 1 pc 2 pcs 2 pcs 2 pcs 1 pc 1 pc 1 pc... -
Page 5: Installation/Connection
Installation/Connection Installation method 1... - Page 6 Installation method 2 Detaching the front panel Replacing the front panel Precautions Do not touch the contacts on the front panel or on the unit body, since this may result in poor electrical contact. If dirt or dust gets on the contacts, wipe them with a clean, dry cloth. This mounting method is used for Japanese cars.
- Page 7 Electrical connection Note: For your driving safety, please link your parking wire with low power level, and keep it controlled by manual brake switch. Wire should be high power level and the unit cannot play video disc.
- Page 8 Using the ISO Connector 1. If your car is equipped with the ISO connector, then connect the ISO connectors as illustrated. 2. For connections without the ISO connectors, check the wiring in the vehicle carefully before connecting, incorrect connection may cause serious damage to this unit.
-
Page 9: Panel Controls
Panel controls LOU/TA button OPEN button VOL knob/SEL button 1/OSD button 2/INT button 3/RPT button AMS button SD/MMC slot USB jack 10. PREVIOUS/NEXT button 11. DISP button 12. BND/SYS button 13. 6/PLAY button 14. 5/STOP button 15. 4/RDM button 16. PWR button 17. - Page 10 Remote control MODE button PWR button BND/SYS button Cursor buttons (LEFT/RIGHT/UP/DOWN), ENTER button STOP/RETURN button ST/PROG button AMS/RPT button LOC/RDM button OSD button 10. PBC button 11. Number buttons 12. 10+ button 13. PLAY/PAUSE button 14. MUTE button 15. TITLE button 16.
- Page 11 Changing the battery 1. Press the catch and at the same time pull out the battery tray. 2. Insert the 1 x lithium battery, type CR 2025 3V battery with the stamped (+) mark facing upward. Insert the battery tray into the remote control. Warning: Store the battery where children cannot reach.
-
Page 12: General Operation
Reset the unit Operating the unit for the first time or after replacing the car battery, you must press OPEN button to flip down the front panel. Press RESET button with a pointed object to restore the unit to the original factory settings. - Page 13 Mode control Press MODE button on the panel or MOD button on the RC to select different source modes: TUNER => DISC (the type of disc in the unit if there is any) => USB (if a USB device is inserted) => CARD (if a SD/MMC card is inserted) =>...
-
Page 14: Radio Operation
Band selection Press BND/SYS button repeatedly to select FM1, FM2, FM3, AM1, AM2. Display will show the wave band, frequency and preset station number if already stored. Manual/Automatic tuning Manual tuning: Press PREVIOUS/NEXT buttons on the panel or SEEK+/SEEK- buttons on the RC to select a station upward or downward step-by-step. - Page 15 Local mode Press LOC/RDM button on the RC to switch on/off Local tuning mode. When Local mode is on, “LOC ON” appears in the display and only local stations are available. When Local mode is off both distance and local stations can be received.
-
Page 16: Usb/Sd/Mmc Cards/Disc Operations
USB/SD/MMC cards/Disc operations Disc glossary PBC (Play Back Control) PBC is a menu recorded on the disc with SVCD or VCD2.0 format. For the discs contained PBC, it can playback interactive software with the menu displayed on TV. And if the disc contains still images, it can playback high definition of still image. - Page 17 Playing/pausing When the disc/card/USB has been loaded, the playback of the first track starts automatically. To ensure good system performance, wait until the unit finishes reading the disc information before proceeding. Or press the PLAY/PAUSE button on the RC or 6/PLAY button on the unit to start playback. Press it again to pause the playback.
- Page 18 Random playback During playback press the LOC/RDM button on the RC or 4/RDM button on the unit to turn on/off the random playback mode. This function is not available for DVD discs. Intro playback (for CD/VCD) You can play the beginning of every track for 10 seconds in sequence. Press the 2/INT button to start intro play of whole disc.
- Page 19 On-screen display (OSD) During playback press OSD button on the RC repeatedly to show various playback information on the screen. The information may include (depending on the disc type): the number of the current title/track/chapter, the elapsed time of the current title/track/chapter, the remaining time of the current title/track/chapter, the elapsed time of the disc, the remained time of the disc.
- Page 20 Mixed disc operations When a disc containing audio, picture and video files is played, Category/Folder/File list will be displayed on the display, and the name of currently played file/folder will be displayed on top. Current selected item will be highlighted. Category Select Use LEFT/RIGHT cursor buttons to select: Audio files...
-
Page 21: Mp3 Overview
MP3 overview Notes on MP3: MP3 is short for MPEG Audio Layer 3 and refers to an audio compression technology standard. This product allows playback of MP3 files on CD-ROM, CD-R or CD-RW discs. The unit can read MP3 files written in the format compliant with ISO 9660. However it does not support the MP3 data written by the method of packet write. -
Page 22: System Setup Menu
System setup menu Press the SETUP button on the RC to display the system setup menu. Use the LEFT/RIGHT cursor buttons on RC to select the desired menu: System setup, Language setup, Audio setup, Video setup, Speaker setup, Digital setup. Press OK to enter it. - Page 23 Language setup OSD language Select the OSD language. Audio language Select the audio language (if DVD disc supports several audio languages). Subtitle language Select the subtitle language (if DVD disc supports several subtitle languages). Menu language Select the DISC menu language (if DVD disc supports several menu languages).
-
Page 24: Tv Operation
Speaker setup LT/RT: The audio out is Left and Right channels format even if the original sound is 5.1CH format. Stereo: The audio out format is stereo even if the original sound is 5.1CH format. VSS: The audio format Advanced Virtual Surround Sound Digital setup OP MODE Select the output mode: Line out, RF remod. -
Page 25: Back View Camera
Back view camera This unit is equipped with back view camera output. The camera is used to observe the situation behind the vehicle when you are backing the car. Please connect your back view camera with the back car video input. And connect the detecting wire for back a car with the rear gear light. -
Page 26: Troubleshooting Guide
Troubleshooting guide Symptom The car ignition is not on. No power The fuse is blown. Disc cannot be loaded. Presence of disc inside the player. Disc cannot be read. Inserting the disc in upside down. Compact disc is extremely dirty or defective. -
Page 27: Specification
Specification General Power supply: 12 V DC Maximum power output: 50 W x 4 channels Compatible formats: DVD/SVCD/VCD/HDCD/MP3/WMA/CDDA/Picture-CD/JPEG/ MPEG4 (DivX) Supported disc types: DVD/DVD±R/DVD±RW/CD/CD-R/CD-RW/USB/SD/MMC card Dimensions (L x W x H): 165 x 178 x 50 mm ESP function: 40 sec. for Audio CD, 120 sec. for MP3 TFT display Screen size: 3.5”... - Page 28 ... 28 ... 29 ... 30 ... 31 ... 35 ... 38 ... 40 USB- 3 ... 48 ... 50 ... 53 ... 53 ... 54 ... 54 ... 56 SD/MMC/ ... 42 ... 55...
- Page 29 -10º...
- Page 30 2.6X4 1 pc 2 pcs 2 pcs 2 pcs 1 pc 1 pc 1 pc 1 pc 1 pc 1 pc 1 pc 1 pc...
- Page 32 PWR. OPEN,...
- Page 34 ISO ( 12 (+)/ ACC+/ ISO, (+) - (-) - (+) - (-) - (+) - (-) - (+) - (-) -...
- Page 35 LOU/TA OPEN VOL/ 1/OSD 2/INT 3/RPT SD/MMC PREVIOUS/NEXT DISP BND/SYS 6/PLAY 5/STOP 4/RDM AF/ST EQ/PTY RESET EJECT...
- Page 36 MODE BND/SYS ENTER STOP/RETURN ST/PROG AMS/RPT LOC/RDM PLAY/PAUSE MUTE TITLE SUB-T SETUP ANGLE SLOW VOL-/VOL+/SEEK-/PREVIOUS/ SEEK+/NEXT/SEL ZOOM AUDIO GOTO...
- Page 37 (CR 2025 3V), –...
- Page 38 RESET «MUTE ON». SEL, ) => BAL ( ) => FAD ( ) => COT ( ) => COR ( VOL, OPEN, VOL+/- MUTE : VOL ( ) => BAS ( ) => HUE ( VOL+/- ) => TRE ) => BRT VOL+/-...
- Page 39 MODE : TUNER ( ) => DISC ( => CARD ( SD/MMC SEL; LOUD LOU/TA => CLAS. ) => USB ( ) => AUX => TV. DISP; VOL+/- VOL+/- EQ/PTY, LOUD. : POP => ROCK...
- Page 40 BND/SYS, SEEK-/SEEK+ AMS, : FM1, FM2, FM3, AM1, AM2. PREVIOUS/NEXT (18 FM, 12 AM). PREVIOUS/NEXT (1-6), AMS. SEEK-/SEEK+ PREVIOUS/NEXT SEEK+/SEEK- AMS.
- Page 41 AF/ST, LOC/RDM Local RDS ( “RDS”. AF ( AF/ST, «AF ON». EQ/PTY, VOL+/- TA ( LOU/ “ST ON”. “LOC ON”. RDS. PTY. Local ( Local EQ/PTY,...
- Page 42 USB- SD/MMC/ PBC ( – PBC, – DVD- – OPEN MODE DISC. EJECT (...
- Page 43 SD/MMC/USB SD/MMC USB- PLAY/PAUSE STOP/RETURN DVD/VCD: : X2 => X4 => X8 => X16 => X20. 6/PLAY STOP/RETURN PLAY/PAUSE 5/STOP PREVIOUS/NEXT PLAY/PAUSE 5/STOP 6/PLAY PREVIOUS/NEXT 6/PLAY PREVIOUS/NEXT...
- Page 44 DVD/VCD X1/2 => X1/3 => X1/4 => X1/5 => X1/6 => X1/7. 6/PLAY VCD/CD . 1 ( . 1 ( Intro ( CD/VCD) TITLE PLAY/PAUSE PLAY/PAUSE, DVD/VCD) SLOW, ) => ) => ) => LOC/RDM 2/INT, Intro. DVD) 6/PLAY PLAY/PAUSE AMS/RPT ) =>...
- Page 45 PBC ( ST/PROG VCD, CD, MP3, WMA ST/PROG, SUB-T PBC, PLAY ENTER, CLEAR DVD) AUDIO ENTER.
- Page 46 DVD/VCD) ZOOM : X2, X3, X4, X1/2, X1/3, X1/4, DVD- ANGLE VCD) AUDIO Left ( ) => Right ( ) => Stereo ( DVD/VCD) BAND/SYS : NTSC => PAL => AUTO. GOTO ( GOTO,...
- Page 47 ENTER ENTER ENTER 5/STOP, PLAY/PAUSE, STOP/RETURN...
- Page 48 MPEG3 CD-ROM, CD-R CD-RW. ISO 9660. “.mp3”. “.mp3”, “ MP3” “ ”, PC “ ” “ ” 448. VBR, . VBR:...
- Page 49 44,1 ISO 9660, CD-R MP3 CD-R CD-R CD-RW CD-R CD-RW, CD-RW CD-R CD-RW MP3: 1. ID3TAG.
- Page 50 SETUP ENTER, NTSC: PAL: 4:3 PS: 4:3 LB: 16:9: – 0000.
- Page 51 SPDIF/RAW: SPDIF/PCM:...
- Page 52 LOGIC Dolby, 5.1, 5.1,...
- Page 53 AMS, ALL», NEXT «SCAN ONE». AMS, PREVIOUS, ST/PROG, «SCAN 95). NEXT PREVIOUS. 10+,...
- Page 55 “ ”. RESET.
- Page 56 DVD/SVCD/VCD/HDCD/MP3/WMA/CDDA/Picture-CD/JPEG/ MPEG4 (DivX) DVD/DVD±R/DVD±RW/CD/CD-R/CD-RW/USB/SD/MMC card 165 x 178 x 50 CD, 120 3.5- TFT- 480x272 300:1 .: 120 .: 120 65.0 – 74.0/87.5 – 108.0 - 1620 - 20 RCA- (2V)
Need help?
Do you have a question about the SM-CMD3011 and is the answer not in the manual?
Questions and answers